2018 MERCEDES-BENZ GLS SUV window
[x] Cancel search: windowPage 144 of 398
ignite if in contact with the exhaust system or
parts of the engine that heat up. There is a risk
of fire.
Carry out regular checks to make sure that
there are no flammable foreign materials in
the engine compartment or in the exhaust
system.
General notes
Vehicles with a gasoline engine:the catalytic
converter is preheated for up to 30 seconds
after a cold start. The sound of the engine may
change during this time.
Automatic transmission
XShift the transmission to position j
(Ypage 148).
The transmission position indicator on the
multifunction display shows j
(
Ypage 149).
iYou can start the engine in transmission
position jand i.
Starting procedure with the SmartKey
XTo start a diesel engine: turn the SmartKey
to position 2in the ignition lock
(
Ypage 140).
The % preglow indicator lamp in the instru-
ment cluster lights up.
XTurn the SmartKey to position 3in the igni-
tion lock (Ypage 140) and release it as soon
as the engine is running.
iVehicles with a diesel engine: you can
start the engine without preglow if the engine
is warm.
Using KEYLESS-GO to start the engine
The Start/Stop button can be used to start the
vehicle without inserting the SmartKey into the
ignition lock. The Start/Stop button must be
inserted in the ignition lock and the SmartKey
must be in the vehicle. This mode for starting the
engine operates independently of the ECO
start/stop automatic engine start function.
XDepress the brake pedal and keep it
depressed.
XPress the Start/Stop button once
(Ypage 140).
Vehicles with a gasoline engine: the engine
starts.
Vehicles with a diesel engine: preglow is
activated and the engine starts.
Starting procedure via smartphone
Observe the important safety notes on starting
the engine (Ypage 141).
You can also start your engine via your smart-
phone from outside the vehicle. In this case, the
previously selected climate control setting is
activated. In this way you can cool or heat the
interior of the vehicle before starting the jour-
ney.
Only start the engine via your smartphone if it is
safe to start and run the engine where your vehi-
cle is parked.
Observe the legal stipulations in the area where your vehicle is parked. Engine start via smart-
phone may be limited to certain countries or
regions.
You can execute a maximum of two consecutive
starting attempts via your smartphone. If you
insert the SmartKey into the ignition lock, you
can carry out two more starting attempts.
Once you have started the engine, you can
switch the engine off via your smartphone at any
time.
You can only start the engine via your smart-
phone if:
Rthe SmartKey is in the ignition lock
Rpark position jis selected
Rthe accelerator pedal is not depressed
Rthe anti-theft alarm system is not activated
Rthe panic alarm is not activated
Rthe hazard warning lamps are switched off
Rthe hood is closed
Rthe doors are closed and locked
Rthe windows and sliding sunroof are closed
Also make sure that:
Rthe fuel tank is sufficiently filled
Rthe starter battery is sufficiently charged
142Driving
Driving and parking
Page 171 of 398
Off-road fording
!Under no circumstances should you accel-
erate before entering the water. The bow
wave could cause water to enter and damage
the engine and other assemblies.
!Do not open any of the vehicle's doors while
fording. Otherwise, water could get into the
vehicle interior and damage the vehicle's
electronics and interior equipment.
REstablish how deep the water is and the char-
acteristics of the body of water before ford-
ing.
RSelect the highest possible vehicle level.
RShift to a lower gear using the left-hand steer-
ing wheel paddle shifter.
RAvoid high engine speeds.
REnter and exit the water at a flat place and at
a steady walking pace.
RDrive slowly and at an even speed through the
water.
REnsure that a bow wave does not form as you
drive.
RDo not stop and do not switch off the engine.
Water offers a high degree of resistance, and
the ground is slippery and in some cases
unstable. Therefore, it is difficult and danger-
ous to pull away in the water.
RClean any mud from the tire tread after ford-
ing.
RApply the brakes to dry them after fording.
Always observe the fording depth values
(
Ypage 393).
Winter driving
GWARNING
If you shift down on a slippery road surface in an attempt to increase the engine's braking
effect, the drive wheels could lose their grip.
There is an increased danger of skidding and
accidents.
Do not shift down for additional engine brak-
ing on a slippery road surface.
GDANGER
If the exhaust pipe is blocked or adequate
ventilation is not possible, poisonous gases
such as carbon monoxide (CO) may enter the vehicle. This is the case, e.g. if the vehicle
becomes trapped in snow. There is a risk of
fatal injury.
If you leave the engine or the auxiliary heating
running, make sure the exhaust pipe and area
around the vehicle are clear of snow. To
ensure an adequate supply of fresh air, open a
window on the side of the vehicle that is not
facing into the wind.
!When scraping ice off the rear window, take
care not to damage the rear-window seal or
trim.
Have your vehicle winter-proofed at a qualified
specialist workshop at the onset of winter.
Drive particularly carefully on slippery road sur-
faces. Avoid sudden acceleration, steering and
braking maneuvers. Do not use cruise control or
Distance Pilot DISTRONIC.
If the vehicle threatens to skid or cannot be
stopped when moving at low speed:
XShift the transmission to position i.
XTry to bring the vehicle under control using
corrective steering.
When driving in snow with or without snow
chains, select driving program Slippery
(
Ypage 147).
iVehicles with a diesel engine: do not
cover the radiator, e.g. with a protective
cover. The measuring function of the on-
board diagnosis system may otherwise pro-
vide inaccurate values. Some of these values
are required by law and must therefore always be accurate.
The outside temperature indicator is not
designed to serve as an ice-warning device and
is therefore unsuitable for that purpose.
Changes in the outside temperature are dis-
played after a short delay.
Indicated temperatures just above the freezing
point do not guarantee that the road surface is
free of ice. The road may still be icy, especially in
wooded areas or on bridges. You should pay
special attention to road conditions when tem-
peratures are around the freezing point.
For more information on driving with snow
chains, see (
Ypage 356).
Driving tips169
Driving and parking
Z
Page 173 of 398
Familiarize yourself with the characteristics of
your vehicle and the gear shift operation before
driving through difficult terrain.
The following driving systems are specially
adapted to off-road driving:
RtheOff-road drive program (vehicles without
Off-Road Engineering package)
(
Ypage 219)
ROff-road andOff-road Plus drive programs
(vehicles with Off-Road Engineering package)
(
Ypage 220)
RLOW RANGE off-road gear (vehicles with the
Off-Road Engineering package)
(
Ypage 221)
RDifferential lock (vehicles with the Off-Road
Engineering package) (Ypage 221)
ROff-road ABS (Ypage 67)
ROff-road 4ETS (Ypage 70)
ROff-road ESP®(Ypage 71)
RAIRMATIC package (vehicle level)
(Ypage 188)
RDSR (Downhill Speed Regulation)
(Ypage 218)
Observe the following notes:
RStop the vehicle before starting to drive along
an off-road route. If necessary, select the off- road program (
Ypage 220) or shift to the
LOW RANGE off-road gear (Ypage 221).
RSelect a vehicle level that is suitable for the
terrain. To avoid damaging the vehicle, make
sure there is always sufficient ground clear-
ance.
RCheck that items of cargo and loads are
stowed safely and are well secured
(
Ypage 305).
RAlways keep the engine running and in gear
when driving on a downhill gradient. Activate
DSR (
Ypage 218).
RAlways keep the engine running and in gear
when driving down an incline.
RAdapt your speed to the terrain. The rougher,
steeper or more ruts on the terrain, the slower
your speed should be.
RDo not jump with the vehicle as this will inter- rupt the vehicle's propulsion.
RDrive with extreme care on unfamiliar off-road
routes where visibility is poor. For safety rea-
sons, get out of the vehicle first and survey
the off-road route.
RLook out for obstacles, such as rocks, holes,
tree stumps and furrows.
RTake care when turning on an uphill or down-hill slope or when driving across a slope. The
vehicle could otherwise tip over.
RAlways keep the doors, the tailgate, the side
windows and the sliding sunroof closed whilethe vehicle is in motion.
RDo not shift the automatic transmission to
position i.
RObserve the notes on off-road fording
(Ypage 169).
iInformation about retrofitting special all-ter-
rain tires is available from any qualified spe-
cialist workshop.
iDo not use the HOLD function when driving
off-road, on steep uphill or downhill gradients
or on slippery or loose surfaces. The HOLD
function cannot hold the vehicle on such sur-
faces.
Checklist before driving off-road
!If the engine oil warning lamp lights up while
the vehicle is in motion, stop the vehicle in a
safe place as soon as possible. Check the
engine oil level. The engine oil warning lamp
warning must not be ignored. Continuing the
journey while the symbol is displayed could
lead to engine damage.
XEngine oil level: check the engine oil level
and add oil if necessary.
When driving on steep gradients, the engine
oil level must be sufficiently high to ensure a
correct oil supply in the vehicle.
XDEF tank (BlueTEC vehicles): check the
level and add if necessary (Ypage 158).
XTire-changing tool kit: check that the jack is
working and make sure you have the lug
wrench, a robust tow cable and a folding
spade in the vehicle.
XWheels and tires: check the tread depth and
pressure of the tires.
XCheck for damage and remove any foreign
objects, e.g. small stones, from the wheels/
tires.
XReplace any missing valve caps.
XReplace dented or damaged wheels.
XRims: dented or bent rims can result in a loss
of tire pressure and damage the tire bead.
Driving tips171
Driving and parking
Z
Page 230 of 398
Most U.S. states and all Canadian provinces
require by law:
RSafety chains between the towing vehicle and
the trailer. The chains should be cross-wound
under the trailer drawbar. They must be fas-
tened to the vehicle's trailer coupling, not to
the bumper or the axle.
Leave enough play in the chains to make tight
cornering possible.
RA separate brake system for certain types of
trailer.
RSafety switch for braked trailers. Check the
specific legal requirements applicable to your
state.
If the trailer becomes detached from the tow-
ing vehicle, the safety feature triggers the
trailer brakes.
Towing a trailer
There are numerous legal requirements con-
cerning the towing of a trailer, e.g. speed restric-
tions. Make sure that your car/trailer combina-tion complies with the local regulations:
Rin your place of residence
Rin the location to which you are driving
The police and local authorities can provide reli-
able information.
Observe the following when towing a trailer:
RTo gain driving experience and to become
accustomed to the new handling characteris-
tics, you should practice the following in a
traffic-free location:
-cornering
-stopping
-backing up
RBefore driving, check:
-trailer tow hitch
-safety switch for braked trailers
-safety chains
-electrical connections
-lights
-wheels
RAdjust the exterior mirrors to provide an
unobstructed view of the rear section of the
trailer.
RIf the trailer has electronically controlled
brakes, pull away carefully. Brake manually using the brake controller and check whether
the brakes function correctly.
RSecure any objects on the trailer to prevent
the cargo from slipping when the vehicle is in
motion.
RWhen you couple up a trailer, check at regular
intervals that the load is firmly secured. If the
trailer is equipped with trailer lights and
brakes, check the trailer to ensure that these
are working.
RBear in mind that the handling will be less
stable when towing a trailer than when driving
without one. Avoid sudden steering move-
ments.
RThe vehicle/trailer combination is heavier,
accelerates more slowly, has a decreased
gradient climbing capability and a longer
braking distance.
It is more susceptible to side winds and
requires more careful steering.
RIf possible, do not brake suddenly, but instead
depress the brake pedal moderately at first so
that the trailer can activate its brakes. Then
increase the pressure on the brake pedal.
RIf the automatic transmission repeatedly
shifts between gears on uphill or downhill gra-
dients, shift to a lower gear using the left-hand
steering wheel paddle shifter.
A lower gear and lower speed reduce the risk
of engine failure.
RWhen driving downhill, shift to a lower gear to
utilize the engine's braking effect.
Avoid continuous brake application as this
may overheat the vehicle brakes and, if instal-
led, the trailer brakes.
RIf the coolant temperature increases dramat-
ically while the air-condit ioning system is
switched on, switch off the air-conditioning
system.
Coolant heat can also be dissipated by open-
ing the windows and switching the ventilation blower and the interior temperature to the
highest level.
RWhen overtaking, pay particular attention to
the extended length of your vehicle/trailer
combination.
Due to the length of the vehicle/trailer com-
bination, you require additional road space in
relation to the vehicle you are overtaking
before you can change back to the original
lane.
228Towing a trailer
Driving and parking
Page 243 of 398
XPress the6ora button to start dialing.
or
XTo exit the redial memory: press the~
or % button.
Assistance menu
Introduction
Depending on the equipment installed in the
vehicle, you have the following options in the
DriveAssist
menu:
RDisplaying the assistance graphic
(Ypage 241)
RActivating/deactivating the Traffic Sign
Assist display (Ypage 241)
RActivating or deactivating Steering Pilot
(Ypage 241)
RActivating or deactivating Active Brake Assist (Ypage 242)
RActivating or deactivating Active Brake Assist
with cross-traffic function (Ypage 242)
RActivating/deactivating ATTENTION ASSIST
(Ypage 242)
RActivating/deactivating Blind Spot Assist or
Active Blind Spot Assist (Ypage 242)
RActivating/deactivating Lane Keeping Assist
or Active Lane Keeping Assist (Ypage 242)
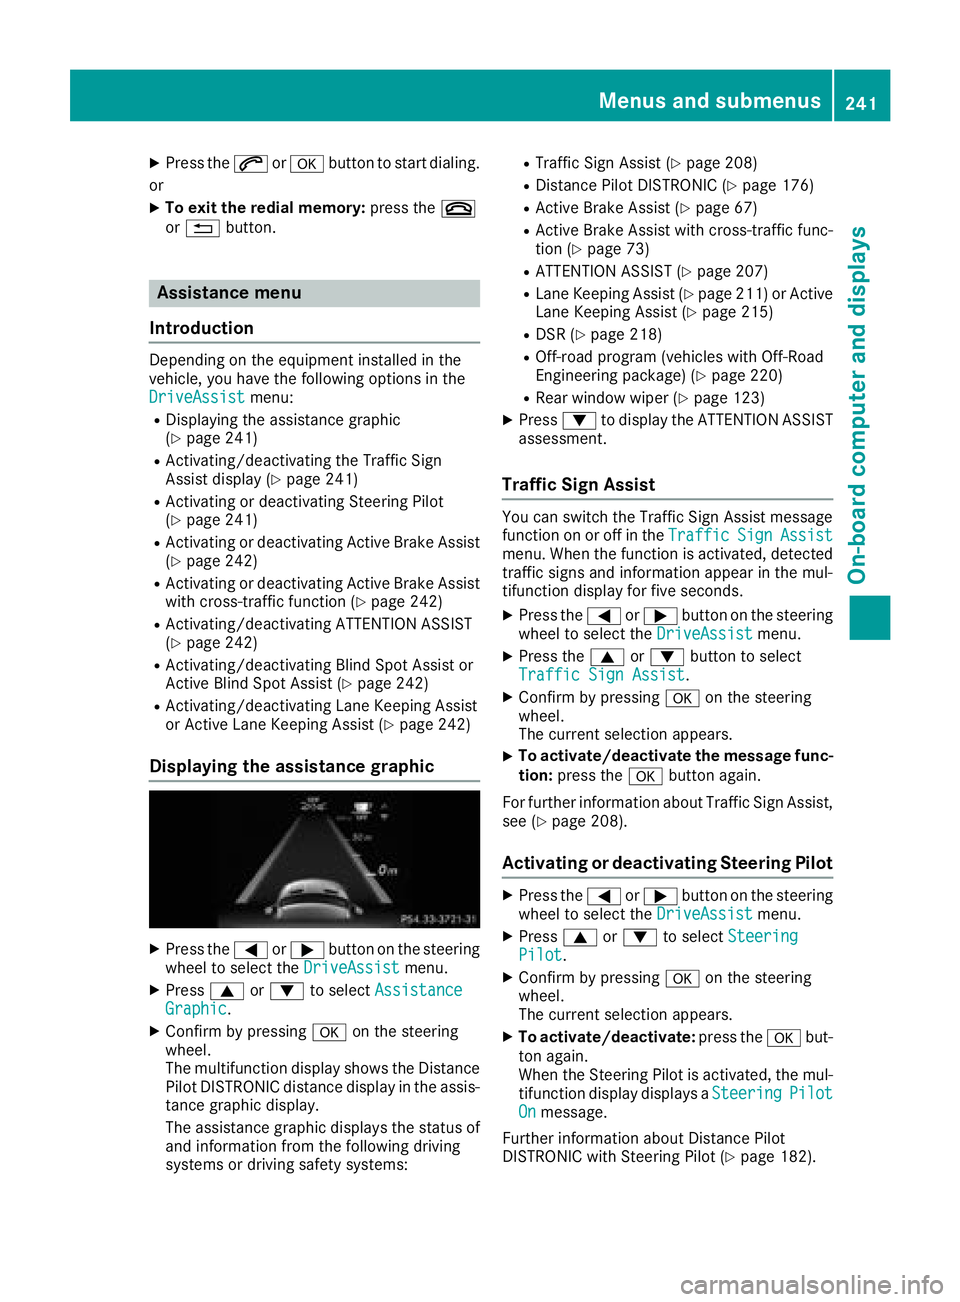
Displaying the assistance graphic
XPress the =or; button on the steering
wheel to select the DriveAssistmenu.
XPress9or: to select AssistanceGraphic.
XConfirm by pressing aon the steering
wheel.
The multifunction display shows the Distance
Pilot DISTRONIC distance display in the assis-
tance graphic display.
The assistance graphic displays the status of
and information from the following driving
systems or driving safety systems:
RTraffic Sign Assist (Ypage 208)
RDistance Pilot DISTRONIC (Ypage 176)
RActive Brake Assist (Ypage 67)
RActive Brake Assist with cross-traffic func-
tion (Ypage 73)
RATTENTION ASSIST (Ypage 207)
RLane Keeping Assist (Ypage 211) or Active
Lane Keeping Assist (Ypage 215)
RDSR (Ypage 218)
ROff-road program (vehicles with Off-Road
Engineering package) (Ypage 220)
RRear window wiper (Ypage 123)
XPress :to display the ATTENTION ASSIST
assessment.
Traffic Sign Assist
You can switch the Traffic Sign Assist message
function on or off in the TrafficSignAssistmenu. When the function is activated, detected
traffic signs and information appear in the mul-
tifunction display for five seconds.
XPress the=or; button on the steering
wheel to select the DriveAssistmenu.
XPress the9or: button to select
Traffic Sign Assist.
XConfirm by pressing aon the steering
wheel.
The current selection appears.
XTo activate/deactivate the message func-
tion: press the abutton again.
For further information about Traffic Sign Assist,
see (
Ypage 208).
Activating or deactivating Steering Pilot
XPress the =or; button on the steering
wheel to select the DriveAssistmenu.
XPress9or: to select SteeringPilot.
XConfirm by pressing aon the steering
wheel.
The current selection appears.
XTo activate/deactivate: press theabut-
ton again.
When the Steering Pilot is activated, the mul- tifunction display displays a Steering
PilotOnmessage.
Further information about Distance Pilot
DISTRONIC with Steering Pilot (
Ypage 182).
Menus and submenus241
On-board computer and displays
Z
Page 259 of 398
Display messagesPossible causes/consequences andMSolutions
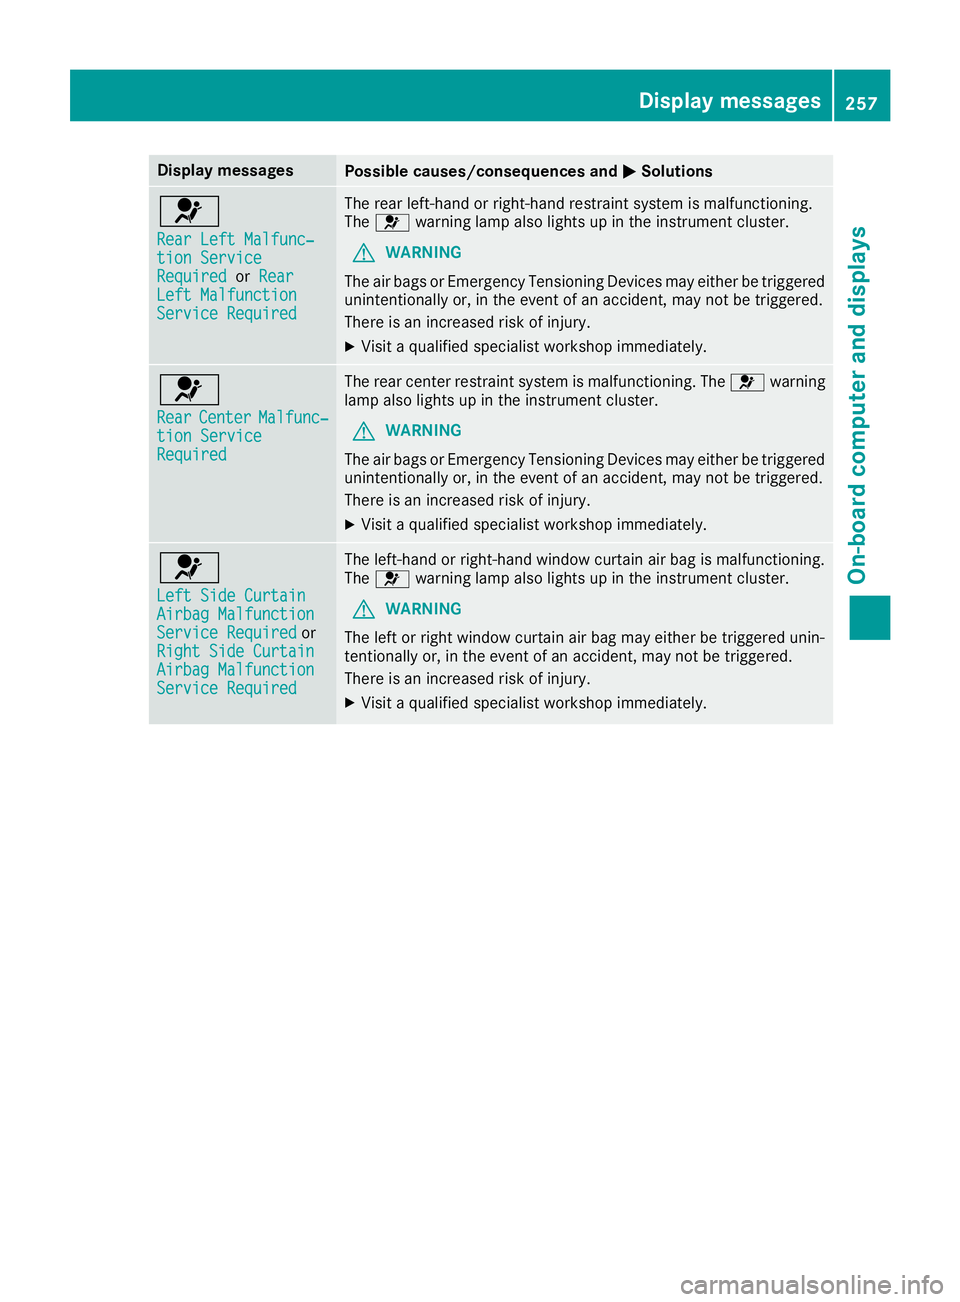
6
RearLef tMalfunc‐tio nServic eRequiredorRea rLeftMalfunctionServic eRequired
The rear left-han dor right-hand restrain tsystem is malfunctioning .
The 6 warning lamp also lights up in th einstrumen tcluster.
GWARNIN G
The air bags or Emergency Tensioning Devices may either be triggered
unintentionally or, in th eevent of an accident, may no tbe triggered .
There is an increased ris kof injury.
XVisit aqualified specialist workshop immediately.
6
Rea rCenterMalfunc‐tionServic eRequired
The rear center restrain tsystem is malfunctioning .The 6 warning
lamp also lights up in th einstrumen tcluster.
GWARNIN G
The air bags or Emergency Tensioning Devices may either be triggered
unintentionally or, in th eevent of an accident, may no tbe triggered .
There is an increased ris kof injury.
XVisit aqualified specialist workshop immediately.
6
Lef tSid eCurtai nAirbag MalfunctionServiceRequiredor
Right Sid eCurtai n
Airbag MalfunctionServiceRequired
The left-han dor right-hand window curtai nair bag is malfunctioning .
The 6 warning lamp also lights up in th einstrumen tcluster.
GWARNIN G
The lef tor right window curtai nair bag may either be triggered unin-
tentionally or, in th eevent of an accident, may no tbe triggered .
There is an increased ris kof injury.
XVisit aqualified specialist workshop immediately.
Display messages25 7
On-board computer and displays
Z
Page 308 of 398
Cargo compartment cover
Important safety notes
GWARNING
On its own, the cargo compartment cover
cannot secure or restrain heavy objects,
items of luggage and heavy loads. You could
be hit by an unsecured load during sudden
changes in direction, braking or in the event of
an accident. There is an increased risk of
injury or even fatal injury.
Always store objects so that they cannot be
flung around. Secure objects, luggage or
loads against slipping or tipping over, e.g. by
using tie downs, even if you are using the
cargo compartment cover.
!When loading the vehicle, make sure that
you do not stack the load in the cargo com-
partment higher than the lower edge of the
side windows. Do not place heavy objects on
top of the cargo compartment cover.
The cargo compartment cover may be installed
behind the 2nd or 3rd row of seats.
Extending/retracting the cargo com-
partment cover
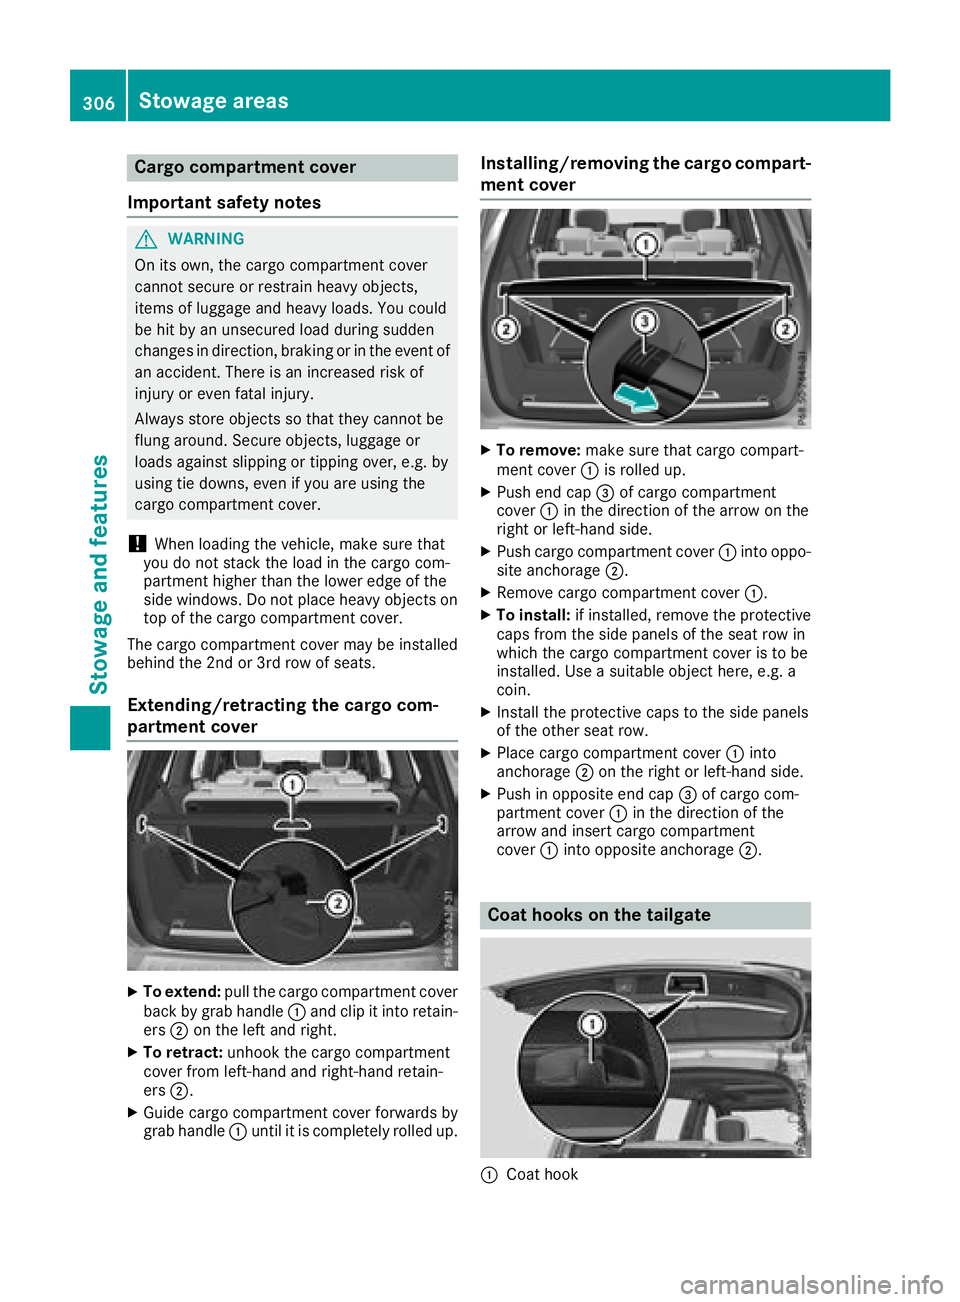
XTo extend: pull the cargo compartment cover
back by grab handle :and clip it into retain-
ers ;on the left and right.
XTo retract: unhook the cargo compartment
cover from left-hand and right-hand retain-
ers ;.
XGuide cargo compartment cover forwards by
grab handle :until it is completely rolled up.
Installing/removing the cargo compart-
ment cover
XTo remove: make sure that cargo compart-
ment cover :is rolled up.
XPush end cap =of cargo compartment
cover :in the direction of the arrow on the
right or left-hand side.
XPush cargo compartment cover :into oppo-
site anchorage ;.
XRemove cargo compartment cover :.
XTo install:if installed, remove the protective
caps from the side panels of the seat row in
which the cargo compartment cover is to be
installed. Use a suitable object here, e.g. a
coin.
XInstall the protective caps to the side panels
of the other seat row.
XPlace cargo compartment cover :into
anchorage ;on the right or left-hand side.
XPush in opposite end cap =of cargo com-
partment cover :in the direction of the
arrow and insert cargo compartment
cover :into opposite anchorage ;.
Coat hooks on the tailgate
:Coat hook
306Stowage areas
Stowage and features
Page 312 of 398
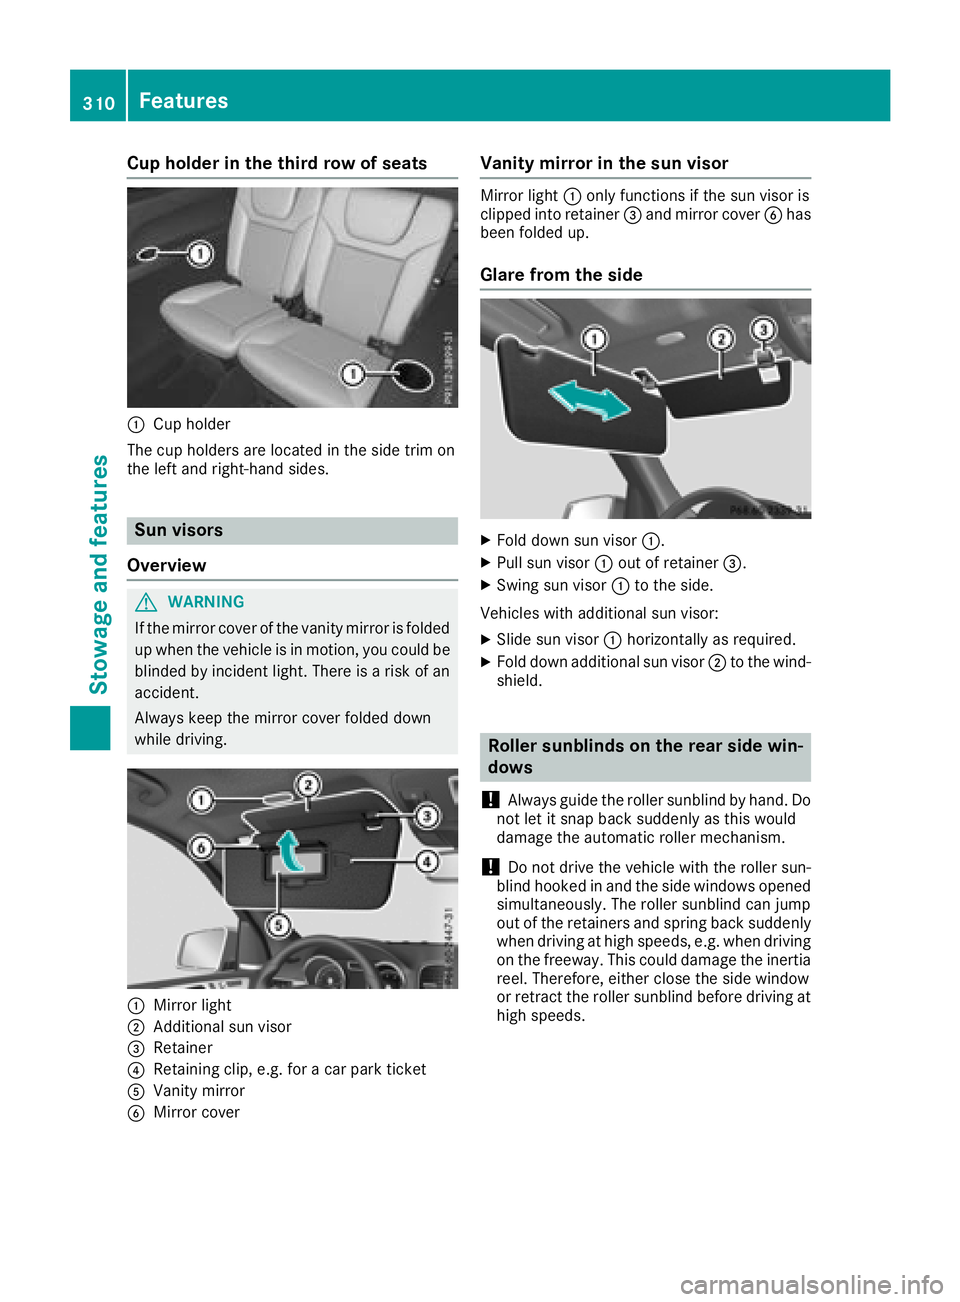
Cup holder in the third row of seats
:Cup holder
The cup holders are located in the side trim on
the left and right-hand sides.
Sun visors
Overview
GWARNING
If the mirror cover of the vanity mirror is folded
up when the vehicle is in motion, you could be
blinded by incident light. There is a risk of an
accident.
Always keep the mirror cover folded down
while driving.
:Mirror light
;Additional sun visor
=Retainer
?Retaining clip, e.g. for a car park ticket
AVanity mirror
BMirror cover
Vanity mirror in the sun visor
Mirror light :only functions if the sun visor is
clipped into retainer =and mirror cover Bhas
been folded up.
Glare from the side
XFold down sun visor :.
XPull sun visor:out of retainer =.
XSwing sun visor :to the side.
Vehicles with additional sun visor:
XSlide sun visor :horizontally as required.
XFold down additional sun visor ;to the wind-
shield.
Roller sunblinds on the rear side win-
dows
!
Always guide the roller sunblind by hand. Do
not let it snap back suddenly as this would
damage the automatic roller mechanism.
!Do not drive the vehicle with the roller sun-
blind hooked in and the side windows opened
simultaneously. The roller sunblind can jump
out of the retainers and spring back suddenly
when driving at high speeds, e.g. when driving
on the freeway. This could damage the inertia
reel. Therefore, either close the side window
or retract the roller sunblind before driving at
high speeds.
310Features
Stowage and features