2018 MERCEDES-BENZ GLS sensor
[x] Cancel search: sensorPage 117 of 398
Exterior lighting
General notes For reasons of safety, Mercedes-Benz recom-
mends that you drive with the lights switched on
even during the daytime. In some countries,
operation of the headlamps varies due to legal
requirements and self-imposed obligations.
Setting the exterior lighting
Setting options Exterior lighting can be set using: R
the light switch R
the combination switch ( Y
page 116)R
the on-board computer ( Y
page 243)
Light switch
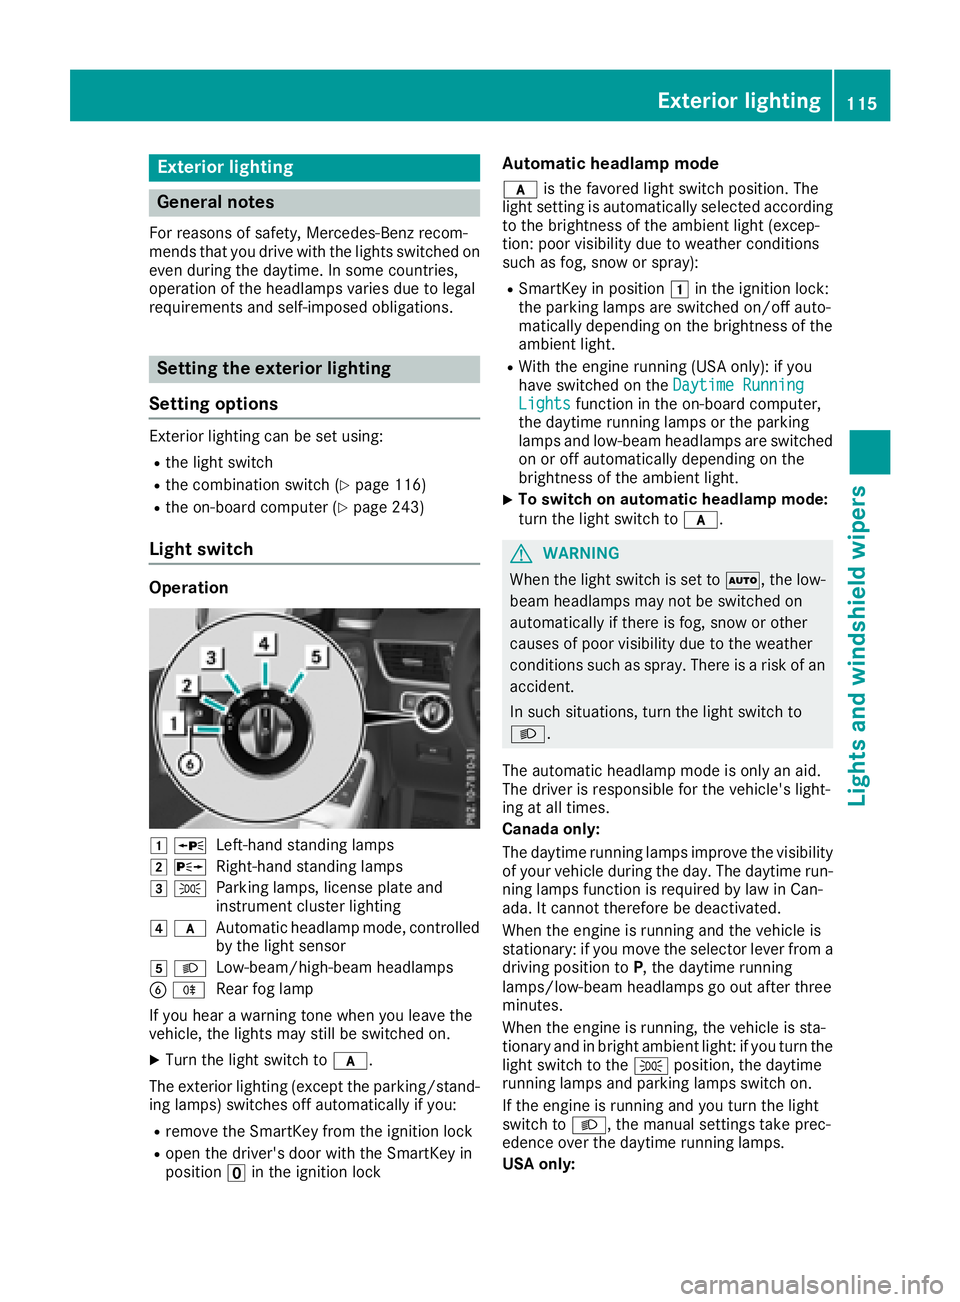
Operation
�G �c
Left-hand standing lamps�H �d
Right-hand standing lamps�I �`
Parking lamps, license plate and
instrument cluster lighting�J �q
Automatic headlamp mode, controlled
by the light sensor
�K �X
Low-beam/high-beam headlamps
�
Page 118 of 398
The daytime running lamps improve the visibility
of your vehicle during the day. To do this, the
daytime running lamps function must be
switched on using the on-board computer
( Y
page 243).
If the engine is running and you turn the light
switch to �` or �X , the manual settings
take precedence over the daytime running
lamps.
Low-beam headlamps Even if the light sensor does not detect that it is
dark, the parking lamps and low-beam head-
lamps switch on when the ignition is switched on
and the light switch is set to the �X position.
This is a particularly useful function in the event
of rain and fog. X
To switch on the low-beam headlamps:
turn the SmartKey to position �H in the igni-
tion lock or start the engine. X
Turn the light switch to �X .
The green �X indicator lamp in the instru-
ment cluster lights up.
Rear fog lamp The rear fog lamp improves visibility of your
vehicle for the traffic behind in the event of thick
fog. Please take note of the country-specific
regulations for the use of rear fog lamps. X
To switch on the rear fog lamp: turn the
SmartKey to position �H in the ignition lock or
start the engine. X
Turn the light switch to �X or �q .X
Press the �^ button.
The yellow �^ indicator lamp in the instru-
ment cluster lights up. X
To switch off the rear fog lamp: press the
�^ button.
The yellow �^ indicator lamp in the instru-
ment cluster goes out.
Parking lamps
! If the battery charge is very low, the parking
lamps or standing lamps are automatically
switched off to enable the next engine start.
Always park your vehicle safely and in a well lit
area, in accordance with the relevant legal
stipulations. Avoid using the �` parking
lamps over a period of several hours. If pos-
sible, switch on the right-hand �d or left-
hand �c standing lamps. X
To switch on: turn the light switch to �` .
The green �` indicator lamp in the instru-
ment cluster lights up.
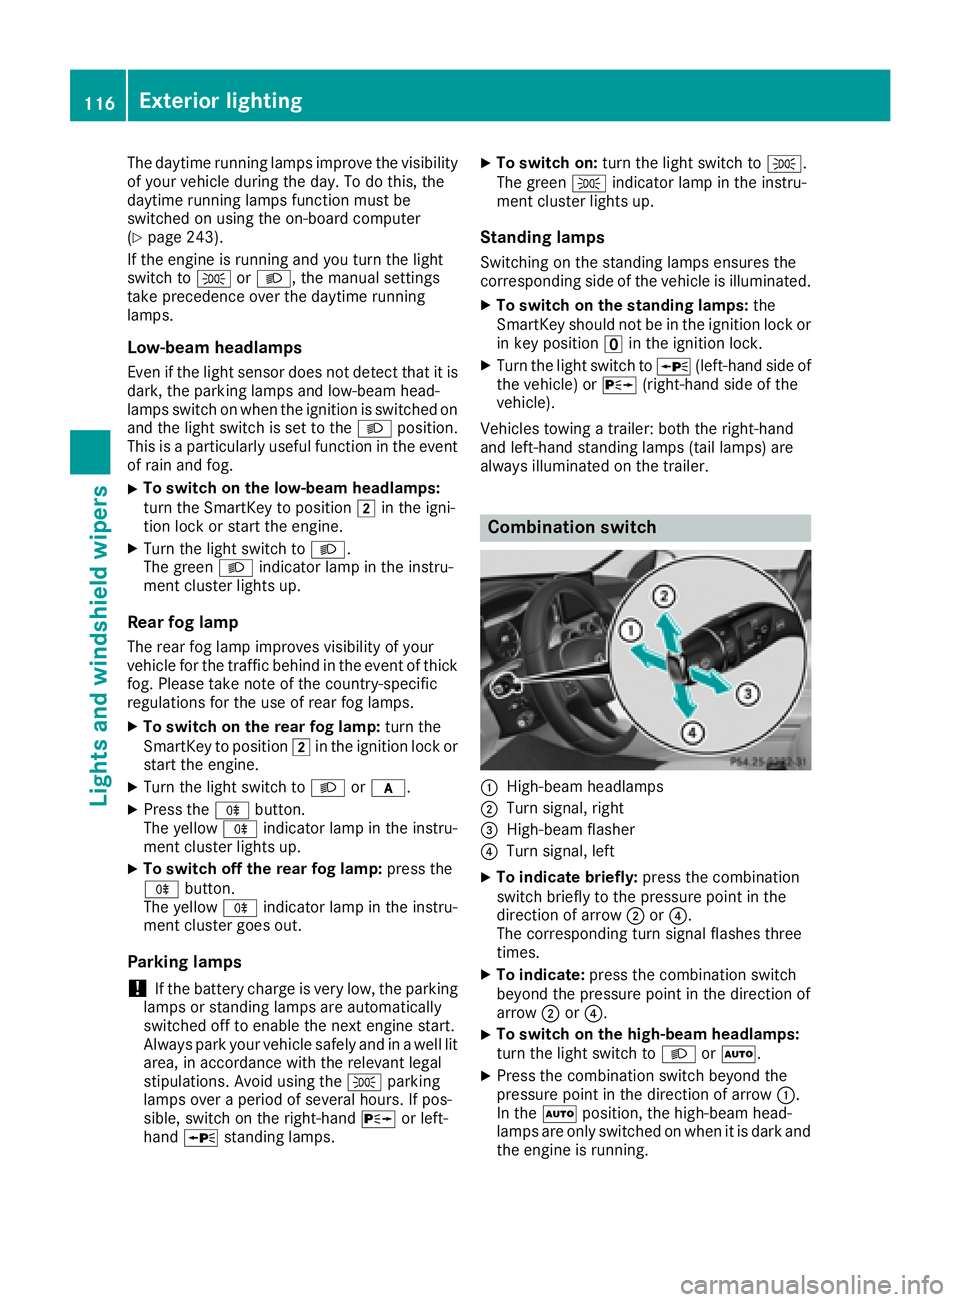
Standing lamps Switching on the standing lamps ensures the
corresponding side of t he vehicle is illuminated.X
To switch on the standing lamps: the
SmartKey should not be in the ignition lock or
in key position �
Page 120 of 398
Highway mode Highway mode increases the range of the beam.
Active: if you are driving at a speed above
110 km/h and do not make any large steering
movements for at least 1,000 m or if you are
driving at a speed above 130 km/h.
Not active: if you are driving at speeds below
80 km/h following activation.
Extended range fog lamps The extended range fog lamps reduce the glare
experienced by the driver and improve the illu-
mination of the edge of the road.
Active: if you are driving at speeds below
40 mph (70 km/h) and you switch on the rear
fog lamp.
Not active: if, following activation, you are driv-
ing at speeds above 60 mph (100 km/h) or if you
switch off the rear fog lamp
Off-road lights The off-road lights facilitate the early recogni-
tion of objects/obstacles when driving off-road
thanks to a symmetrical, wider and brighter dis-
tribution of light from the low-beam headlamps.
Active: when driving at speeds no faster than
30 mph (50 km/h) and the off-road program
selector wheel is in position 1 or 2.
Not active: when driving at speeds above
30 mph (50 km/h).
When the off-road lights are switched on, the
cornering light function is permanently activa-
ted, the active light function is deactivated and
the headlamp range control is set to static
mode.
Adaptive Highbeam Assist
General notes You can use this function to set the headlamps
to change between low beam and high beam
automatically. The system recognizes vehicles
with their lights on, either approaching from the
opposite direction or traveling in front of your
vehicle, and consequently switches the head-
lamps from high beam to low beam.
The system automatically adapts the low-beam
headlamp range depending on the distance to
the other vehicle. Once the system no longer detects any other vehicles, it reactivates the
high-beam headlamps.
The system's optical sensor is located behind
the windshield near the overhead control panel.
Important safety notes
G WARNING
Adaptive Highbeam Assist does not recognize
road users: R
who have no lights, e.g. pedestrians R
who have poor lighting, e.g. cyclists R
whose lighting is blocked, e.g. by a barrier
On very rare occasions, Adaptive Highbeam
Assist may fail to recognize other road users
that have lights, or may recognize them too
late. In this, or in similar situations, the auto-
matic high-beam headlamps will not be deac-
tivated or will be activated regardless. There is
a risk of an accident.
Always carefully observe the traffic conditions
and switch off the high-beam headlamps in
good time.
Adaptive Highbeam Assist cannot take into
account road, weather or traffic conditions.
Adaptive Highbeam Assist is only an aid. You are
responsible for adjusting the vehicle's lighting
to the prevailing light, visibility and traffic con-
ditions.
In particular, the detection of obstacles can be
impaired if: R
poor visibility, e.g. due to fog, heavy rain or
snow R
dirt on the sensors or the sensors are
obscured
Switching Adaptive Highbeam Assist
on/off X
To switch on: turn the light switch to �X .X
Press the combination switch beyond the
pressure point in the direction of arrow �C .
The �
Page 141 of 398
Notes on breaking-in a new vehicle
Important safety notes The sensor system of some driving and driving
safety systems adjusts automatically while a
certain distance is being driven after the vehicle
has been delivered or after repairs. Full system
effectiveness is not reached until the end of this
teach-in procedure.
New and replaced brake pads and discs only
reach their optimum braking effect after several
hundred kilometers of driving. Compensate for
this by applying greater force to the brake pedal.
The first 1000 miles (1500 km) The more you look after the engine when it is
new, the more satisfied you will be with its per-
formance in the future. R
You should therefore drive at varying vehicle
and engine speeds for the first 1000 miles
(1500 km). R
Avoid heavy loads, e.g. driving at full throttle,
during this period. R
Change gear in good time, before the tach-
ometer needle is �
Page 178 of 398
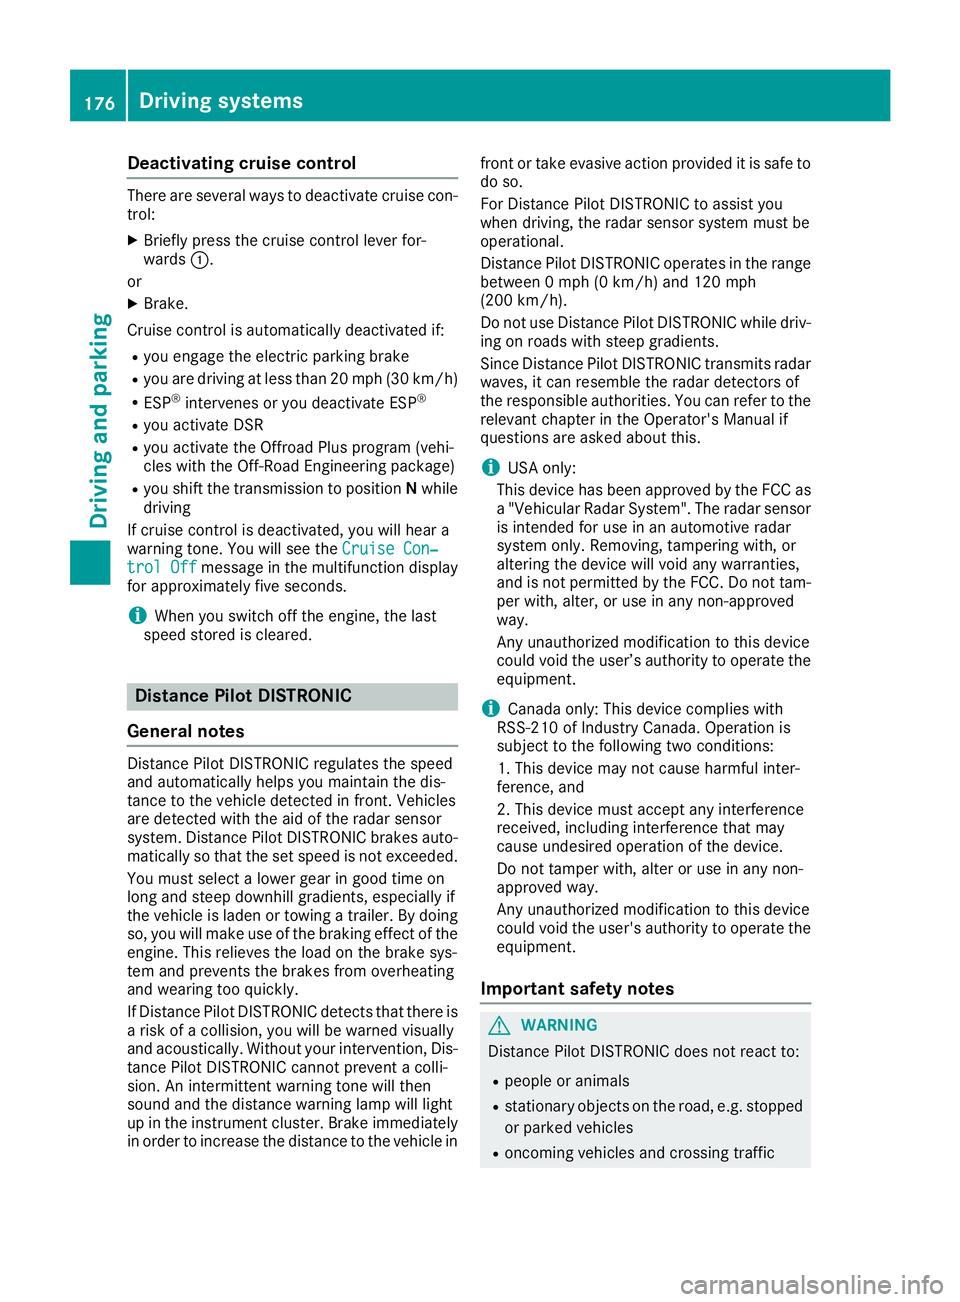
Deactivating cruis e contro lThere are severa l ways to deactivat e cruise con-
trol: X
Briefly press th e cruise contro l lever for-
ward s �C .
or X
Brake.
Cruise contro l is automatically deactivated if:R
you engage th e electric parking brakeR
you are drivin g at les s than 20 mph (30 km/ h)R
ESP ®
intervenes or you deactivate ESP ®
R
you activate DSR R
you activate the Offroad Plus program (vehi-
cles with the Off-Road Engineering package) R
you shift the transmission to position N while
driving
If cruise control is deactivated, you will hear a
warning tone. You will see the Cruise Con‐
trol Off message in the multifunction display
for approximately five seconds.
i When you switch off the engine, the last
speed stored is cleared.
Distance Pilot DISTRONIC
General notes Distance Pilot DISTRONIC regulates the speed
and automatically helps you maintain the dis-
tance to the vehicle detected in front. Vehicles
are detected with the aid of the radar sensor
system. Distance Pilot DISTRONIC brakes auto-
matically so that the set speed is not exceeded.
You must select a lower gear in good time on
long and steep downhill gradients, especially if
the vehicle is laden or towing a trailer. By doing
so, you will make use of the braking effect of the
engine. This relieves the load on the brake sys-
tem and prevents the brakes from overheating
and wearing too quickly.
If Distance Pilot DISTRONIC detects that there is
a risk of a collision, you will be warned visually
and acoustically. Without your intervention, Dis-
tance Pilot DISTRONIC cannot prevent a colli-
sion. An intermittent warning tone will then
sound and the distance warning lamp will light
up in the instrument cluster. Brake immediately
in order to increase the distance to the vehicle in front or take evasive action provided it is safe to
do so.
For Distance Pilot DISTRONIC to assist you
when driving, the radar sensor system must be
operational.
Distance Pilot DISTRONIC ope rates in the range
b etween 0 mph (0 km/h) and 120 mph
(200 km/h).
Do not use Distance Pilot DISTRONIC while driv-
ing on roads with steep gradients.
Since Distance Pilot DISTRONIC transmits radar
waves, it can resemble the radar detectors of
the responsible authorities. You can refer to the
relevant chapter in the Operator's Manual if
questions are asked about this.
i USA only:
This device has been approved by the FCC as
a "Vehicular Radar System". The radar sensor
is intended for use in an automotive radar
system only. Removing, tampering with, or
altering the device will void any warranties,
and is not permitted by the FCC. Do not tam-
per with, alter, or use in any non-approved
way.
Any unauthorized modification to this device
could void the user’s authority to operate the
equipment.
i Canada only: This device complies with
RSS-210 of Industry Canada. Operation is
subject to the following two conditions:
1. This device may not cause harmful inter-
ference, and
2. This device must accept any interference
received, including interference that may
cause undesired operation of the device.
Do not tamper with, alter or use in any non-
appro ved w ay.
Any unauthorized modification to this device
could void the user's authority to operate the
equipment.
Important safety notes
G WARNING
Distance Pilot DISTRONIC does not react to: R
people or animals R
stationary objects on the road, e.g. stopped
or parked vehicles R
oncoming vehicles and crossing traffic176
Driving system s
Dr ivi ng an d parking
Page 179 of 398
As a result, Distance Pilot DISTRONIC may
neither give warnings nor intervene in such
situations. There is a risk of an accident.
Always pay careful attention to the traffic sit-
uation and be ready to brake.
G WARNING
Distance Pilot DISTRONIC cannot always
clearly identify other road users and complex
traffic situations.
In such cases, Distance Pilot DISTRONIC may: R
give an unnecessary warning and then
brake the vehicle R
neither give a warning nor intervene R
accelerate or brake unexpectedly
There is a risk of an accident.
Continue to drive carefully and be ready to
brake, especially if Distance Pilot DISTRONIC
warns you.
G WARNING
Distance Pilot DISTRONIC brakes your vehicle
with up to 50% of the maximum possible
deceleration. If this deceleration is not suffi-
cient, Distance Pilot DISTRONIC alerts you
with a visual and acoustic warning. There is a
risk of an accident.
Apply the brakes yourself in these situations
and try to take evasive action.
! When Distance Pilot DISTRONIC or the
HOLD function is activated, the vehicle
brakes automatically in certain situations.
To avoid damage to the vehicle, deactivate
DISTRONIC PLUS and the HOLD function in
the following or similar situations: R
when towing the vehicle R
in the car wash
The Distance Pilot DISTRONIC R
can neither reduce the risk of accident nor
override the laws of physics if you fail to adapt
your driving style. R
cannot take into account road, weather or
traffic conditions. R
is only an aid. You are responsible for the dis-
tance to the vehicle in front, for vehicle speed, for braking in good time and for staying in your
lane.
Do not use Distance Pilot DISTRONIC: R
in road and traffic conditions which do not
allow you to maintain a constant speed, e.g. in
heavy traffic or on winding roads R
on slippery road surfaces. Braking or accel-
erati ng could cause the drive wheels to lose
tra ction and the vehicle could then skid R
in poor visibility, e.g. due to fog, heavy rain or
snow
Distance Pilot DISTRONIC may not detect nar-
row vehicles driving in front, e.g. motorcycles, or
vehicles driving on a different line.
In particular, the detection of obstacles can be
impaired if: R
there is dirt on the sensors or anything else
covering the sensors R
there is snow or heavy rain R
there is interference by other radar sources R
there are strong radar reflections, for exam-
ple, in parking garages
If Distance Pilot DISTRONIC no longer detects a
vehicle in front, it may unexpectedly accelerate
to the speed stored.
This speed may: R
be too high if you are driving in a turning lane
or an exit lane R
be so high when driving in the right-hand lane
that you overtake vehicles in the left-hand
lane R
be so high when driving in the left-hand lane
that you overtake vehicles in the right-hand
lane
If there is a change of drivers, advise the new
driver of the speed stored.Driving systems 177
Driving an d parking Z
Page 195 of 398
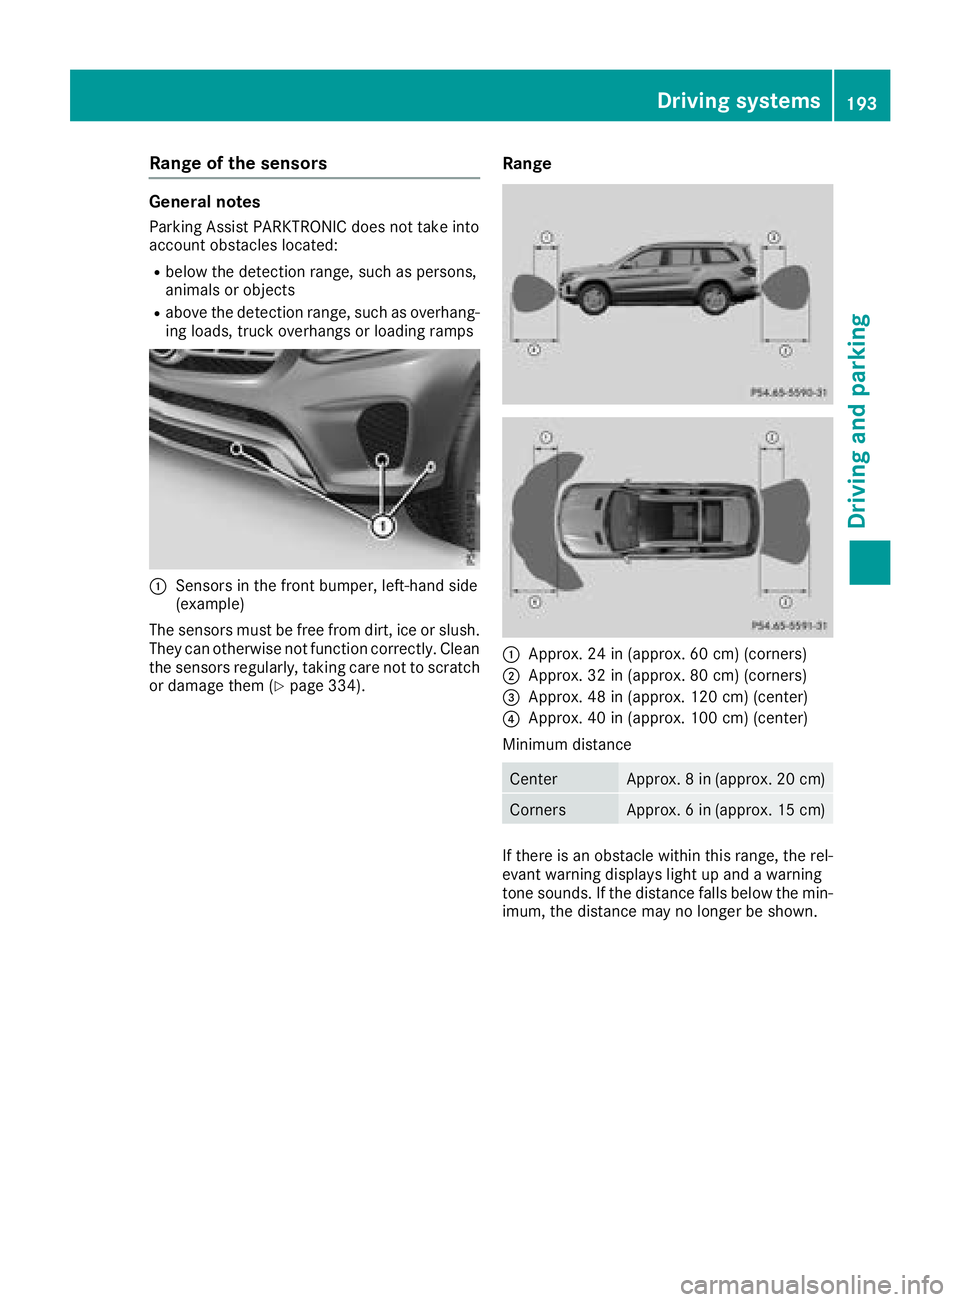
Range of the sensors General notes Parking Assist PARKTRONIC does not take into
account obstacles located: R
below the detection range, such as persons,
animals or objects R
above the detection range, such as overhang-
ing loads, truck overhangs or loading ramps
�C
Sensors in the front bumper, left-hand side
(example)
The sensors must be free from dirt, ice or slush.
They can otherwise not function correctly. Clean
the sensors regularly, taking care not to scratch
or damage them ( Y
page 334). Range
�C
Approx. 24 in (approx. 60 cm) (corners) �D
Approx. 32 in (approx. 80 cm) (corners) �
Page 197 of 398
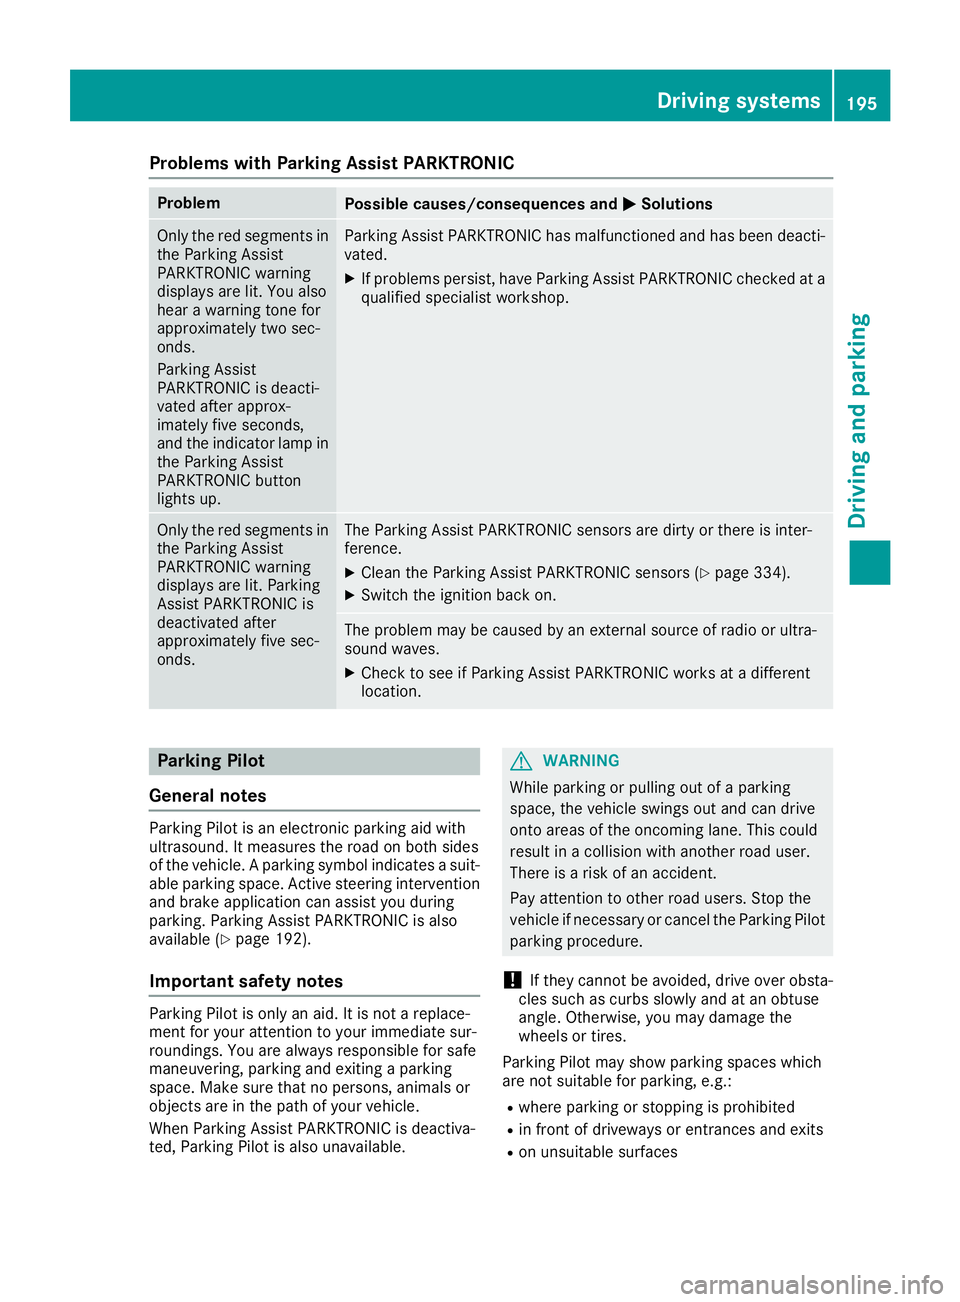
Problems with Parking Assist PARKTRONIC Problem
Possible causes/consequences and �P Solutions
Only the red segments in
the Parking Assist
PARKTRONIC warning
displays are lit. You also
hear a warning tone for
approximately two sec-
onds.
Parking Assist
PARKTRONIC is deacti-
vated after approx-
imately five seconds,
and the indicator lamp in
the Parking Assist
PARKTRONIC button
lights up. Parking Assist PARKTRONIC has malfunctioned and has been deacti-
vated. X
If problems persist, have Parking Assist PARKTRONIC checked at a
qualified specialist workshop.
Only the red segments in
the Parking Assist
PARKTRONIC warning
displays are lit. Parking
Assist PARKTRONIC is
deactivated after
approximately five sec-
onds. The Parking Assist PARKTRONIC sensors are dirty or there is inter-
ference. X
Clean the Parking Assist PARKTRONIC sensors ( Y
page 334).X
Switch the ignition back on.
The problem may be caused by an external source of radio or ultra-
sound waves. X
Check to see if Parking Assist PARKTRONIC works at a different
location.
Parking Pilot
General notes Parking Pilot is an electronic parking aid with
ultrasound. It measures the road on both sides
of the vehicle. A parking symbol indicates a suit-
able parking space. Active steering intervention
and brake application can assist you during
parking. Parking Assist PARKTRONIC is also
available ( Y
page 192).
Important safety notes
Parking Pilot is only an aid. It is not a replace-
ment for your attention to your immediate sur-
roundings. You are always responsible for safe
maneuvering, parking and exiting a parking
space. Make sure that no persons, animals or
objects are in the path of your vehicle.
When Parking Assist PARKTRONIC is deactiva-
ted, Parking Pilot is also unavailable. G WARNING
While parking or pulling out of a parking
space, the vehicle swings out and can drive
onto areas of the oncoming lane. This could
result in a collision with another road user.
There is a risk of an accident.
Pay attention to other road users. Stop the
vehicle if necessary or cancel the Parking Pilot
parking procedure.
! If they cannot be avoided, drive over obsta-
cles such as curbs slowly and at an obtuse
angle. Otherwise, you may damage the
wheels or tires.
Parking Pilot may show parking spaces which
are not suitable for parking, e.g.: R
where parking or stopping is prohibited R
in front of driveways or entrances and exits R
on unsuitable surfacesDriving systems 195
Driving and parking Z