2018 MERCEDES-BENZ GLS towing
[x] Cancel search: towingPage 25 of 398
Mounting dimensions .................... 395
Parking Assist PARKTRONIC ......... .1 92
Power supply ................................. 230
Pulling away with a trailer .............. 143
Removing the ball coupling ............ 229
Trailer loads ................................... 395
Towing away
Important safety guidelines ........... 349
Installing the towing eye ................ 350
Notes for 4MATIC vehicles ............ 351
Removing the towing eye .............. .3 50
Transporting the vehicle ................ 351
With both axles on the ground ....... 350
Towing eye ......................................... 339
Traffic reports
see also Digital Operator's Man-
ual ................................................. .2 92
Traffic Sign Assist
Activating/deactivating the warn-
ing function ................................... .2 41
Display message ............................ 268
Function/notes ............................ .2 08
Important safety notes .................. 209
Instrument cluster display ............. 209
Trailer coupling
see Towing a trailer
Trailer loads and drawbar nose-
weights ............................................... 229
Trailer towing
Active Blind Spot Assist ................. 215
Active Lane Keeping Assist ............ 218
Blind Spot Assist ............................ 211
Permissible trailer loads and
drawbar noseweights ..................... 229
Transfer case ..................................... 155
Transmission
see Automatic transmission
Transmission position display ......... 149
Transporting the vehicle .................. 351
Traveling uphill
Brow of hill ..................................... 174
Driving downhill ............................ .1 74
Maximum gradient-climbing capa-
bility ............................................... 173
Trim pieces (cleaning instruc-
tions) ................................................. .3 36 Trip computer (on-board com-
puter) ................................................. .2 36
Trip odometer
Calling up ................................... .... 236
R es
etting (on-board computer) ...... 237
Trunk
see Tailgate
Turn signals
Display message ............................ 260
Replacing bulbs (front) ................... 122
Switching on/off ........................... 116
Two-way radio
Frequencies ................................... 384
Installation ..................................... 384
Transmission output (maximum) .... 384
TWR (Tongue Weight Rating) (defi-
nition) ................................................. 374
Type identification plate
see Vehicle identification plate
U Unlocking
Emergency unlocking ....................... 84
From inside the vehicle (central
unlocking button) ............................. 83
Upshift indicator (on-board com-
puter, Mercedes-AMG vehicles) ....... 245
USB devices
Connecting to the Media Inter-
face ............................................... 299
V
Vanity mirror (in the sun visor) ........ 310
Vehicle
Correct use ...................................... 31
Data acquisition ............................... 32
Display message ............................ 275
Equipment ....................................... 28
Individual settings .......................... 243
Limited Warranty ............................. 32
Loading .......................................... 364
Locking (in an emergency) ............... 84
Locking (SmartKey) .......................... 77
Lowering ........................................ 378
Maintenance .................................... 29
Operating safety .............................. 30 Index 23
Page 26 of 398
Parking .......................................... 161
Parking for a long period ............... .1 64
Pulling away ................................... 143
Raising .......................................... .3 76
Reporting problems ......................... 31
Securing from rolling away ............ 375
Towing away .................................. 349
Transporting .................................. 351
Unlocking (in an emergency) ........... 84
Unlocking (SmartKey) ..................... .7 7
Vehicle data ................................... 392
Vehicle battery
see Battery (vehicle)
Vehicle data ....................................... 392
Vehicle data (off-road driving)
Approach/departure angle ............ 394
Fording depth ................................ 393
Maximum gradient climbing abil-
ity .................................................. 394
Vehicle dimensions ........................... 392
Vehicle emergency locking ................ 84
Vehicle identification number
see VIN
Vehicle identification plate .............. 385
Vehicle level
AIRMATIC ...................................... 190
Vehicle level (display message) ....... 265
Vehicle tool kit .................................. 339
Video
Operating the DVD ........................ .2 39
see also Digital Operator's Man-
ual ................................................. .2 92
VIN ...................................................... 385
Seat ............................................... 386
Type plate ...................................... 385
W
Warning and indicator lamps
ABS ................................................ 282
Brakes .......................................... .2 81
Coolant .......................................... 288
Distance Pilot DISTRONIC ............. 290
Distance warning ........................... 290
Engine diagnostics ......................... 288
ESP ®
.............................................. 284
ESP ®
OFF ....................................... 285
Fuel tank ........................................ 288 Overview .......................................... 37
Parking brake ................................ 287
PASSENGER AIR BAG ...................... 45
Reserve fuel ................................... 288
Restraint system ............................ 287
Seat belt ........................................ 280
Tire pressure monitor .................... 291
Warranty .............................................. 28
Washer fluid
Display message ............................ 278
Weather display (COMAND)
see also Digital Operator's Man-
ual .................................................. 292
Wheel and tire combinations
Tires ............................................... 379
Wheel bolt tightening torque ........... 378
Wheel chock ...................................... 375
Wheels
Changing a wheel .......................... 374
Checking ........................................ 354
Cleaning ......................................... 333
Emergency spare wheel ................. 380
Important safety notes .................. 354
Information on driving .................... 354
Interchanging/changing ................ 374
Mounting a new wheel ................... 377
Mounting a wheel .......................... 375
Overview ........................................ 354
Removing a wheel .......................... 377
Snow chains .................................. 356
Storing ........................................... 375
Tightening torque ........................... 378
Wheel size/tire size ....................... 379
Window curtain air bag
Display message ............................ 257
Operation ......................................... 51
Windows
see Side windows
Windshield
Defrosting ...................................... 133
Infrared reflective .......................... 324
Windshield washer fluid
see Windshield washer system
Windshield washer system
Adding washer fluid ....................... 329
Important safety notes .................. 391
Windshield wipers
Problem (malfunction) ................... 12424
Index
Page 63 of 398
Activating the special seat belt retractor: X
Pull the seat belt out fully and let the inertia
reel retract it again.
While the seat belt is retracting, you should
hear a ratcheting sound. The special seat belt
retractor is enabled. X
Push the child restraint system down so that
the seat belt is tight and does not loosen.
Removing the child restraint system and deac-
tivating the special seat belt retractor: X
Make sure you observe the child restraint
system manufacturer's installation instruc-
tions. X
Press the release button of the seat belt
buckle and guide the seat belt tongue back
towards the belt sash guide.
The special seat belt retractor is deactivated.
Child restraint system The use of seat belts and child restraint systems
is required by law in: R
all 50 states R
the U.S. territories R
the District of Columbia R
all Canadian provinces
If you install a rearward-facing child restraint
system on the center rear seat, the rear arm rest
must be folded back as far as possible.
You can obtain further information about the
correct child restraint system from any author-
ized Mercedes-Benz Center.
G WARNING
If the child restraint system is installed incor-
rectly on a suitable seat, it cannot protect as
intended. The child cannot then be restrained
in the event of an accident, heavy braking or
sudden changes of direction. There is an
increased risk of injury, possibly even fatal.
Make sure that you observe the child restraint
system manufacturer's installation instruc-
tions and the notes on use. Please ensure,
that the base of the child restraint system is
always resting completely on the seat cush-
ion. Never place objects, e.g. cushions, under
or behind the child restraint system. Only use
child restraint systems with the original cover designed for them. Only replace damaged
covers with genuine covers.
G WARNING
If the child restraint system is installed incor-
rectly or is not secured, it can come loose in
the event of an accident, heavy braking or a
sudden change in direction. The child
restraint system could be thrown about, strik-
ing vehicle occupants. There is an increased
risk of injury, possibly even fatal.
Always install child restraint systems prop-
erly, even if they are not being used. Make
sure that you observe the child restraint sys-
tem manufacturer's installation instructions.
You will find further information on stowing
objects, luggage or loads under "Loading guide-
lines" ( Y
page 300).
G WARNING
Child restraint systems or their securing sys-
tems which have been damaged or subjected
to a load in an accident can no longer protect
as intended. The child cannot then be
restrained in the event of an accident, heavy
braking or sudden changes of direction. There
is an increased risk of injury, possibly even
fatal.
Replace child restraint systems which have
been damaged or subjected to a load in an
accident as soon as possible. Have the secur-
ing systems on the child restraint system
checked at a qualified specialist workshop,
before you install a child restraint system
again.
The securing systems of child restraint systems
are: R
the seat belt system R
the LATCH-type (ISOFIX) securing rings R
the Top Tether anchorages
If it is absolutely necessary to carry a child on
the front-passenger seat, be sure to observe the
information on the "Occupant Classification
System (OCS)" ( Y
page 51). There you will also
find information on deactivating the front-
passenger front air bag.Children in the vehicle 61
Safety Z
Page 153 of 398
Kickdown Use kickdown for maximum acceleration .X
Depress th e accelerato r pedal beyon d th e
pressur e point.
The automatic transmission shift s to a lower
gear depending on th e engin e speed.X
Eas e off th e accelerato r pedal once th e
desire d speed is reached.
The automatic transmission shift s bac k up.
Rocking the vehicle free Shifting bac k and forth between transmission
position s �[ and �^ can help to free up th e
vehicl e if it get s stuck in mud or snow. The vehi-
cle's engin e managemen t system limits th e
speed to a maximum of 5 mph (9 km/h) when
shifting bac k and forth . To shift repeatedly
between transmission position s �[ and �^ ,
mov e th e DIRECT SELECT lever up and down
past th e poin t of resistance.
Towing a trailer X
Drive in th e middle of th e engin e spee d range
on uphil l gradients .X
Dependin g on th e uphil l or downhill gradient,
use th e left-han d steering whee l paddl e
shifter ( Y
page 152) to select a lower gear ,
eve n if cruise control or Distanc e Pilo t
DISTRONI C are activated.
Drive programs
Slippery drive program The Slipper y drive progra m has th e followin g
characteristics :R
reduce d engin e and transmission setting s for
optimum propulsion on slipper y or snow-cov-
ere d roads.R
optimized ES P ®
stabilit y control on slipper y or
snow-covered roads. R
th e vehicl e has improved drivin g stabilit y on
slipper y or snow-covered roads, for example. Comfort drive program The Comfor t drive progra m has th e followin g
characteristics : R
comfort-oriented engin e and transmission
settings. R
optimal fuel consumption resulting from th e
automatic transmission shifting up sooner. R
th e vehicl e pullin g away mor e gentl y in
forward and revers e gears, unless th e accel-
erator pedal is depressed fully. R
th e automatic transmission shifting up
sooner. This result s in th e vehicl e bein g driven
at lower engin e speeds and th e wheels bein g
less likely to spin .
Sp ort drive program The Sport drive progra m has th e followin g char-
acteristics : R
sport y engin e and transmission settings. R
th e automatic transmission shifting up later.
th e fuel consumption possibl y bein g higher as
a result of th e later automatic transmission
shift points . R
th e suspension exhibits sport y damping (vehi-
cle s wit h AIRMATIC) .
Drive program Sp ort Plus (Mercedes-
AMG vehicles) The Sport Plu s drive progra m has th e followin g
characteristics : R
th e vehicl e exhibits particularly sport y drivin g
characteristics . R
th e vehicl e pullin g away in first gear .R
th e automatic transmission shifting up later.
th e fuel consumption possibl y bein g higher as
a result of th e later automatic transmission
shift points . R
th e suspension exhibits particularly fir m
springing and damping setting s (vehicles wit h
AIRMATIC) . R
th e ECO start/sto p function is deactivated, it
can , however , be activated again usin g th e
ECO butto n ( Y
page 145).Automatic transmission 15 1
Driving an d parking Z
Page 176 of 398
Hilltops When driving up an uphill gradient, slightly
reduce pressure on the accelerator immediately
before reaching the brow of the hill. Make use of
the vehicle's own impetus to travel over the
brow.
This style of driving prevents: R
the vehicle from lifting off the ground on the
brow of a hill R
the vehicle from traveling too quickly down
the other side
Driving downhill R
Drive slowly. R
Do not drive at an angle down steep inclines.
Steer into the line of fall and drive with the
front wheels aligned straight. Otherwise, the
vehicle could slip sideways, tip and rollover. R
Shift to a lower gear using the left-hand pad-
dle shifter before tackling steep downhill gra-
dients. R
Activate DSR. If this is not sufficient, brake
gently. When doing so, make sure that the
vehicle is facing in the direction of the line of
fall. R
Check that the brakes are working normally
after a long downhill stretch.
i The special off-road ABS setting enables a
precise, brief and repeated locking of the
front wheels. This causes them to dig into
loose earth. Be aware that the front wheels
easily skid across the ground surface if com-
pletely braked and therefore lose their ability
to steer.
Driving systems
Intelligent Drive Mercedes-Benz Intelligent Drive stands for inno-
vative driver assistance and safety systems
which enhance comfort and support the driver in
critical situations. With these intelligent co-ordi-
nated systems Mercedes-Benz has set a mile-
stone on the path towards autonomous driving.
Mercedes-Benz Intelligent Drive embraces all
elements of active and passive safety in one well
thought out system – for the safety of the vehi-
cle occupants and that of other road users. Further information on driving safety systems
( Y
page 66).
Cruise control
General notes Cruise control maintains a constant road speed
for you. It brakes automatically in order to avoid
exceeding the set speed. You must select a
lower gear in good time on long and steep down-
hill gradients, especially if the vehicle is laden or
towing a trailer. By doing so, you will make use of
the braking effect of the engine. This relieves the
load on the brake system and prevents the
brakes from overheating and wearing too
quickly.
Use cruise control only if road and traffic con-
ditions make it appropriate to maintain a steady
speed for a prolonged period. You can store any
road speed above 20 mph (30 km/h).
i Cruise control should not be activated when
driving off-road.
Important safety notes If you fail to adapt your driving style, cruise con-
trol can neither reduce the risk of an accident
nor override the laws of physics. Cruise control
cannot take into account the road, traffic and
weather conditions. Cruise control is only an
aid. You are responsible for the distance to the
vehicle in front, for vehicle speed, for braking in
good time and for staying in your lane.
Do not use cruise control: R
in road and traffic conditions which do not
allow you to maintain a constant speed, e.g. in
heavy traffic or on winding roads R
on slippery road surfaces. Braking or accel-
erating could cause the drive wheels to lose
traction and the vehicle could then skid R
when there is poor visibility, e.g. due to fog,
heavy rain or snow
If there is a change of drivers, advise the new
driver of the speed stored.174
Driving systems
Driving and parking
Page 178 of 398
Deactivating cruis e contro lThere are severa l ways to deactivat e cruise con-
trol: X
Briefly press th e cruise contro l lever for-
ward s �C .
or X
Brake.
Cruise contro l is automatically deactivated if:R
you engage th e electric parking brakeR
you are drivin g at les s than 20 mph (30 km/ h)R
ESP ®
intervenes or you deactivate ESP ®
R
you activate DSR R
you activate the Offroad Plus program (vehi-
cles with the Off-Road Engineering package) R
you shift the transmission to position N while
driving
If cruise control is deactivated, you will hear a
warning tone. You will see the Cruise Con‐
trol Off message in the multifunction display
for approximately five seconds.
i When you switch off the engine, the last
speed stored is cleared.
Distance Pilot DISTRONIC
General notes Distance Pilot DISTRONIC regulates the speed
and automatically helps you maintain the dis-
tance to the vehicle detected in front. Vehicles
are detected with the aid of the radar sensor
system. Distance Pilot DISTRONIC brakes auto-
matically so that the set speed is not exceeded.
You must select a lower gear in good time on
long and steep downhill gradients, especially if
the vehicle is laden or towing a trailer. By doing
so, you will make use of the braking effect of the
engine. This relieves the load on the brake sys-
tem and prevents the brakes from overheating
and wearing too quickly.
If Distance Pilot DISTRONIC detects that there is
a risk of a collision, you will be warned visually
and acoustically. Without your intervention, Dis-
tance Pilot DISTRONIC cannot prevent a colli-
sion. An intermittent warning tone will then
sound and the distance warning lamp will light
up in the instrument cluster. Brake immediately
in order to increase the distance to the vehicle in front or take evasive action provided it is safe to
do so.
For Distance Pilot DISTRONIC to assist you
when driving, the radar sensor system must be
operational.
Distance Pilot DISTRONIC ope rates in the range
b etween 0 mph (0 km/h) and 120 mph
(200 km/h).
Do not use Distance Pilot DISTRONIC while driv-
ing on roads with steep gradients.
Since Distance Pilot DISTRONIC transmits radar
waves, it can resemble the radar detectors of
the responsible authorities. You can refer to the
relevant chapter in the Operator's Manual if
questions are asked about this.
i USA only:
This device has been approved by the FCC as
a "Vehicular Radar System". The radar sensor
is intended for use in an automotive radar
system only. Removing, tampering with, or
altering the device will void any warranties,
and is not permitted by the FCC. Do not tam-
per with, alter, or use in any non-approved
way.
Any unauthorized modification to this device
could void the user’s authority to operate the
equipment.
i Canada only: This device complies with
RSS-210 of Industry Canada. Operation is
subject to the following two conditions:
1. This device may not cause harmful inter-
ference, and
2. This device must accept any interference
received, including interference that may
cause undesired operation of the device.
Do not tamper with, alter or use in any non-
appro ved w ay.
Any unauthorized modification to this device
could void the user's authority to operate the
equipment.
Important safety notes
G WARNING
Distance Pilot DISTRONIC does not react to: R
people or animals R
stationary objects on the road, e.g. stopped
or parked vehicles R
oncoming vehicles and crossing traffic176
Driving system s
Dr ivi ng an d parking
Page 179 of 398
As a result, Distance Pilot DISTRONIC may
neither give warnings nor intervene in such
situations. There is a risk of an accident.
Always pay careful attention to the traffic sit-
uation and be ready to brake.
G WARNING
Distance Pilot DISTRONIC cannot always
clearly identify other road users and complex
traffic situations.
In such cases, Distance Pilot DISTRONIC may: R
give an unnecessary warning and then
brake the vehicle R
neither give a warning nor intervene R
accelerate or brake unexpectedly
There is a risk of an accident.
Continue to drive carefully and be ready to
brake, especially if Distance Pilot DISTRONIC
warns you.
G WARNING
Distance Pilot DISTRONIC brakes your vehicle
with up to 50% of the maximum possible
deceleration. If this deceleration is not suffi-
cient, Distance Pilot DISTRONIC alerts you
with a visual and acoustic warning. There is a
risk of an accident.
Apply the brakes yourself in these situations
and try to take evasive action.
! When Distance Pilot DISTRONIC or the
HOLD function is activated, the vehicle
brakes automatically in certain situations.
To avoid damage to the vehicle, deactivate
DISTRONIC PLUS and the HOLD function in
the following or similar situations: R
when towing the vehicle R
in the car wash
The Distance Pilot DISTRONIC R
can neither reduce the risk of accident nor
override the laws of physics if you fail to adapt
your driving style. R
cannot take into account road, weather or
traffic conditions. R
is only an aid. You are responsible for the dis-
tance to the vehicle in front, for vehicle speed, for braking in good time and for staying in your
lane.
Do not use Distance Pilot DISTRONIC: R
in road and traffic conditions which do not
allow you to maintain a constant speed, e.g. in
heavy traffic or on winding roads R
on slippery road surfaces. Braking or accel-
erati ng could cause the drive wheels to lose
tra ction and the vehicle could then skid R
in poor visibility, e.g. due to fog, heavy rain or
snow
Distance Pilot DISTRONIC may not detect nar-
row vehicles driving in front, e.g. motorcycles, or
vehicles driving on a different line.
In particular, the detection of obstacles can be
impaired if: R
there is dirt on the sensors or anything else
covering the sensors R
there is snow or heavy rain R
there is interference by other radar sources R
there are strong radar reflections, for exam-
ple, in parking garages
If Distance Pilot DISTRONIC no longer detects a
vehicle in front, it may unexpectedly accelerate
to the speed stored.
This speed may: R
be too high if you are driving in a turning lane
or an exit lane R
be so high when driving in the right-hand lane
that you overtake vehicles in the left-hand
lane R
be so high when driving in the left-hand lane
that you overtake vehicles in the right-hand
lane
If there is a change of drivers, advise the new
driver of the speed stored.Driving systems 177
Driving an d parking Z
Page 185 of 398
with the curb or other road boundaries. Be par-
ticularly aware of other road users, e.g. cyclists,
that are directly next to your vehicle.
Obstacles such as traffic pylons on the lane or
projecting out into the lane are not detected.
An inappropriate steering intervention, e.g. after
intentionally driving over a lane marking, can be
corrected at any time if you steer slightly in the
opposite direction.
Distance Pilot DISTRONIC with Steering Pilot
cannot continuously keep your vehicle in lane. In
some cases, the steering intervention is not suf-
ficient to bring the vehicle back to the lane. In
such cases, you must steer the vehicle yourself
to ensure that it does not leave the lane.
The support provided by the system can be
impaired if: R
there is poor visibility, e.g. due to insufficient
illumination of the road, or due to snow, rain,
fog or heavy spray R
there is glare, e.g. from oncoming traffic, the
sun or reflections (e.g. when the road surface
is wet) R
the windshield is dirty, fogged up, damaged or
covered, for instance by a sticker, in the vicin-
ity of the camera R
there are no or several unclear lane markings
for one lane, e.g. roadworks R
the lane markings are worn away, dark or cov-
ered up, e.g. by dirt or snow R
the distance to the vehicle in front is too short
and thus the lane markings cannot be detec-
ted R
the lane markings change quickly, e.g. lanes
branch off, cross on e another or mergeR
the road is narrow and winding R
there are strong shadows cast on the road
The system is switched to passive and no longer
assists you by performing steering interventions
if: R
you actively change lane R
you switch on the turn signal R
take your hands off the steering wheel or do
not steer for a prolonged period of time
i After you have finished changing lanes,
Steering Pilot is automatically active once
more. Steering Pilot cannot provide assistance: R
on very sharp corners R
when towing a trailer R
when a loss of tire pressure or a defective tire
has been detected and displayed
Observe the important safety notes on Distance
Pilot DISTRONIC ( Y
page 176).
The steering interventions are carried out with a
limited steering moment. The system requires
the driver to keep his hands on the steering
wheel and to steer himself.
If you do not steer yourself or if you take your
hands off the steering wheel for a prolonged
period of time, the system will first alert you with
a visual warning. A steering wheel symbol
appears in the multifunction display. If you have
still not started to steer and have not taken hold
of the steering wheel after five seconds at the
latest, a warning tone also sounds to remind you
to take control of the vehicle. Steering Pilot is
then switched to passive. Distance Pilot
DISTRONIC remains active.
Activating Steering Pilot X
Activate Distance Pilot DISTRONIC with
Steering Pilot using the on-board computer
( Y
page 241).
The Steering Pilot On message appears
on the multifunction display. Steering Pilot is
activated.
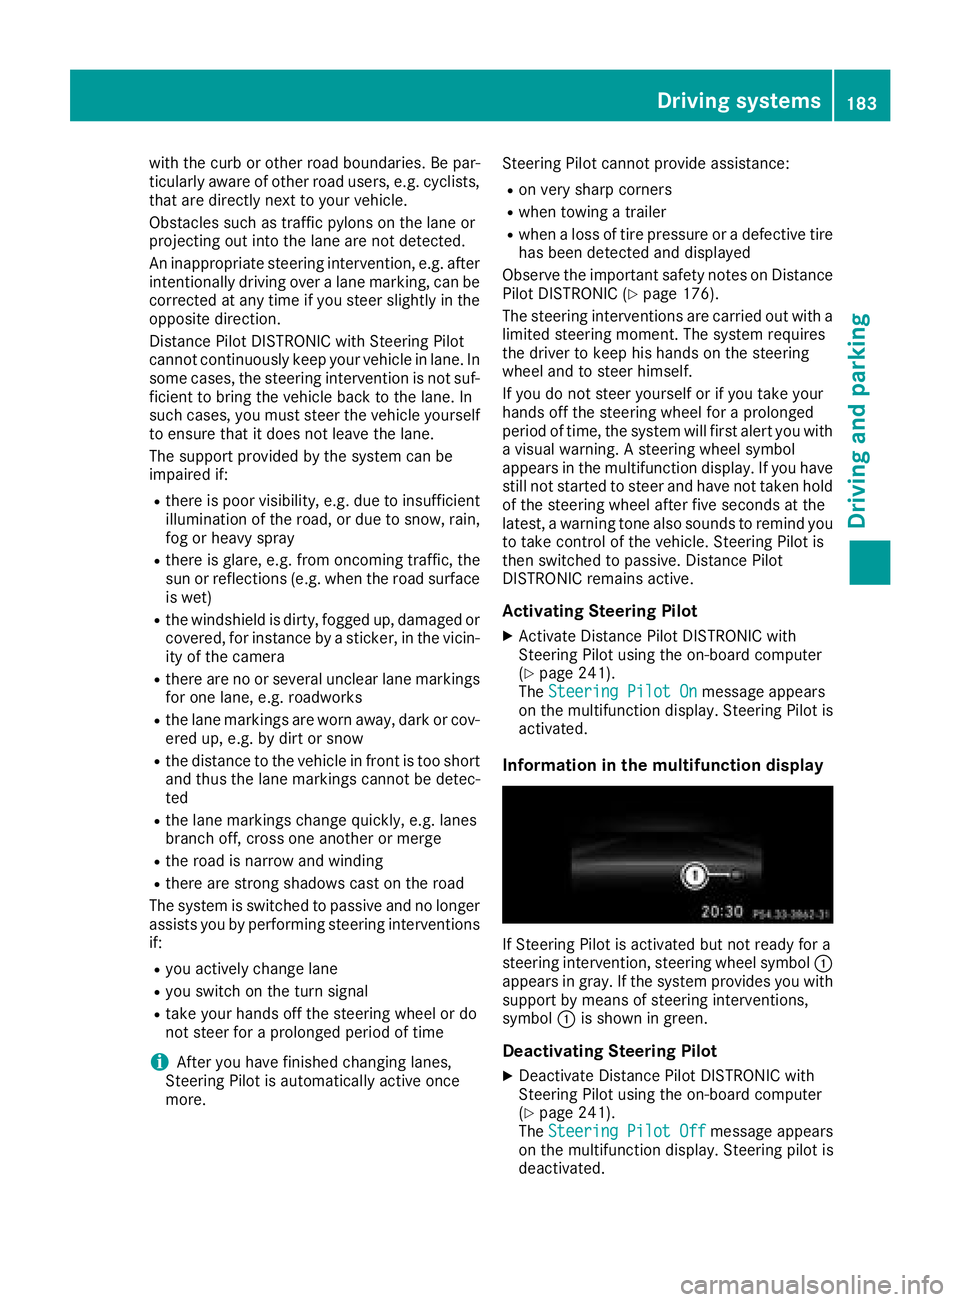
Information in the multifunction display
If Steering Pilot is activated but not ready for a
steering intervention, steering wheel symbol �C
appears in gray. If the system provides you with
support by means of steering interventions,
symbol �C is shown in green.
Deactivating Steering Pilot X
Deactivate Distance Pilot DISTRONIC with
Steering Pilot using the on-board computer
( Y
page 241).
The Steering Pilot Off message appears
on the multifunction display. Steering pilot is
deactivated.Driving systems 183
Driving and parking Z