2018 MERCEDES-BENZ G-CLASS fuel fill door release
[x] Cancel search: fuel fill door releasePage 11 of 294

Fuel ................................................ 124
General .......................................... 124
Gravel roads .................................. 131
Hydroplaning .................................127
Icy road surfaces ........................... 128
Important safety notes .................. 104
Limited braking efficiency on sal-
ted roads ....................................... 126
Off-road driving .............................. 129
Off-road fording .............................1 28
Pulling away on slippery surfaces .. 127
Snow chains .................................. 259
Subjecting brakes to a load ........... 126
The first 1500 km .......................... 104
Tire ruts ......................................... 131
Towing a trailer .............................. 154
Traveling uphill ............................... 132
Wet road surface ........................... 126
DVD audio
Operating (on-board computer) ..... 165
DVD video
Operating (on-board computer) ..... 166
see also Digital Operator's Man-
ual ..................................................2 03
E
EASY-ENTRY feature
Activating/deactivating ................. 170
Function/notes ................................ 81
EASY-EXIT feature
Function/notes ................................ 81
Switching on/off ........................... 170
EBD (electronic brake force distri-
bution)
Display message ............................ 176
Function/notes ................................ 61
ECO start/stop function
Deactivating/activating ................. 108
General information ....................... 107
Electronic Stability Program
see ESP
®(Electronic Stability Program)
Electronic Traction System
see 4ETS (Electronic Traction System)
Emergency
Automatic measures after an acci-
dent ................................................. 50 Emergency release
Driver's door ....................................6 8
Vehicle .............................................6 8
Emergency Tensioning Devices
Activation ........................................ .47
Emissions control
Service and warranty information .... 24
Engine
Check Engine warning lamp .......... .199
Display message ............................ 180
ECO start/stop function ................ 107
Engine number ............................... 283
Irregular running ............................ 110
Jump-starting ................................. 249
Starting problems .......................... 110
Starting the engine with the
SmartKey ....................................... 106
Switching off .................................. 123
Tow-starting (vehicle) ..................... 254
Engine electronics
Problem (malfunction) ................... 110
Engine oil
Adding ...........................................2 33
Additives ........................................ 286
Checking the oil level ..................... 232
Checking the oil level using the
dipstick .......................................... 232
Checking the oil level using the
on-board computer ........................ 232
Display message ............................ 182
Filling capacity ....... ........................ 286
G
eneral notes ................................ 285
Notes about oil grades ................... 285
Notes on oil level/consumption .... 232
Temperature (on-board com-
puter) ............................................. 171
Entering an address
see also Digital Operator's Man-
ual ..................................................2 03
ESP
®(Electronic Stability Pro-
gram)
4ETS (Electronic Traction Sys-
tem) ................................................. 59
AMG menu (on-board computer) ... 171
Characteristics ................................. 60
Deactivating/activating ................... 60
Display message ............................ 175
Function/notes ................................ 59
Index9
Page 12 of 294

General notes .................................. 59
Important safety information ...........59
Trailer stabilization ........................... 61
Warning lamp ................................. 196
Exhaust
see Exhaust pipe
Exhaust check ................................... 125
Exhaust pipe
Cleaning ......................................... 240
Exterior lighting
Cleaning ......................................... 239
see Lights
Exterior mirrors
Adjusting ......................................... 82
Dipping (automatic) .........................8 3
Folding in when locking (on-board
computer) ...................................... 170
Folding in/out (automatically) ......... 83
Folding in/out (electrically) ............. 82
Out of position (troubleshooting) ..... 83
Setting ............................................. 82
Storing settings (memory func-
tion) ................................................. 84
Storing the parking position ............. 83
F
Favorites
Overview ........................................ 205
Filler cap
see Refueling
First-aid kit ......................................... 244
Flat tire
Changing a wheel/mounting the
spare wheel ................................... 275
Preparing the vehicle ..................... 246
Folding the seat backrest (rear)
forwards/back .................................. 212
Frequencies
Mobile phone ................................. 281
Two-way radio ................................ 281
Fuel
Additives ........................................ 285
Consumption statistics .................. 163
Displaying the range ...................... 163
Driving tips .................................... 124
Fuel gauge ....................................... 32
Grade (gasoline) ............................ 284 Important safety notes .................. 284
Premium-grade unleaded gaso-
line ................................................. 284
Problem (malfunction) ................... 122
Refueling ........................................ 120
Tank content/reserve fuel ............. 284
Fuel filler flap
Closing ........................................... 121
Emergency release ........................ 121
Opening ......................................... 120
Fuel level
Calling up the range (on-board
computer) ...................................... 163
Fuel tank
Capacity ........................................ 284
Problem (malfunction) ................... 122
Fuse allocation chart ........................ 255
Fuse box
cargo compartment ....................... 256
Dashboard ..................................... 255
Front-passenger footwell ............... 255
Transmission tunnel ....................... 255
Fuses
Allocation chart ............................. 255
Before changing ............................. 254
Dashboard fuse box ....................... 255
Fuse allocation chart ..................... 255
Fuse box in the cargo compart-
ment .............................................. 256
Fuse box in the front-passenger
footwell .......................................... 255
Fuse box in the transmission tun-
nel ................................................. 255
Important safety notes .................. 254
G
Garage door openerClearing the memory ..................... 229
General notes ................................ 226
Important safety notes .................. 227
Opening/closing the garage doo r..2 29
Problems when programming ........2 29
Programming the remote control ... 227
Synchronizing the rolling code ....... 228
Gasoline ............................................. 284
Gear indicator (on-board com-
puter) ..................................................1 71
10Index
Page 65 of 294

SmartKey
Important safety notes
GWARNING
If children are left unsupervised in the vehicle,
they could:
Ropen the doors, thus endangering other
people or road users.
Rget out and disrupt traffic.
Roperate the vehicle's equipment.
Additionally, children could set the vehicle in
motion if, for example, they:
Rrelease the parking brake.
Rshifting the automatic transmission out of
park position P
RStart the engine.
There is a risk of an accident and injury.
When leaving the vehicle, always take the
SmartKey with you and lock the vehicle. Never
leave children or animals unattended in the
vehicle. Always keep the SmartKey out of
reach of children.
GWARNING
If you attach heavy or large objects to the
SmartKey, the SmartKey could be uninten-
tionally turned in the ignition lock. This could
cause the engine to be switched off. There is a risk of an accident.
Do not attach any heavy or large objects to the
SmartKey. Remove any bulky key rings before
inserting the SmartKey into the ignition lock.
!Keep the SmartKey away from strong mag-
netic fields. Otherwise, the remote control
function could be affected.
Strong magnetic fields can occur in the vicin-
ity of powerful electrical installations.
Do not keep the SmartKey:
Rwith electronic devices, e.g. a mobile phone
or another SmartKey.
Rwith metallic objects, e.g. coins or metal foil.
Rinside metallic objects, e.g. a metal case.
This can affect the functionality of the Smart- Key. A check which periodically establishes a radio
connection between the vehicle and the Smart-
Key determines whether a valid SmartKey is in
the vehicle. This occurs, for example:
Rwhen starting the engine
Rwhile driving
SmartKey functions
:&
Locks the vehicle
;%Unlocks the vehicle
The SmartKey centrally locks/unlocks:
Rthe doors
Rthe rear door
Rthe fuel filler flap
XTo unlock centrally: press the%button.
If you do not open the vehicle within approx-
imately 40 seconds of unlocking:
Rthe vehicle is locked again.
Rprotection against theft is reactivated.
XTo lock centrally: press the&button.
The turn signals flash once when unlocking and
three times when locking.
You can also set an audible signal to confirm
that the vehicle has been locked. The audible
signal can be activated and deactivated using
the on-board computer (
Ypage 170).
You will receive visual and acoustic locking con-
firmation if all components were able to be
locked.
When the surround lighting is activated via the
on-board computer, it lights up when it is dark
after the vehicle is unlocked with the SmartKey (
Ypage 169).
SmartKey63
Opening and closing
Z
Page 66 of 294

Changing the settings of the locking
system
You can change the settings of the locking sys-
tem. This means that only the driver's door and
the fuel filler flap are unlocked when the vehicle
is unlocked. This is useful if you frequently travel
alone.
XTo change the setting:press and hold down
the % and& buttons simultaneously
for approximately six seconds until the bat-
tery check lamp (
Ypage 65) flashes twice.
If the setting of the locking system is changed
within the signal range of the vehicle, pressing
the & or% button:
Rlocks or
Runlocks the vehicle
The SmartKey now functions as follows:
XTo unlock the driver's door and fuel filler
flap: press the %button once.
XTo unlock centrally: press the%button
twice.
XTo lock centrally: press the&button.
XTo restore the factory settings: press and
hold the %and& buttons simultane-
ously for approximately six seconds until the
battery check lamp (
Ypage 65) flashes
twice.
Mechanical key
General notes
If the vehicle can no longer be unlocked with the
SmartKey, use the mechanical key.
If you use the mechanical key to unlock and
open the driver's door, the anti-theft alarm sys-
tem will be triggered. Switch off the alarm
(
Ypage 62).
If you unlock the vehicle using the mechanical
key, the fuel filler flap will not be unlocked auto-
matically.
XTo unlock the fuel filler flap: insert the
SmartKey into the ignition lock.
Removing the mechanical key
XPush release catch :in the direction of the
arrow and at the same time remove mechan- ical key ;from the SmartKey.
Further information on locking/unlocking the
driver's door (
Ypage 68).
Inserting the mechanical key
XPush mechanical key ;completely into the
SmartKey until it engages and release
catch :is back in its basic position.
SmartKey battery
Important safety notes
GWARNING
Batteries contain toxic and corrosive substan- ces. If batteries are swallowed, it can result in
severe health problems. There is a risk of fatalinjury.
Keep batteries out of the reach of children. If
a battery is swallowed, seek medical attention
immediately.
HEnvironmental note
Batteries contain dangerous
substances. It is against the
law to dispose of them with
the household rubbish. They
must be collected separately
64SmartKey
Opening and closing
Page 123 of 294
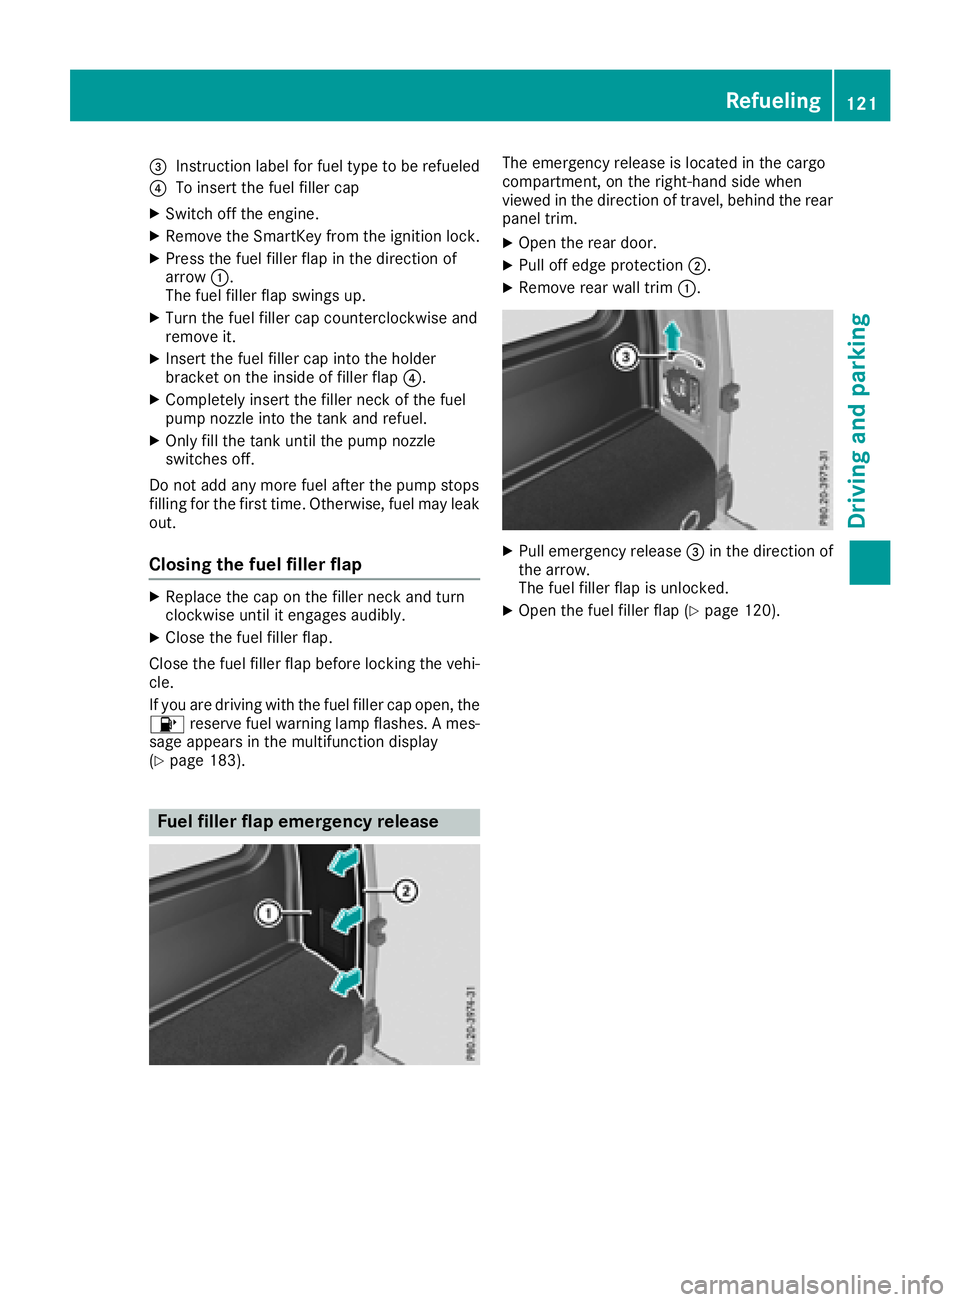
=Instruction label for fuel type to be refueled
?To insert the fuel filler cap
XSwitch off the engine.
XRemove the SmartKey from the ignition lock.
XPress the fuel filler flap in the direction of
arrow:.
The fuel filler flap swings up.
XTurn the fuel filler cap counterclockwise and
remove it.
XInsert the fuel filler cap into the holder
bracket on the inside of filler flap ?.
XCompletely insert the filler neck of the fuel
pump nozzle into the tank and refuel.
XOnly fill the tank until the pump nozzle
switches off.
Do not add any more fuel after the pump stops
filling for the first time. Otherwise, fuel may leak
out.
Closing the fuel filler flap
XReplace the cap on the filler neck and turn
clockwise until it engages audibly.
XClose the fuel filler flap.
Close the fuel filler flap before locking the vehi-
cle.
If you are driving with the fuel filler cap open, the
8 reserve fuel warning lamp flashes. A mes-
sage appears in the multifunction display
(
Ypage 183).
Fuel filler flap emergency release
The emergency release is located in the cargo
compartment, on the right-hand side when
viewed in the direction of travel, behind the rear
panel trim.
XOpen the rear door.
XPull off edge protection ;.
XRemove rear wall trim:.
XPull emergency release =in the direction of
the arrow.
The fuel filler flap is unlocked.
XOpen the fuel filler flap (Ypage 120).
Refueling121
Driving and parking
Z
Page 124 of 294
Problems with the fuel and fuel tank
ProblemPossible causes/consequences andMSolutions
Fuel is leaking from the
vehicle.GWARNING
The fuel line or the fuel tank is defective.
There is a risk of fire or explosion.
XApply the parking brake.
XSwitch off the engine.
XRemove the SmartKey from the ignition lock.
XDo not restart the engine under any circumstances.
XConsult a qualified specialist workshop.
The fuel filler flap cannot
be opened.The fuel filler flap is not unlocked.
XUnlock the vehicle (Ypage 63).
XOpen the rear door.
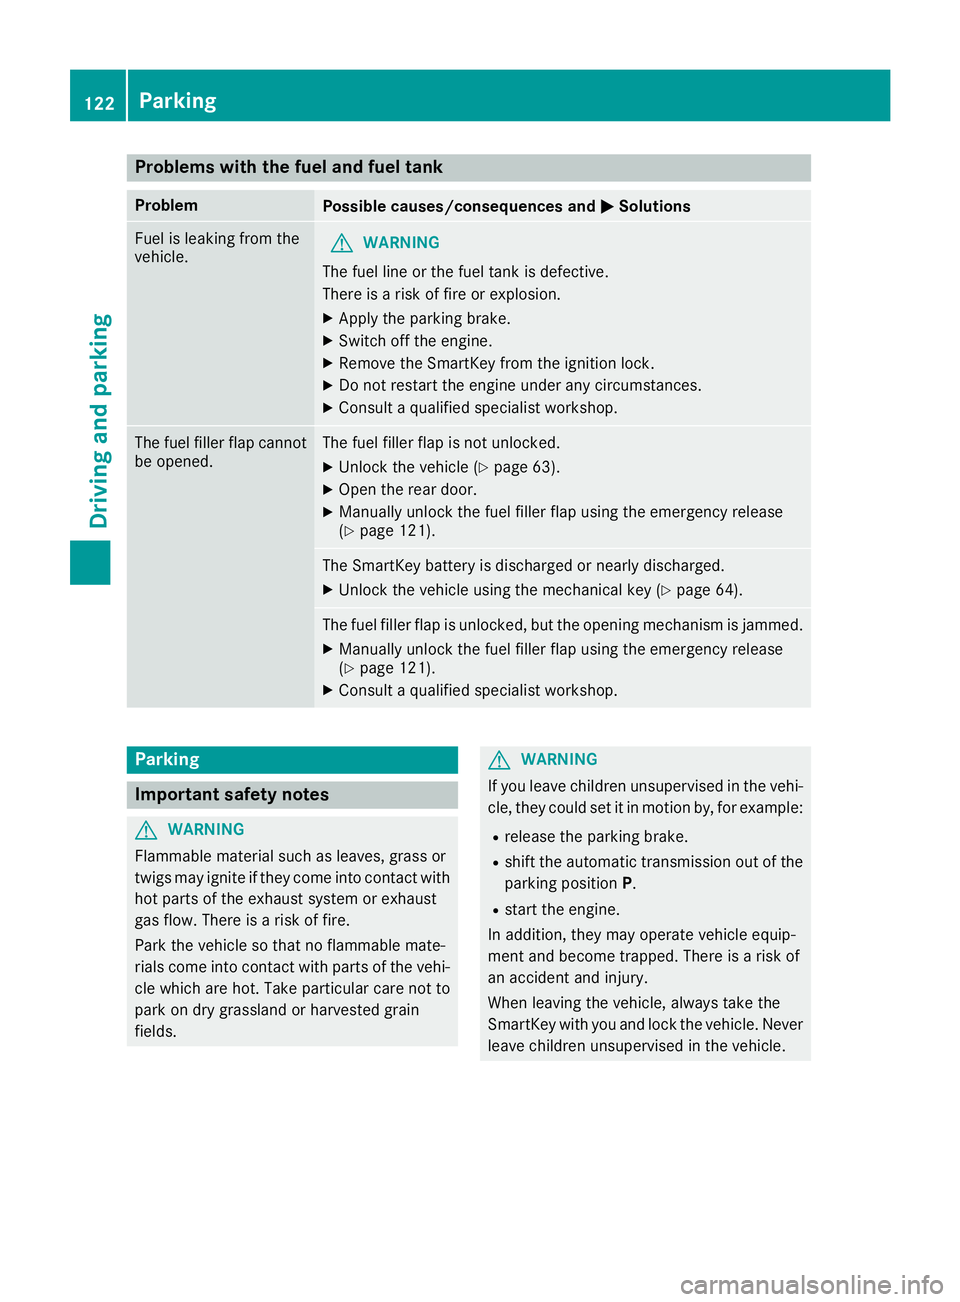
XManually unlock the fuel filler flap using the emergency release
(Ypage 121).
The SmartKey battery is discharged or nearly discharged.
XUnlock the vehicle using the mechanical key (Ypage 64).
The fuel filler flap is unlocked, but the opening mechanism is jammed.
XManually unlock the fuel filler flap using the emergency release
(Ypage 121).
XConsult a qualified specialist workshop.
Parking
Important safety notes
GWARNING
Flammable material such as leaves, grass or
twigs may ignite if they come into contact with
hot parts of the exhaust system or exhaust
gas flow. There is a risk of fire.
Park the vehicle so that no flammable mate-
rials come into contact with parts of the vehi-
cle which are hot. Take particular care not to
park on dry grassland or harvested grain
fields.
GWARNING
If you leave children unsupervised in the vehi-
cle, they could set it in motion by, for example:
Rrelease the parking brake.
Rshift the automatic transmission out of the
parking position P.
Rstart the engine.
In addition, they may operate vehicle equip-
ment and become trapped. There is a risk of
an accident and injury.
When leaving the vehicle, always take the
SmartKey with you and lock the vehicle. Never
leave children unsupervised in the vehicle.
122Parking
Driving and parking
Page 265 of 294
Checking the tire pressures
Important safety notes
Observe the notes on tire pressure
(Ypage 260).
Information on air pressure for the tires on your
vehicle can be found:
Ron the vehicle's Tire and Loading Information
placard on the B-pillar
Rin the tire pressure table in the fuel filler flap
(Ypage 120)
Runder "Tire pressure" (Ypage 260)
Checking tire pressures manually
To determine and set the correct tire pressure,
proceed as follows:
XRemove the valve cap of the tire that is to be
checked.
XPress the tire pressure gage securely onto the
valve.
XRead the tire pressure and compare it to the
recommended value on the Tire and Loading
Information placard or the tire pressure table
(
Ypage 260).
XIf the tire pressure is too low, increase the tire
pressure to the recommended value.
XIf the tire pressure is too high, release air. To
do so, press down the metal pin in the valve,
using the tip of a pen for example. Then check
the tire pressure again using the tire pressure
checker.
XScrew the valve cap onto the valve.
XRepeat these steps for the other tires.
Tire pressure monitor
General notes
If a tire pressure monitor is installed, the vehi-
cle's wheels have sensors that monitor the tire
pressures in all four tires. The tire pressure mon-
itor warns you if the pressure drops in one or
more of the tires. The tire pressure monitor only
functions if the corresponding sensors are
installed in all wheels.
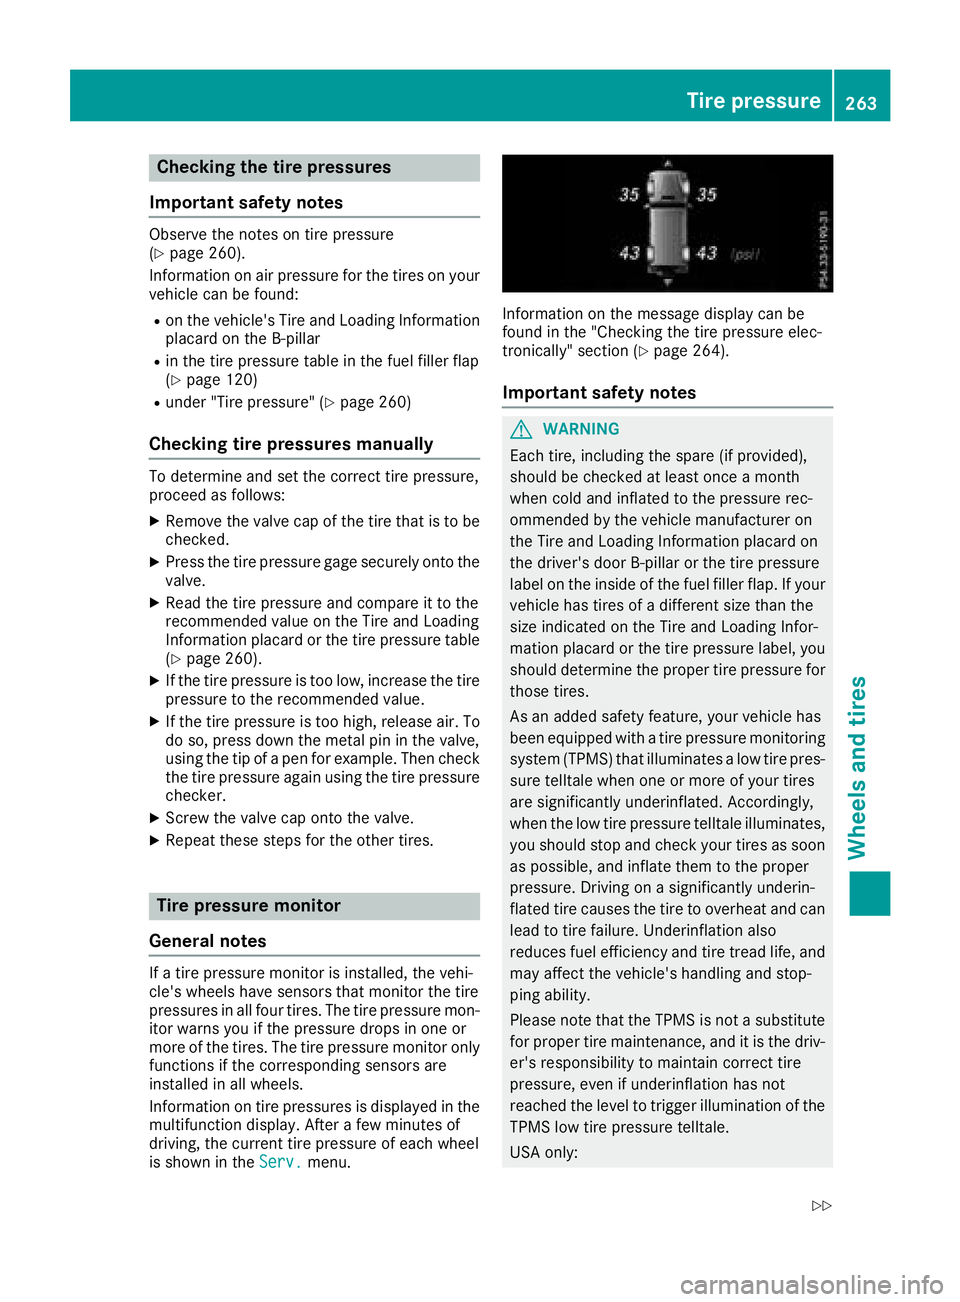
Information on tire pressures is displayed in the
multifunction display. After a few minutes of
driving, the current tire pressure of each wheel
is shown in the Serv.
menu.
Information on the message display can be
found in the "Checking the tire pressure elec-
tronically" section (
Ypage 264).
Important safety notes
GWARNING
Each tire, including the spare (if provided),
should be checked at least once a month
when cold and inflated to the pressure rec-
ommended by the vehicle manufacturer on
the Tire and Loading Information placard on
the driver's door B-pillar or the tire pressure
label on the inside of the fuel filler flap. If your
vehicle has tires of a different size than the
size indicated on the Tire and Loading Infor-
mation placard or the tire pressure label, you
should determine the proper tire pressure for
those tires.
As an added safety feature, your vehicle has
been equipped with a tire pressure monitoring
system (TPMS) that illuminates a low tire pres-
sure telltale when one or more of your tires
are significantly underinflated. Accordingly,
when the low tire pressure telltale illuminates,
you should stop and check your tires as soon
as possible, and inflate them to the proper
pressure. Driving on a significantly underin-
flated tire causes the tire to overheat and can lead to tire failure. Underinflation also
reduces fuel efficiency and tire tread life, and
may affect the vehicle's handling and stop-
ping ability.
Please note that the TPMS is not a substitute
for proper tire maintenance, and it is the driv-
er's responsibility to maintain correct tire
pressure, even if unde rinf
lation has not
reached the level to trigger illumination of the
TPMS low tire pressure telltale.
USA only:
Tire pressure263
Wheels and tires
Z