Page 79 of 506

This meansthat there ve rsing function can‐
not pr event someone being trapped in these
situations.
#When closing, make sure that no body
parts are in the closing area.
#Re lease the button immediately if
somebody becomes trapped.
or
#Press the button in any direction during
th e automatic closing process.
The closing process is stopped.
Au tomatic reve rsing function of thero ller
sunblind
If th ere is an object obstructing thero ller sun‐
blind during the closing process, thero ller sun‐
blind opens again automaticall y.The automatic
re ve rsing function is only an aid and is not a sub‐
st itute foryo ur attentiveness.
#When opening or closing thero ller sunblind,
make sure that no body parts are in the
sweep.
& WARNING Risk of becoming trapped
despite there ve rsing function being
active
In particular, there ve rsing function does not
re act tosoft, light and thin objects, forex am‐
ple small fingers.
This means that there ve rsing function can‐
not pr event entrapment in these situations.
#When opening or closing thero ller sun
blind, make sure that no body parts are
in the sweep.
#Re lease the button immediately if
somebody becomes trapped.
or
#Press the button in any direction during
th e automatic closing process.
The closing process is stopped.
Au tomatic features of the sliding sunroof
%
The term "sliding sunro of" alsorefers to the
panoramic sliding sunroof. By pushing or pulling
the3 button, you can
inter rupt the automatic functions: "Rain closing
function when driving" and "Automatic lo wering
fe ature".
Ra in closing function when driving
Ve hicles with a panoramic sliding sunroof: If
it starts torain, thera ised sliding sunroof is
automatically lo wered while theve hicle is in
motion.
Au tomatic lo weringfeature
Ve hicles with a panoramic sliding sunroof: If
th e sliding sunroof is raised at there ar, the slid‐
ing sunroof is automatically lo wered slightly at
higher speeds. Atlow speeds, it is raised again
automaticall y.
&
WARNING Risk of entrapment byauto‐
matic lo wering of the sliding sunroof
At high speeds thera ised sliding sunroof
automatically lo wersslightly at there ar.
This could trap you or other persons.
Opening and closing 77
Page 80 of 506

#Make surethat nobody reaches into the
sweep of the sliding sunroof whilst the
ve hicle is in motion.
#If somebody becomes trapped, immedi‐
ately pull back the sliding sunroof but‐
to n.
The sliding sunroof li fts during opening.
Problems with the sliding sunroof
%
The term "sliding sunro of" alsorefers to the
panoramic sliding sunroof.
Problem Possible causes/consequences and MSolutions
The sliding sunroof cann otbe closed
and you cannot see the cause. &
WARNING Risk of becoming trapped or fata l injury byclosing the sliding sunroof again
If yo u close the sliding sunroof again immediately af ter it has been bloc ked or reset, the sliding sunroof
closes with increased or maximum forc e.
The reve rsing feature is then not active. Parts of the body could become trapped in the closing area in
th e process.
#Make sure that no parts of the body are in the closing area.#Re lease the button immediately if somebody becomes trapped.
or
#Press the button in any direction during the automatic closing process.
The closing process is stopped.
If th e sliding sunroof is obstructed during closing and reopens again slightly:
78
Opening and closing
Page 84 of 506

Notes onthe cor rect driver's seat position
&
WARNING Risk of injury from adjusting
th eve hicle settings while theve hicle is in
motion
Yo u could lose cont rol of theve hicle in the
fo llowing situations:
Rifyo u adjust the driver's seat, the head
re stra int, thesteering wheel or the mir ror
while theve hicle is in motion
Rifyo ufa sten your seat belt while theve hi‐
cle is in motion
#Before starting the engine: adjust the
driver's seat, the head restra int, the
st eering wheel or the mir ror and fasten
yo ur seat belt.
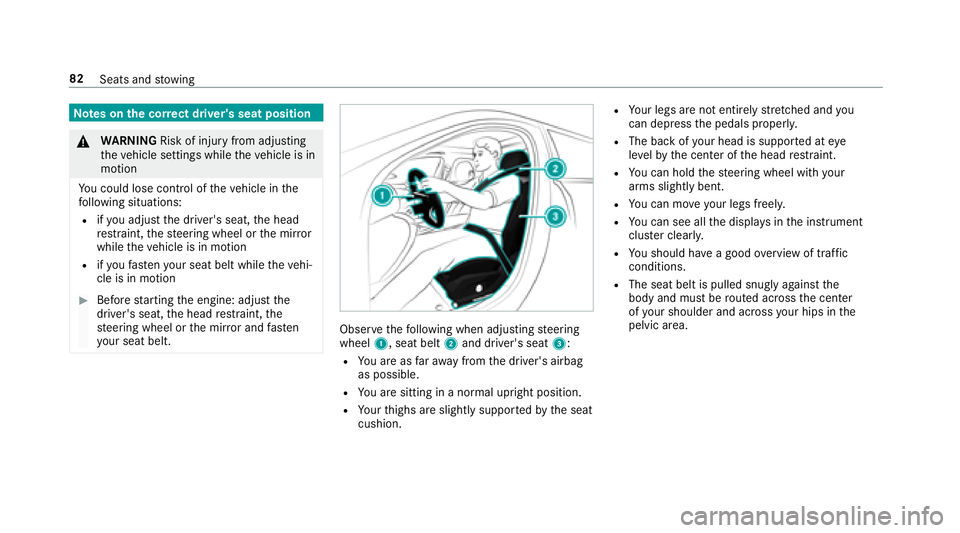
Obser vethefo llowing when adjusting steering
wheel 1, seat belt 2and driver's seat 3:
RYou are as faraw ay from the driver's airbag
as possible.
RYo u are sitting in a no rmal upright position.
RYour thighs are slightly suppor tedby the seat
cushion.
RYo ur legs are not entirely stre tched and you
can dep ress the pedals proper ly.
RThe back of your head is support ed ateye
le ve lby the center of the head restra int.
RYo u can hold thesteering wheel with your
arms slightly bent.
RYo u can mo veyour legs freel y.
RYou can see all the displa ysinthe instrument
clus ter clearl y.
RYou should ha vea good overview of traf fic
conditions.
RThe seat belt is pulled snug lyagainst the
body and must be routed across the center
of your shoulder and across your hips in the
pelvic area.
82 Seats and stowing
Page 89 of 506
#Toselect the front passenger seat: press
button 1.
When the indicator lamp lights up, the front
passenger seat is selected.
#Ad just the front passenger seat using the
buttons in the door control panel on the driv‐
er's side.
Ad justing the 4-w aylumbar support
1Toraise
2To sof ten
3To lowe r
4To harden
#Using buttons 1to4, adjust the conto ur
of the backrest individually tosuit your bac k.
Headrestra ints
Ad justing the front seat head restra ints man‐
ually
& WARNING Risk of injury from adjusting
th eve hicle settings while theve hicle is in
motion
Yo u could lose cont rol of theve hicle in the
fo llowing situations:
Rifyo u adjust the driver's seat, the head
re stra int, thesteering wheel or the mir ror
while theve hicle is in motion
Rifyo ufa sten your seat belt while theve hi‐
cle is in motion
#Before starting the engine: adjust the
driver's seat, the head restra int, the
st eering wheel or the mir ror and fasten
yo ur seat belt.
Seats and stowing 87
Page 96 of 506

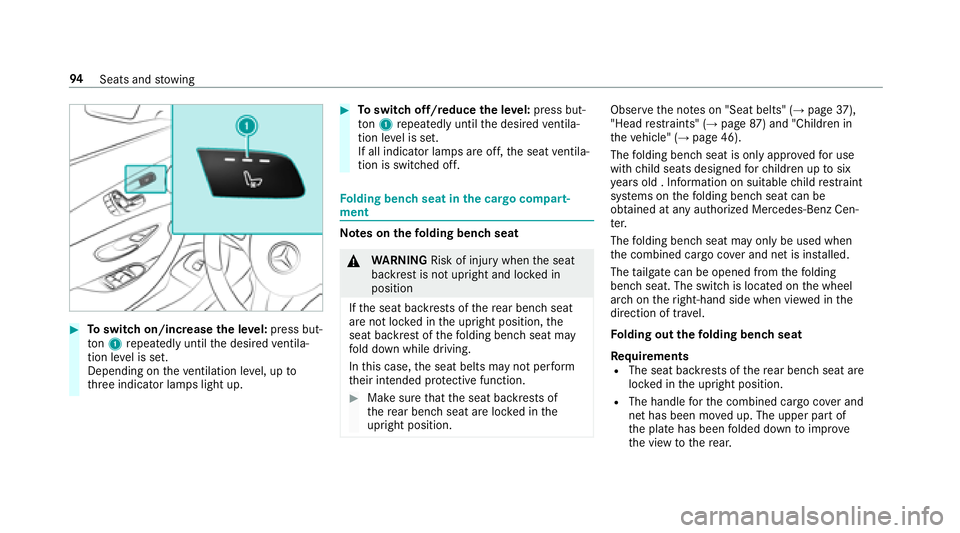
#Toswitch on/increase the le vel:press but‐
to n1 repeatedly until the desired ventila‐
tion le vel is set.
Depending on theve ntilation le vel, up to
th re e indicator lamps light up.
#To switch off/reduce the le vel:press but‐
to n1 repeatedly until the desired ventila‐
tion le vel is set.
If all indicator lamps are off, the seat ventila‐
tion is switched off.
Fo lding bench seat in the cargo compa rt‐
ment
Note s onthefo lding bench seat
&
WARNING Risk of injury whenthe seat
backrest is not upright and loc ked in
position
If th e seat backrests of there ar bench seat
are not loc ked in the upright position, the
seat backrest of thefo lding bench seat may
fo ld down while driving.
In this case, the seat belts may not per form
th eir intended pr otective function.
#Make sure that the seat backrests of
th ere ar bench seat are loc ked in the
upright position.
Obser vethe no tes on "Seat belts" (→page 37),
"Head restra ints" (→page 87) and "Children in
th eve hicle" (→page 46).
The folding bench seat is only appr ovedfo r use
with child seats designed forch ildren up tosix
ye ars old . Info rmation on suitable child restra int
sy stems on thefo lding bench seat can be
obtained at any authorized Mercedes-Benz Cen‐
te r.
The folding bench seat may only be used when
th e combined cargo co ver and net is ins talled.
The tailgate can be opened from thefo lding
bench seat. The switch is located on the wheel
ar ch on theright-hand side when vie wed in the
direction of tr avel.
Fo lding out the folding bench seat
Requ irements
RThe seat backrests of there ar bench seat are
loc ked in the upright position.
RThe handle forth e combined cargo co ver and
net has been mo ved up. The upper part of
th e plate has been folded down toimpr ove
th e view tothere ar.
94
Seats and stowing
Page 113 of 506
Overview ofthe tie-down eyes
1Tie-down eyes
Re lated topic:
Loading guidelines (
→page 101).
Overview of bag hoo ks
&
WARNING Risk of injury when using bag
hooks with heavy objects
The bag hooks cannot restra in heavy objects
or items of luggage.
Objects or items of luggage could be throw n
around and thereby hit vehicle occupants
when braking or abruptly changing direc‐
tions.
#Only hang light objects on the bag
hooks.
#Ne ver hang hard, sharp-edged or fragile
objects on the bag hooks.
The bag hook can bear a maximum load of
6.6 lbs (3 kg). Do not use it tosecure a load.1Bag hook
% Obser vethe no tes on loading theve hicle
(
→page 101).
EA SY-PAC K load-secu ring kit
Note s onthe EAS Y-PA CK load-securing kit
The EA SY-PAC K load-securing kit allows youto
use your cargo co mpartment for a variet yof pur‐
Seats and stowing 111
Page 119 of 506

Usingthere ar passenger co mpartment ash‐
tr ay
#To open: pull co ver2 out byits top handle
edge.
#To remo vethe inser t:push ribbing 3from
th e left side and pull insert 1upwards and
out.
#To install the inser t:ins tall inse rt1 from
abo veand press down into the holder until it
engages.
Using the cigar ette lighter
&
WARNING ‑ Risk of fire and injury from
hot cigar ette lighter
Yo u can burn yourself ifyo uto uch the hot
heating element or the soc ket of the ciga‐
re tte lighter.
In addition, flammable materials may ignite
if:
Ryo udr op the hot cigar ette lighter
Rach ild holds the hot cigar ette lighter to
objects, forex ample
#Alw ays hold the cigar ette lighter bythe
knob.
#Alw ays make sure that the cigar ette
lighter is out of reach of children.
#Ne ver lea vechildren unatte nded inthe
ve hicle.
Re quirement:RThe ignition is switched on.
#Press in cigar ette lighter 1.
The cigar ette lighter will pop out automati‐
cally when the heating element is red-hot.
Soc kets
12 V sock etinthe front center console
Re quirement:ROnly connect devices up toa maximum of
18 0wa tts (15 A).
Seats and stowing 11
7
Page 126 of 506

Theexterior lighting (e xcept parking and stand‐
ing lights) switch es off automatically when the
driver's door is opened.
Au tomatic driving lights
The pa rking lights, low beam and daytime run‐
ning lights are switched on au tomatically
depending on the ignition status, whe ther the
engine is running and on the ambient light.
&
WARNING Risk of accident when the low
beam is switched off in poor visibility
When the light switch is set toÃ, the low
beam may not be switched on automatically
if th ere is fog, snow or other causes of poor
visibility such as spr ay.
#In such cases, turn the light switch to
L.
The automatic driving lights are only an aid. You
are responsible forve hicle lighting. Ac
tivating/deactivating the rear fog light
Re quirement:
RThe light switch is in theL orà posi‐
tion.
#Press the R button.
Please obser vethe count ry-specific la wsonthe
use of rear fog lamps.
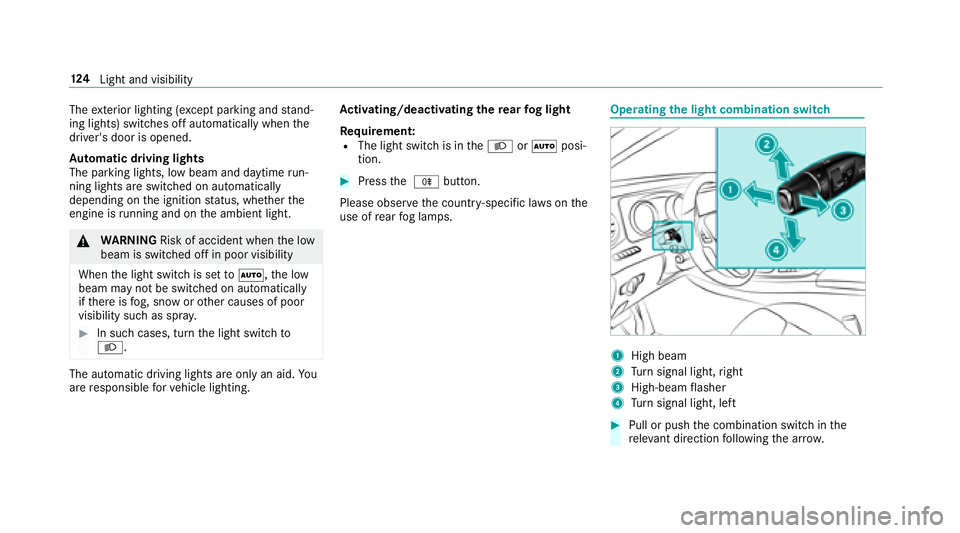
Operating the light combination switch
1High beam
2Turn signal light, right
3High-beam flasher
4Tu rn signal light, left
#Pull or push the combination switch in the
re leva nt di rection following the ar row.
12 4
Light and visibility