2018 MERCEDES-BENZ E-CLASS COUPE ignition
[x] Cancel search: ignitionPage 320 of 486
Notes on care of vehicle parts
&
WARNING Risk of entrapment if the
windshield wipers are switch ed on while
th e windshield is being cleaned
If th e windshield wipers are set in motion
while you are cleaning the windshield or
wiper blades, you can betrapped bythe
wiper arm.
#Alw ays switch off the windshield wipers
and the ignition before cleaning the
windshield or wiper blades.
& WARNING Risk of burn s fromtailpipes
and tailpipe trim
The tailpipe and tailpipe trim can become
ve ry hot. If you come into contact withth ese
parts of theve hicle, you could burn yourself.
#Alw ays be particular lycareful around
th eta ilpipe and theta ilpipe trim.
#Allow theve hicle parts tocool down
before youto uch them.
Obser vethefo llowing information:
Information on cleaning and car eAvoiding vehicle damage
Wheels/rims Usewate r and acid-free wheel cleaners.
RDo not use acidic wheel cleaners toremo vebrake dust.
This could damage wheel bolts and brake components.
RTo avoid cor rosion of the brake discs and brake linings,
drive theve hicle for a few minutes af ter cleaning before
parking it. The brake discs and brake linings warm up and
dry out.
Wi ndo ws
Cleanthe windo wsonthe inside and outside using a damp
clo thand cleaning products recommended byMercedes-
Benz. Do not use dry clo
ths, abrasive products or cleaning agents
containing sol vents toclean the inside of the windo ws.
318
Maintenance and care
Page 328 of 486
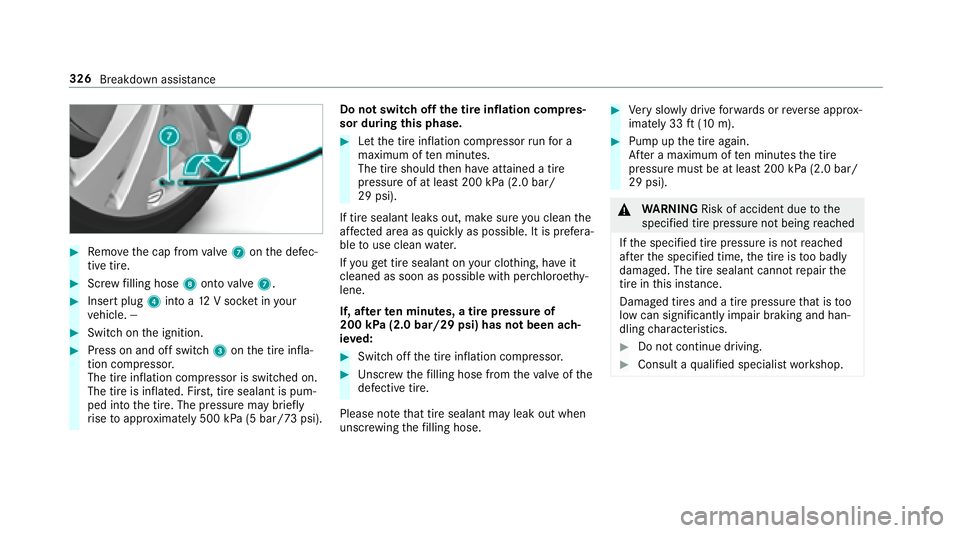
#Remo vethe cap from valve 7 onthe defec‐
tive tire.
#Scr ew filling hose 8onto valve 7.
#Insert plug 4into a 12V soc ket in your
ve hicle. ‑‑
#Switch on the ignition.
#Press on and off switch 3onthe tire infla‐
tion compressor.
The tire inflation compressor is switched on.
The tire is inflated. Fir st, tire sealant is pum‐
ped into the tire. The pressure may brief ly
ri se toappr oximately 500 kPa (5 bar/73 psi). Do not switch off
the tire inflation compres‐
sor du ring this phase.
#Let the tire inflation compressor runfo r a
maximum of ten minu tes.
The tire should then ha veattained a tire
pressure of at least 200 kPa (2.0 bar/
29 psi).
If tire sealant leaks out, make sure you clean the
af fected area as quickly as possible. It is prefera‐
ble touse clean water.
If yo uge t tire sealant on your clo thing, ha veit
cleaned as soon as possible with per chloroe thy‐
lene.
If, af terte n minutes, a tire pressure of
200 kPa (2.0 bar/29 psi) has not been ach‐
ie ve d:
#Switch off the tire inflation compressor.
#Un scr ew thefilling hose from theva lve of the
defective tire.
Please no tethat tire sealant may leak out when
unscr ewing thefilling hose.
#Ve ry slowly drive forw ards or reve rse appr ox‐
imately 33 ft(10 m).
#Pump up the tire again.
Af ter a maximum of ten minu testh e tire
pressure must be at least 200 kPa (2.0 bar/
29 psi).
& WARNING Risk of accident due tothe
specified tire pressure not being reached
If th e specified tire pressure is not reached
af te rth e specified time, the tire is too badly
damaged. The tire sealant cannot repair the
tire in this ins tance.
Dama ged tires and a tire pressure that is too
low can significantly impair braking and han‐
dling characteristics.
#Do not continue driving.
#Consult a qualified specialist workshop.
326
Breakdown assis tance
Page 334 of 486
RThe jumper cable/charging cable must not
come into contact with any parts which may
movewhen the engine is running.
RAlw ays make sure that nei ther you nor the
battery is elect rostatically charge d.
RKe ep away from fire and open flames.
RDo not lean overth e batter y.
RWhencharging: only use battery charge rs
te sted and appr oved byMercedes-Benz and
re ad the battery charge r's operating instruc‐
tions before charging the batter y.
Obser vethe additional following points during
st arting assis tance:
RSt arting assis tance may only be pr ovided
using batteries with a nominal voltage of
12 V.
RThe vehicles must not touch.
RGa soline engine: Onlyaccept starting assis‐
ta nce if the engine and exhaust sy stem are
cold.
#Secure theve hicle byapplying the electric
parking brake.
#Au tomatic transmission: Shiftthe trans‐
mission toposition j.
#Make sure that the ignition and all electrical
consumers are switched off.
#Open the hood.
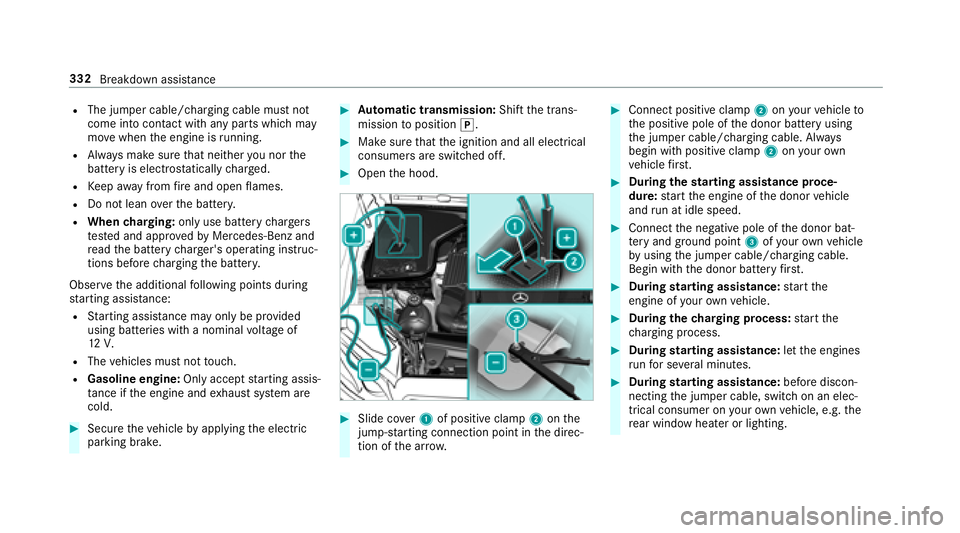
#Slide co ver1 of positive clamp 2onthe
jump-s tarting connection point in the direc‐
tion of the ar row.
#Connect positive clamp 2onyour vehicle to
th e positive pole of the donor battery using
th e jumper cable/charging cable. Alw ays
begin with positive clamp 2onyour ow n
ve hicle firs t.
#Du ring thest arting assist ance proce‐
dure: start the engine of the donor vehicle
and run at idle speed.
#Connect the negative pole of the donor bat‐
te ry and ground po int3 ofyour ow nve hicle
by using the jumper cable/charging cable.
Begin with the donor battery firs t.
#Du ring starting assist ance:start the
engine of your ow nve hicle.
#During thech arging process: start the
ch arging process.
#During starting assist ance:letthe engines
ru nfo r se veral minutes.
#During starting assist ance:before discon‐
necting the jumper cable, switch on an elec‐
trical consumer on your ow nve hicle, e.g. the
re ar wind owheater or lighting.
332
Breakdown assis tance
Page 338 of 486
&WARNING Risk of accident due tolimi‐
te d saf ety-re lated functions during the
to wing process
Saf ety-re lated functions are limited or no lon‐
ge rav ailable in thefo llowing situations:
Rth e ignition is switched off.
Rthe brake sy stem or po werst eering sys‐
te m is malfunctioning.
Rth e energy supply or the on-board electri‐
cal sy stem is malfunctioning.
When your vehicle is then towe daw ay, signif‐
icantly more ef fort may be requ ired tosteer
and brake than is no rmally requ ired.
#Use a tow bar.
#Make sure that thesteering wheel can
mo vefreely, before towing theve hicle
aw ay.
* NO
TEDama gedue toexcessive tracti ve
po we r
Ifyo u pull away sharpl y,the tractive po wer
may be too high and theve hicles could be
damaged.
#Pull away slowly and smoo thly.
Loading the vehicle for transport
#Obser vethe no tes on towing away
(→page 334).
#Connect theto w bar totheto wing eyeto
load theve hicle.
#Ve hicles with automatic transmission:
Shift the automatic transmission toposition
i.
% Ve
hicles with automatic transmission:
The au tomatic transmission may be loc ked
in position jintheeve nt of damage tothe
electrics. Toshift toi, pr ovide the on-
board electrical sy stem with po wer
(
→page 330).
#Load theve hicle onto the transpor ter.
#Ve hicles with automatic transmission:
Shift the automatic transmission toposition
j.
#Use the electric parking brake tosecure the
ve hicle and pr event it from rolling away.
#Only secure theve hicle bythe wheels.
Ve hicles with ADS PLUS (Adaptive Damping
Sy stem PLUS)
&
WARNING Risk of accident when trans‐
porting vehicles with AIR BODY CON‐
TROL
The reduced damping forc es on theve hicle
being transpor ted can cause theve hicle/
trailer combination tostart toswing.
As a result, when transporting vehicles with
AIR BODY CONTROL theve hicle/trailer com‐
bination may start toskid. Consequentl y,yo u
could lose control of your vehicle.
There is a risk of accident and injur y.
336
Breakdown assis tance
Page 341 of 486

color and fuserating. The fuse ratings are li sted
in the fuse assignment diagram.
Fu se assignment diag ram: onthe fuse box in
th e trunk (
→page 341).
* NO
TEDama geor malfunctions caused
by moisture
Moisture may cause dama getothe electrical
sy stem or cause it tomalfunction.
#When the fuse box is open, make sure
th at no moisture can enter the fuse
box.
#When closing the fuse box, make sure
th at the seal of the lid is positioned cor‐
re ctly on the fuse box.
If a newly inser ted fuse also blo ws, ha vethe
cause traced and rectified at a qualified special‐
ist workshop.
Ensure thefo llowing before replacing a fuse:
RThe vehicle is secured against rolling away.
RAll electrical consumers are switched off.
RThe ignition is switched off. The electrical fuses are located in
various fuse
bo xes:
RFu se box in the engine compartment on the
driver's side (→page 339)
RFu se box on the driver's side of the cockpit
(→page 340)
RFu se box in the front-passen gerfo ot we ll
(→page 340)
RFu se box in the trunk on theright-hand side
of theve hicle, when vie wed in the direction
of tr avel (
→page 341)
Fuse box in the engine compa rtment
Prerequisites
Observ eth e no tes on electrical fuses
(
→page 338).
Ha ve thefo llowing readily available:
RA dry clo th
RA screwdriver Opening
&
WARNING Risk of injury from usingthe
windshield wipers while the engine hood
is open
When the engine hood is open and the wind‐
shield wipers are set in motion, you can be
trapped bythe wiper linkage.
#Alw ays switch off the windshield wipers
and ignition before opening the engine
hood.
Breakdown assis tance 339
Page 350 of 486

The system checks the tire pressure and the tire
te mp erature of the tires mounted on theve hicle
by means of a tire pressure sensor.
New tire pressure sensors, e.g. in winter tires,
are automatically taught-in thefirs t time they are
driven.
The tire pressure appears in the multifunction
display (
→page 208).
If th ere is a subs tantial pressure loss or if the
tire temp erature is excessive, a warning is given:
RVia display messages (→page 414).
RViath eh warning lamp in the instrument
clus ter (→page 446).
It is the driver's responsibility toset the tire
pressure tothere commended cold tire pressure
suitable forth e operating situation. Set the tire
pressure for cold tires using a tire pressure
ga uge. Notethat the cor rect tire pressure forth e
cur rent operating situation must firs t be taught-
in to the tire pressure monitoring sy stem.
In most cases, the tire pressure monitoring sys‐
te m will auto matically update the new refere nce
va lues af teryo u ha vechanged the tire pressure. Yo
u can, ho wever,also update there fere nce val‐
ues byrestarting the tire pressure monitoring
sy stem manually (
→page 349).
Sy stem limitations
The tire pressure monitoring sy stem does not
issue a warning:
RIfth e tire pressure is set incor rectly.
RIfth ere is a sudden pressure loss caused, for
ex ample byafo re ign object penetrating the
tire.
RIf th ere is a malfunction caused byano ther
ra dio signal source.
Make sure toobser vethefo llowing fur ther rela‐
te d subjec t:
RNotes on tire pressure (→page 343)
Checking the tire pressure with the tire pres‐
sure moni toring sy stem
Requ irement:
Rthe ignition is switched on. On-board computer:
,�6�H�U�Y�L�F�H.�7�L�U�H �3�U�H�V�V�X�U�H
One of thefo llowing displa ysappears:
RCur rent tire pressure of ea chwheel:
R�7�L�U�H �S�U�H�V�V�X�U�H �Z�L�O�O �E�H �G�L�V�S�O�D�\�H�G �D�I�W�H�U �G�U�L�Y�L�Q�J �D
�I�H�Z �P�L�Q�X�W�H�V
R�7�L�U�H �3�U�H�V�V�X�U�H �0�R�Q�L�W�R�U �$�F�W�L�Y�H: thete ach-in
process of the sy stem is not yet comple te.
The tire pressures are already being moni‐
to re d.
#Compare the tire pressure with there com‐
mended tire pressure forth e cur rent operat‐
34 8
Wheels and tires
Page 379 of 486
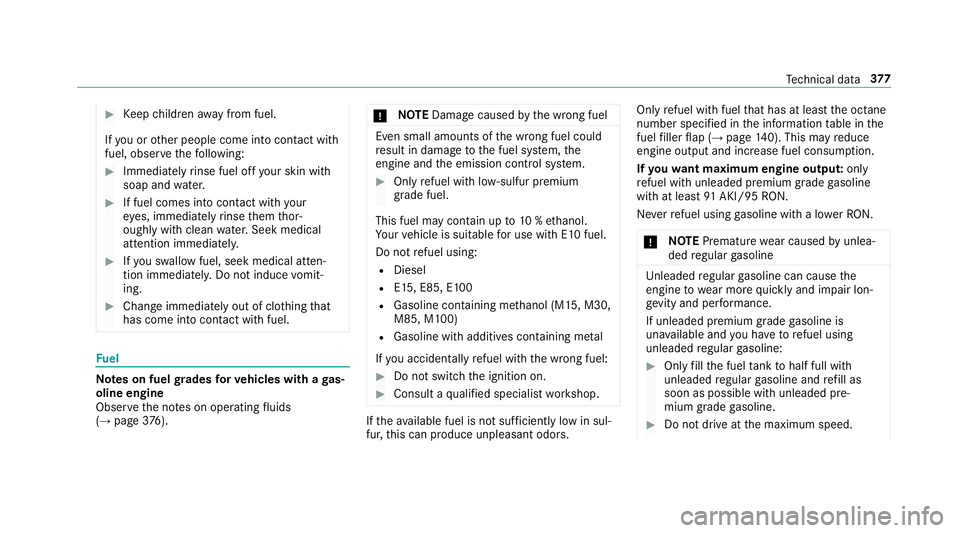
#Keep children away from fuel.
If yo u or other people come into contact with
fuel, obser vethefo llowing:
#Immediately rinse fuel off your skin wit h
soap and water.
#If fuel comes into contact with your
ey es, immediately rinse them thor‐
oughly with clean water.Seek medical
attention immediately.
#If yo u sw allow fuel, seek medical atten‐
tion immediatel y.Do not induce vomit‐
ing.
#Change immediately out of clo thing that
has come into con tact wi thfuel.
Fuel
Note s on fuel grades forve hicles with a gas‐
oline engine
Obser vethe no tes on operating fluids
(
→page 376). *
NO
TEDama gecaused bythe wrong fuel
Even small amounts of the wrong fuel could
re sult in damage tothe fuel sy stem, the
engine and the emission control sy stem.
#Only refuel with lo w-sulfur premium
grade fuel.
This fuel may contain up to10 %ethanol.
Yo ur vehicle is suitable for use with E10 fuel.
Do not refuel using:
RDiesel
RE15, E85, E100
RGasoline containing me thanol (M15, M30,
M85, M100)
RGasoline with additives con taining me tal
If yo u accidenta llyrefuel with the wrong fuel:
#Do not switch the ignition on.
#Consult a qualified specialist workshop.
Ifth eav ailable fuel is not suf ficiently low in sul‐
fur, this can produce unpleasant odors. Only
refuel with fuel that has at least the octane
number specified in the information table in the
fuel filler flap (
→page 140). This may reduce
engine output and increase fuel consum ption.
If yo uwa nt maximum engine output: only
re fuel with unleaded premium grade gasoline
with at least 91AKI/95 RON.
Ne verre fuel using gasoline with a lo werRO N.
* NO
TEPremature wear caused byunlea‐
ded regular gasoline
Unleaded regular gasoline can cause the
engine towe ar more quickly and impair lon‐
ge vity and per form ance.
If unleaded premium grade gasoline is
una vailable and you ha vetorefuel using
unleaded regular gasoline:
#Only fill th e fuel tank tohalf full with
unleaded regular gasoline and refill as
soon as possible with unleaded pre‐
mium grade gasoline.
#Do not drive at the maximum speed.
Te ch nical da ta37
7
Page 392 of 486
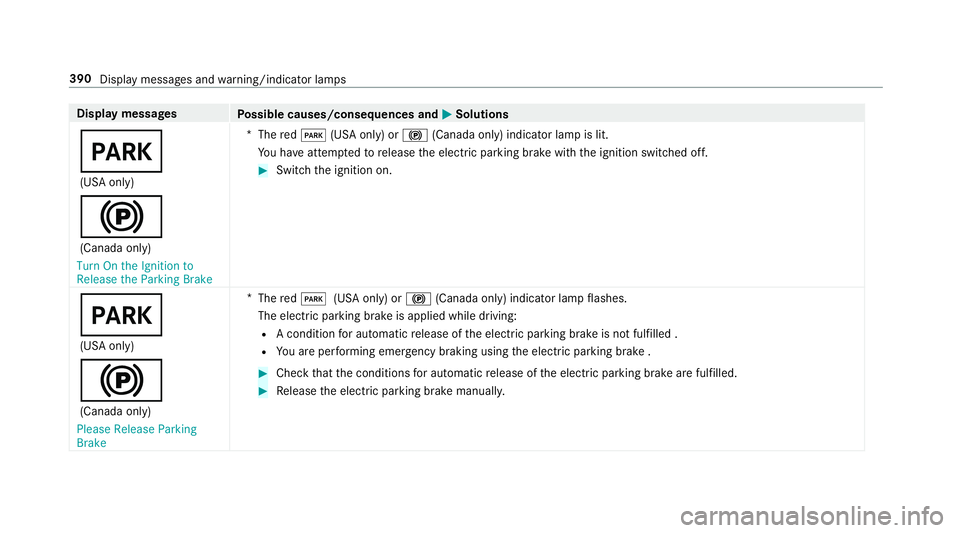
Displaymessages
Possible causes/consequences and MSolutions
F
(USA only)
!
(Canada only)
�7�X�U�Q �2�Q �W�K�H �,�J�Q�L�W�L�R�Q �W�R
�5�H�O�H�D�V�H �W�K�H �3�D�U�N�L�Q�J �%�U�D�N�H *
The redF (USA only) or !(Canada only) indicator lamp is lit.
Yo u ha veattem ptedto release the electric parking brake with the ignition switched off.
#Switch the ignition on.
F
(USA only)
!
(Canada only)
�3�O�H�D�V�H �5�H�O�H�D�V�H �3�D�U�N�L�Q�J
�%�U�D�N�H *
The redF (USA only) or !(Canada only) indicator lamp flashes.
The electric parking brake is applied while driving:
RA condition for au tomatic release of the electric parking brake is not fulfilled .
RYo u are per form ing emer gency braking using the electric parking brake .
#Check that the conditions for au tomatic release of the electric parking brake are fulfilled.
#Re lease the electric parking brake manually.
390
Display messages and warning/indicator lamps