2018 MERCEDES-BENZ AMG GT ROADSTER fuse
[x] Cancel search: fusePage 6 of 409

Driving and pa
rking .................................. 11 3
Driving ......................................................... 11 3
DY NA MIC SELECT switch ............................1 19
Au tomatic transmission .............................. 121
Re fuelling .................................................... 12 5
Pa rking ...................................................... .128
Driving and driving saf ety sy stems .............1 35
Ve hicle towing instructions ........................ .164 Instrument Display and on-board
compu ter.................................................. 16 6
Instrument display overview ...................... .166
Overview of the buttons on thesteering
wheel ..........................................................1 67
Operating the on-board computer ............... 167
Setting the design ....................................... 16 9
Setting the additional value range .............. 16 9
Overview of displa yson the multifunc‐
tion display .................................................1 70
Menus and submenus ................................. 17 0Multimedia sy
stem .................................. 17 8
Overview and operation .............................. 178
Sy stem settings .......................................... 186AMG TR
ACKPA CE ...................................... .196
Te lephone .................................................. .200
Online and Internet functions ..................... 223
Media .......................................................... 231
Ra dio ...........................................................2 41
Sound ......................................................... 24 4 Maintenance and care
.............................247
ASS YST PLUS service inter val display ........ .247
Engine compartment .................................. 24 8
Cleaning and care ...................................... .254 Breakdown assistance
............................265
Emergency .................................................. 265
Flat tyre ...................................................... 266
Battery (vehicle) ......................................... 272
To w- starting or towing away ....................... 278
Electrical fuses ........................................... 282 Wheels and tyres
..................................... 285
No tes on noise or unusual handling char‐
acteristics .................................................. .285 No
tes on regular lyinspecting wheels and
tyres .......................................................... .285
No tes on snow chains ................................ 285
Ty re pressure .............................................. 286
Wheel change ............................................ .293
Collapsible spa rewheel .............................. 303 Te
ch nical data .......................................... 306
No tes on tech nical da ta.............................. 306
On-board electronics .................................. 306
Ve hicle identification plate, VIN and
engine number ...........................................3 06
Operating fluids .......................................... 307
Ve hicle data ................................................ 313 Display messages and
warning/indi‐
cator lamps ............................................... 316
Displ aymessa ges ....................................... 316
Wa rning and indicator lamps ...................... 357 Index
......................................................... 372 Con
tents 3
Page 113 of 409

#
Press button ¿.
Switch off the A/C function only brief lyother‐
wise the windo wsmay mist up more quickl y.
Condensation may drip from the underside of
th eve hicle when cooling mode is active. This is
not a sign that there is a malfunction. Ac
tivating/deactivating the A/C function via
the multimedia sy stem Multimedia sy
stem:
4 Vehicle 5
b Climate control 5
A/C
The A/C function heats, cools and dehumidifies
th eve hicle's interior air. #
Activate Oor deacti vate ª the function. Setting climate control
toautomatic mode In auto
matic mode, the set temp erature is con‐
trolled and maintained at a const ant levelby the
air suppl y. #
Press the à button. #
Toswitch tomanual mode: pressthe H
or _ button. Climate
style Climate
style function
In automatic mode, you can select thefo llowing
climate style settings forth e driver's and front
passenger areas:
R FOCUS: high air flow , slightly cooler setting
R MEDIUM: medium air flow ,st andard setting
R DIFFUSE: low airflow , slightly warmer and
draught-f ree setting
Setting the clima testyle
Multimedia sy stem:
4 Vehicle 5
b Climate control
5 Climate mode #
Select Driverand/or Passenger. #
Select FOCUS, MEDIUM orDIFFUSE .
% Tofeel the ef fect of the climate style, the
à function must be active (/ page110). Overvi
ewofthe air distribution settings The symbols on
the display indicate which vents
th e air flow is being directed thro ugh:
¯ def
rost ervents
P centre and side air
vents
O fo
ot we llve nts
S centre, side and
foot we llve nts
a defros
ter and foot we llve nts
_ all
vents
b defros
ter,middle and side air vents Ac
tivating/deactivating the climate control
syn chro nisation function via the control
panel Climate control can be set centrally using
the
synchronisation function. The temp erature and
air distribution setting forth e driver side is adop‐
te d automatically forth e front passenger side. #
Press button 0. 11 0
Climate cont rol
Page 285 of 409

Installing
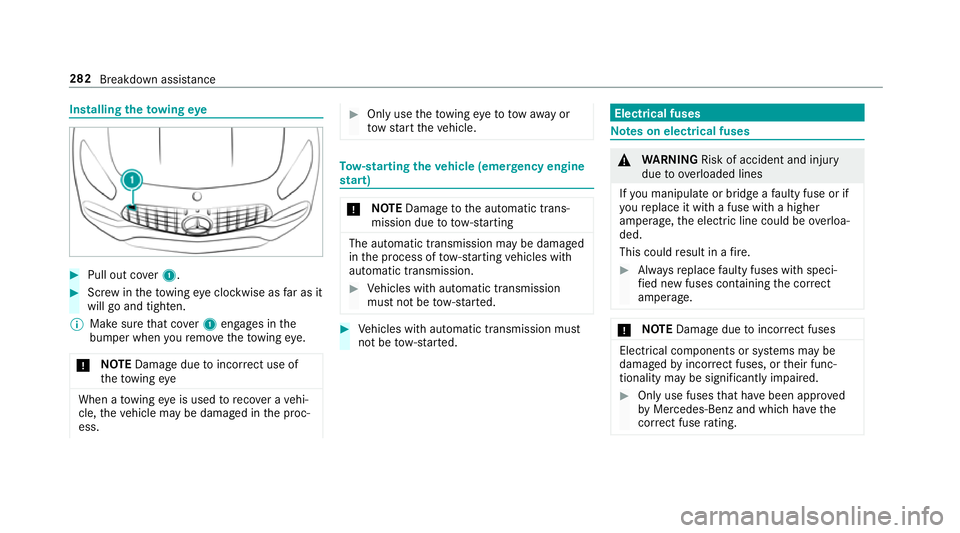
theto wing eye #
Pull out co ver1. #
Screw intheto wing eyeclockwise as far as it
will go and tighten.
% Make sure that co ver1 engages in the
bumper when youre mo vetheto wing eye.
* NO
TEDama gedue toincor rect use of
th eto wing eye When a
towing eye is used toreco ver a vehi‐
cle, theve hicle may be damaged in the proc‐
ess. #
Only use theto wing eyeto to waw ay or
to w start theve hicle. To
w- starting theve hicle (eme rgency engine
st art) *
NO
TEDama getothe automatic trans‐
mission due to tow-starting The automatic transmission may be damaged
in the process of tow- starting vehicles with
automatic transmission. #
Vehicles with automatic transmission
must not be tow- star ted. #
Vehicles with automatic transmission must
not be tow- star ted. Electrical fuses
Note
s on electrical fuses &
WARNING Risk of accident and inju ry
due to ov erloaded lines
If yo u manipulate or bridge a faulty fuse or if
yo ure place it with a fuse with a higher
amperage, the electric line could be overloa‐
ded.
This could result in a fire. #
Alw aysre place faulty fuses with speci‐
fi ed new fuses conta iningthe cor rect
amperage. *
NO
TEDama gedue toincor rect fuses Electrical components or sy
stems may be
damaged byincor rect fuses, or their func‐
tionality may be significant lyimpaired. #
Only use fuses that ha vebeen appr oved
by Mercedes-Benz and which ha vethe
cor rect fuse rating. 282
Breakdown assi stance
Page 286 of 409

Blown fuses must be
replaced with fuses of the
same rating, which you can recognise bythe col‐
our and fuse rating. The fuse ratings and fu rther
information tobe obser ved are lis ted in the fuse
assignment diagram.
Fu se assignment diag ram: onthe fuse box in
th e boot (/ page 284).
* NO
TEDama geor malfunctions caused
by moisture Moisture may cause dama
getothe electrical
sy stem or cause it tomalfunction. #
When the fuse box is open, make sure
th at no moisture can enter the fuse
box. #
When closing the fuse box, make sure
th at the seal of the lid is positioned cor‐
re ctly on the fuse box. If
th e newly inser ted fuse also blo ws, ha vethe
cause traced and rectified at a qualified special‐
ist workshop, e.g. a Mercedes-Benz Service
Centre. Ensure
thefo llowing before replacing a fuse:
R The vehicle is secured against rolling away.
R All electrical consumers are switched off.
R The ignition is switched off.
The electrical fuses are located in various fuse
bo xes:
R Fuse box in the front passenger foot we ll
(/ page 283)
R Fuse box in the boot on the left-hand side of
th eve hicle, when vie wed in the direction of
tr av el (/ page 284) Opening and closing
the fuse box in the front
passenger foot we ll Obser
vethe no tes on electrical fuses
(/ page 282). Opening #
Remo vecarpet 1over thefo ot re st. Breakdown assis
tance 283
Page 287 of 409

#
Loosen scr ews2 onthefloor panel and
re mo vethefloor panel.
Closing #
Fitthefloor panel again. #
Tighten scr ews2. #
Position the carpet back in place and press
down firm ly. Opening and closing
the fuse box in the boot Obser
vethe no tes on electrical fuses
(/ page 282). #
Turn thefast ener on service flap 1 anti-
clo ckwise. #
Open the service flap.
The fuse assignment diagram is in a recess on
th e side of the fuse box. 284
Breakdown assis tance
Page 387 of 409

ECO display
Function ............................................... 11 8
Re setting ............................................. 175
ECO start/s top function ......................... 11 8
Au tomatic engine start ........................ 11 8
Au tomatic engine stop .........................1 18
Operation ............................................. 11 8
Switching off/on .................................. 11 8
Electric pa rking brake ............................ .132
Applying auto matically ........................ 13 2
App lying or releasing manually ............ 13 4
Emergency braking .............................. 13 4
Re leasing automatically ...................... .133
Electrical fuses see Fuses
Electromagnetic compatibility Declaration of conformity ......................22
Emer gency
Fire extinguisher ................................. .266
Fir st-aid kit (so ftsided) ....................... 266
Overview of the help functions .............. 16
Saf etyve st .......................................... 265
Setting up thewa rning triangle .......... .265
Emer gency braking ................................. 13 4Emer
gency braking
see BAS (Brake Assi stSystem)
Emer gency call sy stem
see Mercedes-Benz emer gency call sy stem
Emer gency engine start ......................... 282
Emer gency key
Inserting/removing ............................... 58
Locking a door .......................................64
Un locking a door .................................. .64
Emotion Start
St arting theve hicle .............................. 11 3
Engine ECO start/ stop function ......................1 18
Engine number .................................... 306
St arting (k ey) .......................................1 13
St arting (s tart/s top button) .................1 13
St arting assis tance .............................. 276
Engine bonnet Opening/closing ................................ .248
Engine data Displ aying ............................................ 121
Engine electronics Notes .................................................. 306 Engine number
........................................3 06
Engine oil ................................................. .251
Ad ditives .............................................. 310
Capacity .............................................. .311
Checking the oil le vel using the oil
dipstick ............................................... 250
Checking the oil le vel using the on-
board computer ................................... 251
MB-Fr eigabe or MB-Appr oval .............. .311
Quality ................................................. 311
Te mp erature (on-board computer,
Pe rformance menu) ............................. 171
To pping up ...........................................2 51
Entering characters
Fu nction/no tes ................................... 185
On theto uchpad .................................. 186
ERA-GLONASS test mode
St arting/ending .................................. 223
ESP ®
Crosswind Assist ................................ .140
ESP ®
(Electronic Stability Prog ram)
Ac tivating/deactivating ...................... .139
Fu nction/no tes .................................... 137
SPORT handling mode ......................... 137384
Index
Page 388 of 409

St
atus display (on-board computer,
Pe rformance menu) ............................. 171
EU general operating permit number ....306
Exterior lighting Care .................................................... 260
Ex terior lighting
see Lights F
Fa tigue de tection
see ATTENTION ASSIST
Fa ult message
see Displ aymessa ge
Favo urites
Ad ding .................................................1 83
Calling up ............................................ 183
Del eting .............................................. .184
Moving .................................................1 84
Overview ............................................. 183
Re naming ............................................ 183
Fire extinguisher ..................................... 266
Fi rs t-aid kit (soft sided) .......................... 266 Flat
towing
see Tow- bar sy stem
Flat tyre ....................................................2 66
MOExtended tyres ............................... 267
No tes .................................................. 266
TIREFIT kit ...........................................2 68
Wheel change ...................................... 297
Floor mats .................................................. 97
Fo il co vering
Ra dar sensors ...................................... 13 6
Fr ee software ............................................ 28
Fr equency band
Dialling (on-board computer) .............. .175
Fr ont airbag .............................................. .35
Fr ont and reve rsing camera ...................159
Fr ont camera
Fu nction .............................................. 15 9
Fu el .......................................................... .310
Ad ditives .............................................. 310
E10 ...................................................... 308
Fu elreser ve ......................................... 310
Pe trol ................................................... 308
Quality (p etro l) .................................... 308 Re
fuelling ............................................. 12 5
Sulphur content ................................... 308
Ta nk content ........................................ 310
Fu el consum ption
On-board computer .............................. 174
Fu nction seat
see Door cont rol panel
Fu ses ........................................................ 282
Before replacing a fuse ........................ 282
Fu se assignment diagram ...................2 82
Fu se box in the boot ............................2 84
Fu se box in the front passenger foot‐
we ll ...................................................... 283
No tes .................................................. 282 G
G-me ter (on-board co mputer, Per‐
fo rm ance menu) ...................................... 171
Garage door opener Clearing the memory ........................... 131
Opening or closing the door ................1 30
Programming buttons .......................... 12 8
Ra dio equipment appr oval numbers .... 131
Re solving problems ............................. 12 9 Index
385