2018 MERCEDES-BENZ AMG GT ROADSTER warning light
[x] Cancel search: warning lightPage 200 of 294

Warning and indicator lamps in the
instrument cluster
General notes
Some systems carry out a self-diagnosis when
the ignition is switched on. Therefore, someindicator and warning lamps may light up or
flash temporarily. This behavior is non-critical.
These indicator and warning lamps only indicate
a malfunction if they light up or flash after start-
ing the engine or whilst driving.
Safety
Seat belts
Warning/
indicator
lampNSignal type
Possible causes/consequences and M
Solutions
üNAfter starting the engine, the red seat belt warning lamp lights up for 6 seconds.
The seat belt warning lamp reminds the driver and front passenger to fasten their
seat belts.
XFasten your seat belt (Ypage 44).
üN After starting the engine, the red seat belt warning lamp lights up. In addition, a
warning tone sounds for up to 6 seconds.
The driver's seat belt is not fastened.
XFasten your seat belt (Ypage 44).
The warning tone ceases.
üN The red seat belt warning lamp lights up after the engine starts, as soon as the
driver's or the front-passenger door is closed.
The driver or front passenger has not fastened their seat belt.
XFasten your seat belt (Ypage 44).
The warning lamp goes out.
There are objects on the front-passenger seat.
XRemove the objects from the front-passenger seat and stow them in a secure
place.
The warning lamp goes out.
üN The red seat belt warning lamp flashes and an intermittent audible warning
sounds.
The driver or front passenger has not fastened their seat belt. The vehicle is being driven faster than 15 mph (25 km/h) or has briefly been driven faster than 15 mph
(25 km/h).
XFasten your seat belt (Ypage 44).
The warning lamp goes out and the intermittent warning tone ceases.
There are objects on the front-passenger seat. The vehicle is being driven faster
than 15 mph (25 km/h) or has briefly been driven faster than 15 mph (25 km/h).
XRemove the objects from the front-passenger seat and stow them in a secure
place.
The warning lamp goes out and the intermittent warning tone ceases.
198Warning and indicator lamps in the instrument cluster
On-board computer and displays
Page 205 of 294
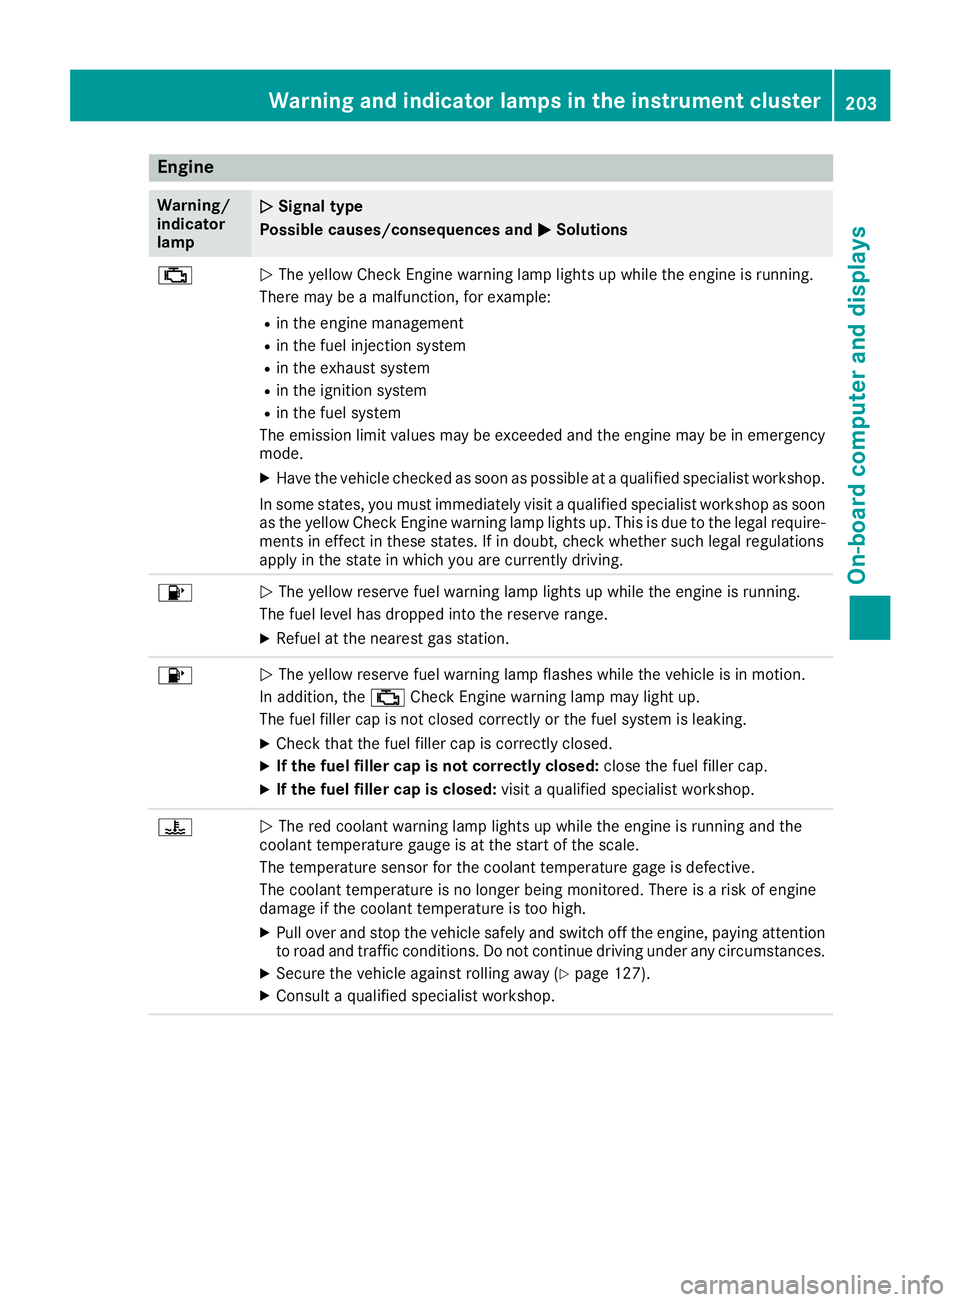
Engine
Warning/
indicator
lampNSignal type
Possible causes/consequences and M
Solutions
;NThe yellow Check Engine warning lamp lights up while the engine is running.
There may be a malfunction, for example:
Rin the engine management
Rin the fuel injection system
Rin the exhaust system
Rin the ignition system
Rin the fuel system
The emission limit values may be exceeded and the engine may be in emergency
mode.
XHave the vehicle checked as soon as possible at a qualified specialist workshop.
In some states, you must immediately visit a qualified specialist workshop as soon as the yellow Check Engine warning lamp lights up. This is due to the legal require-
ments in effect in these states. If in doubt, check whether such legal regulations
apply in the state in which you are currently driving.
8N The yellow reserve fuel warning lamp lights up while the engine is running.
The fuel level has dropped into the reserve range.
XRefuel at the nearest gas station.
8N The yellow reserve fuel warning lamp flashes while the vehicle is in motion.
In addition, the ;Check Engine warning lamp may light up.
The fuel filler cap is not closed correctly or the fuel system is leaking.
XCheck that the fuel filler cap is correctly closed.
XIf the fuel filler cap is not correctly closed: close the fuel filler cap.
XIf the fuel filler cap is closed:visit a qualified specialist workshop.
?NThe red coolant warning lamp lights up while the engine is running and the
coolant temperature gauge is at the start of the scale.
The temperature sensor for the coolant temperature gage is defective.
The coolant temperature is no longer being monitored. There is a risk of engine
damage if the coolant temperature is too high.
XPull over and stop the vehicle safely and switch off the engine, paying attention
to road and traffic conditions. Do not continue driving under any circumstances.
XSecure the vehicle against rolling away (Ypage 127).
XConsult a qualified specialist workshop.
Warning and indicator lamps in the instrument cluster203
On-board computer and displays
Z
Page 207 of 294
Warning/
indicator
lampNSignal type
Possible causes/consequences and M
Solutions
XMake sure that the air supply to the engine radiator is not blocked, e.g. by snow,
slush or ice.
XAt coolant temperatures below 248 ‡ (120 †), drive to the nearest qualified
specialist workshop.
XAvoid subjecting the engine to heavy loads, e.g. driving in mountainous terrain,
and stop-and-go traffic.
Driving systems
Warning/
indicator
lampNSignal type
Possible causes/consequences and M
Solutions
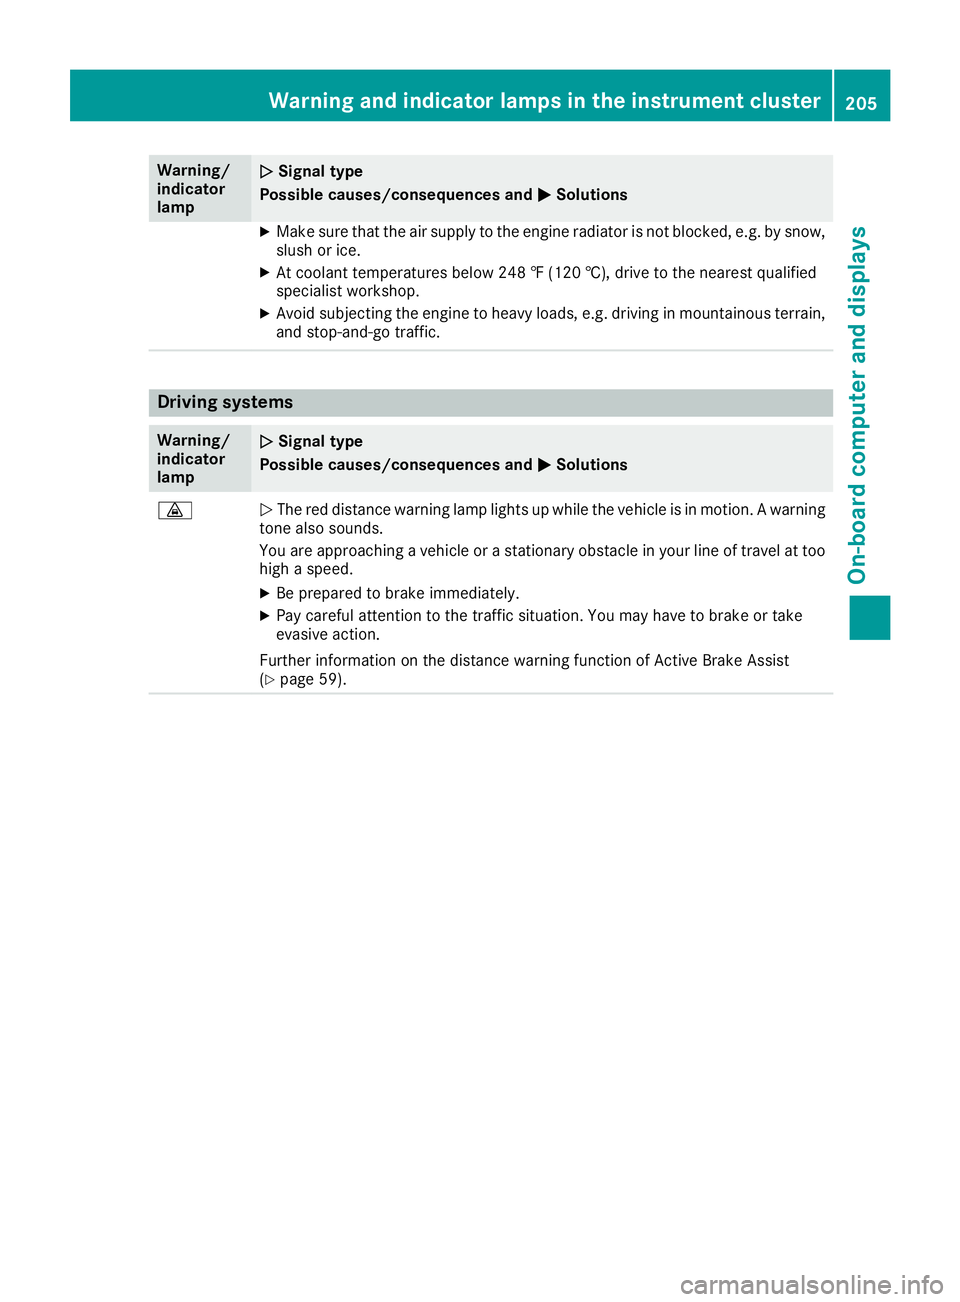
·NThe red distance warning lamp lights up while the vehicle is in motion. A warning
tone also sounds.
You are approaching a vehicle or a stationary obstacle in your line of travel at too high a speed.
XBe prepared to brake immediately.
XPay careful attention to the traffic situation. You may have to brake or take
evasive action.
Further information on the distance warning function of Active Brake Assist
(
Ypage 59).
Warning and indicator lamps in the instrument cluster205
On-board computer and displays
Z
Page 210 of 294
General notes
The multimedia system section in this Opera-
tor's Manual describes the basic principles for
operation. More information can be found in theDigital Operator's Manual.
Important safety notes
GWARNING
If you operate information systems and com-
munication equipment integrated in the vehi-
cle when driving, you may be distracted from
the traffic situation. You could also lose con-
trol of the vehicle. There is a risk of an acci-
dent.
Only operate this equipment when the traffic
situation permits. If you are not sure that this
is possible, park the vehicle paying attention
to traffic conditions and operate the equip-
ment when the vehicle is stationary.
You must observe the legal requirements for the
country in which you are currently driving when
operating the multimedia system.
The multimedia system calculates the route to
the destination without taking the following into
account, for example:
Rtraffic lights
Rstop and yield signs
Rparking or stopping restrictions
Rroad narrowing
Rother road and traffic rules and regulations
The multimedia system may give incorrect nav-
igation recommendations if the actual street/
traffic situation does not correspond with the
digital map's data.
For example:
Ra diverted route
Rthe road layout or the direction of a one-way
street has been changed
For this reason, you must always observe road
and traffic rules and regulations during your
journey. Road and traffic rules and regulations
always have priority over multimedia system
driving recommendations. Navigation announcements are intended to
direct you while driving without diverting your
attention from the road and driving.
Please always use this feature instead of con-
sulting the map display for directions. Looking
at the icons or map display can distract you from
traffic conditions and driving, and increase the
risk of an accident.
This equipment complies with FCC radiation
exposure limits set forth for uncontrolled equip-
ment and meets the FCC radio frequency (RF)
Exposure Guidelines in Supplement C to OET65.
This equipment has very low levels of RF energy
that is deemed to comply without maximum
permissive exposure evaluation (MPE). How-
ever, it is
recommended to insta
ll it at a distance
of at least 8 inches (approx. 20 cm) between the
radiation source and a person's body (not
including limbs such as hands, wrists, feet and
legs).
GWARNING
Modifications to electronic components, their software as well as wiring can impair their
function and/or the function of other net-
worked components. In particular, systems
relevant to safety could also be affected. As a
result, these may no longer function as inten-
ded and/or jeopardize the operating safety of
the vehicle. There is an increased risk of an
accident and injury.
Never tamper with the wiring as well as elec-
tronic components or their software. You
should have all work to electrical and elec-
tronic equipment carried out at a qualified
specialist workshop.
Function restrictions
For safety reasons, some functions are restric-
ted or unavailable while the vehicle is in motion.
You will notice this, for example, because either
you will not be able to select certain menu items
or a message will appear to this effect.
208Function restrictions
Multimedia system
Page 223 of 294

Cigarette lighter
GWARNING
You can burn yourself if you touch the hot
heating element or the socket of the cigarette lighter.
In addition, flammable materials can ignite if:
Rthe hot cigarette lighter falls
Ra child holds the hot cigarette lighter to
objects, for example
There is a risk of fire and injury.
Always hold the cigarette lighter by the knob.
Always make sure that the cigarette lighter is
out of reach of children. Never leave children
unsupervised in the vehicle.
Your attention must always be focused on the
traffic conditions. Only use the cigarette lighter when road and traffic conditions permit.
XSelect key position 2with the Start/Stop
button (Ypage 111).
XTo open: slide cover :forward until it
engages.
XPress in cigarette lighter ;.
Cigarette lighter ;will pop out automatically
when the heating element is red-hot.
XTo close: briefly press cover :at the front.
12 V sockets
General notes
XSelect key position 1with the Start/Stop
button (Ypage 111).
The sockets can be used for accessories with a
maximum draw of 180 W (15 A). Accessories include such items as chargers for mobile
phones.
If you use the sockets for long periods when the
engine is switched off, the battery may dis-
charge.
An emergency cut-out ensures that the on-
board voltage does not drop too low. If the on-
board voltage is too low, the power to the sock-
ets is automatically cut. This ensures that there
is sufficient power to start the engine.
Socket in the trunk
XLift up the cover of socket
:.
mbrace
General notes
The mbrace system is only available in the USA.
A license agreement must be in place in order to
activate the mbrace service. Make sure that
your system is activated and operational. To
register, press the ïInfo call button. If any of
the steps mentioned are not carried out, the
system may not be activated.
If you have questions about the activation, con-
tact one of the following telephone hotlines:
Mercedes-Benz Customer Assistance Center at
1-800 FOR-MERCEDES (1-800-367-6372) or
1-866-990-9007
Shortly after successfully registering with the
mbrace service, a user ID and password will be
sent to you by mail. You can use this password
to log onto the mbrace area under "Owners
Online" at http://www.mbusa.com.
Features221
Stowage and features
Z
Page 224 of 294
The system is available if:
Rit has been activated and is operational
Rthe corresponding mobile phone network is
available for transmitting data to the Cus-
tomer Center
Ra service subscription is available
Determining the location of the vehicle on a map
is only possible if:
RGPS reception is available
Rthe vehicle position can be forwarded to the
Customer Assistance Center
The mbrace system
To adjust the volume during a call, proceed as
follows:
XPress the WorX button on the multi-
function steering wheel.
or
XUse the multimedia system volume control.
The system offers various services, e.g.:
RAutomatic and manual emergency call
RRoadside Assistance call
RInfo call
You can find information and a description of all
available features under "Owners Online" at
http://www.mbusa.com.
System self-test
After you have switched on the ignition, the sys- tem carries out a self-diagnosis.
A malfunction in the system has been detected
if one of the following occurs:
RThe indicator lamp in the SOS button does notcome on during the system self-test.
RThe indicator lamp in the FRoadside
Assistance button does not light up during
self-diagnosis of the system.
RThe indicator lamp in the ïInfo call button
does not light up during the system self-diag-
nosis.
RThe indicator lamp in one or more of the fol-
lowing buttons continues to light up red after
the system self-diagnosis:
-SOS button
-F Roadside Assistance call button
-ïInfo call button
RTheInoperativeor the Service NotActivatedmessage appears in the multi-
function display after the system self-diagno-
sis.
If a malfunction is indicated as outlined above,
the system may not operate as expected. In the event of an emergency, help will have to be
summoned by other means.
Have the system checked at the nearest author-
ized Mercedes-Benz Center or call the following telephone assistance services:
Mercedes-Benz Customer Assistance Center at
1-800 FOR-MERCEDES (1-800-367-6372) or
1-866-990-9007.
Emergency call
Important safety notes
GWARNING
It can be dangerous to remain in the vehicle,
even if you have pressed the SOS button in an emergency if:
Ryou see smoke inside or outside of the vehi-
cle, e.g. if there is a fire after an accident
Rthe vehicle is on a dangerous section of
road
Rthe vehicle is not visible or cannot easily beseen by other road users, particularly when
dark or in poor visibility conditions
There is a risk of an accident and injury.
Leave the vehicle immediately in this or simi-
lar situations as soon as it is safe to do so.
Move to a safe location along with other vehi-
cle occupants. In such situations, secure the
vehicle in accordance with national regula-
tions, e. g. with a warning triangle.
General notes
Observe the notes on system activation
(Ypage 221).
The emergency call is triggered automatically if
an air bag is deployed or an Emergency Ten-
222Features
Stowage and features
Page 231 of 294
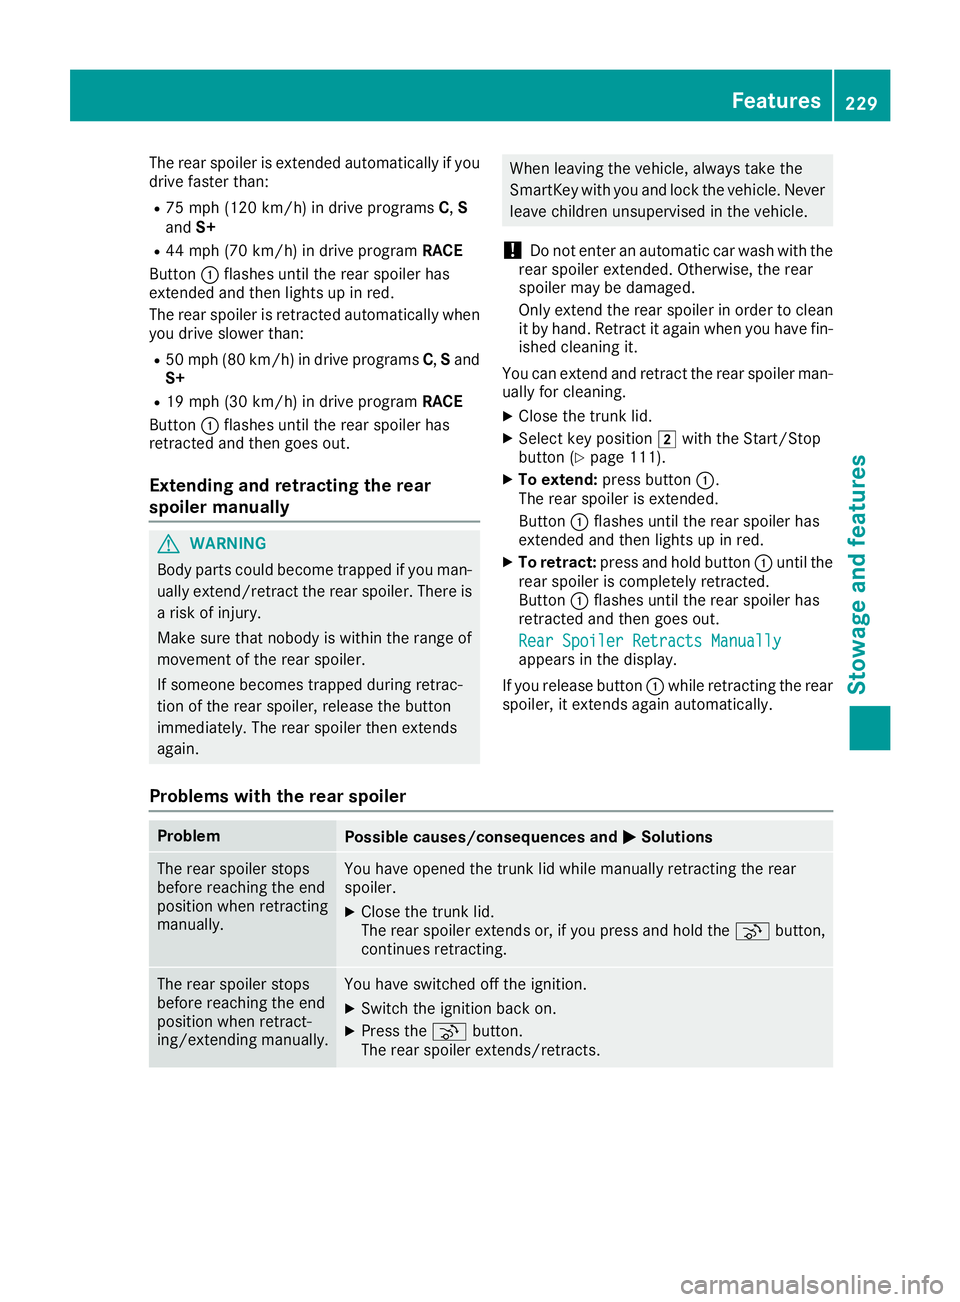
The rear spoiler is extended automatically if you
drive faster than:
R75 mph (120 km/h) in drive programsC,S
and S+
R44 mph (70 km/h) in drive program RACE
Button :flashes until the rear spoiler has
extended and then lights up in red.
The rear spoiler is retracted automatically when
you drive slower than:
R50 mph (80 km/h) in drive programs C,Sand
S+
R19 mph (30 km/h) in drive program RACE
Button :flashes until the rear spoiler has
retracted and then goes out.
Extending and retracting the rear
spoiler manually
GWARNING
Body parts could become trapped if you man-
ually extend/retract the rear spoiler. There is a risk of injury.
Make sure that nobody is within the range of
movement of the rear spoiler.
If someone becomes trapped during retrac-
tion of the rear spoiler, release the button
immediately. The rear spoiler then extends
again.
When leaving the vehicle, always take the
SmartKey with you and lock the vehicle. Never
leave children unsupervised in the vehicle.
!Do not enter an automatic car wash with the
rear spoiler extended. Otherwise, the rear
spoiler may be damaged.
Only extend the rear spoiler in order to clean
it by hand. Retract it again when you have fin-
ished cleaning it.
You can extend and retract the rear spoiler man- ually for cleaning.
XClose the trunk lid.
XSelect key position 2with the Start/Stop
button (Ypage 111).
XTo extend: press button :.
The rear spoiler is extended.
Button :flashes until the rear spoiler has
extended and then lights up in red.
XTo retract: press and hold button :until the
rear spoiler is completely retracted.
Button :flashes until the rear spoiler has
retracted and then goes out.
Rear Spoiler Retracts Manually
appears in the display.
If you release button :while retracting the rear
spoiler, it extends again automatically.
Problems with the rear spoiler
ProblemPossible causes/consequences and MSolutions
The rear spoiler stops
before reaching the end
position when retracting
manually.You have opened the trunk lid while manually retracting the rear
spoiler.
XClose the trunk lid.
The rear spoiler extends or, if you press and hold the ¬button,
continues retracting.
The rear spoiler stops
before reaching the end
position when retract-
ing/extending manually.You have switched off the ignition.
XSwitch the ignition back on.
XPress the ¬button.
The rear spoiler extends/retracts.
Features229
Stowage and features
Z
Page 234 of 294
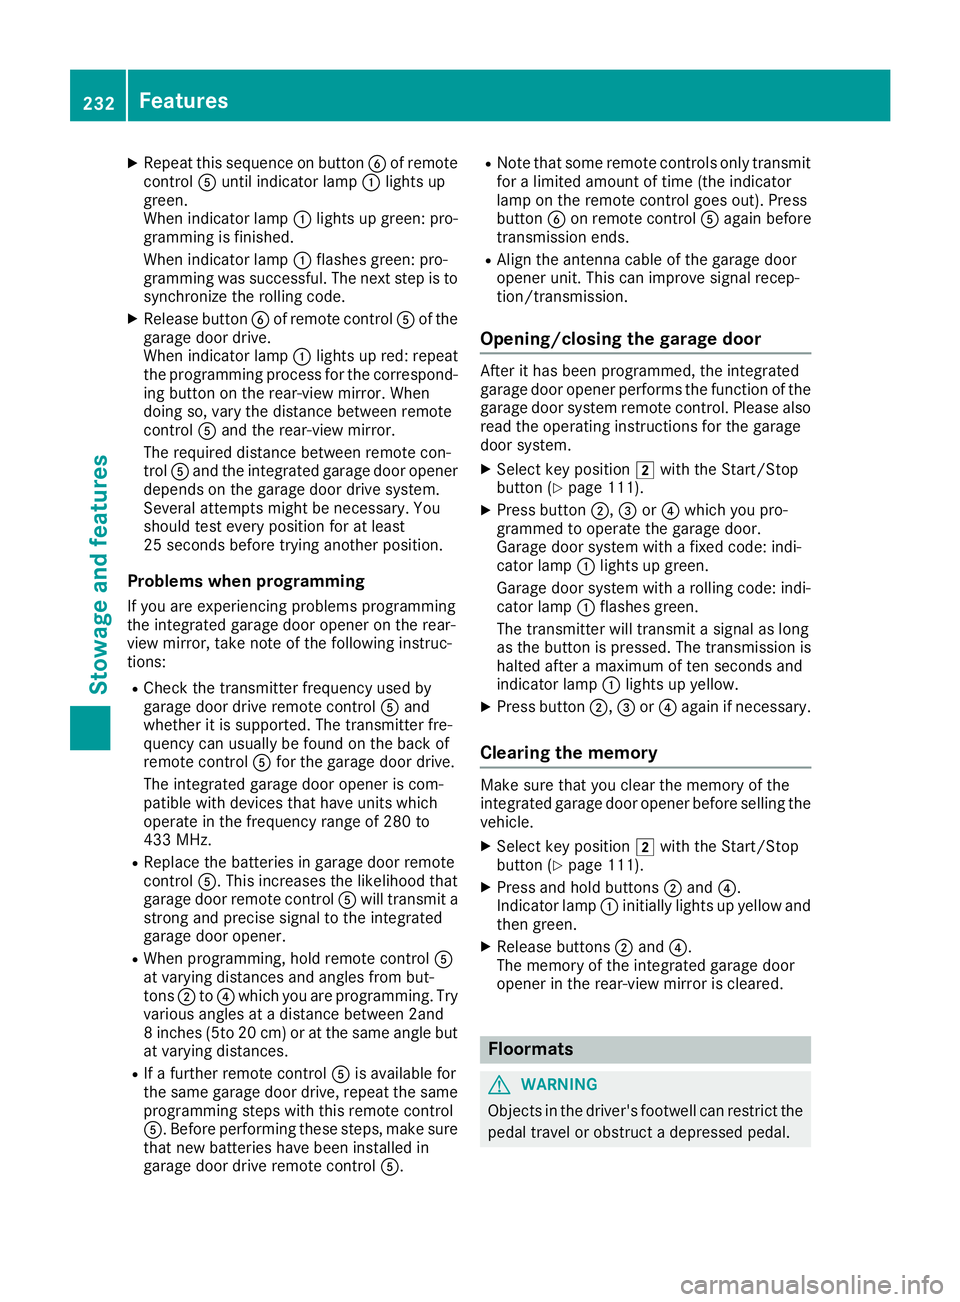
XRepeat this sequenceon butto nB of remot e
control Auntil indicator lamp :lights up
green .
When indicator lamp :lights up green :pro -
grammin gis finished.
When indicator lamp :flashes green :pro -
grammin gwas successful. The next step is to
synchroniz eth erollin gcode.
XReleas ebutto nB of remot econtrol Aof th e
garage door drive.
When indicator lamp :lights up red :repeat
th eprogrammin gprocess for th ecorrespond -
ing butto non th erear-view mirror .When
doin gso, var yth edistanc ebetween remot e
control Aand th erear-view mirror .
The require ddistanc ebetween remot econ-
trol Aand th eintegrate dgarage door opener
depend son th egarage door driv esystem.
Several attempts might be necessary. You
should test every position for at least
25 seconds before trying another position .
Problemswhen programming
If you are experiencin gproblem sprogrammin g
th eintegrate dgarage door opener on th erear -
vie wmirror ,tak enote of th efollowin ginstruc-
tions:
RChec kth etransmitte rfrequency used by
garage door driv eremot econtrol Aand
whether it is supported. The transmitte rfre-
quency can usually be foun don th ebac kof
remot econtrol Afor th egara ge d
oor drive.
The integrate dgarage door opener is com-
patible wit hdevice sthat hav eunit swhic h
operate in th efrequency range of 28 0to
43 3MHz.
RReplac eth ebatterie sin garage door remot e
control A.This increases th elikelihood that
garage door remot econtrol Awill transmit a
stron gand precis esignal to th eintegrate d
garage door opener.
RWhen programming, hold remot econtrol A
at varying distances and angles from but -
tons ;to? whic hyou are programming. Try
various angles at adistanc ebetween 2an d
8 inches (5t o20 cm) or at th esam eangle but
at varying distances.
RIf afurther remot econtrol Ais available for
th esam egarage door drive, repeat th esam e
programmin gsteps wit hthis remot econtrol
A. Before performin gthese steps, mak esur e
that ne wbatterie shav ebeen installed in
garage door driv eremot econtrol A.
RNotethat som eremot econtrol sonly transmit
for alimite damoun tof time (the indicator
lamp on th eremot econtrol goes out). Press
butto nB on remot econtrol Aagain before
transmission ends.
RAlign th eantenna cable of th egarage door
opener unit. This can improve signal recep-
tion/transmission.
Opening/closing the garage door
Afte rit has been programmed ,th eintegrate d
garage door opener performs th efunction of th e
garage door system remot econtrol .Pleas ealso
read th eoperating instruction sfor th egarage
door system.
XSelec tke yposition 2withth eStart/Sto p
butto n (Ypage 111).
XPress butto n;, =or? whic hyou pro -
grammed to operate th egarage door .
Garag edoor system wit h afixed code: indi-
cator lamp :lights up green .
Garag edoor system wit h arollin gcode: indi-
cator lamp :flashes green .
The transmitte rwill transmit asignal as lon g
as th ebutto nis pressed. The transmission is
halted after amaximum of te nseconds and
indicator lamp :lights up yellow .
XPress button;, =or? again if necessary.
Clearing the memory
Mak esur ethat you clear th ememory of th e
integrate dgarage door opener before selling th e
vehicle.
XSelec tke yposition 2withth eStart/Sto p
butto n (Ypage 111).
XPress and hold buttons ;and ?.
Indicato rlamp :initially lights up yellow and
then green .
XReleasebuttons ;and ?.
The memory of th eintegrate dgarage door
opener in th erear-view mirror is cleared .
Floormats
GWARNING
Objects in th edriver' sfootwell can restrict th e
pedal travel or obstruct adepressed pedal .
232Features
Stowage and features