2018 MERCEDES-BENZ AMG GT ROADSTER phone
[x] Cancel search: phonePage 123 of 174
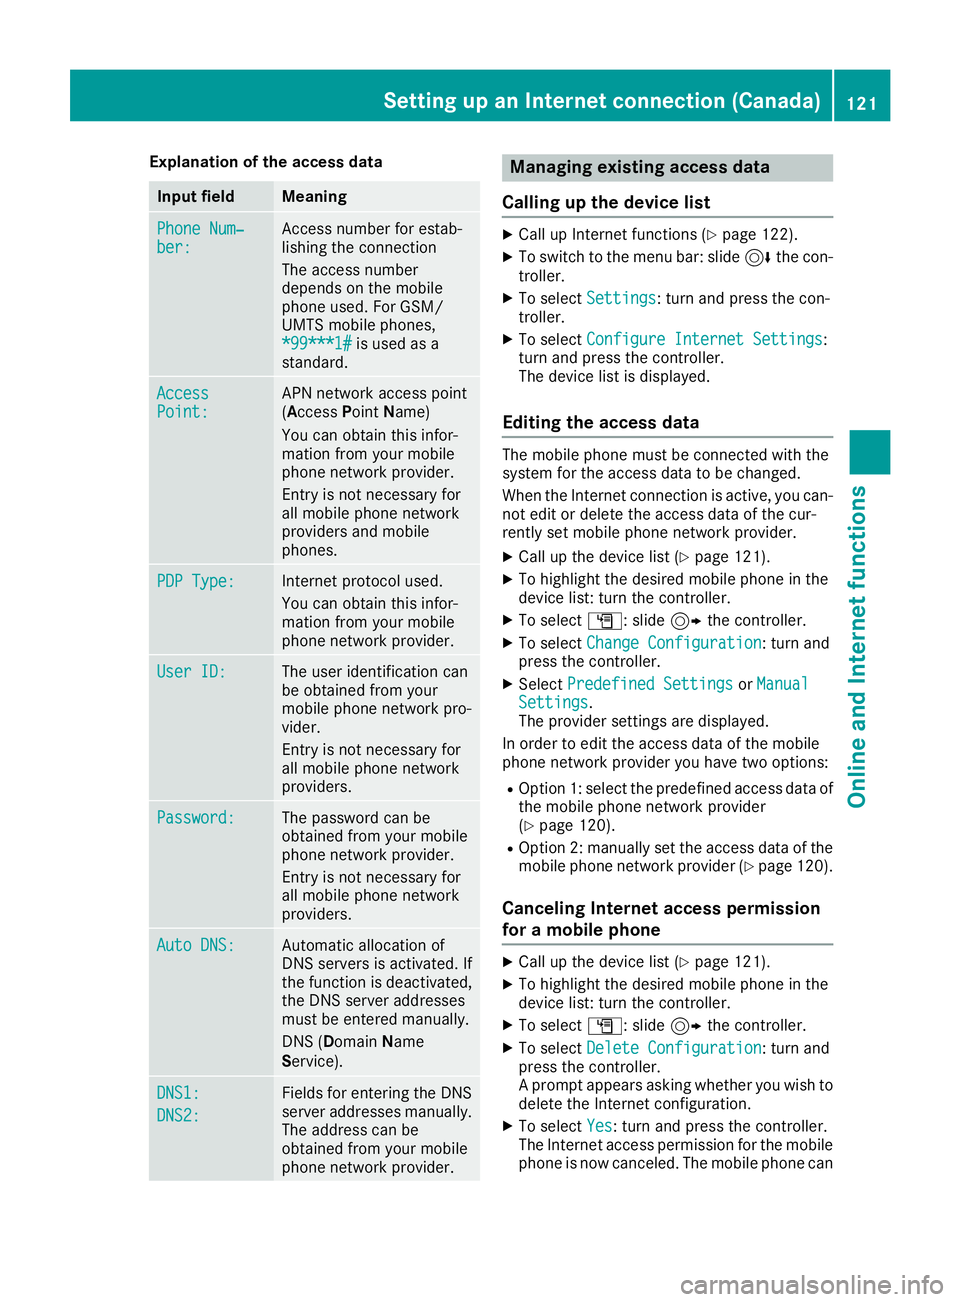
Explanation of the access data
Input fieldMeaning
Phone Num‐ber:Access number for estab-
lishing the connection
The access number
depends on the mobile
phone used. For GSM/
UMTS mobile phones,
*99***1#
is used as a
standard.
AccessPoint:APN network access point
(Access PointName)
You can obtain this infor-
mation from your mobile
phone network provider.
Entry is not necessary for
all mobile phone network
providers and mobile
phones.
PDP Type:Internet protocol used.
You can obtain this infor-
mation from your mobile
phone network provider.
User ID:The user identification can
be obtained from your
mobile phone network pro-
vider.
Entry is not necessary for
all mobile phone network
providers.
Password:The password can be
obtained from your mobile
phone network provider.
Entry is not necessary for
all mobile phone network
providers.
Auto DNS:Automatic allocation of
DNS servers is activated. If
the function is deactivated,
the DNS server addresses
must be entered manually.
DNS (Domain Name
Service).
DNS1:
DNS2:
Fields for entering the DNS
server addresses manually.
The address can be
obtained from your mobile
phone network provider.
Managing existing access data
Calling up the device list
XCall up Internet functions (Ypage 122).
XTo switch to the menu bar: slide 6the con-
troller.
XTo select Settings: turn and press the con-
troller.
XTo select Configure Internet Settings:
turn and press the controller.
The device list is displayed.
Editing the access data
The mobile phone must be connected with the
system for the access data to be changed.
When the Internet connection is active, you can-
not edit or delete the access data of the cur-
rently set mobile phone network provider.
XCall up the device list (Ypage 121).
XTo highlight the desired mobile phone in the
device list: turn the controller.
XTo select G: slide 9the controller.
XTo select Change Configuration: turn and
press the controller.
XSelect Predefined SettingsorManualSettings.
The provider settings are displayed.
In order to edit the access data of the mobile
phone network provider you have two options:
ROption 1: select the predefined access data of
the mobile phone network provider
(
Ypage 120).
ROption 2: manually set the access data of the
mobile phone network provider (Ypage 120).
Canceling Internet access permission
for a mobile phone
XCall up the device list (Ypage 121).
XTo highlight the desired mobile phone in the
device list: turn the controller.
XTo select G: slide 9the controller.
XTo select Delete Configuration: turn and
press the controller.
A prompt appears asking whether you wish to
delete the Internet configuration.
XTo select Yes: turn and press the controller.
The Internet access permission for the mobile
phone is now canceled. The mobile phone can
Setting up an Internet connection (Canada)121
Online and Internet functions
Z
Page 124 of 174
now no longer be used by the system for
Internet functions.
Setting automatic disconnection of
the Internet connection
If a preset time has elapsed during which the
Internet functions have not been used, the Inter-
net automatically disconnects.
XCall up the device list (Ypage 121).
XTo highlight the desired mobile phone in the
device list: turn the controller.
XTo selectG: slide 9the controller.
XTo select Disconnect AutomaticallyWhen Inactive: turn and press the control-
ler.
XTo select 5 Minutes,10 Minutesor 20Minutes: turn and press the controller.
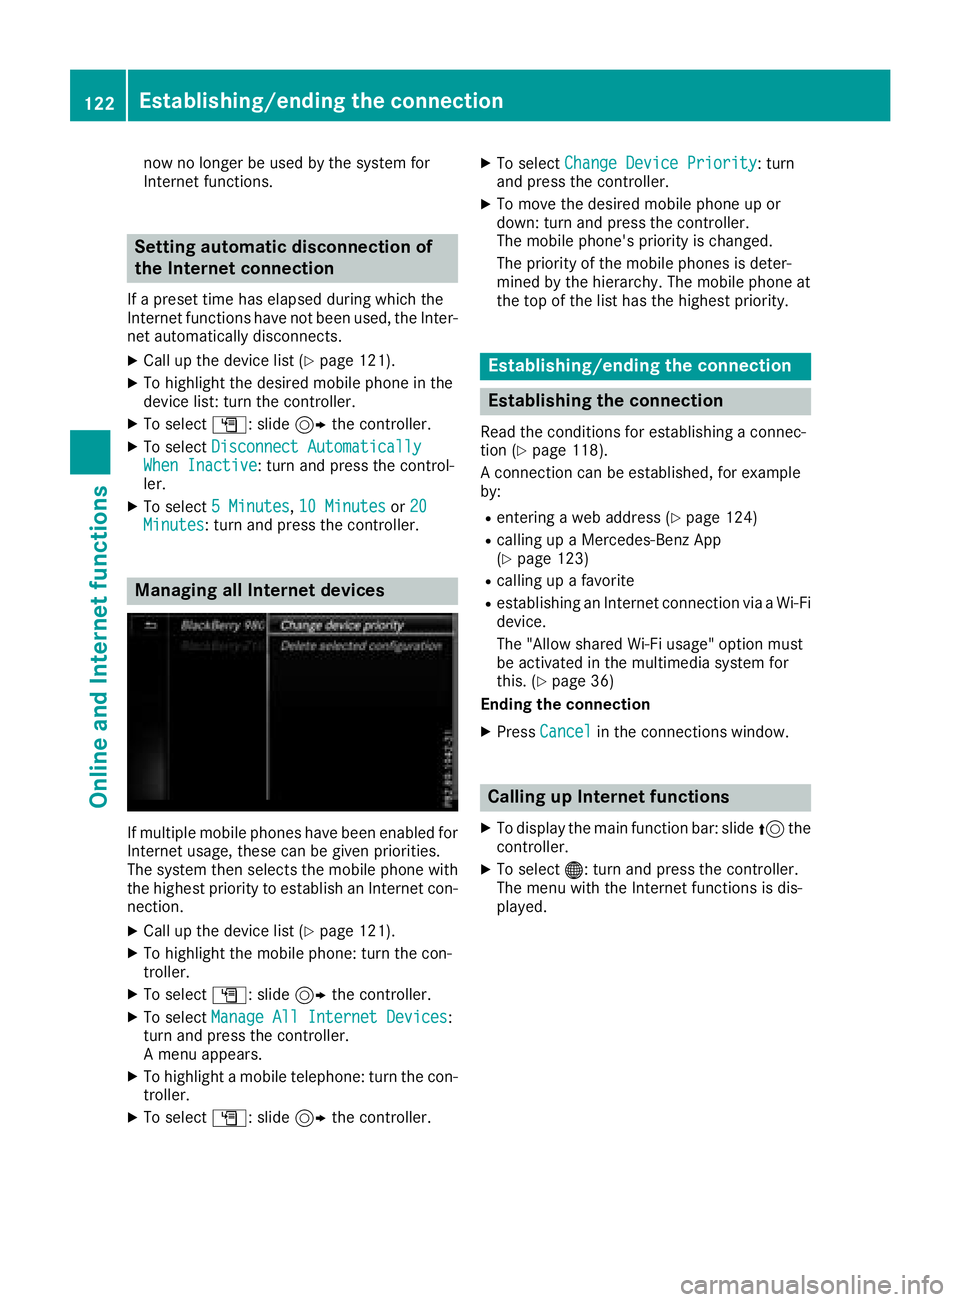
Managing all Internet devices
If multiple mobile phones have been enabled for
Internet usage, these can be given priorities.
The system then selects the mobile phone with
the highest priority to establish an Internet con-
nection.
XCall up the device list (Ypage 121).
XTo highlight the mobile phone: turn the con-
troller.
XTo select G: slide 9the controller.
XTo select Manage All Internet Devices:
turn and press the controller.
A menu appears.
XTo highlight a mobile telephone: turn the con-
troller.
XTo select G: slide 9the controller.
XTo select Change Device Priority: turn
and press the controller.
XTo move the desired mobile phone up or
down: turn and press the controller.
The mobile phone's priority is changed.
The priority of the mobile phones is deter-
mined by the hierarchy. The mobile phone at
the top of the list has the highest priority.
Establishing/ending the connection
Establishing the connection
Read the conditions for establishing a connec-
tion (Ypage 118).
A connection can be established, for example
by:
Rentering a web address (Ypage 124)
Rcalling up a Mercedes-Benz App
(Ypage 123)
Rcalling up a favorite
Restablishing an Internet connection via a Wi-Fi
device.
The "Allow shared Wi-Fi usage" option must
be activated in the multimedia system for
this. (
Ypage 36)
Ending the connection
XPress Cancelin the connections window.
Calling up Internet functions
XTo display the main function bar: slide 5the
controller.
XTo select ®: turn and press the controller.
The menu with the Internet functions is dis-
played.
122Establishing/ending the connection
Online and Internet functions
Page 125 of 174
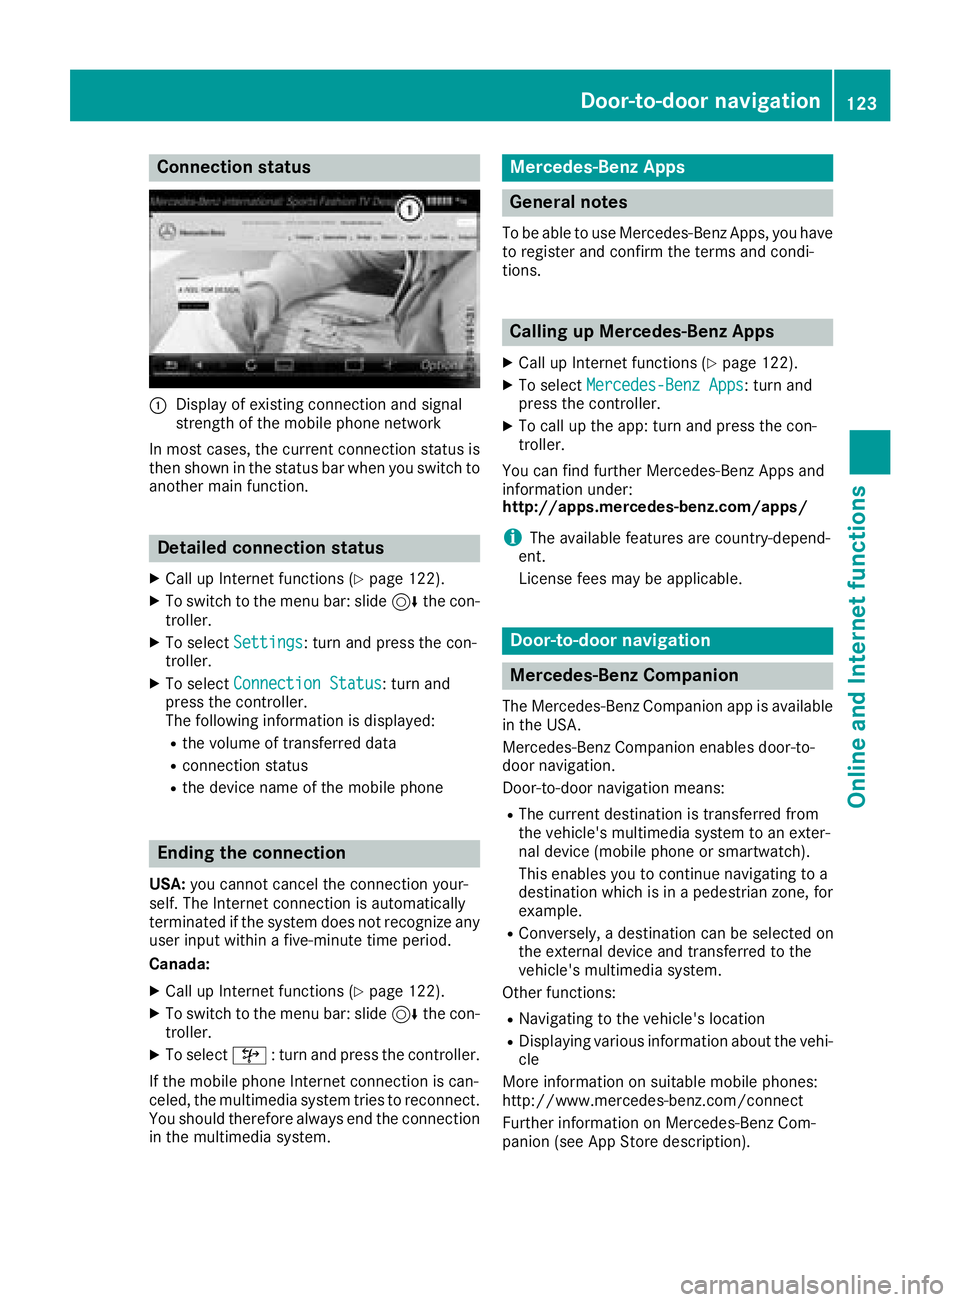
Connection status
:Display of existing connection and signal
strength of the mobile phone network
In most cases, the current connection status is
then shown in the status bar when you switch to
another main function.
Detailed connection status
XCall up Internet functions (Ypage 122).
XTo switch to the menu bar: slide 6the con-
troller.
XTo select Settings: turn and press the con-
troller.
XTo select Connection Status: turn and
press the controller.
The following information is displayed:
Rthe volume of transferred data
Rconnection status
Rthe device name of the mobile phone
Ending the connection
USA: you cannot cancel the connection your-
self. The Internet connection is automatically
terminated if the system does not recognize any
user input within a five-minute time period.
Canada:
XCall up Internet functions (Ypage 122).
XTo switch to the menu bar: slide 6the con-
troller.
XTo select ©: turn and press the controller.
If the mobile phone Internet connection is can-
celed, the multimedia system tries to reconnect.
You should therefore always end the connection
in the multimedia system.
Mercedes-Benz Apps
General notes
To be able to use Mercedes-Benz Apps, you have
to register and confirm the terms and condi-
tions.
Calling up Mercedes-Benz Apps
XCall up Internet functions (Ypage 122).
XTo select Mercedes-Benz Apps: turn and
press the controller.
XTo call up the app: turn and press the con-
troller.
You can find further Mercedes-Benz Apps and
information under:
http://apps.mercedes-benz.com/apps/
iThe available features are country-depend-
ent.
License fees may be applicable.
Door-to-door navigation
Mercedes-Benz Companion
The Mercedes-Benz Companion app is available
in the USA.
Mercedes-Benz Companion enables door-to-
door navigation.
Door-to-door navigation means:
RThe current destination is transferred from
the vehicle's multimedia system to an exter-
nal device (mobile phone or smartwatch).
This enables you to continue navigating to a
destination which is in a pedestrian zone, for
example.
RConversely, a destination can be selected on
the external device and transferred to the
vehicle's multimedia system.
Other functions:
RNavigating to the vehicle's location
RDisplaying various information about the vehi- cle
More information on suitable mobile phones:
http://www.mercedes-benz.com/connect
Further information on Mercedes-Benz Com-
panion (see App Store description).
Door-to-door navigation123
Online and Internet functions
Z
Page 134 of 174
subsidiaries. All other marks, channel names
and logos are the property of their respective
owners. All rights reserved.
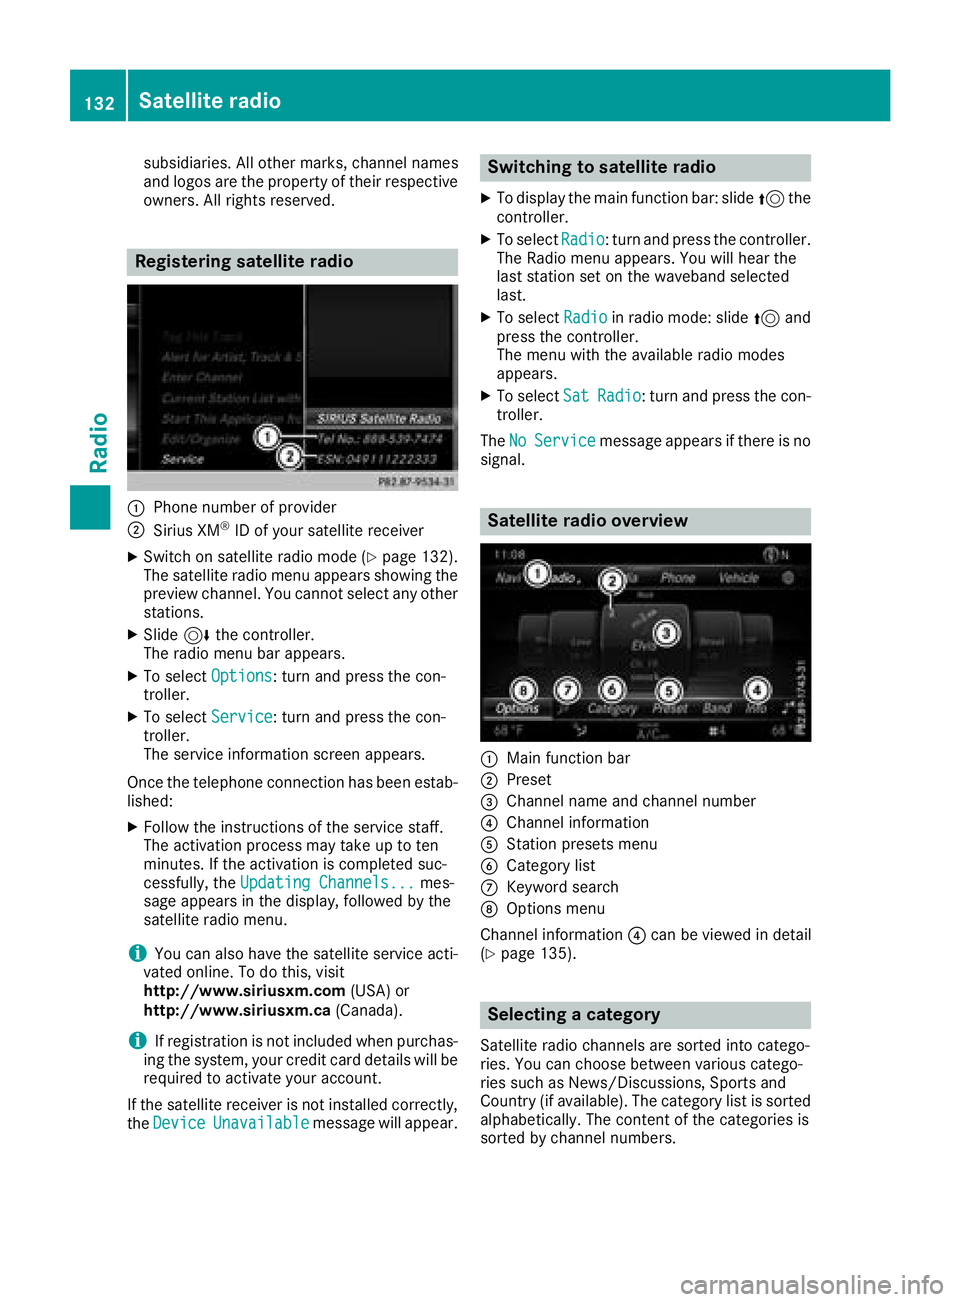
Registering satellite radio
:Phone number of provider
;Sirius XM®ID of your satellite receiver
XSwitch on satellite radio mode (Ypage 132).
The satellite radio menu appears showing the
preview channel. You cannot select any other
stations.
XSlide 6the controller.
The radio menu bar appears.
XTo select Options: turn and press the con-
troller.
XTo select Service: turn and press the con-
troller.
The service information screen appears.
Once the telephone connection has been estab-
lished:
XFollow the instructions of the service staff.
The activation process may take up to ten
minutes. If the activation is completed suc-
cessfully, the Updating Channels...
mes-
sage appears in the display, followed by the
satellite radio menu.
iYou can also have the satellite service acti-
vated online. To do this, visit
http://www.siriusxm.com (USA) or
http://www.siriusxm.ca (Canada).
iIf registration is not included when purchas-
ing the system, your credit card details will be
required to activate your account.
If the satellite receiver is not installed correctly,
the Device
Unavailablemessage will appear.
Switching to satellite radio
XTo display the main function bar: slide 5the
controller.
XTo select Radio: turn and press the controller.
The Radio menu appears. You will hear the
last station set on the waveband selected
last.
XTo select Radioin radio mode: slide 5and
press the controller.
The menu with the available radio modes
appears.
XTo select SatRadio: turn and press the con-
troller.
The No
Servicemessage appears if there is no
signal.
Satellite radio overview
:Main function bar
;Preset
=Channel name and channel number
?Channel information
AStation presets menu
BCategory list
CKeyword search
DOptions menu
Channel information ?can be viewed in detail
(
Ypage 135).
Selecting a category
Satellite radio channels are sorted into catego-
ries. You can choose between various catego-
ries such as News/Discussions, Sports and
Country (if available). The category list is sorted alphabetically. The content of the categories is
sorted by channel numbers.
132Satellite radio
Radio
Page 137 of 174
Displaying information
XTo selectInf oin th eradio men ubar :turn and
press th econtroller .
Information on th ecurrentl yreceived pro -
gram is displayed.
If available ,you will see :
Rthechannel log o
Rthechannel abbreviation
Rth eartist of th etrack that is currentl ybein g
playe d
Rthecurren ttrack
XTo return to th eradi omenu :selec tInf oby
slidin g6 and pressing th econtroller .
Displaying service information
The satellite radio provider' scustomer servic e
center is available by phone at any time to
answer any genera lquestion sor question son
th eversions available .
XTo selectOption s:turn and press th econ-
troller.
XTo selec tServic e:turn and press th econ-
troller.
The satellite radio provider' sdetails appear.
XTo return to th emain display :press th e
% button.
Channel list update s
Duringreception of ane wchannel list ,th e
Updating Channels...messag eis shown .
The channel last selecte dis switched to mut e
until th eupdat ehas bee ncompleted. Satellite
radio mode is no tavailable durin gthis process.
Once th eupdat ehas bee ncompleted, th esat -
ellite radio men uappears .If th echannel last
selecte dis available ,this channel will be played.
Sound settings
Information on soun dsetting s (Ypage 158).
Satellite radio135
Radio
Page 148 of 174

Selecting a playback mode
The following options are available:
RNormal Track Sequence: the tracks are
played in the normal order (e.g. track 1, 2, 3
etc.).
RRandom Medium: all tracks on the data
medium are played in random order (e.g.
track 3, 8, 5 etc.).
RRandomTrackList: the current track list is
played in random order (e.g. 3, 8, 5 etc.).
XTo show the main function bar: slide 5the
controller.
XTo select Media: turn and press the controller.
A menu appears with the available media
sources.
XTo select the media source: turn the control-
ler and press to confirm.
XTo switch to the menu bar: slide 6the con-
troller.
XTo select Options: turn and press the con-
troller.
XSelect Playback Mode.
The options list appears. The #dot indicates
the current setting.
XSelect the desired option.
The option is switched on. For all options
except Normal Track Sequence
, you will
see a corresponding icon in the main display.
iThe Normal Track Sequenceoption is
automatically selected when you change the
disc you are currently listening to or when you
select a different medium. If an option is
selected, it remains selected after the multi-
media system is switched on or off.
Bluetooth®audio mode
Requirements
The Bluetooth®function must be activated in
the multimedia system (Ypage 38).
Bluetooth®audio mode requires a Bluetooth®-
capable audio device.
Check your Bluetooth
®audio device for the fol-
lowing; see the manufacturer's operating
instructions:
RBluetooth®audio profile The Bluetooth
®audio device must support
the A2DP and AVRCP Bluetooth®audio pro-
files.
RBluetooth®visibility
Certain Bluetooth®audio devices do not just
require activation of the Bluetooth®function.
In addition, your device must be made "visi-
ble" to other devices.
RBluetooth®device name
This device name is predetermined but can
usually be changed. For a clear selection of
the Bluetooth
®device, Mercedes-Benz rec-
ommends that you customize the device
name.
iA2DP ( Advanced AudioDistribution Profile):
Bluetooth®audio profile for audio data trans-
mission
AVRCP (Audio VideoRemote ControlProfile):
Bluetooth
®audio profile for audio data play-
back
iThe Bluetooth®device must be visible to the
multimedia system for authorization. After
authorization, the multimedia system even
finds the Bluetooth
®device when it is not
visible.
General notes
Before using your Bluetooth®audio device with
the multimedia system for the first time, you will
need to authorize it.
When you authorize a new Bluetooth
®audio
device, it is connected automatically. Connec-
tion involves first searching for a Bluetooth
®
audio device and then authorizing it.
You can authorize up to 15 Bluetooth®devices.
iIf you authorize a mobile phone that sup-
ports Bluetooth®audio, the A2DP and AVRCP
Bluetooth®audio profiles are connected
automatically.
The mobile phone is then entered:
Rin the Bluetooth®telephone list
(Ypage 92)
Rin the Bluetooth®device list
(Ypage 147)
Mercedes-Benz recommends authorizing a
mobile phone in Bluetooth
®telephony
(Ypage 92).
146Bluetooth®audio mode
Media
Page 149 of 174

Bluetooth®audio menu
:Audio transmission status (depending on
the Bluetooth®audio device, also title name
and artist)
;Data medium position in the media list
=Sound settings
?Device list
AStops Ëor starts Ìplayback
BName of the connected Bluetooth®audio
device (example)
COptions menu
The following functions are available via media
menu bar ?:
ROptions: calls up Bluetooth®audio options
RStopsËor starts Ìplayback
RSearch: searches for a track (not available on
all connected audio devices)
RConn. Device: calls up the device manager
Rà: calls up the sound settings.
XTo show the menu bar: slide 6the control-
ler.
Switching to Bluetooth®audio
XTo display the main function bar: slide 5the
controller.
XTo select Media: turn and press the controller.
The last media source you have set is dis-
played.
XTo select Media: slide5and press the con-
troller.
XTo select Bluetooth Audio: turn and press
the controller.
If the Bluetooth
®audio device is already
authorized, it is activated by the multimedia
system. The Bluetooth
®audio menu appears
(Ypage 147). Playback starts. If you see the
No
BluetoothAudioDeviceConnectedmessage, you will need to author-
ize the Bluetooth®audio device first
(Ypage 147).
iIf the Bluetooth®audio device connected
supports metadata and corresponding data is
available, then the artist, track and album
name can be displayed.
Searching for and authorizing a Blue-
tooth®audio device
Searching for a Bluetooth®audio device
XSwitch on Bluetooth®audio mode
(Ypage 147).
XSlide 6the controller.
The media menu bar is shown.
XTo select Connect Device: turn and press
the controller.
XTo select Search for Audio Devices:
press the controller.
A message appears.
XSelect Start Search.
The multimedia system searches for Blue-
tooth
®audio devices within range and adds
them to the Bluetooth®device list.
The duration of the search depends on the
number of Bluetooth
®audio devices within
range and their characteristics.
:Bluetooth®audio device within range and
already authorized
;Newly detected mobile phone with Blue-
tooth®audio mode in range
The Bluetooth
®device list displays all author-
ized devices, whether they are within range or
not. After a device search, devices which are
within range but not authorized are also dis-
played.
Bluetooth®audio mode147
Media
Z
Page 150 of 174

If the multimedia system cannot find your Blue-
tooth®audio device, external authorization may
follow (Ypage 148).
Authorizing a Bluetooth
®audio device
XIn the Bluetooth®device list, select a Blue-
tooth®audio device that has not yet been
authorized: turn and press the controller.
Authorization starts.
Depending on which Bluetooth
®audio device
is being used, the device can be authorized
either by entering a passkey or by Secure
Simple Pairing. You can find information on
this in the "Authorizing (connecting) a mobile
phone" section (
Ypage 92).
After successful authorization, the Blue-
tooth
®audio device is connected and starts
playing.
iWith some Bluetooth®audio devices, play-
back must initially be started on the device
itself, so that the multimedia system can play
the audio data. For the audio device used, the
output of the audio files has to be specified via
Bluetooth
®.
iThe Bluetooth®audio device must support
Bluetooth®version 2.1 for connection via
Secure Simple Pairing. The multimedia sys-
tem creates a six-digit code which is dis-
played simultaneously on both devices that
are to be connected.
For some Bluetooth
®audio devices, the pair-
ing must also be confirmed within 10 sec-
onds.
External authorization
If the multimedia system does not find your
Bluetooth®audio device (Ypage 147), this may
be due to particular security settings on your
Bluetooth
®audio device. In this case, check
whether your Bluetooth®audio device can
locate the multimedia system.
The Bluetooth
®device name of the multimedia
system is MB Bluetooth.
XSwitch on Bluetooth®audio mode
(Ypage 147).
XSlide 6the controller.
The media menu bar is shown.
XTo select Connect Device: turn and press
the controller.
XTo select ConnectviaAudioDevice: turn
and press the controller.
XStart the authorization on your Bluetooth®
audio device (see the manufacturer's operat- ing instructions).
After successful authorization, the Blue-
tooth
®audio device is connected and starts
playing.
iWith some Bluetooth®audio devices, play-
back must initially be started on the device
itself, so that the multimedia system can play
the audio data.
Device-specific information on authorizing
and connecting Bluetooth
®-capable mobile
phones can be found on the Internet at
http://www.mercedes-benz.com/connect.
Displaying details
XTo select a Bluetooth®audio device from the
Bluetooth®device list: turn the controller
(Ypage 147).
XTo select G: slide 9the controller.
XTo select Details: turn and press the con-
troller.
The following information concerning the
selected mobile phone is shown:
RBluetooth®name
RBluetooth®address
RAvailability status (shown after an update)
RAuthorization status
XTo close the detailed display: press the
% button.
Starting/stopping playback
Requirement: the Bluetooth®audio menu
(Ypage 147) is shown.
Starting playback
XTo select Ì: turn and press the controller.
Playback starts. Ëis selected.
Stopping playback
XSelect Ë.
A message appears. Ìis selected.
Continuing playback
XSelect Ì.
A message appears. Ëis selected.
148Bluetooth®audio mode
Media