2018 MERCEDES-BENZ AMG GT ROADSTER lock
[x] Cancel search: lockPage 54 of 174
Carpool lanes are indicatedbya diamond sym-
bol on specific road signs and on the road sur-
face. The road signs may also inc ludethe des-
ignation CARPOOL. The lanes are arranged as a
separate lane next to the others or are builtas a
physically separate lane.
Dependin g on the setting under Use Carpool
Lanes, the multimediasystem uses carpool
lanes when calculating the route. During route
guidance, visual and audible drivingdire ctions
pro vide guidance into and out of carpool lanes.
XTo switch to navigation mode:slide 5the
controller.
XTo select Navi: turn and press the controller.
The map displays the current veh icleposition
or the navigation menu appears.
XIf the navigation menu appears, press the
controller.
The map shows the vehicle's current position.
XTo show the menu: slide6the controller.
XTo select Options:turn and press the con-
troller.
XSelect Route Settings.
XSelectAvoid Options.
XSelectUse Carpool Lanes.
Carpool lanes willeither beused Oor avoi-
ded ªwhen calculating the route.
Destination entry
Important safety notes
GWAR NING
If you operate information systems and com-
munication equipment integrated inthe veh i-
cle when driving, you may be distracted from
the traff icsituation. You could also lose con-
trol of the veh icle. There isa risk of an acc i-
dent.
Only operate th is equipment when the traff ic
situation permits. Ifyou are not sure that th is
is possible, park the veh iclepaying attention
to traff icconditions and operate the equip-
ment when the veh icle isstationary.
You must observe the legal requirements for the
country in which you are currently driving when
operating the multimedia system.Destination entry may be blocked while driving,
depending on the country specifications.
General notes
The various character entry options are descri-
bed for the controller. Alternatively you can use
the touchpad to enter characters and select
menus (
Ypage 21).
Using an address
Calling up the address entry menu
XTo switch tonavigation mode:slide 5the
controller.
XTo select Navi: turn and press the controller.
The map displays the current vehicle position
or the navigation menu appears.
XIf the navigation menu appears, press the
controller.
The map shows the vehicle's current position.
XTo show the menu: slide6the controller.
XTo select Destination: turn and press the
controller.
XSelect Address Entry.
Address entry options
Examples of how you can enter an address:
RCity/ZIP code, street, house number
RCity/ZIP code, street
RCity/ZIP code, center
RCity/ZIP code, street, intersection
RStreet, City/ZIP code, house number
RStreet, City/ZIP code, intersection
The address can beentered faster byentering
the street before the city if the address has an
unusual street name.
While entering an address, you can also switch
to other destination entry options:
RKeyword search (Ypage 55)
RMap (Ypage 60)
RPOI (Ypage 57)
52Destination entry
Navigation
Page 62 of 174
IfCalculate Alternative Routesis acti-
vated (Ypage 50), Continueis available.
Rotating a 3D POI
Realistically modeled buildings are shown on
the map in an all-round view. These 3D POIs are
sights or buildings of regional importance, e.g. a
main railway station.
3D POIs can be turned on the 20 m, 50 m and
100 m map scales. To aid orientation, the points
of the compass are shown while turning.
XSelect a point of interest (Ypage 59).
XTo selectMap: turn and press the controller.
XSelect a 3D POI from the map using PreviousorNext.
If the 3D POI is marked in gold, you can select
3D
.
XSelect 3D.
The 3D POI turns on its own axis.
XTo exit the all-round view, press the control-
ler.
Using the map
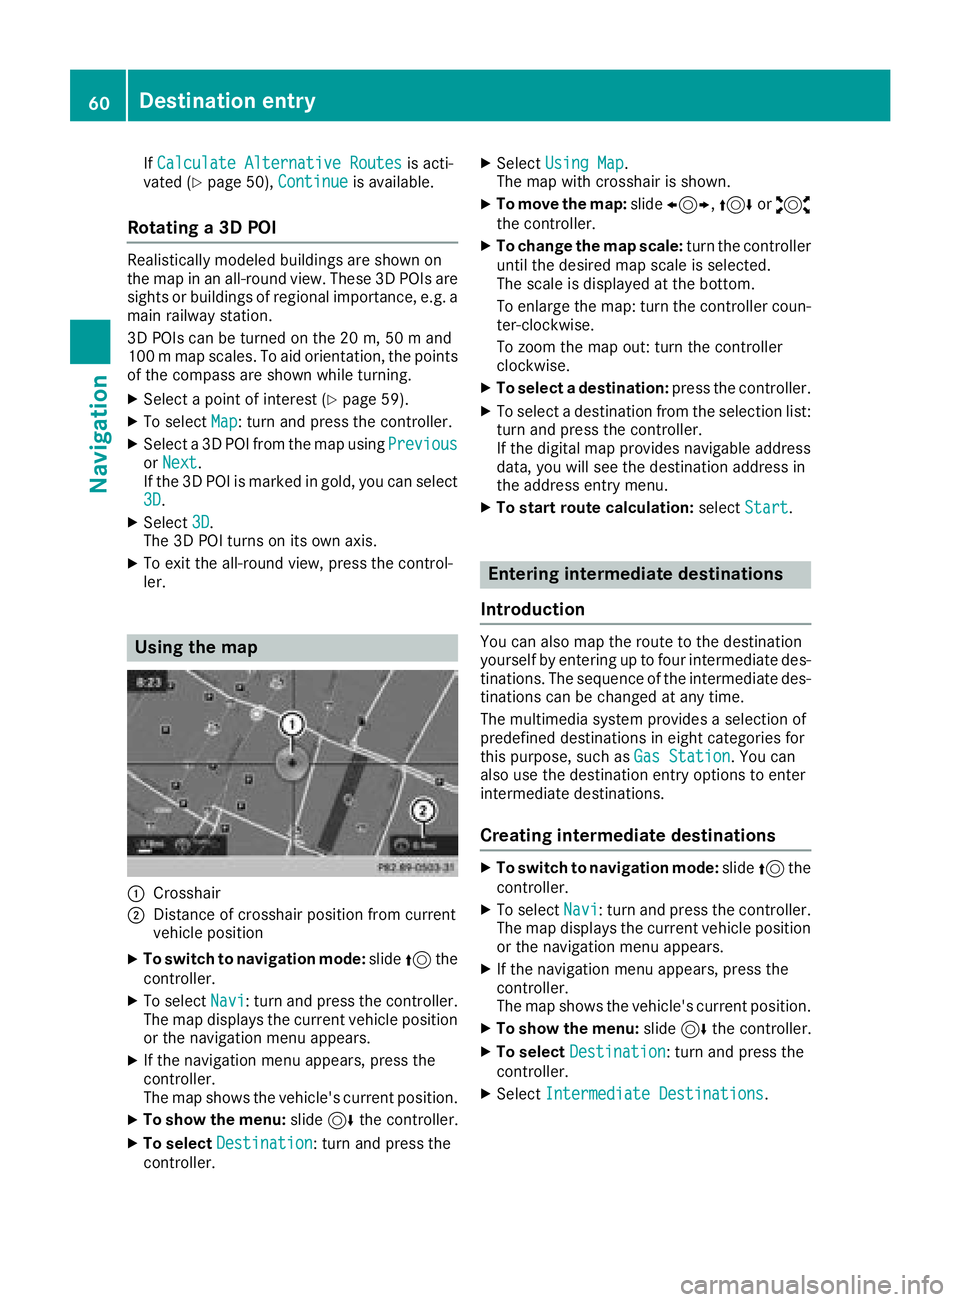
:Crosshair
;Distance of crosshair position from current
vehicle position
XTo switch to navigation mode: slide5the
controller.
XTo select Navi: turn and press the controller.
The map displays the current vehicle position
or the navigation menu appears.
XIf the navigation menu appears, press the
controller.
The map shows the vehicle's current position.
XTo show the menu: slide6the controller.
XTo select Destination: turn and press the
controller.
XSelect Using Map.
The map with crosshair is shown.
XTo move the map: slide1, 4or2
the controller.
XTo change the map scale: turn the controller
until the desired map scale is selected.
The scale is displayed at the bottom.
To enlarge the map: turn the controller coun-
ter-clockwise.
To zoom the map out: turn the controller
clockwise.
XTo select a destination: press the controller.
XTo select a destination from the selection list:
turn and press the controller.
If the digital map provides navigable address
data, you will see the destination address in
the address entry menu.
XTo start route calculation: selectStart.
Entering intermediate destinations
Introduction
You can also map the route to the destination
yourself by entering up to four intermediate des-
tinations. The sequence of the intermediate des-
tinations can be changed at any time.
The multimedia system provides a selection of
predefined destinations in eight categories for
this purpose, such as Gas Station
. You can
also use the destination entry options to enter
intermediate destinations.
Creating intermediate destinations
XTo switch to navigation mode: slide5the
controller.
XTo select Navi: turn and press the controller.
The map displays the current vehicle position
or the navigation menu appears.
XIf the navigation menu appears, press the
controller.
The map shows the vehicle's current position.
XTo show the menu: slide6the controller.
XTo select Destination: turn and press the
controller.
XSelect Intermediate Destinations.
60Destination entry
Navigation
Page 72 of 174

Starting route guidance to a POI
XTo select a POI:turn the controller and press
to confirm.
The POI details are displayed.
You can perform the following functions:
RStore in the address book (Ypage 77)
RView on the map (Ypage 82)
RCalled if a phone is connected and a phone
number is available (Ypage 96)
RSelect for route guidance and calculate a
route to it (Ypage 54)
Using the traffic jam function
Highway information enables the use of the traf-
fic jam function. The remaining route on the
highway in this case is blocked in the direction of
travel from the selected exit.
XTo select Detour: turn and press the control-
ler.
The traffic jam function appears
(
Ypage 73).
Destination reached
Once the destination is reached, you will see the
checkered flag. Route guidance is finished.
Navigation announcements
Repeating navigation announcements
If you missed the current navigation announce-
ment, you can call it up again.
XTo switch to navigation mode: slide5the
controller.
XTo select Navi: turn and press the controller.
The map displays the current vehicle position
or the navigation menu appears.
XIf the navigation menu appears, press the
controller.
The map shows the vehicle's current position.
XTo show the menu: slide6the controller.
XTo select +: turn and press the controller.
The navigation announcement is repeated.
iIf the Repeat Spoken Driving Recom‐mendationsfunction has previously been
added as a favorite, you can alternatively
select the function using the favorites button
(
Ypage 31).
Setting the volume manually
XDuring a navigation announcement, turn
Ä the control knob.
iWhen you start the engine, the volume is set
to the lowest setting.
70Route guidance
Navigation
Page 76 of 174
In the display, you will then see theRoad NotMappedmessage, an arrow and the distance to
the destination. The direction arrow shows the
compass heading to the destination.
As soon as the system can assign the vehicle
position to the map again, route guidance con-
tinues in the usual way.
Real-time traffic reports
Prerequisites
This function is currently not available for Can-
ada.
In order to receive real-time traffic reports via
satellite radio, you need to subscribe to SIRIUS
XM Satellite Radio Traffic Message Service.
Further information on satellite radio
(
Ypage 131).
The multimedia system can receive traffic
reports via satellite radio and take account of
these for route guidance in the navigation sys-
tem. Received traffic reports are displayed on
the map either as text or as symbols.
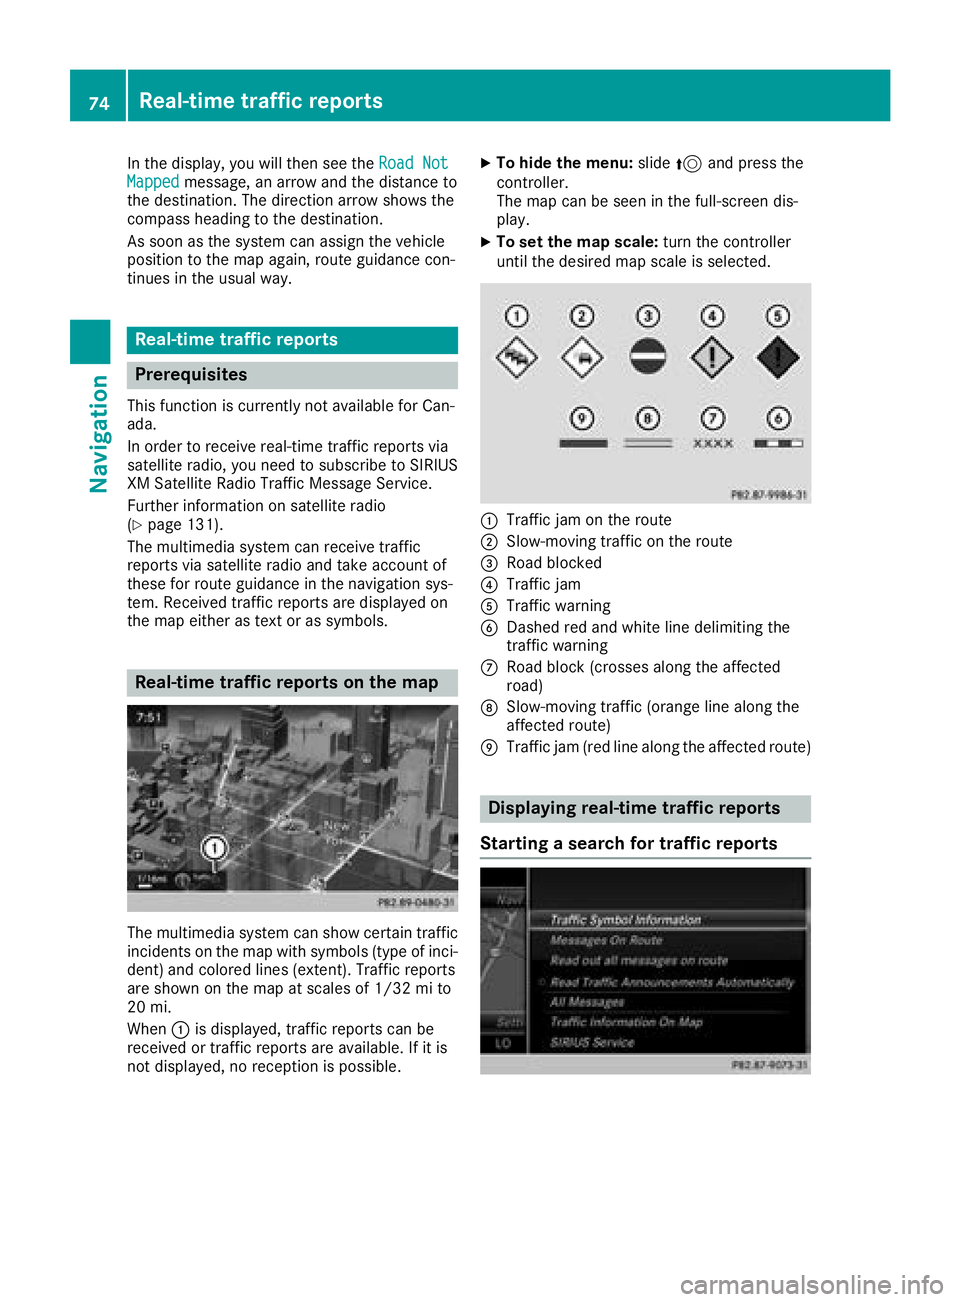
Real-time traffic reports on the map
The multimedia system can show certain traffic
incidents on the map with symbols (type of inci-
dent) and colored lines (extent). Traffic reports
are shown on the map at scales of 1/32 mi to
20 mi.
When :is displayed, traffic reports can be
received or traffic reports are available. If it is
not displayed, no reception is possible.
XTo hide the menu: slide5and press the
controller.
The map can be seen in the full-screen dis-
play.
XTo set the map scale: turn the controller
until the desired map scale is selected.
:Traffic jam on the route
;Slow-moving traffic on the route
=Road blocked
?Traffic jam
ATraffic warning
BDashed red and white line delimiting the
traffic warning
CRoad block (crosses along the affected
road)
DSlow-moving traffic (orange line along the
affected route)
ETraffic jam (red line along the affected route)
Displaying real-time traffic reports
Starting a search for traffic reports
74Real-time traffic reports
Navigation
Page 84 of 174
Rotating the 3D map
You can use this function to explore the vicinity
of the destination in a 3D view. The function is
available in all map scales.
XTo switch to navigation mode:slide5the
controller.
XTo select Navi: turn and press the controller.
The map displays the current vehicle position
or the navigation menu appears.
XIf the navigation menu appears, press the
controller.
The map shows the vehicle's current position.
XTo show the menu: slide6the controller.
XTo select Position: turn and press the con-
troller.
XSelect 3D Map Rotation.
XTurn the controller to change to the 3D map
perspective.
Additional functions:
RMoving the map (Ypage 49)
Map display
Displaying the navigation map
The multimedia system displays the navigation
map and globe satellite images. This allows for a realistic map display free from distortion in all
map scales.
Other functions:
RMoving the map (Ypage 49)
RChanging the map scale (Ypage 79)
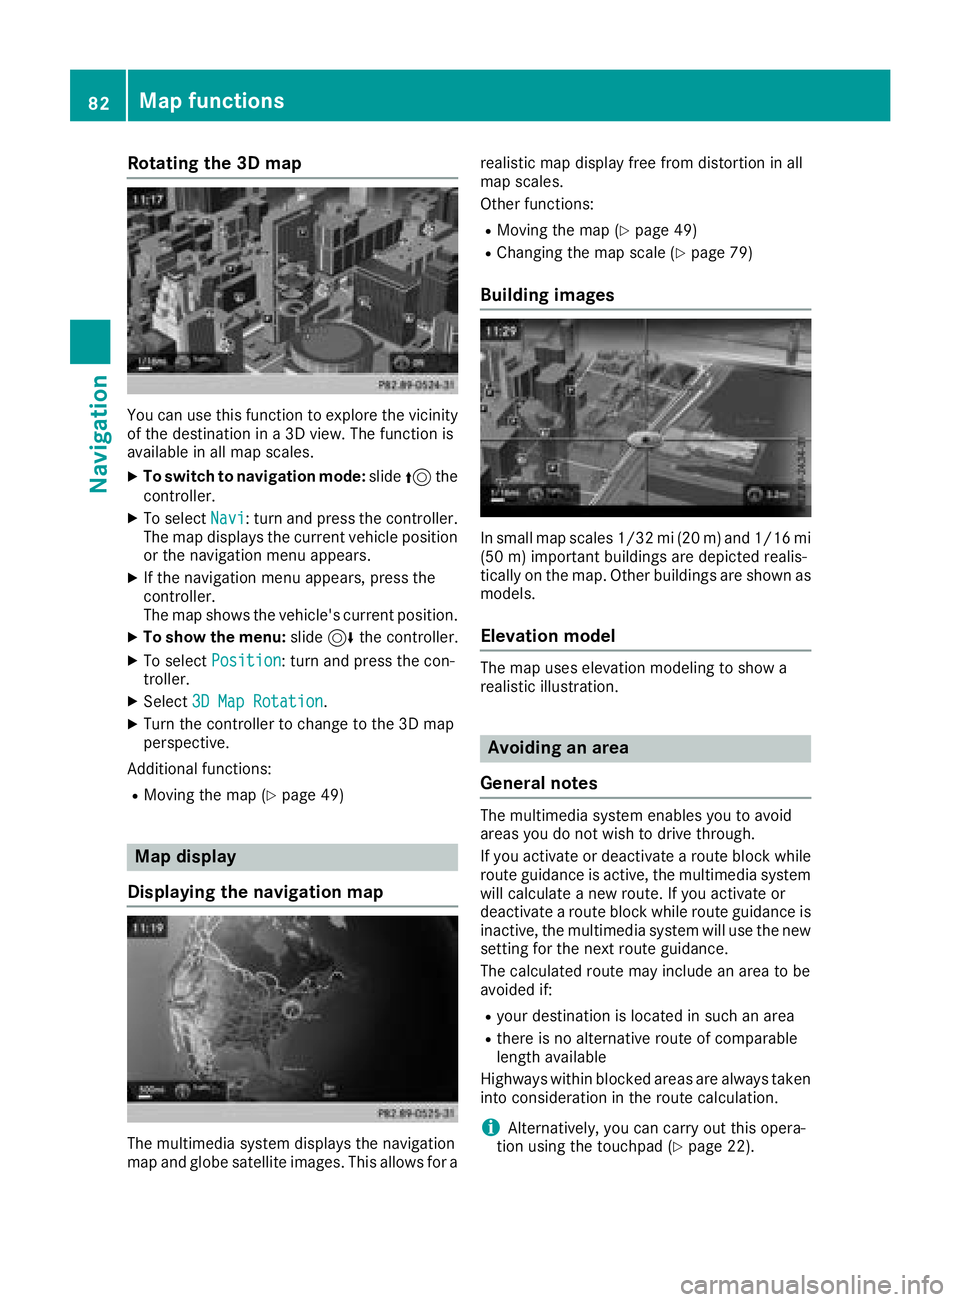
Building images
In small map scales 1/32 mi (20
m) and1/16 mi
(5 0m) importan t buildings are depicted realis-
tically on the map. Other buildings are shown as
models.
Elevation model
The map uses elevation modeling to show a
realistic illustration.
Avoiding an area
General notes
The multimedia system enables you to avoid
areas you do not wish to drive through.
If you activate or deactivate a route block while
route guidance is active, the multimedia system
will calculate a new route. If you activate or
deactivate a route block while route guidance is
inactive, the multimedia system will use the new
setting for the next route guidance.
The calculated route may include an area to be
avoided if:
Ryour destination is located in such an area
Rthere is no alternative route of comparable
length available
Highways within blocked areas are always taken
into consideration in the route calculation.
iAlternatively, you can carry out this opera-
tion using the touchpad (Ypage 22).
82Map functions
Navigation
Page 85 of 174
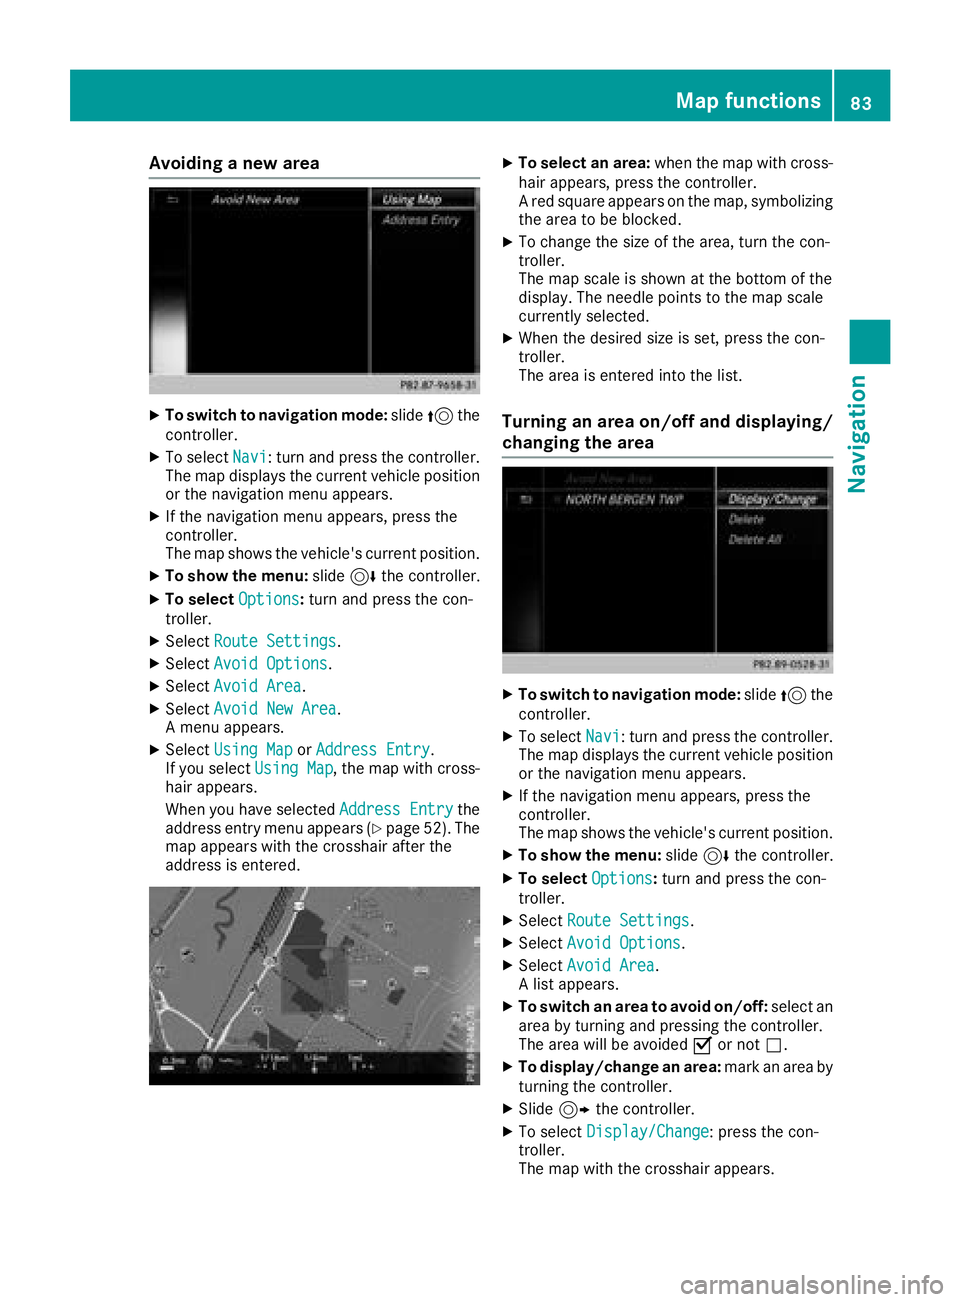
Avoiding a new area
XTo switch to navigation mode:slide5 the
controller .
XTo selectNavi:tur nand press th econtroller .
The map displays th ecurren tvehicl eposition
or th enavigation men uappears.
XIf th enavigation men uappears, press th e
controller .
The map shows th evehicle's curren tposition .
XTo showthemenu: slide6 thecontroller .
XTo select Options:tur nand press th econ-
troller .
XSelectRoute Settings.
XSelec tAvoid Option s.
XSelectAvoid Are a.
XSelectAvoid New Are a.
A men uappears.
XSelec tUsing Mapor Addres sEntry.
If you select Using Map,th emap wit hcross -
hair appears.
When you hav eselected AddressEntry
the
address entr ymen uappear s (Ypage 52) .The
map appear swit hth ecrosshair after th e
address is entered .
XTo select an area: when themap wit hcross -
hair appears, press th econtroller .
A red squar eappear son th emap, symbolizing
th earea to be blocked.
XTo chang eth esiz eof th earea, tur nth econ-
troller .
The map scale is shown at th ebotto mof th e
display. The needle points to th emap scale
currentl yselected.
XWhen th edesired siz eis set ,press th econ-
troller .
The area is entered int oth elist .
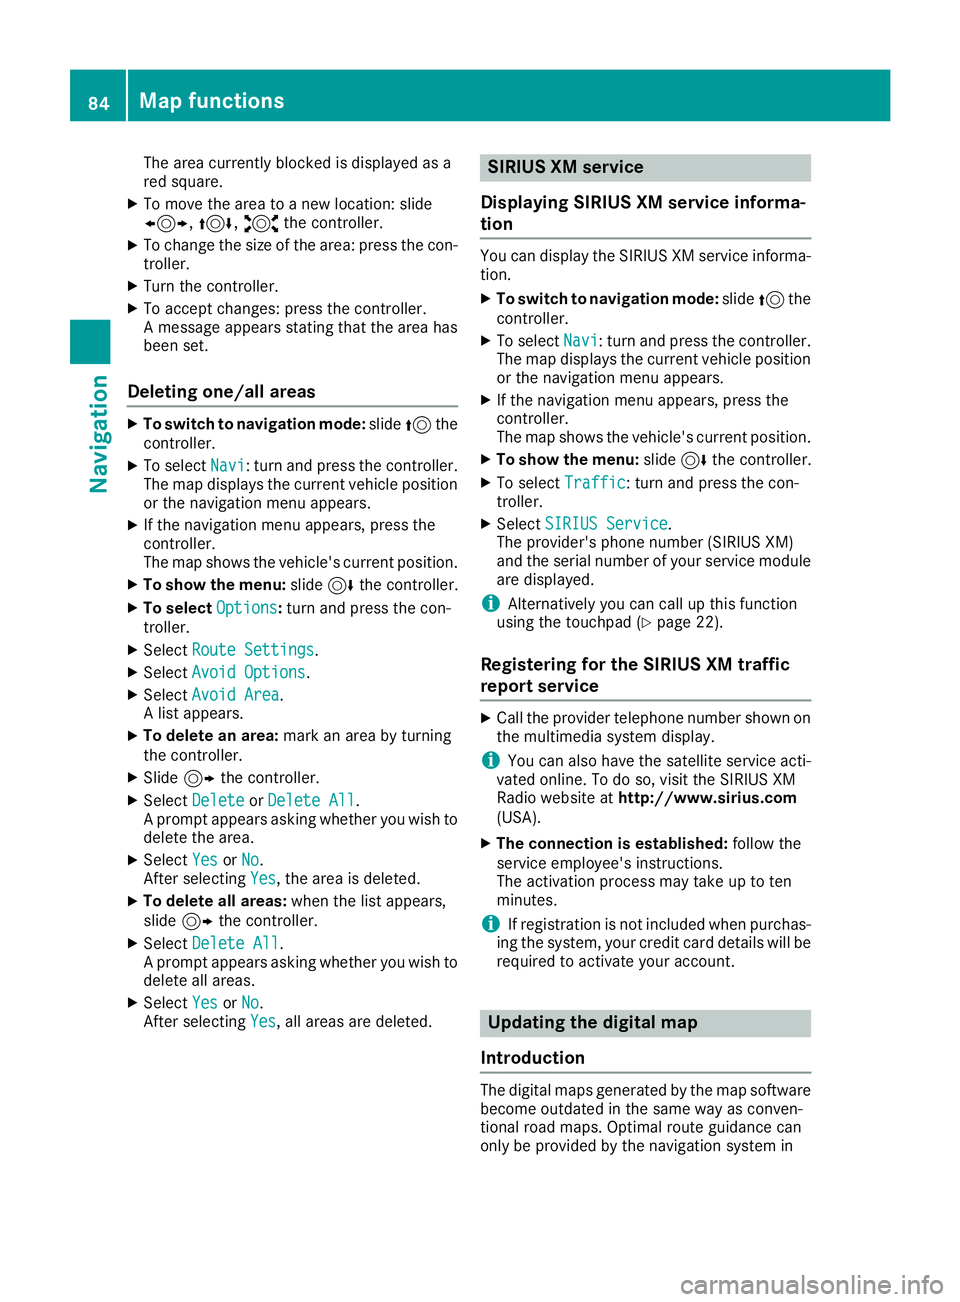
Turning an area on/off and displaying/
changing the area
XTo switch to navigation mode: slide5 the
controller .
XTo selectNavi:tur nand press th econtroller .
The map displays th ecurren tvehicl eposition
or th enavigation men uappears.
XIf th enavigation men uappears, press th e
controller .
The map shows th evehicle's curren tposition .
XTo showthemenu: slide6 thecontroller .
XTo select Options:tur nand press th econ-
troller .
XSelectRoute Settings.
XSelec tAvoid Option s.
XSelectAvoid Are a.
A list appears.
XTo switch an area to avoid on/off: select an
area by turnin gand pressing th econtroller .
The area will be avoided Oor no tª.
XTo display/chang ean area: markan area by
turnin gth econtroller .
XSlide9thecontroller .
XTo select Display/Change:press th econ-
troller .
The map wit hth ecrosshair appears.
Map functions83
Navigation
Z
Page 86 of 174
The area currently blocked is displayed as a
red square.
XTo move the area to a new location: slide
1,4,2the controller.
XTo change the size of the area: press the con-
troller.
XTurn the controller.
XTo accept changes: press the controller.
A message appears stating that the area has
been set.
Deleting one/all areas
XTo switch to navigation mode: slide5the
controller.
XTo select Navi: turn and press the controller.
The map displays the current vehicle position
or the navigation menu appears.
XIf the navigation menu appears, press the
controller.
The map shows the vehicle's current position.
XTo show the menu: slide6the controller.
XTo select Options:turn and press the con-
troller.
XSelect Route Settings.
XSelectAvoid Options.
XSelectAvoid Area.
A list appears.
XTo delete an area: mark an area by turning
the controller.
XSlide 9the controller.
XSelect DeleteorDelete All.
A prompt appears asking whether you wish to
delete the area.
XSelect YesorNo.
After selecting Yes, the area is deleted.
XTo delete all areas: when the list appears,
slide 9 the controller.
XSelect Delete All.
A prompt appears asking whether you wish to
delete all areas.
XSelect YesorNo.
After selecting Yes, all areas are deleted.
SIRIUS XM service
Displaying SIRIUS XM service informa-
tion
You can display the SIRIUS XM service informa-
tion.
XTo switch to navigation mode: slide5the
controller.
XTo select Navi: turn and press the controller.
The map displays the current vehicle position
or the navigation menu appears.
XIf the navigation menu appears, press the
controller.
The map shows the vehicle's current position.
XTo show the menu: slide6the controller.
XTo select Traffic: turn and press the con-
troller.
XSelect SIRIUS Service.
The provider's phone number (SIRIUS XM)
and the serial number of your service module
are displayed.
iAlternatively you can call up this function
using the touchpad (Ypage 22).
Registering for the SIRIUS XM traffic
report service
XCall the provider telephone number shown on
the multimedia system display.
iYou can also have the satellite service acti-
vated online. To do so, visit the SIRIUS XM
Radio website at http://www.sirius.com
(USA).
XThe connection is established: follow the
service employee's instructions.
The activation process may take up to ten
minutes.
iIf registration is not included when purchas-
ing the system, your credit card details will be
required to activate your account.
Updating the digital map
Introduction
The digital maps generated by the map software
become outdated in the same way as conven-
tional road maps. Optimal route guidance can
only be provided by the navigation system in
84Map functions
Navigation
Page 113 of 174
XSelectSpeed Dial Preset List.
The speed dial list is displayed.
XTo select G: slide 9the controller.
XTo select Delete All Speed Dial Pre‐sets: turn and press the controller.
XTo selectYes: turn and press the controller.
All speed dials are deleted.
Messages
General notes
New messages are identified by the /sym-
bol in the display of the multimedia system and
an audible signal. Once you have read all the
messages, the symbol is no longer displayed.
The multimedia system displays the 100 newest
text messages and e-mails.
The ú symbol is displayed when the mobile
phone's message memory is full. The symbol is
no longer displayed if you delete messages on
the mobile phone.
Function restrictions
Text messages cannot be written while the vehi-
cle is in motion.
Requirements
To use the message functions, the connected
mobile phone must support the MAP Bluetooth®
profile. The prompt for the MAP Bluetooth®pro-
file may have to be confirmed on the mobile
phone.
With some mobile phones, some settings still
have to be made after connecting to the multi-
media system (see the manufacturer's operat-
ing instructions). The messages are then dis-
played the next time you connect to the multi-
media system.
An e-mail account must be set up on the mobile
phone for the e-mail function (see the manufac-
turer’s operating instructions).
To read and write e-mails in the multimedia sys- tem, the e-mail account first needs to be con-
figured (
Ypage 112). Some mobile phones with the MAP Bluetooth
®
profile:
Ronly show new text messages
Rdo not support the deleting or editing of text
messages
Rdo not support the drafts folder for text mes-
sages
Rdo not support the sending of text messages
Rdo not support the e-mail function
Rdo not send messages when in a locked sta-
tus
Not all mobile phones available on the market
are equally suitable. Further information about
settings and supported functions of Bluetooth
®-
capable mobile phones can be found on the
Internet at
http://www.mercedes-benz.com/connect .
Or call the Mercedes-Benz Customer Assistance
Center at 1-800-FOR-MERCedes
(1-800-367-6372) (
for the USA) or Customer
Relations at 1-800-387-0100 (for Canada).
Settings
Calling up the settings menu for mes-
sages
XTo show the main function bar: slide 5the
controller.
XTo select Phone: turn and press the controller.
The telephone menu is displayed.
XTo switch to the menu bar: slide 6the con-
troller.
XTo select 1: turn and press the controller.
The message menu is displayed.
XTo switch to the menu bar: slide 6the con-
troller.
XTo select Settings: turn and press the con-
troller.
The text message settings and the available e-
mail accounts of the connected mobile phone
will be displayed.
Configuring the text messages dis-
played
XCall up the settings menu for messages
(Ypage 111).
XTo highlight Text Message: turn the control-
ler.
Messages111
Telephone
Z