Page 141 of 473

handling mode or
was deactivated before the
engine was switched off.
ESP ®
is inter vening if the ESP ®
÷ warning
lamp flashes in the instrument clus ter:
R Do not deacti vate ESP ®
.
R Only depress the accelera tor pedal as far as
is necessar y.
R Adapt your driving style to suit the cur rent
ro ad and weather conditions.
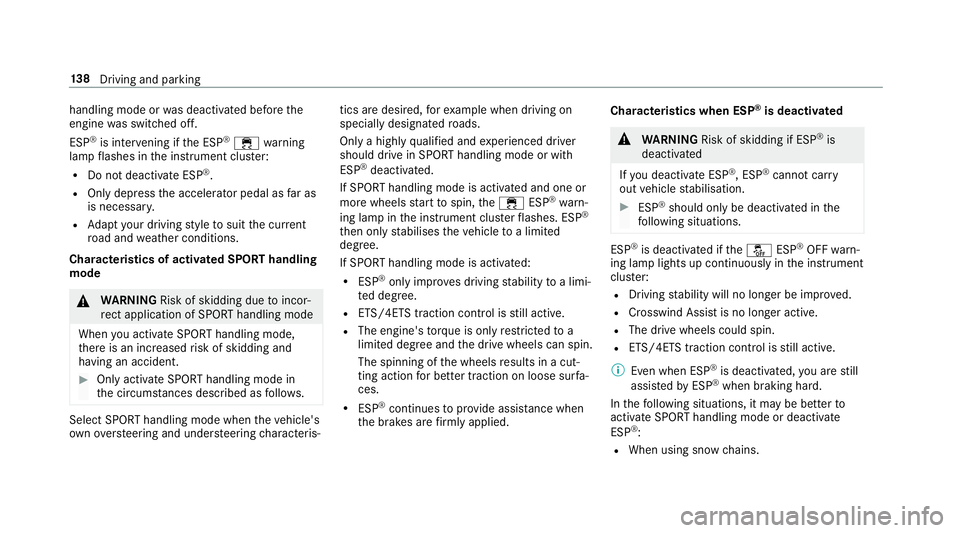
Cha racteristics of activated SPORT handling
mode &
WARNING Risk of skidding due toincor‐
re ct application of SPORT handling mode
When you activate SPORT handling mode,
th ere is an increased risk of skidding and
having an accident. #
Only activate SPORT handling mode in
the circums tances described as follo ws. Select SPORT handling mode when
theve hicle's
ow nov ersteering and under steering characteris‐ tics are desired,
forex ample when driving on
specially designated roads.
On lya high ly qualified and experienced driver
should drive in SPORT handling mode or with
ESP ®
deactivated.
If SPORT handling mode is activated and one or
more wheels start tospin, the÷ ESP®
wa rn‐
ing lamp in the instrument clus terflashes. ESP ®
th en only stabilises theve hicle toa limited
deg ree.
If SPORT handling mode is activated:
R ESP ®
only impr oves driving stability toa limi‐
te d deg ree.
R ETS/4ETS traction control is still active.
R The engine's torque is on lyrestricted to a
limited degree and the drive wheels can spin.
The spinning of the wheels results in a cut‐
ting action for better traction on loose sur fa‐
ces.
R ESP ®
continues toprov ide assis tance when
th e brakes are firm lyapplied. Cha
racteristics when ESP ®
is deactivated &
WARNING Risk of skidding if ESP ®
is
deactivated
If yo u deactivate ESP ®
, ESP ®
cannot car ry
out vehicle stabilisation. #
ESP ®
should on lybe deactivated in the
fo llowing situations. ESP
®
is deactivated if theå ESP®
OFF warn‐
ing lamp lights up continuously in the instrument
clus ter:
R Driving stability will no lon ger be impr oved.
R Crosswind Assist is no longer active.
R The drive wheels could spin.
R ETS/4ETS traction control is still active.
% Even when ESP ®
is deactivated, you are still
assis tedby ESP ®
when braking ha rd.
In thefo llowing situations, it may be better to
activate SPO RThandling mode or deactivate
ESP ®
:
R When using snow chains. 13 8
Driving and pa rking
Page 142 of 473

R
In deep sno w.
R On sand or gra vel.
% Spinning the wheels results in a cutting
action which pr ovides better grip.
% Activate ESP ®
as soon as the situations
described abo veno longer apply. ESP ®
will
ot herwise not be able tostabilise theve hicle
if th eve hicle starts toskid or a wheel starts
to spin.
If th e÷ ESP®
wa rning lamp lights up continu‐
ousl y,ESP ®
is not available due toa malfunction.
Obse rve any information which may be displa yed
in the instrument clus ter:
R Warning and indicator lamps (/ page416)
R Displ aymessa ges (/ page374)
ETS/4ETS (Electronic Traction Sy stem)
ETS/4E TStraction control is pa rtof ESP ®
.
ETS/4ETS can impr oveth eve hicle's traction by
inter vening in thefo llowing ways:
R The drive wheels are braked individually if
th ey spin. R
More drive torque is transferred tothe wheel
or wheels with traction. Ac
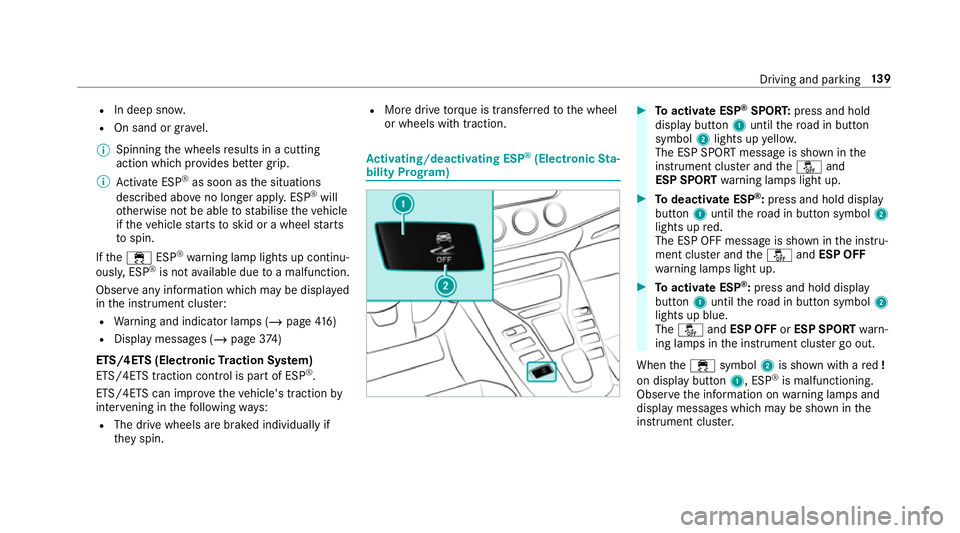
tivating/deactivating ESP ®
(Electronic Sta‐
bility Prog ram) #
Toactivate ESP ®
SPORT: press and hold
display button 1until thero ad in button
symbol 2lights up yello w.
The ESP SPORT message is shown in the
instrument clus ter and theå and
ESP SPORT warning lamps light up. #
Todeactivate ESP ®
:press and hold displ ay
button 1until thero ad in button symbol 2
lights up red.
The ESP OFF message is shown in the instru‐
ment clus ter and theå andESP OFF
wa rning lamps light up. #
Toactivate ESP ®
:press and hold display
button 1until thero ad in button symbol 2
lights up blue.
The å andESP OFF orESP SPORT warn‐
ing lamps in the instrument clus ter go out.
When the÷ symbol 2is shown with a red!
on display button 1, ESP®
is malfunctioning.
Obser vethe information on warning lamps and
display messages which may be shown in the
instrument clus ter. Driving and pa
rking 13 9
Page 178 of 473

4
Transmission oil temp erature
5 Boost pressure
If th e engine or transmission is not at operating
te mp erature, the multifunction display sho ws
te mp erature 3or4 in blue. Avoid using the
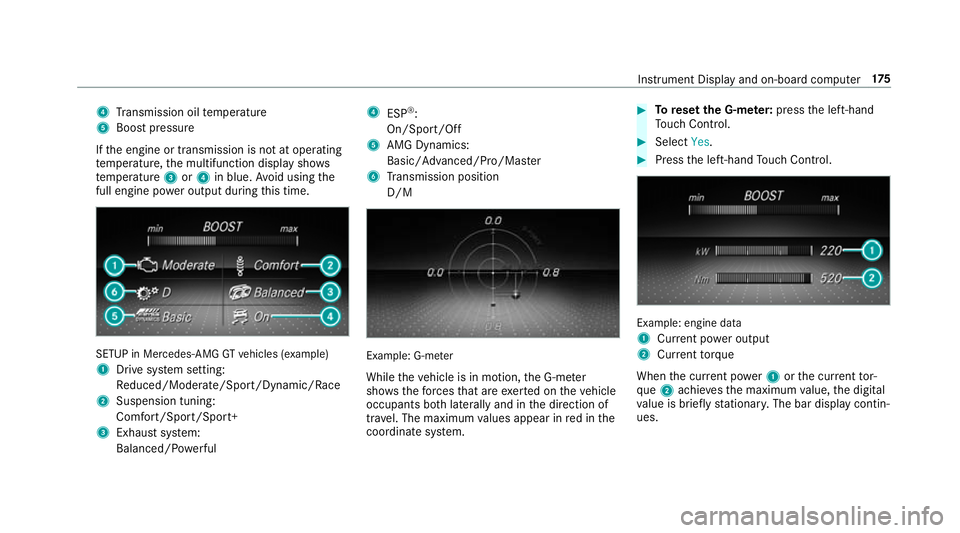
full engine po wer output during this time. SETUP in Mercedes
-AMG GTvehicles (e xample)
1 Drive sy stem setting:
Re duced/Moderate/Spo rt/Dynamic/Race
2 Suspension tuning:
Comfort/Sport/Sport+
3 Exhau stsystem:
Balanced/ Powe rful 4
ESP®
:
On/Sport/Off
5 AMG Dynamics:
Basic/ Advanced/Pro/Ma ster
6 Transmission position
D/M Example: G-m
eter
While theve hicle is in motion, the G-me ter
sho wsthefo rc es that are exerted on theve hicle
occupants bo thlaterally and in the direction of
tra vel. The maximum values appear in red in the
coordinate sy stem. #
Toreset the G-m eter: press the left-hand
To uch Control. #
Select Yes. #
Press the left-hand Touch Control. Example: engine data
1
Current po wer output
2 Curr enttorque
When the cur rent po wer1 orthe cur rent tor‐
qu e2 achie vesth e maximum value, the digital
va lue is brief lystationar y.The bar display contin‐
ues. Instrument Display and on-board computer
175
Page 364 of 473

#
Unscr ew the cent ring pin. #
Tighten the last wheel bolt until it is finger-
tight. #
Ifth e collapsible emer gency spa rewheel has
been fitted, infla tethe collapsible emer gency
spa rewheel (/ page 363). #
Lowe rth eve hicle (/ page 361). Lo
weri ngtheve hicle af ter a wheel change Re
quirements:
R The new wheel has been fitted
(/ page 360).
* NO
TEDama getothe emer gency spa re
wheel when lo wering theve hicle Lo
we ring theve hicle without pr eviously
inflating the emer gency collapsible spa re
wheel can damage its rim. #
Inflate the emer gency collapsible spa re
wheel using the tyre inflation compres‐
sor before lo wering theve hicle. #
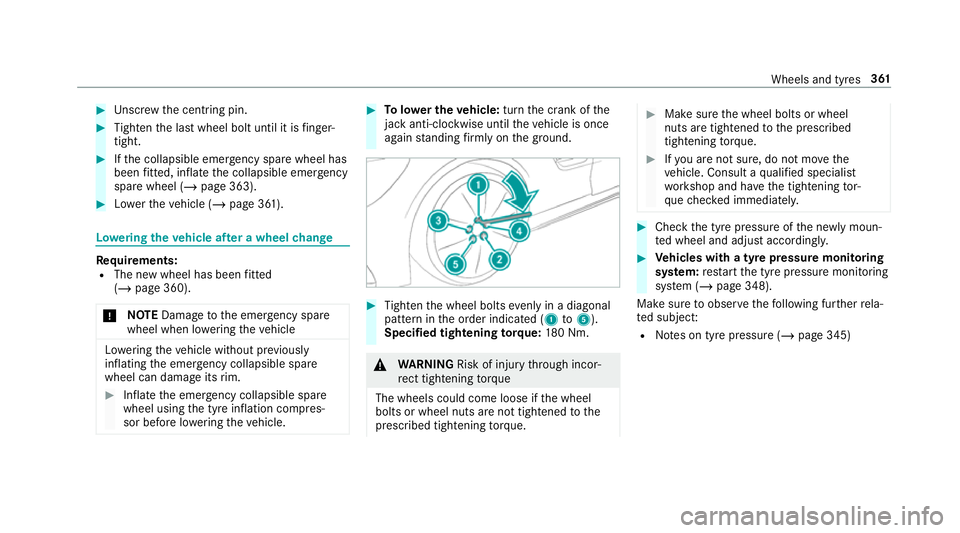
Tolowe r the vehicle: turnthe crank of the
jack anti-clo ckwise until theve hicle is once
again standing firm lyon the ground. #
Tighten the wheel bolts evenly in a diagonal
pattern in the order indicated (1 to5 ).
Specified tightening torq ue: 180 Nm. &
WARNING Risk of inju rythro ugh incor‐
re ct tigh tening torque
The wheels could come loose if the wheel
bolts or wheel nuts are not tightened tothe
prescribed tightening torque. #
Makesure the wheel bolts or wheel
nuts are tightened tothe prescribed
tightening torque. #
Ifyo u are not sure, do not mo vethe
ve hicle. Consult a qualified specialist
wo rkshop and ha vethe tightening tor‐
qu ech ecked immediately. #
Check the tyre pressure of the newly moun‐
te d wheel and adjust according ly. #
Vehicles with a tyre pressure monitoring
sy stem: restart the tyre pressure monitoring
sy stem (/ page 348).
Make sure toobser vethefo llowing fur ther rela‐
te d subjec t:
R Notes on tyre pressure (/ page 345) Wheels and tyres
361