Page 269 of 473

Data is transmitted du
ring the connection tothe
Mercedes-Benz Cus tomer Centre (/ page 267).
Information on the breakd own assistance
call
A breakdown assis tance call tothe Mercedes-
Benz Cus tomer Centre has been initia ted via the
ove rhead control panel (/ page 265) orthe
multimedia sy stem (/ page 264).
Scope of the breakdown assis tance
R Aqu alified Mercedes-Benz tech nician pro‐
vides breakdown assi stance on site and/or
th eve hicle will be towe dto the nearest
Mercedes-Benz service cent re.
Yo u may be charge dfo rth ese services.
Data is transfer red during the connection tothe
Mercedes-Benz Cus tomer Centre (/ page 267).
Information on Mercedes me connect acci‐
dent management
The Mercedes me connect accident manage‐
ment is an extension of the Mercedes-Benz
emer gency call sy stem (/ page 267). An emer
gency call is made tothe Mercedes-
Benz emer gency call centre af ter an accident:
R Avo ice connection is made toa con tact per‐
son at the Mercedes-Benz emer gency call
centre.
R If necessa ry,th e conta ct person at the
Mercedes-Benz emer gency call centre for‐
wa rdsth e call toMercedes me connect acci‐
dent management.
Fo rw arding the call is not possible in all
count ries.
R If necessar y,theve hicle will be towe dto a
Mercedes-Benz service centre.
Ar ranging a service appointment via
Mercedes me connect
If yo u ha veactivated the maintenance manage‐
ment service, releva nt vehicle data is transfer red
automatically tothe Mercedes-Benz Cus tomer
Centre. You will then recei veindividual recom‐
mendations rega rding the maintenance of your
ve hicle.
Re gardless of whe ther you ha veconsented to
th e maintenance management service, the multi‐
media sy stem reminds you af ter a cer tain amount of time
that a service is due. A prom pt
appears asking if youwo uld like tomake an
appointment. #
Toarra nge a service appointment: select
Call .
Af teryo ur agreement theve hicle data is sent
and a Mercedes-Benz Cus tomer Centre
emplo yee deals with your appointment. The
information is then sent toyour desired
service outlet.
This service outlet will then conta ctyou
within 24hours.
% Ifyo u select Call later afte rth e service mes‐
sage appears, the message is hidden and
re appears af ter a cer tain period of time.
Giving consent todata transfer for Me rcedes
me connect
Re quirements:
R There is an active breakdown assis tance or
Info call on the multimedia sy stem
(/ page 264) or theove rhead control panel
(/ page 265). 266
Multimedia sy stem
Page 284 of 473
Multimedia sy
stem:
4 Media 5
à Media sources
5 Mem. card
Inserting
The multimedia connection unit is located in the
stow age compartment under the armrest. #
Insert the SD memory card into the SD card
slot until it engages. The side with the con‐
ta cts must face down wards.
Pla yable music files are pla yed bac k. Re
moving #
Press the SD card. #
Remo vethe SD card. Multimedia sy
stem 281
Page 286 of 473

Connecting USB devices
* NO
TEDama gecaused byhigh temp era‐
tures High
temp eratures can damage USB devices. #
Remo vethe USB device af ter use and
ta ke it out of theve hicle. The multimedia connection unit is
found in the
stow age compartment under the armrest and
has two USB ports.
Depending on theve hicle's equipment, addi‐
tional USB ports can be found in thestow age
compartment of the cent reconsole. #
Connect the USB device tothe USB port.
Pla yable music files are pla yed back only if
th e cor responding media display is activated.
% Use the USB port identified byç touse
Apple CarPlay™ and Android Auto. Selecting a track in
the media playba ck
Multimedia sy stem:
4 Media
Selecting a track byskipping toa track #
Toskip backwards or forw ards toa
track: navigate up or down.
Selecting a track using the cur rent track list #
Select è. #
Select Current track list. #
Select a tra ck.
Selecting playback options
Multimedia sy stem:
4 Media 5
Z Options
Playing back similar trac ks #
Select Play similar tracks.
A track li stwith similar trac ksis created and
pla yed bac k. Playback mode #
Select Random playback of the current track
list.
The cur rent track li stis pla yed in random
orde r. #
Select Random playback of the current
medium.
All trac kson the active data storage medium
are pla yed in random orde r. #
Select Normal track sequence .
The cur rent track li stis pla yed in the order it
appears on the data storage medium.
Controlling media playback
Multimedia sy stem:
4 Media 5
Y Playback control
A bar with playback controls is shown. #
Topause playback: select and confirm
Y with th e cent ral control element.
The Ë symbol is displa yed. #
Toresume playback: select and confirm
Y again with the cent ral control element.
The Ì symbol is displa yed. Multimedia sy
stem 283
Page 289 of 473

Ac
tivating/deactivating full-screen mode
Multimedia sy stem:
4 Media 5
à Media sources #
Select a data storage medium.
Pla yable video files are pla yed bac k. #
Toactivate full-screen mode: select#
Full screen. #
Todeactivate full-sc reen mode: pressthe
to uchpad.
Changing video settings
Multimedia sy stem:
4 Media 5
Z Options
5 Picture format
The following picture form ats are available:
R Automatic
R 16:9
R 4:3
R Zoom #
Select a picture form at. Ad
justing the brightness manually
If th eAutomatic pictureform at is swit ched off,
yo u can adjust the brightness yourself. #
Select Brightness. #
Adjust the brightness. Media sear
ch St
arting the media sear ch
Multimedia sy stem:
4 Media 5
ª Search
Depending on the connected media sources and
fi les, thefo llowing categories are lis ted:
R Current track list
R Keyword search
R Playlists
R Artists
R Albums
R Tracks
R Folders
R Music genres
R Year R
Composers
R Videos
R Podcasts (Apple®
devices)
R Audiobooks (Apple®
devices) #
Select a categor y.
% The categories are available as soon as the
entire media conte nt has beenread in and
anal ysed. Media Inter
face Information about
the Media Inter face
Media In terface is a universal inter face forthe
connection of mobile audio equipment. The mul‐
timedia sy stem has two USB ports. The USB
ports are located in thestow age compartment
under the armrest.
Suppor ted devices
The Media Inter face allo wsyouto connect the
fo llowing data storage media:
R iPod ®
R iPhone ® 286
Multimedia sy stem
Page 319 of 473
R
obser vethe information on the cor rect dis‐
ta nce in the equipment manufacturer's oper‐
ating instructions.
R do not point the nozzle of the high-pressure
cleaner directly at sensitive parts such as
tyres, slits, electrical components, bat teries,
light bulbs and ventilation sl ots. Wa
shing theve hicle byhand Obser
vethe legal requ irements, e.g. in a number
of countries, washing byhand is only permitted
in specially designated wash ba ys. #
Use a mild cleaning agent, e.g. car shampoo. #
Washtheve hicle with luk ewarmwate r using
a soft car sponge. When doing so, do not
ex pose theve hicle todirect sunlight. #
Carefully hose theve hicle off with water and
dry using a chamois. Take care not topoint
th ewate r jet directly towa rdsth e air inlet
grille below the bonn et. 316
Maintenance and care
Page 327 of 473
Emer
gency Re
moving the saf etyve st The saf
etyve sts are located in front door stow‐
age compartments 1.#
Toremo ve:pull out the saf etyve st bag con‐
ta ining the saf etyve st. #
Open the saf etyve st bag and pull out the
saf etyve st. 1
Maximum number of washes
2 Maximum wash temp erature
3 Do not bleach
4 Do not iron
5 Do not tumble dry
6 Do not dry clean
7 Class 2 saf etyve st
The requ irements defined bythe legal standard
are on ly fulfilled if the saf etyve st isthe cor rect
size and is fully closed.
The saf etyve st must be replaced in thefo llowing
situations:
R there flective strips are damaged or dirty R
the maximum permissible number of washes
is exc eeded
R thefluorescence has faded Wa
rning triangle Setting up
thewa rning triangle #
Fold side reflectors 1upwards toform a tri‐
angle and attach at theto p using upper
press-stud 2. #
Fold legs 3down and out tothe side. 324
Breakdown assis tance
Page 328 of 473
Fi
rs t-aid kit (soft sided) Fir
st-aid kit (so ftsided) 1is in the load com‐
partment in the left-hand stowage net. Re
moving the fire extinguisher &
WARNING Risk of accident due toan
incor rectly secu redfire extinguisher in
th e driver's foot we ll
A fire extinguisher in the driver's foot we ll
may impede pedal tra vel or block a
depressed pedal.
This jeopardises the operating and road
saf ety of theve hicle.
Moreo ver,th efire extinguisher can be flung
around in the driver's foot we ll and injure the
driver or other vehicle occupants. #
Alw aysst ore and secure thefire extin‐
guisher in the brac ket du ring the jour‐
ne y. #
Do not remo vethefire extinguisher
while driving. #
Left-hand drive vehicle: pulltab1
upwards. #
Remo vefire extinguisher 2. Flat tyre
Note
s onflat tyres &
WARNING Risk of accident due toaflat
tyre
A flat tyre se verely affects the driving charac‐
te rist ics as well as thesteering and braking
of theve hicle. Breakdown assis
tance 325
Page 330 of 473

Ve
hicles with tyre pressure monitoring sys‐
te m: MOExtended tyres may only be used in
conjunction wi than activated tyre pressure mon‐
itoring sy stem.
If a pressure loss warning message appears in
th e multifunction displa y,proceed as follo ws:
R Check the tyre for dama ge.
R If driving on, obser vethefo llowing no tes.
Driving distance possible in emer gency
mode af ter the pressure loss warning: Load condition Driving distance pos‐
sible in emergency
mode
Pa rtially laden 80 km
Fu lly laden 30 kmThe driving dis
tance possible in emergency
mode may vary depending on the driving style.
Obser vethe maximum permissible speed of
80 km/h. If a tyre has gone
flat and cannot be replaced
with an MOEx tended tyre, you can use a stand‐
ard tyre as a temp orary measure. TIREFIT kit
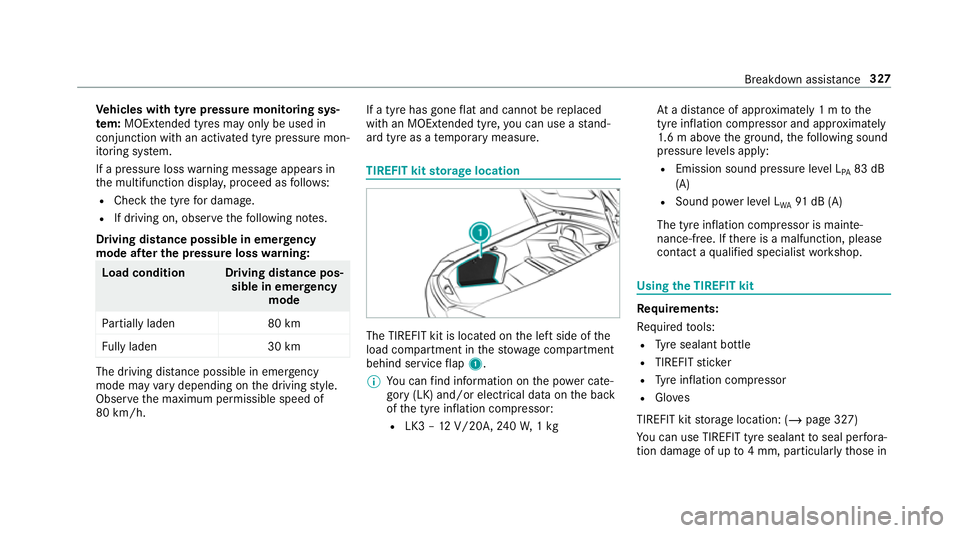
storage location The TIREFIT kit is located on
the left side of the
load compartment in thestow age compartment
behind service flap 1.
% You can find information on the po wer cate‐
gory (LK) and/or electrical data on the back
of the tyre inflation compressor:
R LK3 – 12V/20A, 240W, 1kg At
a dis tance of appr oximately 1 m tothe
tyre inflation compressor and appr oximately
1. 6 m abo vethe ground, thefo llowing sound
pressure le vels apply:
R Emission sound pressure le vel L
PA 83 dB
(A)
R Sound po wer le vel L
WA 91
dB (A)
The tyre inflation compressor is mainte‐
nance-free. If there is a malfunction, please
conta ct aqualified specialist workshop. Using
the TIREFIT kit Re
quirements:
Re quired tools:
R Tyre sealant bottle
R TIREFIT sticker
R Tyre inflation compressor
R Gloves
TIREFIT kit storage location: (/ page 327)
Yo u can use TIREFIT tyre sealant toseal per fora‐
tion dama geof up to4 mm, particularly those in Breakdown assis
tance 327