2018 MERCEDES-BENZ AMG GT R-ROADSTER lights
[x] Cancel search: lightsPage 66 of 473
#
Todeactivate: pressthe& button on the
ke y twice in quick succession.
The battery check lamp of theke yflashes
twice brief lyand lights up once. #
Toactivate: press any button on thekey.
% When theve hicle is star ted with theke y in
th estow age compartment of the cent recon‐
sole, theke y functions are automatical ly
activated (/ page113). Re
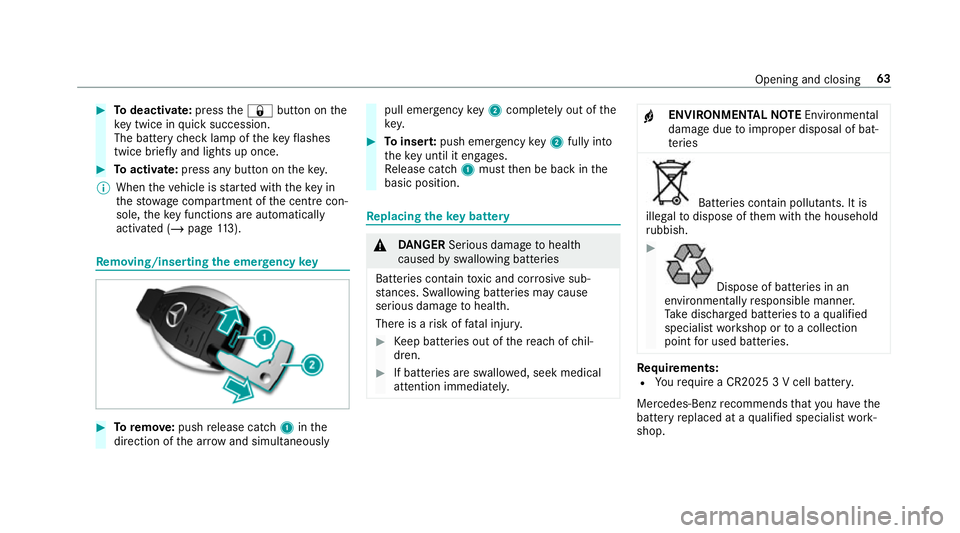
moving/inserting the eme rgency key #
Toremo ve:push release cat ch1 inthe
direction of the ar row and simul taneously pull eme
rgency key2 comp lete ly out of the
key. #
Toinser t:push emer gency key2 fully in to
th eke y until it en gage s.
Re lease cat ch1 must then be back in the
basic position. Re
placing the key battery &
DANG ER Serious damage tohealth
caused byswallowing batteries
Batteries contain toxic and cor rosive sub‐
st ances. Swallowing bat teries may cause
serious damage tohealth.
There is a risk of fata l injur y. #
Keep batteries out of there ach of chil‐
dren. #
If batteries are swallo wed, seek medical
attention immediately. +
ENVIRONMEN
TALNO TEEnvironmental
dama gedue toimproper disposal of bat‐
te ries Batteries conta
in pollutants. It is
illegal todispose of them with the household
ru bbish. #
Dispose of batteries in an
environmen tally responsible manner.
Ta ke dischar ged batteries toaqu alified
specialist workshop or toa collection
point for used batteries. Re
quirements:
R Yourequ ire a CR2025 3 V cell batter y.
Mercedes-Benz recommends that you ha vethe
battery replaced at a qualified specialist work‐
shop. Opening and closing
63
Page 101 of 473
Exterior lighting
Note
s onchanging the lights when driving
abroad It is not necessary
tochange the headlamps.
The legal requirements are also met in countries
in which traf fic drives on theot her side of the
ro ad. Information about lighting sy
stems and your
re sponsibility The
various lighting sy stems of theve hicle are
only aids. The driver of theve hicle is responsible
fo r cor rect vehicle illumination in accordance
with the pr evailing light and visibility conditions,
legal requirements and traf fic situation. Light switch
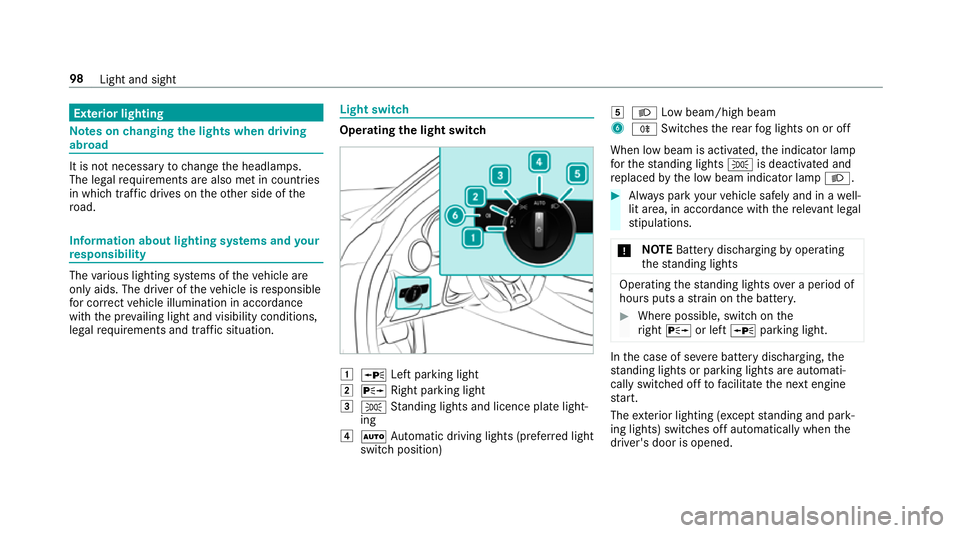
Ope
rating the light switch 1
W Left pa rking light
2 X Right parking light
3 T Standing lights and licence plate light‐
ing
4 Ã Automatic driving lights (prefer red light
switch position) 5
L Low beam/high beam
6 R Switches there ar fog lights on or off
When low beam is activated, the indicator lamp
fo rth est anding lights Tis deactivated and
re placed bythe low beam indicator lamp L. #
Alw ays park your vehicle safely and in a well-
lit area, in accordance with there leva nt le gal
st ipulations.
* NO
TEBattery discharging byoperating
th est anding lights Operating
thest anding lights over a period of
hours puts a stra in on the batter y. #
Where possible, switch on the
ri ght X or left Wparking light. In
the case of se vere battery discharging, the
st anding lights or parking lights are automati‐
cally swit ched off tofacilitate the next engine
st art.
The exterior lighting (e xcept standing and park‐
ing lights) swit ches off automatically when the
driver's door is opened. 98
Light and sight
Page 102 of 473
R
Obser vethe no tes on sur round lighting
(/ page 102).
Au tomatic driving lights function
The standing lights, low beam and daytime run‐
ning lights are switched on au tomatical ly
depending on the ignition status and the light
conditions. &
WARNING Risk of accident when the
dipped beam is switched off in poor visi‐
bility
When the light switch is set toà ,the
dipped beam may not be switched on auto‐
matically if there is fog, snow or other causes
of poor visibility such as spr ay.#
In such cases, turn the light switch to
L . The automatic driving lights are only an aid.
Yo u
are responsible forve hicle lighting. Switching
there ar fog lights on or off
Re quirements:
R The light switch is in theL orà posi‐
tion. #
Press the R button.
Please obser vethe count ry-specific la wsonthe
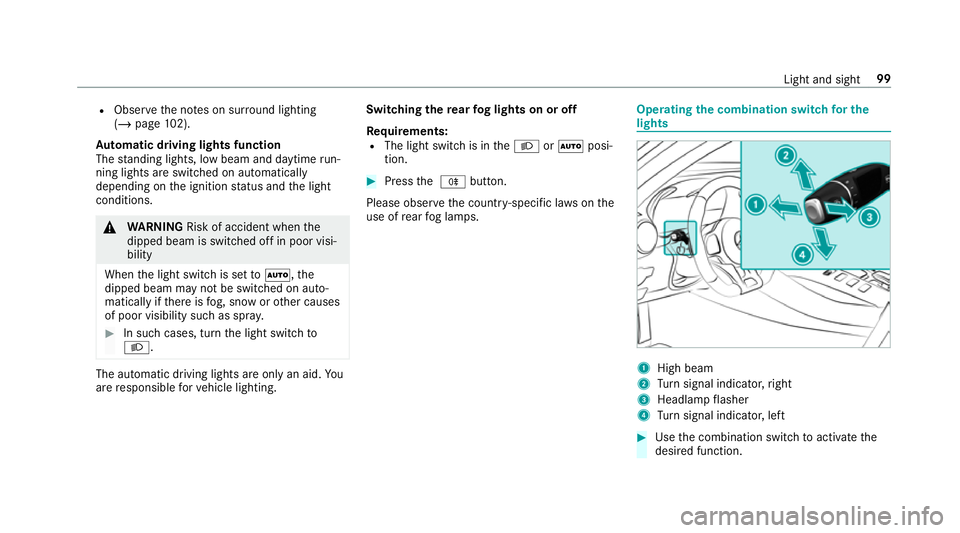
use of rear fog lamps. Operating
the combination switch for the
lights 1
High beam
2 Turn signal indicator, right
3 Headlamp flasher
4 Turn signal indicator, left #
Use the combination switch toactivate the
desired function. Light and sight
99
Page 103 of 473
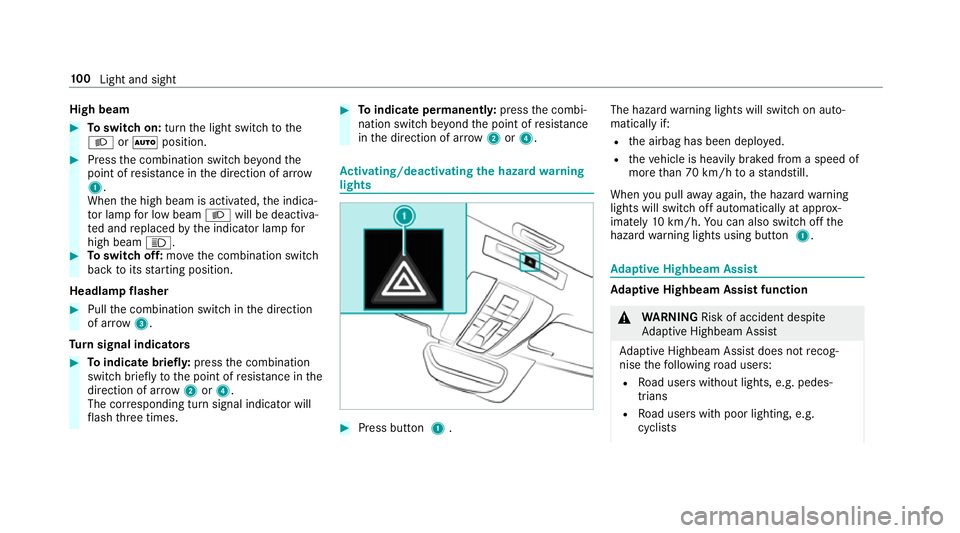
High beam
#
Toswitch on: turnthe light switch tothe
L orà position. #
Press the combination switch be yond the
point of resis tance in the direction of ar row
1 .
When the high beam is activated, the indica‐
to r lamp for low beam Lwill be deactiva‐
te d and replaced bythe indicator lamp for
high beam K. #
Toswitch off: movethe combination switch
back toits starting position.
Headla mpflasher #
Pull the combination switch in the direction
of ar row3.
Tu rn signal indicators #
Toindicate briefl y:press the combination
switch briefly tothe point of resis tance in the
direction of ar row2or4.
The cor responding turn signal indicator will
fl ash thre e times. #
Toindicate permanentl y:press the combi‐
nation switch be yond the point of resis tance
in the direction of ar row2or4. Ac
tivating/deactivating the hazard warning
lights #
Press button 1. The hazard
warning lights will switch on auto‐
matically if:
R the airbag has been deplo yed.
R theve hicle is heavily braked from a speed of
more than 70 km/h toast andstill.
When you pull away again, the hazard warning
lights will switch off automatically at appr ox‐
imately 10km/h. You can also swit choff the
hazard warning lights using button 1. Ad
aptive Highbeam Assist Ad
aptive Highbeam Assist function &
WARNING Risk of accident despi te
Ad aptive Highbeam Assist
Ad aptive Highbeam Assist does not recog‐
nise thefo llowing road users:
R Road users without lights, e.g. pedes‐
trians
R Road users with poor lighting, e.g.
cyclists 100
Light and sight
Page 105 of 473
#
Switch on the main beam using the combina‐
tion switch.
When the main beam is switched on auto‐
matically in the dar k,the _ indicator
lamp on the multifunction display comes on. #
Toswitch off: switch offthe main beam
using the combination switch. Setting
theex terior lighting switch-off delay
time Multimedia sy
stem:
4 Vehicle 5
÷ Light settings
5 Exterior light shut-off #
Set the switch-off delay time. Setting
the sur round lighting Multimedia sy
stem:
4 Vehicle 5
÷ Light settings
5 Locator lighting #
Activate Oor deacti vate ª the function. If
th e sur round lighting is swit ched on, theex te‐
ri or lighting remains lit for 40 seconds af terthe
ve hicle is unloc ked. When youstart theve hicle,
th e sur round lighting is deactivated and the
automatic driving lights are activated. Interior lighting
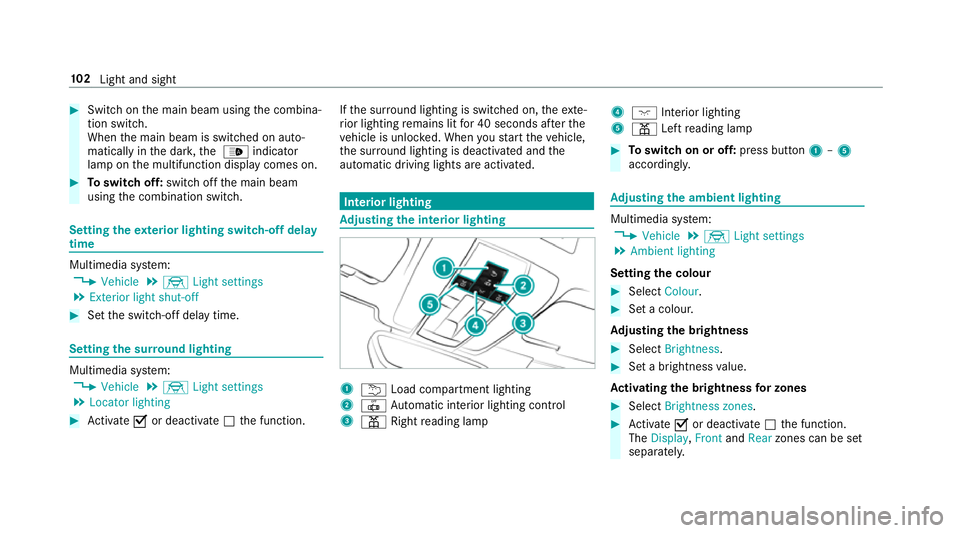
Ad
justing the in terior lighting 1
u Load compartment lighting
2 | Automatic interior lighting control
3 p Rightreading lamp 4
c Inte rior lighting
5 p Leftreading lamp #
Toswitch on or off: press button1–5
accordingly. Ad
justing the ambient lighting Multimedia sy
stem:
4 Vehicle 5
÷ Light settings
5 Ambient lighting
Setting the colour #
Select Colour. #
Set a colour.
Ad justing the brightness #
Select Brightness . #
Set a brightness value.
Ac tivating the brightness for zones #
Select Brightness zones . #
Activate Oor deacti vate ª the function.
The Display ,Front andRear zones can be set
separately. 102
Light and sight
Page 121 of 473
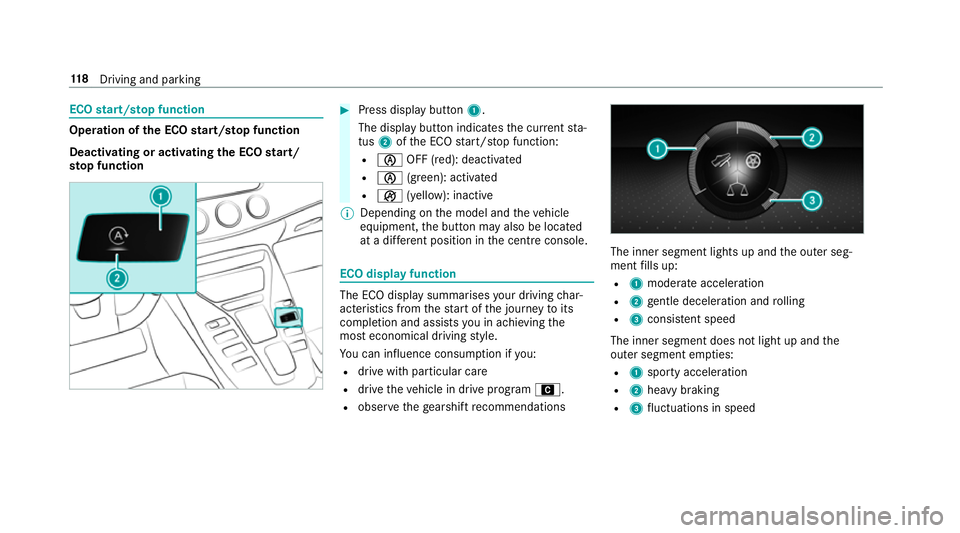
ECO
start/s top function Ope
ration of the ECO start/s top function
Deacti vating or acti vating the ECO start/
sto p function #
Press displ aybutton 1.
The display button indicates the cur rent sta‐
tus 2ofthe ECO start/ stop function:
R è OFF (red): deactivated
R è (green): activated
R ç (yellow): inactive
% Depending on the model and theve hicle
equipment, the button may also be located
at a dif fere nt position in the cent reconsole. ECO displ
ayfunction The ECO display summa
rises your driving char‐
acteristics from thest art of the journey toits
completion and assists you in achieving the
most economical driving style.
Yo u can influence consum ption if you:
R drive with particular care
R drive theve hicle in drive program A.
R obser vethege arshift recommendations The inner segment lights up and
the outer seg‐
ment fills up:
R 1 moderate acceleration
R 2 gentle deceleration and rolling
R 3 consis tent speed
The inner segment does not light up and the
outer segment em pties:
R 1 sporty acceleration
R 2 heavy braking
R 3 fluctuations in speed 11 8
Driving and pa rking
Page 122 of 473
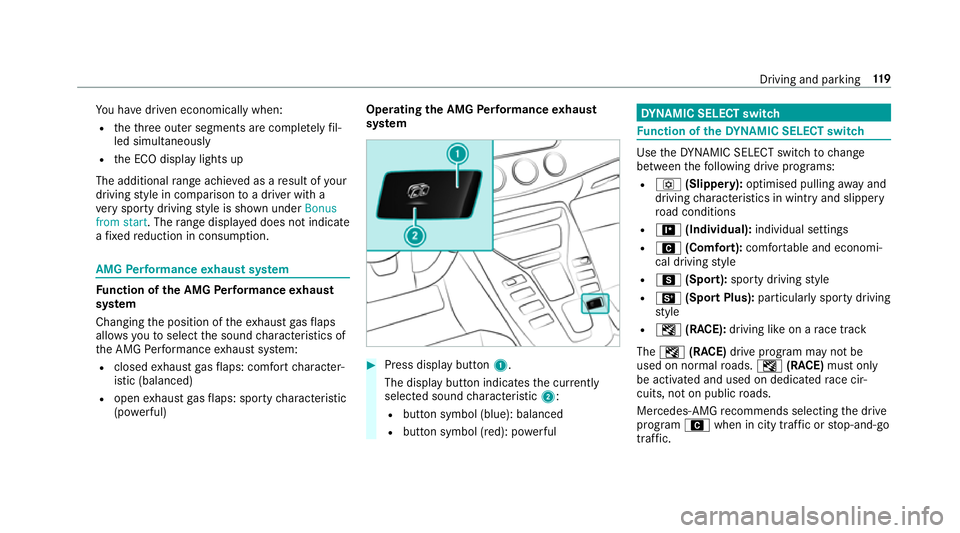
Yo
u ha vedriven economically when:
R theth re e outer segments are comple tely fil‐
led simultaneously
R the ECO display lights up
The additional range achi eved as a result of your
driving style in comparison toa driver with a
ve ry sporty driving style is shown under Bonus
from start. The range displ ayed does not indicate
a fixe dre duction in consum ption. AMG
Performance exhaust sy stem Fu
nction of the AMG Performance exhaust
sy stem
Changing the position of theex haust gasflaps
allo wsyouto select the sound characteristics of
th e AMG Performance exhaust sy stem:
R closed exhaust gasflaps: com fort ch aracter‐
istic (balanced)
R open exhaust gasflaps: sporty characteristic
(po werful) Ope
rating the AMG Performance exhaust
sy stem #
Press display button 1.
The display button indicates the cur rently
selected sound characteristic 2:
R button symbol (blue): balanced
R button symbol (red): po werful DY
NA MIC SELECT switch Fu
nction of theDY NA MIC SELECT switch Use
theDY NA MIC SELECT switch tochange
between thefo llowing drive programs:
R o (Slippery): optimised pulling away and
driving characteristics in wint ryand slippe ry
ro ad conditions
R = (Individual): individual settings
R A (Comfort): comfortable and economi‐
cal driving style
R C (Sport): sporty driving style
R B (Sport Plus): particularly sporty driving
st yle
R I (RACE): driving like on a race track
The I (RACE) drive program may not be
used on normal roads. I (RACE) must on ly
be activated and used on dedicated race cir‐
cuits, not on public roads.
Mercedes-AMG recommends selecting the drive
prog ram A when in city traf fic or stop-and-go
traf fic. Driving and pa
rking 11 9
Page 132 of 473
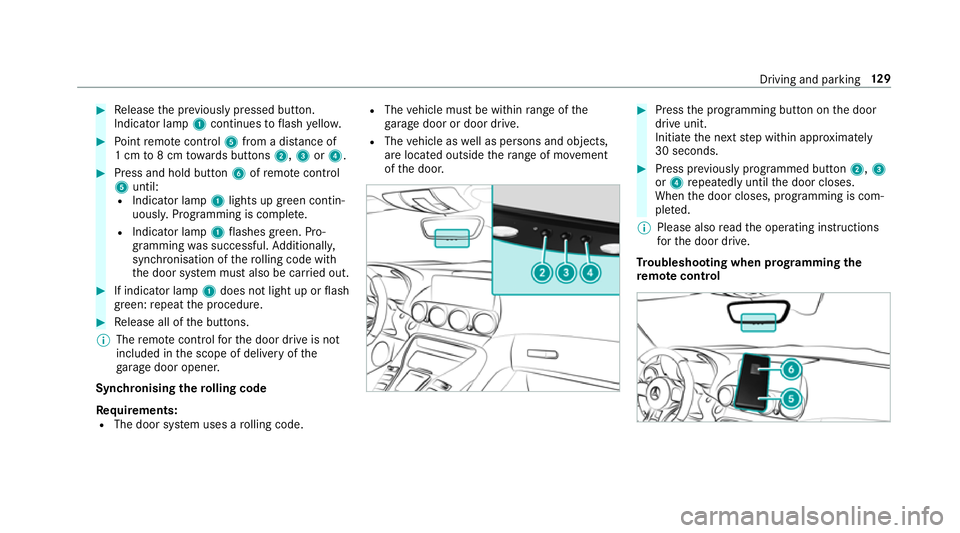
#
Release the pr eviously pressed button.
Indicator lamp 1continues toflash yello w. #
Point remo tecontrol 5from a di stance of
1 cm to8 cm towa rds buttons 2,3or4. #
Press and hold button 6ofremo tecontrol
5 until:
R Indicator la mp1lights up green contin‐
uousl y.Programming is comple te.
R Indicator lamp 1flashes green. Pro‐
gr amming was successful. Additionally,
synchronisation of thero lling code with
th e door sy stem must also be car ried out. #
If indicator lamp 1does not light up or flash
green: repeat the procedure. #
Release all of the buttons.
% The remo tecontrol forth e door drive is not
included in the scope of delivery of the
ga rage door opener.
Synchronising thero lling code
Re quirements:
R The door sy stem uses a rolling code. R
The vehicle must be within range of the
ga rage door or door drive.
R The vehicle as well as persons and objects,
are located outside thera nge of mo vement
of the door. #
Press the programming button on the door
drive unit.
Initiate the next step within appr oximately
30 seconds. #
Press pr eviously prog rammed button 2,3
or 4 repeatedly until the door closes.
When the door closes, programming is com‐
ple ted.
% Please also read the operating instructions
fo rth e door drive.
Tr oubleshooting when prog ramming the
re mo tecont rol Driving and pa
rking 12 9