2018 MERCEDES-BENZ AMG GT R-ROADSTER check engine
[x] Cancel search: check enginePage 315 of 473
#
Allow the engine tocool down and only
to uch co mponent parts described in
th efo llowing. &
WARNING Risk offire and injury from
engine oil
If engine oil comes into con tact wi thhot
component parts in the engine compart‐
ment, it may ignite. #
Make sure that no engine oil is spilled
next tothefiller opening. #
Allow the engine tocool off and thor‐
oughly clean the engine oil from compo‐
nent parts before starting theve hicle. *
NO
TEEngine dama gecaused byan
incor rect oil filter, incor rect oil or addi‐
tives #
Do not use engine oils or oil filters
which do not cor respond tothe specifi‐
cations explicitly prescribed forthe
service inter vals. #
Do not alter the engine oil or oil filter in
order toachie velonger change inter vals
th an presc ribed. #
Do not use additives. #
Follow the instructions in the service
inter val display rega rding the oil
ch ange. *
NO
TEDama gecaused bytopping up too
much engine oil To
o much engine oil can damage the engine
or the catalytic con verter. #
Have excess engine oil remo ved at a
qu alified specialist workshop. #
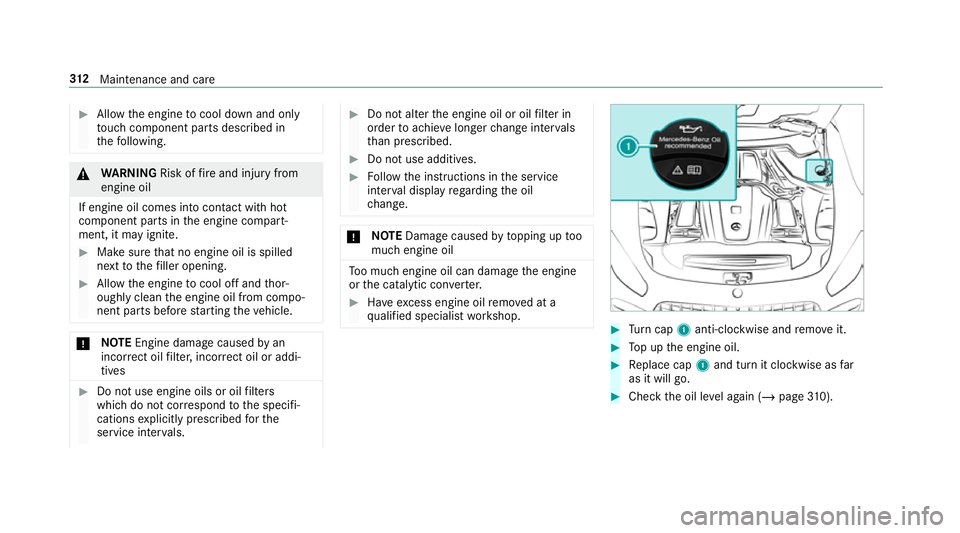
Turn cap 1anti-clockwise and remo veit. #
Top up the engine oil. #
Replace cap 1and turn it clockwise as far
as it will go. #
Check the oil le vel again (/ page310). 312
Maintenance and care
Page 316 of 473
Checking
the coolant le vel &
WARNING Risk of bu rns from hot com‐
ponent parts in the engine compartment
Cer tain components in the engine compart‐
ment can be very hot, e.g. the engine, the
ra diator and parts of theex haust sy stem. #
Allow the engine tocool down and only
to uch co mponent parts described in
th efo llowing. &
WARNING Risk of scalding from hot
coolant
The engine cooling sy stem is pressurised,
particularly when the engine is warm. If you
open the cap, you could be scalded byhot
coolant spr aying out. #
Let the engine cool down before open‐
ing the cap. #
When opening the cap, wear pr otective
gl ove s and saf etygl asses. #
Open the cap slowly torelease pres‐
sure. #
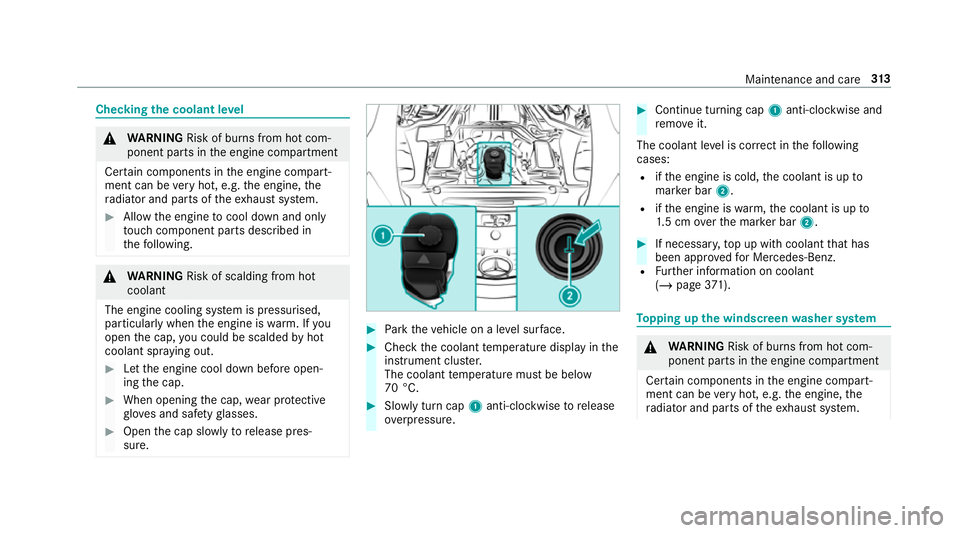
Park theve hicle on a le vel sur face. #
Check the coolant temp erature display in the
instrument clus ter.
The coolant temp erature must be below
70 °C. #
Slowly turn cap 1anti-clockwise torelease
ove rpressure. #
Continue turning cap 1anti-clockwise and
re mo veit.
The coolant le vel is cor rect in thefo llowing
cases:
R ifth e engine is cold, the coolant is up to
mar ker bar 2.
R ifth e engine is warm,th e coolant is up to
1. 5 cm overth e mar ker bar 2. #
If necessar y,top up with coolant that has
been appr ovedfo r Mercedes-Benz.
R Further information on coolant
(/ page 371). To
pping up the windsc reen washer sy stem &
WARNING Risk of bu rns from hot com‐
ponent parts in the engine compartment
Cer tain components in the engine compart‐
ment can be very hot, e.g. the engine, the
ra diator and parts of theex haust sy stem. Maintenance and care
313
Page 337 of 473
*
NO
TEDamaging the battery thro ugh
ove rvoltage When using a battery
charge r without a maxi‐
mum charging voltage, the battery or the
ve hicle electronics may be damaged. #
Only use battery charge rs with a maxi‐
mum charging voltage of 14.8 V. &
WARNING Risk ofexplosion from hydro‐
ge nga s igniting
A battery generates hydrogen gas during the
ch arging process. If there is a short circuit or
spar ksstart toform ,th ere is a danger of the
hy drogen gas igniting. #
Make sure that the positive term inal of
th e connected battery does not come
into conta ct withvehicle parts. #
Never place me tal objects or tools on a
batter y. #
When connecting and disconnecting the
batter y,yo u must obse rveth e descri‐
bed order forth e battery clamps. #
When giving starting assis tance, al ways
make sure that you on lyconnect bat‐
te ry term inals with identical polarity. #
During starting assis tance, you must
obse rveth e described order for con‐
necting and disconnecting the jump
lead. #
Do not connect or disconnect the bat‐
te ry cla mp s while the engine is running. &
WARNING Risk ofexplosion during
ch arging process and starting assis tance
During thech arging process and starting
assis tance, the battery may release an explo‐
sive gas mixture. #
Avoid fire , naked flames, creating
spar ksand smoking. #
Make sure that there is suf ficient venti‐
lation du ring thech arging process and
during starting assis tance. #
Do not lean over a batter y. &
WARNING Risk ofexplosion from a fro‐
zen battery
A dischar ged battery may freeze at temp era‐
tures slightly abo veor below freezing point.
During starting assis tance or battery charg‐
ing, bat tery gas may be released. #
Alw aysth aw a frozen bat tery out first
before charging it or per form ing start‐
ing assis tance. If
th e indicator/warning lamps in the instrument
clus ter do not light up at low temp eratures, it is
ve ry likely that the dischar ged battery has fro‐
zen. In this case you may neither jump-s tart the
ve hicle nor charge the batter y.
The service life of a battery that has been
th awe d may be dramatically shor tened. The
st arting characteristics may be impaired, espe‐
cially at low temp eratures.
It is recommended that you ha veathaw ed bat‐
te ry checked at a qualified specialist workshop. 334
Breakdown assis tance
Page 360 of 473
R
The vehicle is not on a slope.
R The vehicle is on solid, non-slippery and le vel
ground. #
Apply the electric parking brake manually. #
Movethe front wheels tothest ra ight-ahead
position. #
Shift the transmission toposition j. #
Switch off the engine. #
Make sure that the engine cann otbe star ted. #
Place choc ks orother suitable items under
th e front and rear of the wheel that is diago‐
nally opposite the wheel you wish tochange. #
Remo vethe hub caps if necessary . #
Raise theve hicle (/ page 357). Fi
tting/ removing pla stic hub caps Re
moving #
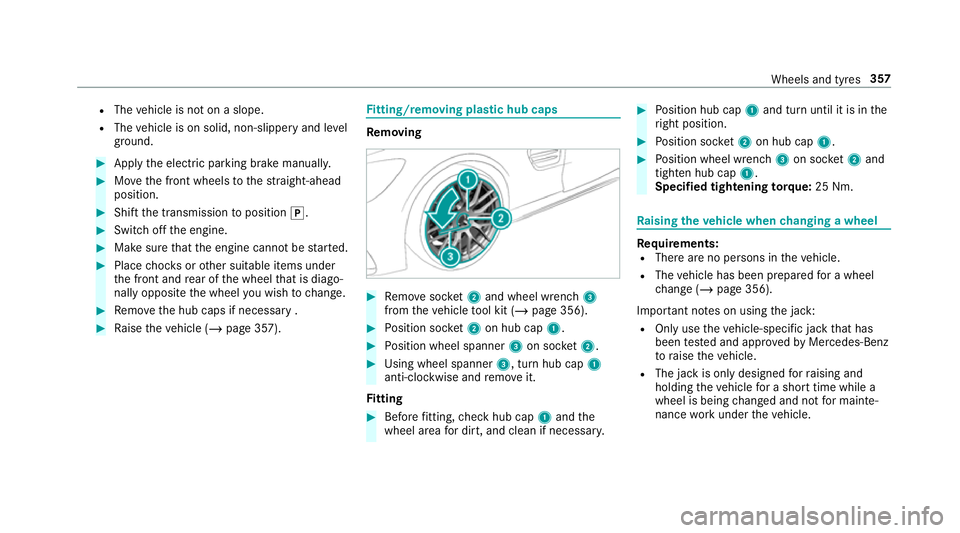
Remo vesoc ket2 and wheel wrench 3
from theve hicle tool kit (/ page 356). #
Position soc ket2 on hub cap 1. #
Position wheel spanner 3on soc ket2. #
Using wheel spanner 3, turn hub cap1
anti-clo ckwise and remo veit.
Fi tting #
Before fitting, check hub cap 1and the
wheel area for dirt, and clean if necessar y. #
Position hub cap 1and turn until it is in the
ri ght position. #
Position soc ket2 on hub cap 1. #
Position wheel wrench 3on soc ket2 and
tighten hub cap 1.
Speci fied tigh tening torq ue: 25 Nm. Ra
ising theve hicle when changing a wheel Re
quirements:
R There are no persons in theve hicle.
R The vehicle has been prepared for a wheel
ch ange (/ page 356).
Important no tes on using the jack:
R Only use theve hicle-specific jack that has
been tested and appr oved byMercedes-Benz
to raise theve hicle.
R The jack is only designed forra ising and
holding theve hicle for a short time while a
wheel is being changed and not for mainte‐
nance workunder theve hicle. Wheels and tyres
357
Page 390 of 473
Display messages
Possible causes/consequences and M
MSolutions
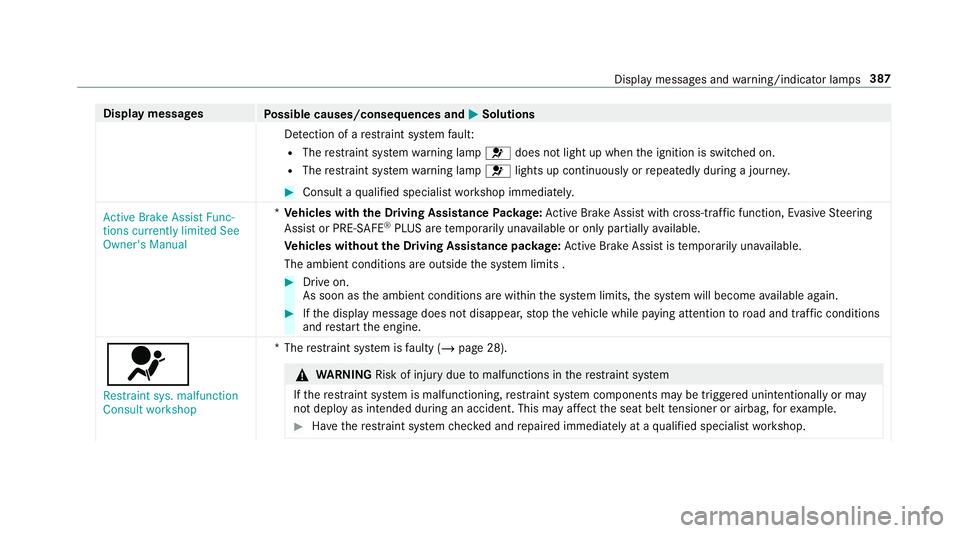
De tection of a restra int sy stem fault:
R The restra int sy stem warning lamp 6does not light up when the ignition is switched on.
R The restra int sy stem warning lamp 6lights up continuously or repeatedly during a journe y. #
Consult a qualified specialist workshop immediatel y.
Active Brake Assist Func-
tions currently limited See
Owner's Manual *
Ve hicles with the Driving Assistance Package: Active Brake Assi stwith cross-traf fic function, Evasi veSteering
Assist or PRE‑SAFE ®
PLUS are temp orarily una vailable or only partially available.
Ve hicles without the Driving Assistance pa ckage: Active Brake Assi stistemp orarily una vailable.
The ambient conditions are outside the sy stem limits . #
Drive on.
As soon as the ambient conditions are within the sy stem limits, the sy stem will become available again. #
Ifth e display message does not disappear, stop theve hicle while paying attention toroad and traf fic conditions
and restart the engine.
6
Restraint sys. malfunction
Consult workshop *T
herestra int sy stem is faulty (/ page 28). &
WARNING Risk of inju rydue tomalfunctions in there stra int sy stem
If th ere stra int sy stem is malfunctioning, restra int sy stem components may be triggered unintentionally or may
not deploy as intended during an accident. This may af fect the seat belt tensioner or airbag, forex ample. #
Have there stra int sy stem checked and repaired immediately at a qualified specialist workshop. Display messages and
warning/indicator lamps 387
Page 401 of 473
Display messages
Possible causes/consequences and M
MSolutions
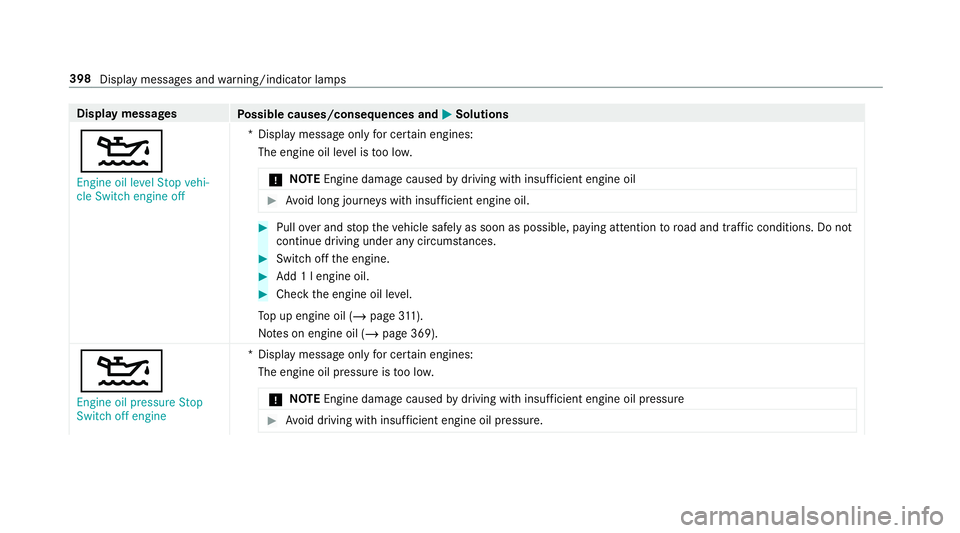
4 Engine oil level Stop vehi-
cle Switch engine off *D
isplay message only for cer tain engines:
The engine oil le vel is too lo w.
* NO
TEEngine dama gecaused bydriving with insuf ficient engine oil #
Avoid long journe yswith insuf ficient engine oil. #
Pull over and stop theve hicle safely as soon as possible, paying attention toroad and traf fic conditions. Do not
continue driving under any circums tances. #
Switch off the engine. #
Add 1 l engine oil. #
Check the engine oil le vel.
To p up engine oil (/ page311).
No tes on engine oil (/ page 369).
4
Engine oil pressure Stop
Switch off engine *D
isplay message only for cer tain engines:
The engine oil pressure is too lo w.
* NO
TEEngine dama gecaused bydriving with insuf ficient engine oil pressure #
Avoid driving with insuf ficient engine oil pressure. 398
Display messages and warning/indicator lamps
Page 402 of 473
Display messages
Possible causes/consequences and M
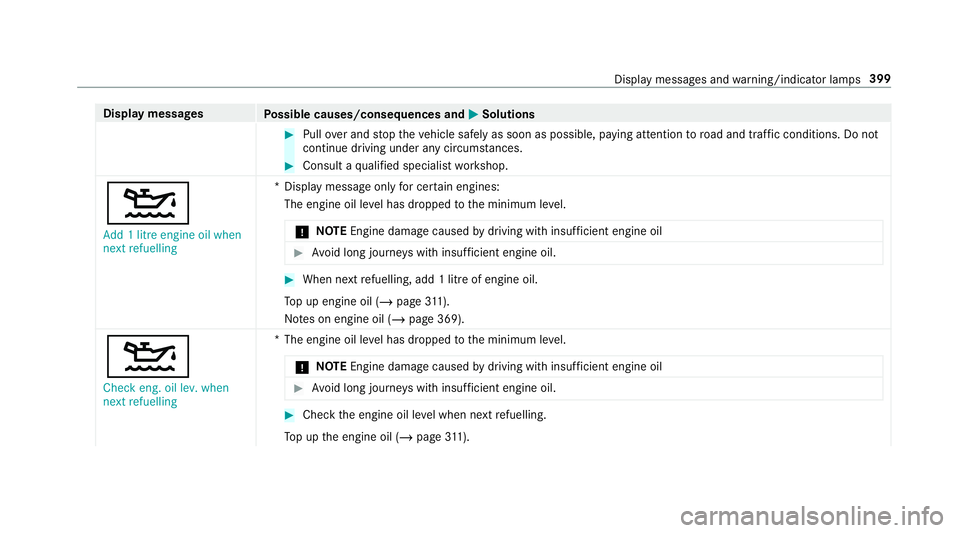
MSolutions #
Pull over and stop theve hicle safely as soon as possible, paying attention toroad and traf fic conditions. Do not
continue driving under any circums tances. #
Consult a qualified specialist workshop.
4 Add 1 litre engine oil when
next refuelling *D
isplay message only for cer tain engines:
The engine oil le vel has dropped tothe minimum le vel.
* NO
TEEngine dama gecaused bydriving with insuf ficient engine oil #
Avoid long journe yswith insuf ficient engine oil. #
When next refuelling, add 1 litre of engine oil.
To p up engine oil (/ page311).
No tes on engine oil (/ page 369).
4
Check eng. oil lev. when
next refuelling *T
he engine oil le vel has dropped tothe minimum le vel.
* NO
TEEngine dama gecaused bydriving with insuf ficient engine oil #
Avoid long journe yswith insuf ficient engine oil. #
Check the engine oil le vel when next refuelling.
To p up the engine oil (/ page311). Displ
aymessa ges and warning/indicator lamps 399
Page 423 of 473
Wa
rning/indicator lamp
Possible causes/consequences and M
MSolutions #
Consult a qualified specialist workshop. #
Do not top up the brake fluid. #
Pull over and stop theve hicle safely as soon as possible, paying attention toroad and traf fic conditions. Do not
continue driving under any circums tances. #
Obser vethe messages on the multifunction displa y. #
Consult a qualified specialist workshop.
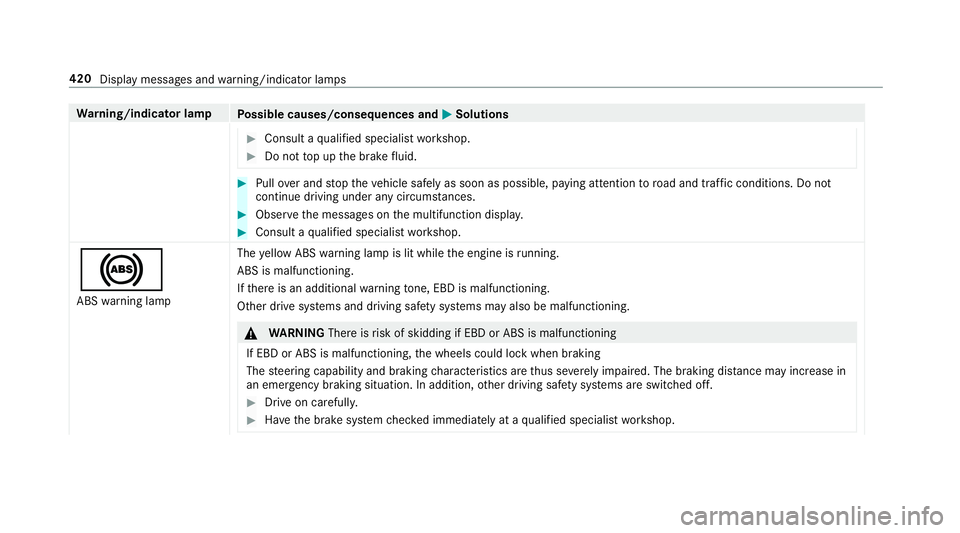
! ABS warning lamp The
yellow ABS warning lamp is lit while the engine is running.
ABS is malfunctioning.
If th ere is an additional warning tone, EBD is malfunctioning.
Other drive sy stems and driving saf ety sy stems may also be malfunctioning. &
WARNING Thereisrisk of skidding if EBD or ABS is malfunctioning
If EBD or ABS is malfunctioning, the wheels could lock when braking
The steering capability and braking characteristics are thus se verely impaired. The braking dis tance may increase in
an emergency braking situation. In addition, other driving saf ety sy stems are switched off. #
Drive on carefull y. #
Have the brake sy stem checked immediately at a qualified specialist workshop. 420
Display messages and warning/indicator lamps