2018 MERCEDES-BENZ AMG GT COUPE height
[x] Cancel search: heightPage 16 of 465
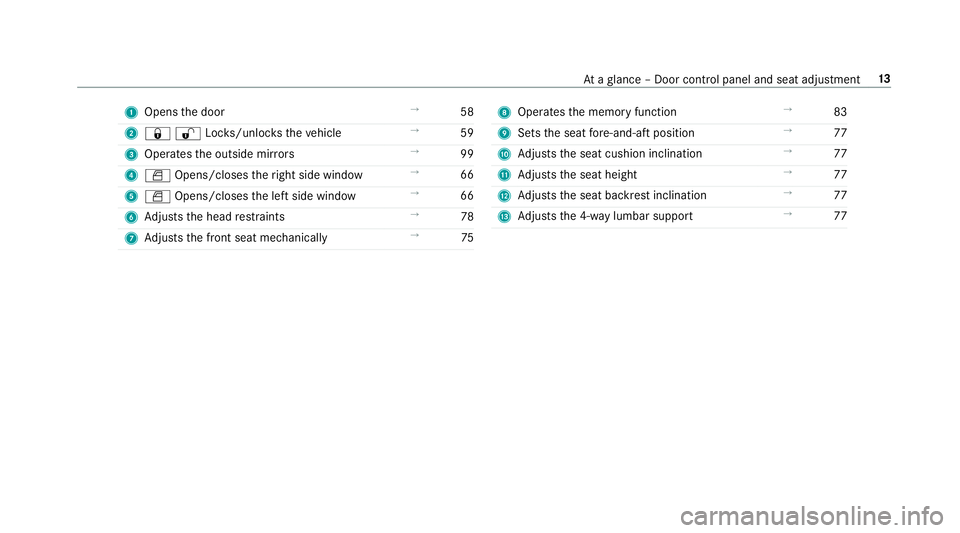
1
Opens the door →
58
2 &%Loc ks/unloc kstheve hicle →
59
3 Operates the outside mir rors →
99
4 W Opens/closes theright side window →
66
5 W Opens/closes the left side window →
66
6 Adjusts the head restra ints →
78
7 Adjusts the front seat mechanically →
75 8
Operates the memory function →
83
9 Sets the seat fore -and-aft position →
77
A Adjusts the seat cushion inclination →
77
B Adjusts the seat height →
77
C Adjusts the seat backrest inclination →
77
D Adjusts the 4-w aylumbar support →
77 At
aglance – Door control panel and seat adjustment 13
Page 44 of 465
R
Suitable positioning of thech ild restra int sys‐
te m (/ page47). PRE-SAFE
®
sy stem PRE-
SAFE®
(anticipa tory occupant pr otec‐
tion) PRE-
SAFE®
is able todetect cer tain critical driv‐
ing situations and implement pre-em ptive meas‐
ures toprotect theve hicle occupants.
PRE-SAFE ®
can implement thefo llowing meas‐
ures independently of each other:
R Tightening the seat belts on the driver's seat
and front passenger seat.
R Closing the side windo ws.
R Vehicles with memory function: moving
th e front passenger seat toa more favo ura‐
ble seat position.
R PRE-SAFE ®
Sound: pr ovided that the multi‐
media sy stem is switched on, generates a
brief noise signal tostimulate the innate pro‐
te ctive mechanism of a person's hea ring. *
NO
TEDama gecaused byobjects in the
fo ot we ll or behind the seat The automatic adjustment of
the seat posi‐
tion may result in damage tothe seat and/or
th e object. #
Stow objects in a suitable place. Re
versing the PRE- SAFE®
sy stem measures If an accident did not occur,
the pre-em ptive
measures that we retake n are reve rsed.
Yo u will need toper form certain settings your‐
self. #
Ifth e seat belt pre-tensioning is not reduced,
mo vethe seat backrest back slightl y.
The locking mechanism releases. Safely transporting
children in theve hicle Alw
ays obser vewhen children are tr avelling
in theve hicle %
Also strictly obser vethe saf ety no tesfo rthe
specific situation. In this wa yyo u can recog‐ nise po
tential risks and avoid dangers if chil‐
dren are tr avelling in theve hicle
(/ page 42).
Be diligent
Bear in mind that neglecting tosecure a child in
th ech ild restra int sy stem may ha veserious con‐
sequences. Alw ays be diligent in securing a child
carefully before everyjou rney.
To impr oveprotection forch ildren younger than
12 years old or under 1.50 m in height,
Mercedes-Benz recommends you obse rvethe
fo llowing information:
R Alw ays secure thech ild in a child restra int
sy stem suitable forth is Mercedes-Benz vehi‐
cle.
R The child restra int sy stem must be appropri‐
ate tothe age, weight and size of thech ild.
R The vehicle seat must be suitable forfitting a
ch ild restra int sy stem (/ page47). Occupant saf
ety41
Page 78 of 465

Seats
Ad
justing the front seat mechanically &
WARNING Risk of becoming trapped if
th e seats are adjus tedby children
Children could become trapped if they adjust
th e seats, particularly when unattended. #
When leaving theve hicle, alw aysta ke
th eke y with you and lock theve hicle.
This also applies tothe digital vehicle
ke y if the "Digital Vehicle Key" function
is activated via Mercedes me connect. #
Never lea vechildren unat tended in the
ve hicle. &
WARNING Risk of becoming trapped
when adjusting the seats
When you adjust a seat, you or other vehicle
occupants could become trapped, e.g. on the
seat guide rail. #
When adjusting a seat, make sure that
no one has any body parts in the sweep
of the seat. Obser
vethe saf ety no tes on "Airbags" and "Chil‐
dren in theve hicle". &
WARNING Risk of accident due tothe
driver's seat not being engaged
If th e driver's seat is not engaged, it could
mo veunexpectedly while theve hicle is in
motion.
This could cause youto lose control of the
ve hicle. #
Alw ays make sure that the driver's seat
is engaged before starting theve hicle. &
WARNING Risk of inju rythro ugh adjust‐
ing vehicle settings while theve hicle is in
motion
Yo u could lose cont rol of theve hicle in the
fo llowing situations:
R ifyo u adjust the driver's seat, the head
re stra ints, thesteering wheel or the mir‐
ro r while theve hicle is in motion
R ifyo ufast enyour seat belt while theve hi‐
cle is in motion #
Before starting the engine: adjust the
driver's seat, the head restra ints, the
st eering wheel or the mir ror and fasten
yo ur seat belt. &
WARNING Risk of becoming trapped if
th e seat height is adjus ted carelessly
If yo u adjust the seat height carelessly, you
or other vehicle occupants could be trapped
and thereby injured. Seats and
stowing 75
Page 80 of 465
#
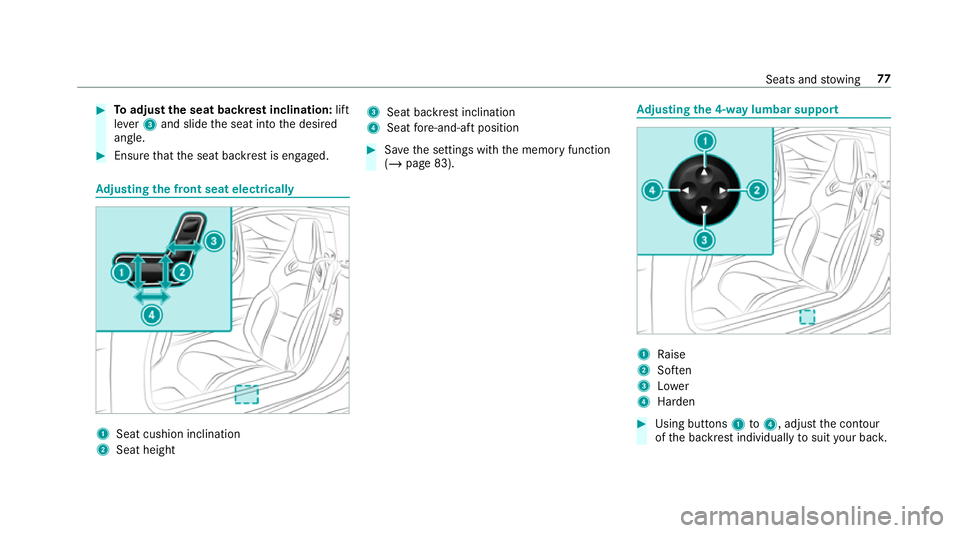
Toadjust the seat backrest inclination: lift
le ve r3 and slide the seat into the desired
angle. #
Ensure that the seat backrest is engaged. Ad
justing the front seat electrically 1
Seat cushion inclination
2 Seat height 3
Seat ba ckrest inclination
4 Seat fore -and-aft position #
Save the settings with the memory function
(/ page 83). Ad
justing the 4-w aylumbar support 1
Raise
2 Soften
3 Lower
4 Harden #
Using buttons 1to4 , adjust the conto ur
of the backrest individually tosuit your bac k. Seats and
stowing 77
Page 84 of 465
#
Toswitch off/reduce the le vel:press but‐
to n1 repeatedly until the desired ventila‐
tion le vel is set.
If all indicator lamps are off, the seat ventila‐
tion is switched off. Ste
ering wheel Ad
justing the steering wheel manually &
WARNING Risk of inju rythro ugh adjust‐
ing vehicle settings while theve hicle is in
motion
Yo u could lose cont rol of theve hicle in the
fo llowing situations:
R ifyo u adjust the driver's seat, the head
re stra ints, thesteering wheel or the mir‐
ro r while theve hicle is in motion
R ifyo ufast enyour seat belt while theve hi‐
cle is in motion #
Before starting the engine: adjust the
driver's seat, the head restra ints, the st
eering wheel or the mir ror and fasten
yo ur seat belt. &
WARNING Risk of entrapment forch il‐
dren when adjusting thesteering wheel
Children could injure themselves if they
adjust thesteering wheel. #
Never lea vechildren unat tended in the
ve hicle. #
When leaving theve hicle, alw aysta ke
th eke y with you and lock theve hicle.
This also applies tothe digital vehicle
ke y if the "Digital Vehicle Key" function
is activated via Mercedes me connect. This function is on
lyavailable forth e AMG GT
and AMG GTS models. #
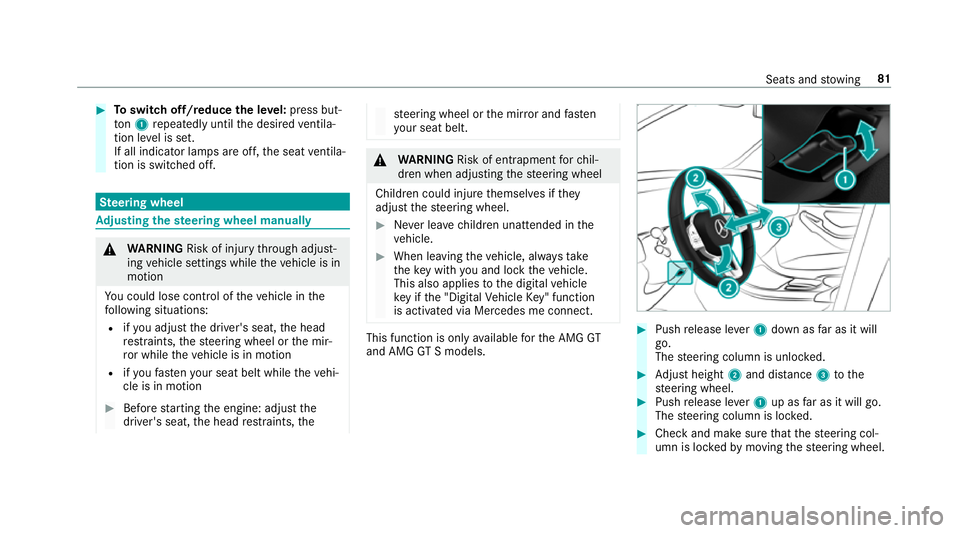
Push release le ver1 down as far as it will
go.
The steering column is unloc ked. #
Adjust height 2and di stance 3tothe
st eering wheel. #
Push release le ver1 up as far as it will go.
The steering column is loc ked. #
Check and make sure that thesteering col‐
umn is loc kedby moving thesteering wheel. Seats and
stowing 81
Page 85 of 465

Ad
justing the steering wheel electrically The
steering wheel can be adjus ted when the
po we r supp lyis switched off. 1
Adjusts the dis tance tothesteering wheel
2 Adjusts the height #
Save the settings with the memory function
(/ page 83). Easy entry and
exitfeature Using
the easy entry and exitfeature &
WARNING Risk of accident when pulling
aw ay during the adjustment process of
th e easy exitfeature
‑ If you pull away while the easy entry and
ex itfeature is making adjustments, you could
lose cont rol of theve hicle. #
Alw ayswa it until the adjustment proc‐
ess is comple tebefore pulling away. &
WARNING Risk of becoming trapped
while adjusting the easy entry andexit
fe ature
When the easy entry andexitfeature adjusts
th esteering wheel, you and other vehicle
occupants – particularly children – could
become trapped. #
During the adjustment process of the
easy entry andexitfeature, make sure th
at no one has any body parts in the
sweep of thesteering wheel. #
Movethe adjustment le ver of thesteer‐
ing wheel if there is a risk of becoming
trapped bythesteering wheel.
The adjustment process is stopped. &
WARNING Risk of becoming trapped
du ring acti vation of the easy entry and
ex itfeature bychildren
If ch ildren activate the easy entry andexit
fe ature, they can become trapped, pa rticu‐
lar lywhen unat tended. #
Never lea vechildren unat tended in the
ve hicle. #
When leaving theve hicle, alw aysta ke
th eke y with you and lock theve hicle. Ve
hicles with memory function: you can stop
th e adjustment process bypressing one of the
memory function position buttons. 82
Seats and stowing
Page 240 of 465
yo
ur region is either pre-ins talled or the map
data is supplied on a data storage medium.
If th e map data on your vehicle has been ins tal‐
led at thefa ctory and you wish toreins tall it, you
do not need toenter the activation code.
Fo r map data that you ha vepur chased in the
fo rm of a data storage medium, you must en ter
th e accompanying activation code.
% Ifyo u sa vethe map data on a data storage
medium with the online map update service,
no entry isrequ ired. The activation code is
st ored on the data storage medium during
th e downloading process.
The online map update service is not availa‐
ble in all countries.
Obse rveth efo llowing when entering the activa‐
tion code:
R The activation code can be used for one vehi‐
cle
R The activation code is not transferable
R The activation code has six digits In
theeve nt of thefo llowing problems, please
con tact a Mercedes-Benz service centre:
R The multimedia sy stem does not accept the
activation code
R You ha velost the activation code
Displaying the compass
Multimedia sy stem:
4 Navigation 5
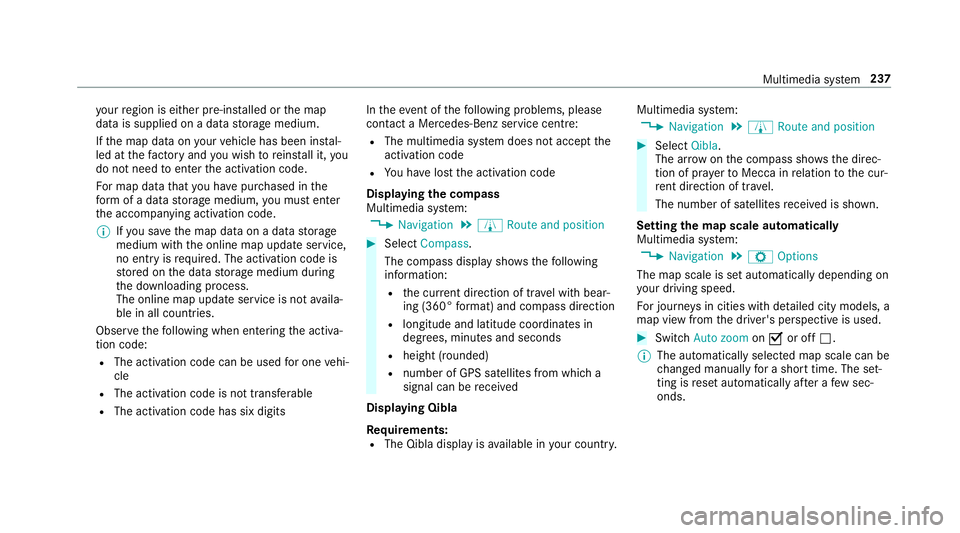
À Route and position #
Select Compass.
The compass display sho wsthefo llowing
information:
R the cur rent di rection of tr avel with bear‐
ing (360° form at) and compass direction
R longitude and latitude coo rdinates in
degrees, minutes and seconds
R height (rounded)
R number of GPS satellites from which a
signal can be recei ved
Displaying Qibla
Requ irements:
R The Qibla display is available in your count ry.Multimedia sy
stem:
4 Navigation 5
À Route and position #
Select Qibla.
The ar rowonthe compass sho wsthe direc‐
tion of pr ayer toMecca in relation tothe cur‐
re nt di rection of tr avel.
The number of satellites recei ved is shown.
Setting the map scale automatically
Multimedia sy stem:
4 Navigation 5
Z Options
The map scale is set automatically depending on
yo ur driving speed.
Fo r journe ysin cities with de tailed city models, a
map view from the driver's perspective is used. #
Switch Auto zoom onO or off ª.
% The automatically selected map scale can be
changed manually for a short time. The set‐
ting is reset automatically af ter a few sec‐
onds. Multimedia sy
stem 237
Page 307 of 465
#
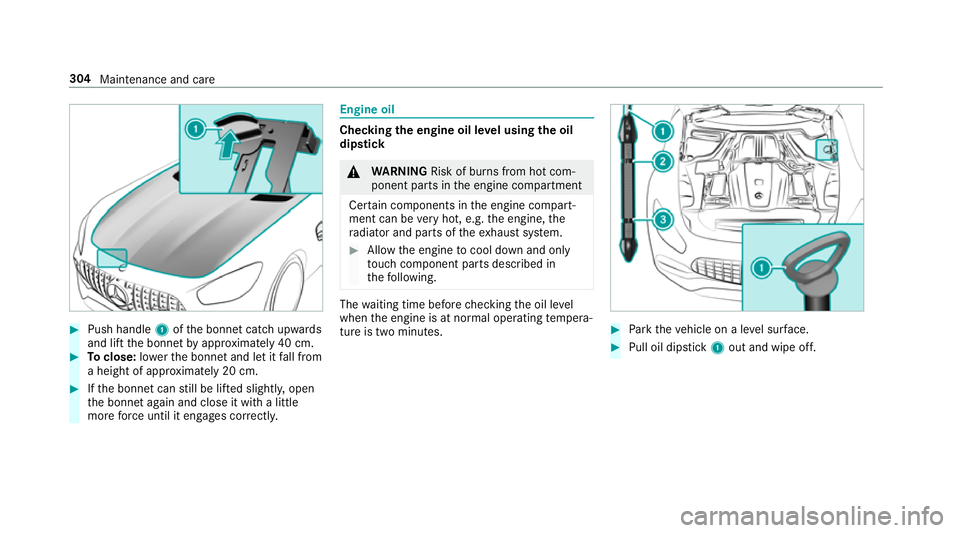
Push handle 1ofthe bonn etcatch up wards
and lift the bonn etby appr oximately 40 cm. #
Toclose: lowe rth e bonn etand let it fall from
a height of appr oximately 20 cm. #
Ifth e bonn etcan still be lif ted slightl y,open
th e bonn etagain and close it with a little
more forc e until it engages cor rectly. Engine oil
Che
cking the engine oil le vel using the oil
dip stick &
WARNING Risk of bu rns from hot com‐
ponent parts in the engine compartment
Cer tain components in the engine compart‐
ment can be very hot, e.g. the engine, the
ra diator and parts of theex haust sy stem. #
Allow the engine tocool down and only
to uch co mponent parts described in
th efo llowing. The
waiting time before checking the oil le vel
when the engine is at normal operating temp era‐
ture is two minutes. #
Park theve hicle on a le vel sur face. #
Pull oil dipstick 1out and wipe off. 304
Maintenance and care