2018 MERCEDES-BENZ AMG GT COUPE light
[x] Cancel search: lightPage 163 of 465

Blind Spot Assi
stFu
nction of Blind Spot Assist
Blind Spot Assist uses two lateral, rear-facing
ra dar sensors tomonitor the area up to3 m
behind and next toyour vehicle.
If a vehicle is de tected at speeds ab ove appr ox‐
imately 30 km/h and this vehicle subsequently
enters the monitoring range next to yourvehicle,
th ewa rning lamp in the outside mir ror lights up
re d.
If a vehicle is de tected close tothe side of your
ve hicle, there dwa rning lamp in the outside mir‐
ro rflashes. If you swit chon the turn signal indi‐
cator in the cor responding direction, a warning
to ne sounds once. If the turn signal indicator
re mains switched on, all other de tected vehicles
are indicated only bytheflashing of thered
wa rning lamp.
If yo uove rtake a vehicle quickl y,no warning is
given. &
WARNING Risk of accident despi teBlind
Spot Assi st
Blind Spot Assi stdoes not react tovehicles
approaching and overtaking you at a greatly
di fferent speed.
As a result, Blind Spot Assist cannot warn
drivers in this situation. #
Alw ays pay careful attention tothe traf‐
fi c situation and maintain a safe dis‐
ta nce at the side of theve hicle. Blind Spot Assist is only an aid. It may
failto
de tect some vehicles and is not a substitute for
attentive driving. Alw ays ensure that there is suf‐
fi cient di stance tothe side forot her road users
and obs tacles.
Sy stem limitations
The sy stem may be limited in thefo llowing situa‐
tions:
R The sensors are dirty or co vered.
R Poor visibility, e.g. due tofog, heavy rain,
snow or spr ay. R
Narrow vehicles, e.g. bicycles, are within the
monitoring range.
Wa rnings may be issued in er ror when driving
close tocrash ba rriers or similar solid lane bor‐
ders. Warnings may be inter rupte d when driving
alongside long vehicles, forex ample lor ries, for a
prolonged time.
Blind Spot Assist is not operational when reve rse
ge ar is engaged.
Ac tivating/deactivating Blind Spot Assi stor
Ac tive Blind Spot Assi st
Multimedia sy stem:
4 Vehicle 5
k Assistance
5 Blind Spot Assist #
Activate Oor deacti vate ª the function. 16 0
Driving and pa rking
Page 171 of 465

Calling up
the assistant display On-board computer:
4 Assistance
The following displa ysare available on the assis‐
ta nt displ aymenu:
R Assis tance graphic
R Attention le vel (/ page 157) #
Toswitch between the displa ys:swipe
upwards or down wards on the left-hand
To uch Control. St
atus displa yson the assis tant displ ay:
R é ATTENTION ASSIS T:deactivated R
Light lane markings: Lane Keeping Assist
enabled
R Green lane markings: Lane Keeping Assist
active
R ¸ Grey radar waves next tovehicle: Blind
Spot Assist or Active Blind Spot Assi stena‐
bled
R ¸ Green radar waves next tovehicle:
Blind Spot Assist or Active Blind Spot Assi st
active
R Active Dis tance Assi stDISTRONIC displa ys
( / page 142) Calling up displa
yson thePe rformance
menu On-board computer:
4 Performance #
Toselect a displa y:swipe upwards or down‐
wa rds on the left-hand Touch Control.
Displa yson thePerformance menu:
R Warm-up
R SETUP R
G-me ter
R Engine da ta
R Vehicles without AMG TRACK PACE: RACE‐
TIMER (/ page170) Example:
warm-up
1 Digital speedom eter
2 Gear display
3 Engine oil temp erature 16 8
Instrument Display and on-board computer
Page 190 of 465
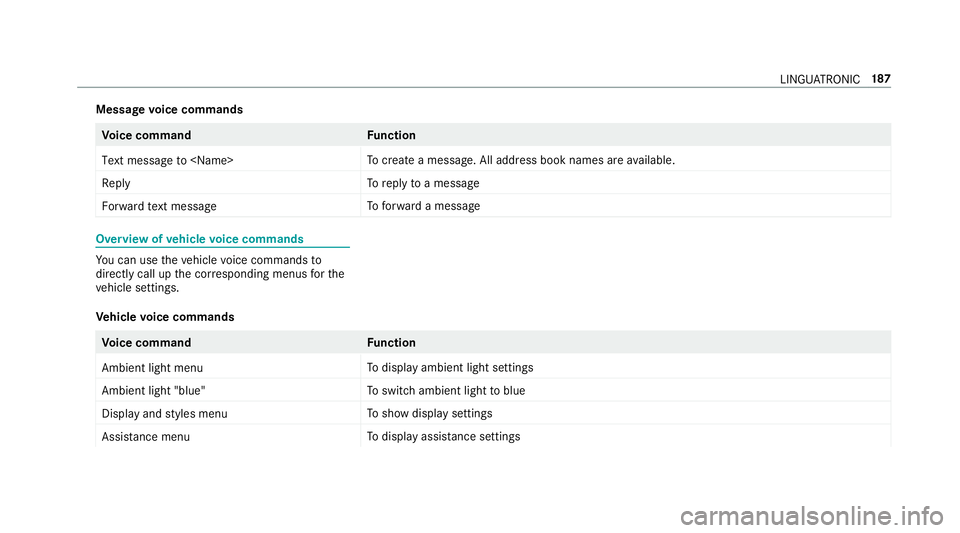
Message
voice commands Vo
ice command Function
Text message to
crea tea message. All address book names are available.
Reply To
reply toa message
Forward text message To
forw ard a message Overview of
vehicle voice commands Yo
u can use theve hicle voice commands to
directly call up the cor responding menus forthe
ve hicle settings.
Ve hicle voice commands Vo
ice command Function
Ambient light menu To
display ambient light settings
Ambient light "blue" To
switch ambient light toblue
Display and styles menu To
show display settings
Assistance menu To
display assis tance settings LING
UATRONIC 187
Page 191 of 465
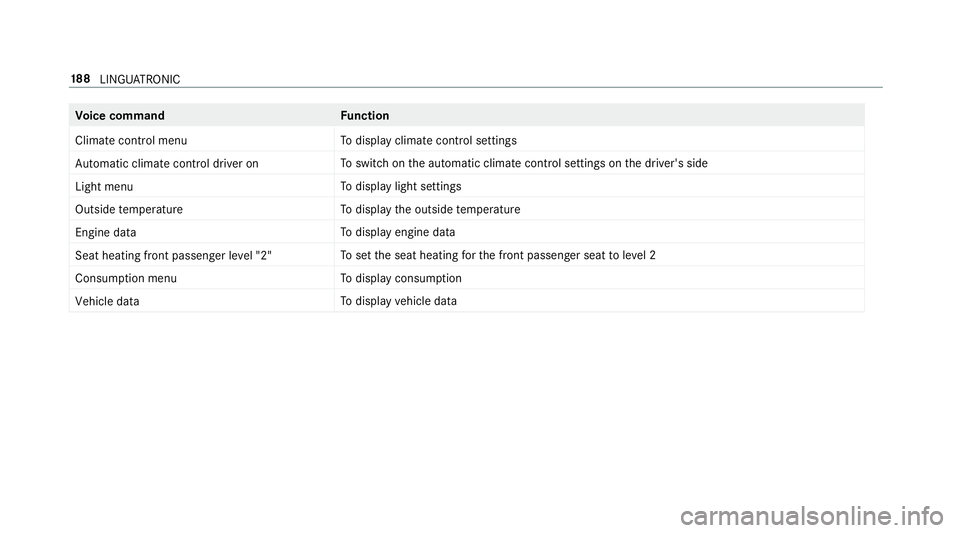
Vo
ice command Function
Climate control menu To
display climate control settings
Automatic climate control driver on To
switch on the automatic climate control settings on the driver's side
Light menu To
display light settings
Outside temperature To
display the outside temp erature
Engine data To
display engine data
Seat heating front passenger level "2" To
set the seat heating forth e front passenger seat toleve l 2
Consumption menu To
display consum ption
Vehicle data To
display vehicle data 18 8
LINGU ATRO NIC
Page 204 of 465
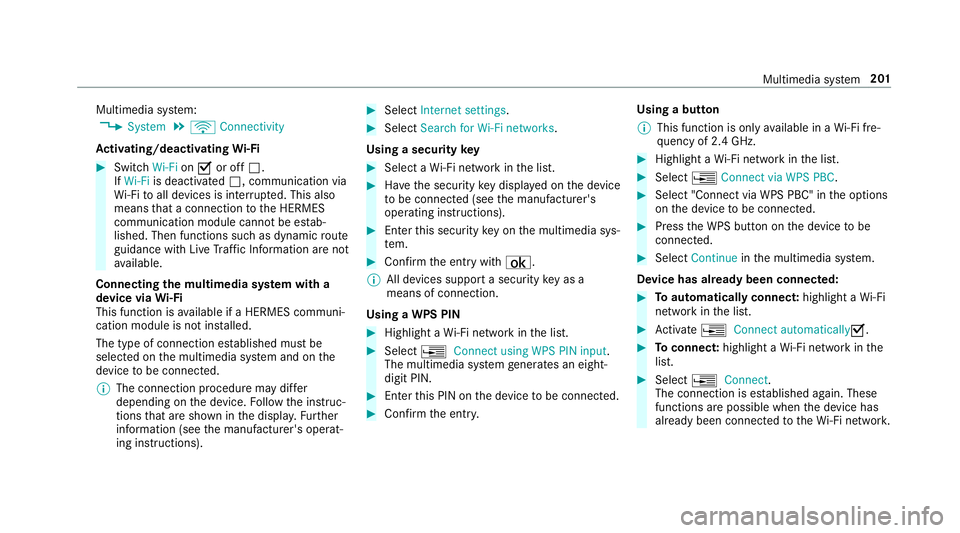
Multimedia sy
stem:
4 System 5
ö Connectivity
Ac tivating/deactivating Wi-Fi #
Switch Wi-FionO or off ª.
If Wi-Fi is deactivated ª, communication via
Wi -Fi toall devices is inter rupte d. This also
means that a connection tothe HERMES
communication module cann otbe es tab‐
lished. Then functions such as dynamic route
guidance with Live Traf fic Information are not
av ailable.
Connecting the multimedia sy stem with a
device via Wi-Fi
This function is available if a HERMES communi‐
cation module is not ins talled.
The type of connection es tablished must be
selected on the multimedia sy stem and on the
device tobe connec ted.
% The connection procedure may dif fer
depending on the device. Follow the instruc‐
tions that are shown in the displa y.Fu rther
information (see the manufacturer's operat‐
ing instructions). #
Select Internet settings . #
Select Search for Wi-Fi networks.
Using a security key #
Select a Wi-Fi network in the list. #
Have the security key displa yed on the device
to be connec ted (see the manufacturer's
operating instructions). #
Ente rth is security key on the multimedia sys‐
te m. #
Confirm the entry with¡.
% All devices support a security key as a
means of connection.
Using a WPS PIN #
Highlight a Wi-Fi network in the list. #
Select ¥Connect using WPS PIN input.
The multimedia sy stem generates an eight-
digit PIN. #
Enter this PIN on the device tobe connec ted. #
Confirm the entry. Using a button
%
This function is only available in a Wi-Fi fre‐
qu ency of 2.4 GHz. #
Highlight a Wi-Fi network in the list. #
Select ¥Connect via WPS PBC. #
Select "Connect via WPS PBC" in the options
on the device tobe connec ted. #
Press the WPS button on the device tobe
connec ted. #
Select Continue inthe multimedia sy stem.
Device has already been connected: #
Toautomatically connect: highlight aWi-Fi
network in the list. #
Activate ¥ Connect automaticallyO. #
Toconnect: highlight a Wi-Fi network in the
list. #
Select ¥Connect.
The connection is es tablished again. These
functions are possible when the device has
already been connected totheWi -Fi networ k. Multimedia sy
stem 201
Page 205 of 465
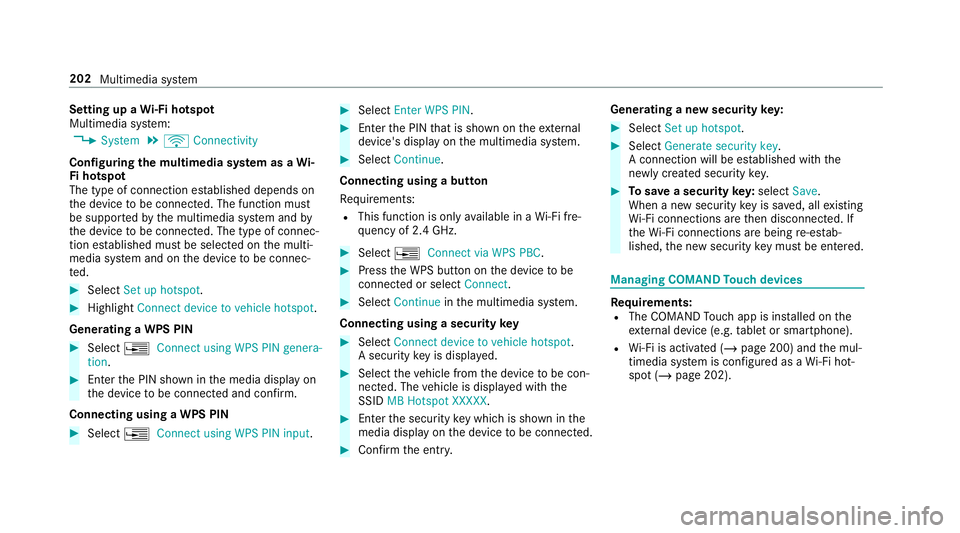
Setting up a
Wi-Fi hotspot
Multimedia sy stem:
4 System 5
ö Connectivity
Configuring the multimedia sy stem as a Wi-
Fi hotspot
The type of connection es tablished depends on
th e device tobe connec ted. The function must
be suppor tedby the multimedia sy stem and by
th e device tobe connec ted. The type of connec‐
tion es tablished must be selected on the multi‐
media sy stem and on the device tobe connec‐
te d. #
Select Set up hotspot. #
Highlight Connect device to vehicle hotspot.
Generating a WPS PIN #
Select ¥Connect using WPS PIN genera-
tion . #
Ente rth e PIN shown in the media display on
th e device tobe connec ted and con firm.
Connecting using a WPS PIN #
Select ¥Connect using WPS PIN input. #
Select Enter WPS PIN. #
Enterth e PIN that is shown on theex tern al
device's display on the multimedia sy stem. #
Select Continue.
Connecting using a button
Re quirements:
R This function is only available in a Wi-Fi fre‐
qu ency of 2.4 GHz. #
Select ¥Connect via WPS PBC. #
Press the WPS button on the device tobe
connec ted or select Connect. #
Select Continue inthe multimedia sy stem.
Connecting using a security key #
Select Connect device to vehicle hotspot .
A secu rity key is displa yed. #
Select theve hicle from the device tobe con‐
nec ted. The vehicle is displa yed with the
SSID MB Hotspot XXXXX . #
Enter the security key which is shown in the
media display on the device tobe connec ted. #
Confirm the entry. Genera
ting a new security key: #
Select Set up hotspot . #
Select Generate security key .
A connection will be es tablished with the
newly crea ted security key. #
Tosave a security key:select Save.
When a new security key is sa ved, all existing
Wi -Fi connections are then disconnected. If
th eWi -Fi connections are being re-es tab‐
lished, the new security key must be en tere d. Managing COMAND
Touch devices Re
quirements:
R The COMAND Touch app is ins talled on the
ex tern al device (e.g. tablet or smartphone).
R Wi-Fi is acti vated (/ page 200) and the mul‐
timedia sy stem is confi gured as a Wi-Fi hot‐
spot (/ page 202). 202
Multimedia sy stem
Page 209 of 465
Importing/exporting user profiles
Re
quirements:
R There is an Internet connection
(/ page 265).
R A Mercedes me account exists at http://
www.me rcedes.me.
R The Personalisation service is active.
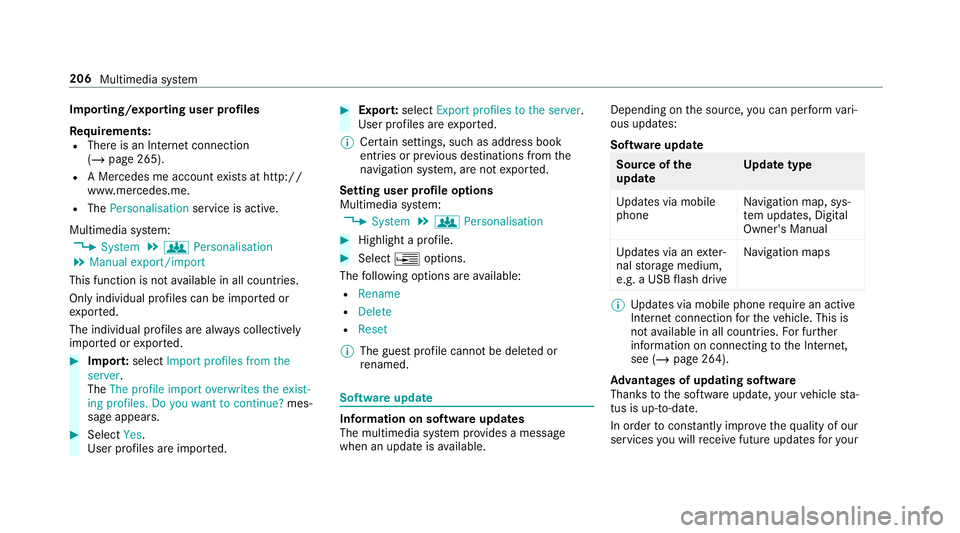
Multimedia sy stem:
4 System 5
g Personalisation
5 Manual export/import
This function is not available in all countries.
On ly individu al profiles can be impor ted or
ex por ted.
The individual profiles are alw ays collectively
impor ted or expor ted. #
Impor t:select Import profiles from the
server.
The The profile import overwrites the exist-
ing profiles. Do you want to continue? mes‐
sage appears. #
Select Yes.
User profiles are impor ted. #
Expor t:select Export profiles to the server.
User profiles are expor ted.
% Certain settings, such as address book
ent ries or pr evious destinations from the
navigation sy stem, are not expor ted.
Setting user profile options
Multimedia sy stem:
4 System 5
g Personalisation #
Highlight a profile. #
Select ¥options.
The following options are available:
R Rename
R Delete
R Reset
% The guest profile cannot be dele ted or
re named. So
ftwa reupdate Information on software updates
The multimedia sy
stem pr ovides a message
when an update is available. Depending on
the source, you can per form vari‐
ous updates:
Software update Source of
the
update Up
date type
Up dates via mobile
phone Na
vigation map, sys‐
te m updates, Digital
Owner's Manual
Up dates via an exter‐
nal storage medium,
e.g. a USB flash drive Na
vigation maps %
Updates via mobile phone requ ire an active
Internet connection forth eve hicle. This is
not available in all countries. For fur ther
information on connecting tothe Internet,
see (/ page 264).
Ad vantages of updating software
Thanks tothe software update, your vehicle sta‐
tus is up-to-date.
In order tocons tantly impr ovethequ ality of our
services you will recei vefuture updates foryo ur 206
Multimedia sy stem
Page 213 of 465
R
steering angle
R engine speed
R engine oil/tyre temp erature
Based on the analysis you can check and opti‐
mise driving characteristics for any position on
th e trac k.
Exporting trac ksorraces (USB) #
Select All tracks.
An ove rview of all stored trac ksand races
appea rs. #
Highlight desired trac ksorraces. #
Select ÜOptions. #
Select Export.
The selected trac ksorraces can be expor ted
to a USB storage device connected tothe
ve hicle.
Editing trac ksand recordings #
Select All tracks. #
Highlight the desired trac k.#
Select Üoptions. #
Select Rename orDelete. or #
Select a trac k. #
Highlight the desired recording. #
Select Üoptions. #
Select Weather orDelete. Setting Drag
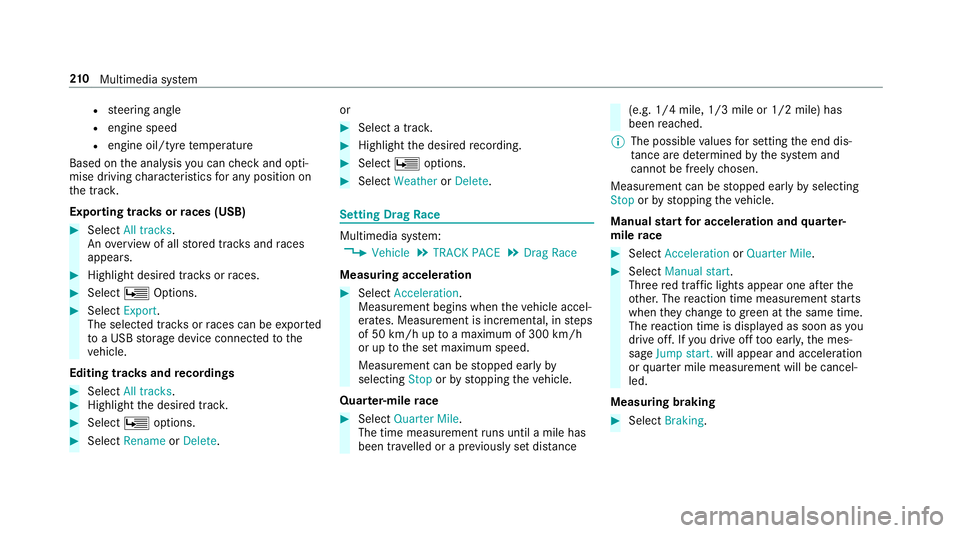
Race Multimedia sy
stem:
4 Vehicle 5
TRACK PACE 5
Drag Race
Measuring acceleration #
Select Acceleration.
Measurement begins when theve hicle accel‐
erates. Measurement is incremental, in steps
of 50 km/h up toa maximum of 300 km/h
or up tothe set maximum speed.
Measurement can be stopped early by
selecting Stoporby stopping theve hicle.
Quar ter-mile race #
Select Quarter Mile.
The time measurement runs until a mile has
been tr avelled or a pr eviously set dis tance (e.g. 1/4 mile, 1/3 mile or 1/2 mile) has
been
reached.
% The possible values for setting the end dis‐
ta nce are de term ined bythe sy stem and
cann otbe freely chosen.
Measurement can be stopped early byselecting
Stop orby stopping theve hicle.
Manual start for accele ration and quarter-
mile race #
Select Acceleration orQuarter Mile . #
Select Manual start .
Three red traf fic lights appear one af terthe
ot her. The reaction time measurement starts
when they change togreen at the same time.
The reaction time is displa yed as soon as you
drive off. If you drive off too ear ly,th e mes‐
sage Jump start. will appear and acceleration
or quarter mile measu rement will be cancel‐
led.
Measuring braking #
Select Braking . 210
Multimedia sy stem