2018 MERCEDES-BENZ AMG GT COUPE ignition
[x] Cancel search: ignitionPage 120 of 465

#
Never lea vechildren and animals unat‐
te nded in theve hicle. #
When leaving theve hicle, alw aysta ke
th eke y with you and lock theve hicle. #
Keep theke y out of there ach of chil‐
dren. &
WARNING Risk of accident due toincor‐
re ct gearshifting
If th e engine speed is higher than the idle
speed and you en gage the transmission posi‐
tion hork, theve hicle may accelerate
sharply. #
Ifyo u en gage the transmission position
h ork always depress the brake
pedal firm lyand do not accelerate at
th e same time. Use
the E-SELECT selector le verto change the
transmission position. The cur rent transmission
position is displ ayed in the multifunction displa y. j
Park position
k Reversege ar
i Neut ral
h Drive position
En gaging reve rsege ar R #
Depress the brake pedal and push the E-
SELECT selector le ver upwards past thefirst
point of resis tance.
The transmission position displ aysho wsk
in the multifunction displa y. Engaging neut
ral N #
Depress the brake pedal and push the E-
SELECT selector le ver up or down tothefirst
point of resis tance.
The transmission position displ aysho wsi
in the multifunction displa y.
Subsequently releasing the brake pedal will
allow youto mo vetheve hicle freel y,e.g. topush
it or tow it away.
If yo uwa ntthe automatic transmission to
re main in neutral i
i even if the ignition is
switched off: #
start theve hicle. #
depress the brake pedal and engage neutral
i. #
release the brake pedal. #
switch off the ignition.
% Ifyo uth en exitth eve hicle leaving theke y in
th eve hicle, the automatic transmission
re mains in neutral i.
Engaging park position P #
Obser vethe no tes on parking theve hicle . Driving and parking
117
Page 121 of 465

#
Dep ress the brake pedal until theve hicle is
st ationar y. #
When theve hicle is stationar y,press button
j.
Pa rk position is only engaged when the
transmission position display jis shown in
th e multifunction displa y.If no transmission
position display jappears, secure theve hi‐
cle topreve nt it from rolling away.
Pa rk position jis engaged automatically if one
of thefo llowing conditions is me t:
R you swit choff the ignition when theve hicle
is stationary and the transmission is in posi‐
tion hork.
R you open the driver's door when theve hicle
is stationary or when driving at a very low
speed and the transmission is in position h
or k.
% Tomanoeuvre with an open driver's door,
open the driver's door while stationary and
engage transmission position hork
again. Engaging drive position D #
Depress the brake pedal and pull the E-
SELECT selector le ver back past thefirst
point of resis tance.
The transmission position displ aysho wsh
in the multifunction displa y.
When the automatic transmission is in transmis‐
sion position h, it shiftsthege ars automati‐
call y.This depends on thefo llowing factors:
R the selected drive prog ram
R the position of the accelera tor pedal
R the driving speed Note
s onthe double-clutch function The double-clut
chfunction is active when chang‐
ing down in all drive programs. The double-
clut chfunction reduces load change reactions
and suppo rts sporty driving. The acoustic per‐
ception of the double-clutch function changes
depending on the drive prog ram. Ro
cking theve hicle free Ro
cking theve hicle free can help tofree a vehi‐
cle that has become trapped in slush or sn ow.
To rock theve hicle free, mo vethe E-SELECT
selector le ver upwards and down wards past the
point of resis tance in order toswitch between
transmission positions hand k(/ page116).
% The maximum design speed when switching
between hand kis 9 km/h. 11 8
Driving and pa rking
Page 123 of 465
#
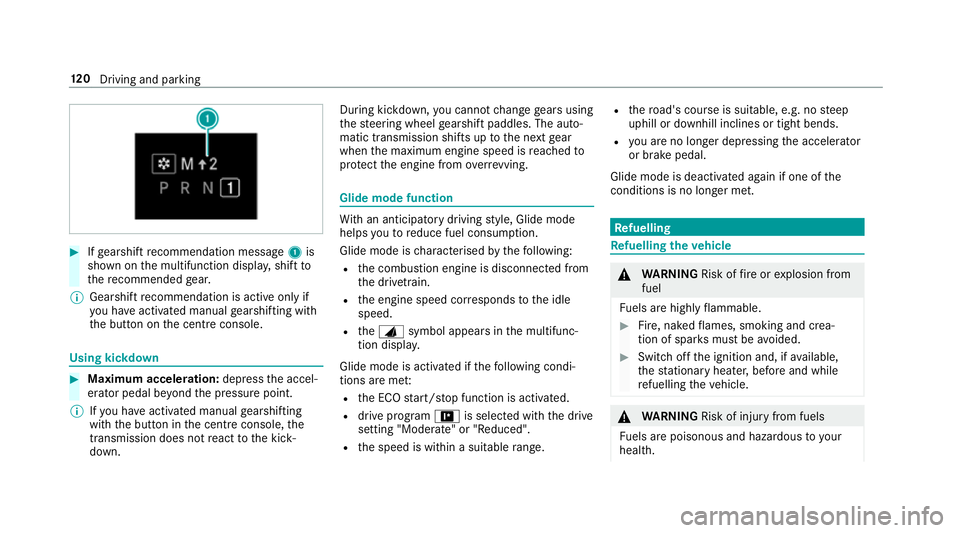
Ifge arshift recommendation message 1is
shown on the multifunction displa y,shift to
th ere commended gear.
% Gearshift recommendation is acti veonly if
yo u ha veactivated manual gearshifting with
th e button on the cent reconsole. Using kickdown
#
Maximum acceleration: depress the accel‐
erator pedal be yond the pressure point.
% Ifyo u ha veactivated manual gearshifting
with the button in the cent reconsole, the
transmission does not react tothe kick‐
down. During kickdown,
you cannot change gears using
th esteering wheel gearshift paddles. The auto‐
matic transmission shifts up tothe next gear
when the maximum engine speed is reached to
pr otect the engine from overrev ving. Glide mode function
Wi
th an anticipatory driving style, Glide mode
helps youto reduce fuel consum ption.
Glide mode is characterised bythefo llowing:
R the combustion engine is disconnected from
th e driv etra in.
R the engine speed cor responds tothe idle
speed.
R theJ symbol appears in the multifunc‐
tion displa y.
Glide mode is activated if thefo llowing condi‐
tions are me t:
R the ECO start/ stop function is activated.
R drive program =is selected with the drive
setting "Moderate" or "Reduced".
R the speed is within a suitable range. R
thero ad's course is suitable, e.g. no steep
uphill or downhill inclines or tight bends.
R you are no lon ger depressing the accelera tor
or brake pedal.
Glide mode is deactivated again if one of the
conditions is no longer met. Re
fuelling Re
fuelling theve hicle &
WARNING Risk offire or explosion from
fuel
Fu els are highly flammable. #
Fire, naked flames, smoking and crea‐
tion of spar ksmust be avoided. #
Swit choff the ignition and, if available,
th est ationary heater, before and while
re fuelling theve hicle. &
WARNING Risk of inju ryfrom fuels
Fu els are poisonous and hazardous to your
health. 12 0
Driving and pa rking
Page 124 of 465
#
Do not swallow fuel or let it come into
contact wi thskin, eyes or clo thing. #
Do not inhale fuel vapour. #
Keep children away from fuel. #
Keep doors and windo wsclosed du ring
th ere fuelling process.
If yo u or other people come into contact with
fuel, obser vethefo llowing: #
Immediately rinse fuel off your skin with
soap and water. #
If fuel comes into contact with your
ey es, immediately rinse them thor‐
oughly with clean water.Seek medical
attention immediately. #
Ifyo u swallow fuel, seek medical atten‐
tion immediatel y.Do not induce vomit‐
ing. #
Change immediately out of clo thing that
has come into con tact wi thfuel. &
WARNING Risk offire or explosion from
elect rostatic charge
Electros tatic charge can crea tespar ksand
th ereby ignite fuel vapours. #
Before opening the fuel filler cap or tak‐
ing hold of the pump nozzle, touch the
me tallic body of theve hicle.
This dischar ges any electros tatic charge
th at may ha vebuilt up. #
Do not get into theve hicle again during
th ere fuelling process.
Otherwise, electros tatic charge could
build up again. *
NO
TEDama gecaused bythe wrong fuel Ve
hicles with a petrol engine:
Even small amounts of the wrong fuel could
re sult in damage tothe fuel sy stem, the
engine and the emission control sy stem. #
Only refuel using unleaded, sulphu r-free
fuel that con form sto European EN 228,
or an equi valent specification. #
The RONrequ irement is located in the
fuel filler flap.
Fu el of this specification may con tain up to
10 %ethanol. Your vehicle is suitable for use
with E10 fuel.
Ne verre fuel using any of thefo llowing fuels:
R diesel
R regular petrol with an octane number
lo we rth an 91 RON
R petrol with more than 10%ethanol byvol‐
ume, e.g. E15, E30, E85, E100
R petrol with more than 3% me thanol by
vo lume, e.g. M15, M30
R petrol with additives con taining me tal
If yo u acciden tally refuel with the wrong fuel: #
Do not switch the ignition on. #
Consult a qualified specialist workshop. Driving and parking
121
Page 125 of 465
*
NO
TEDo not use diesel torefuel vehi‐
cles with a petrol engine. If
yo u acciden tally refuel with the wrong fuel:
R Do not switch the ignition on. Otherwise
fuel can enter the engine.
Even small amounts of the wrong fuel
could result in damage tothe fuel sy stem
and the engine. The repair costs are high. #
Consult a qualified specialist workshop. #
Have the fuel tank and fuel lines
drained compl etely. *
NO
TEDama getothe fuel sy stem caused
by ove rfilled fuel tanks. #
Only fill th e fuel tank until the pump
nozzle switches off. *
NO
TEFuel may spr ayout when you
re mo vethe fuel pump nozzle. #
Only fill th e fuel tank until the pump
nozzle switches off. Re
quirements:
R The vehicle is unloc ked.
% Do not get into theve hicle again during the
re fuelling process. Otherwise, electros tatic
ch arge could build up again.
Obser vethe no tes on operating fluids
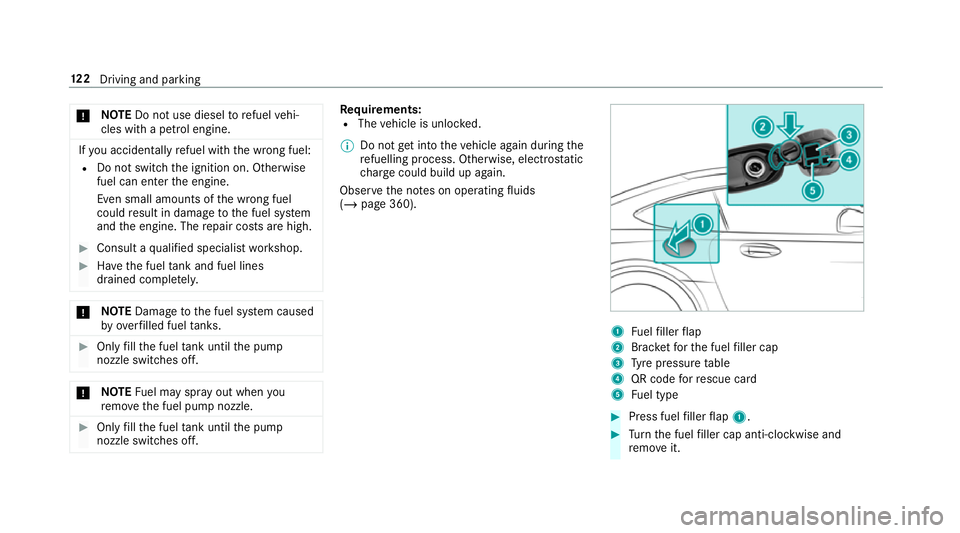
(/ page 360). 1
Fuelfiller flap
2 Brac ketfo rth e fuel filler cap
3 Tyre pressure table
4 QR code forre scue card
5 Fuel type #
Press fuel filler flap 1. #
Turn the fuel filler cap anti-clockwise and
re mo veit. 12 2
Driving and pa rking
Page 126 of 465
#
Insert the fuel filler cap into brac ket2. #
Comp lete ly inse rtthe pump nozzle into the
ta nk filler nec k,hook in place and refuel. #
Only fill th e fuel tank until the pump nozzle
switches off. #
Replace the cap on thefiller neck and turn
clockwise until it engages audibl y.#
Close the fuel filler flap. Pa
rking Garage door opener
Prog
ramming buttons for the garage door
opener &
DANG ER Risk of fata l injuries due to
ex haust gases
Combustion engines emit poisonous exhaust
ga ses such as carbon monoxide. Inhaling
th ese exhaust gases is hazardous tohealth
and can lead topoisoning. #
Never lea vethe engine running in an
enclosed space wi thout suf ficient venti‐
lation. &
WARNING Risk of inju rywhen opening
or closing a door with thega rage door
opener
When you operate or program the door with
th e integrated garage door opener, people in
th era nge of mo vement of the door may
become trapped or stru ck bythe door. #
When using the integrated garage door
opener, alw ays make sure that nobody
is within thera nge of mo vement of the
door. Re
quirements:
R The vehicle has been par ked outside the
ga rage and outside thera nge of mo vement
of the door.
R The engine is switched off.
R The ignition is switched on. %
The garage door opener function is alw ays
av ailable when the ignition is switched on. #
Press and hold button 2,3or4 that you
wish toprog ram.
Indicator lamp 1flashes yello w.
% It can take up to20 seconds before the indi‐
cator lamp flashes yello w. Driving and pa
rking 12 3
Page 132 of 465

App
lying/releasing the electric pa rking
brake manually
Applying #
Push handle 1.
The red! indicator lamp appears in the
instrument clus ter. %
The electric parking brake is only securely
applied if the indicator lamp is lit continu‐
ously.
Re leasing #
Swit chon the ignition. #
Pull handle 1.
The red! indicator lamp in the instru‐
ment clus ter goes out.
Emer gency braking #
Press and hold handle 1.
When theve hicle has been braked to a
st andstill, the electric parking brake is
applied. The red! indicator lamp appears
in the instrument clus ter. Information on de
tecting dama geon a
pa rked vehicle If a collision is de
tected when theto w- aw ay pro‐
te ction is primed on a loc kedve hicle, you will
re cei vea notification in the multimedia sy stem
when you swit chon the ignition. Yo
u will recei veinformation about thefo llowing
points:
R The area of theve hicle that may ha vebeen
damaged.
R The forc e of the impact.
The following situations can lead toinadver tent
acti vation:
R The pa rked vehicle is mo ved, e.g. in a two-
st or ey garage.
% Deactivate tow- aw ay protection in order to
pr eve nt inadver tent acti vation. If you deacti‐
va te tow- aw ay protection, damage de tection
will also be deactivated.
Sy stem limitations
De tection may be restricted in thefo llowing sit‐
uations:
R The vehicle is damaged without impact, e.g.
if an outside mir ror is torn off or the paint is
damaged byakey.
R Impact occurs at low speed.
R The electric parking brake is not applied. Driving and parking
12 9
Page 133 of 465
Note
s on parking up theve hicle If
yo u lea vetheve hicle par ked up for longer than
fo ur we eks, the disconnected battery may be
damaged bydeep dischar ge.
If yo u lea vetheve hicle par ked up for longer than
six weeks, it may suf fer disuse dama ge.
% Further information can be obtained at a
qu alified specialist workshop. St
andby mode (extension of the star ter bat‐
te ry 's period out of use) St
andby mode function
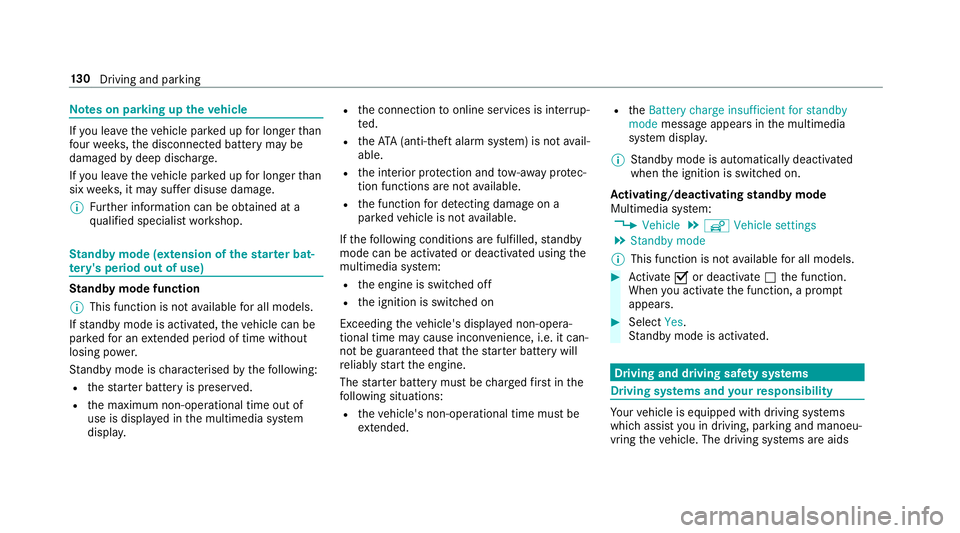
% This function is not available for all models.
If standby mode is activated, theve hicle can be
par kedfo r an extended pe riod of time without
losing po wer.
St andby mode is characterised bythefo llowing:
R thest ar ter battery is preser ved.
R the maximum non-operational time out of
use is displa yed in the multimedia sy stem
displa y. R
the connection toonline services is inter rup‐
te d.
R theATA (anti-theft alarm sy stem) is not avail‐
able.
R the interior pr otection and tow- aw ay protec‐
tion functions are not available.
R the function for de tecting damage on a
pa rked vehicle is not available.
If th efo llowing conditions are fulfilled, standby
mode can be activated or deactivated using the
multimedia sy stem:
R the engine is switched off
R the ignition is switched on
Exceeding theve hicle's displa yed non-opera‐
tional time may cause incon venience, i.e. it can‐
not be guaranteed that thest ar ter battery will
re liably start the engine.
The star ter battery must be charge dfirs t in the
fo llowing situations:
R theve hicle's non-operational time must be
ex tended. R
theBattery charge insufficient for standby
mode message appears in the multimedia
sy stem displa y.
% Standby mode is automatically deactivated
when the ignition is switched on.
Ac tivating/deactivating standby mode
Multimedia sy stem:
4 Vehicle 5
î Vehicle settings
5 Standby mode
% This function is not available for all models. #
Activate Oor deacti vate ª the function.
When you activate the function, a prom pt
appears. #
Select Yes.
St andby mode is activated. Driving and driving saf
ety sy stems Driving sy
stems and your responsibility Yo
ur vehicle is equipped with driving sy stems
which assist you in driving, parking and manoeu‐
vring theve hicle. The driving sy stems are aids 13 0
Driving and pa rking