Page 279 of 576

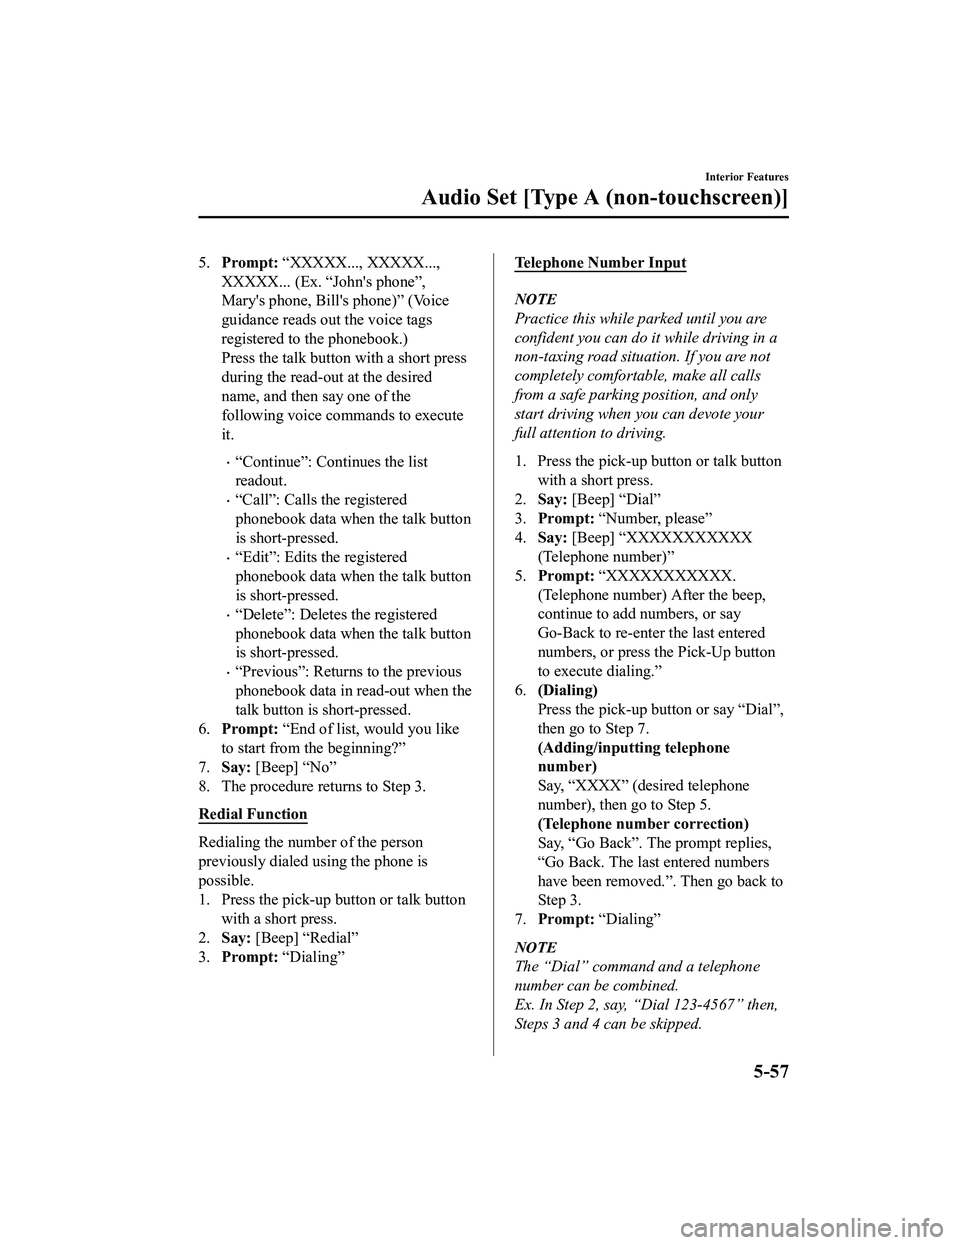
5.Prompt: “XXXXX..., XXXXX...,
XXXXX... (Ex. “John's phone”,
Mary's phone, Bill's phone)” (Voice
guidance reads out the voice tags
registered to the phonebook.)
Press the talk butto n with a short press
during the read-out at the desired
name, and then say one of the
following voice commands to execute
it.
“Continue”: Continues the list
readout.
“Call”: Calls the registered
phonebook data when the talk button
is short-pressed.
“Edit”: Edits the registered
phonebook data when the talk button
is short-pressed.
“Delete”: Deletes the registered
phonebook data when the talk button
is short-pressed.
“Previous”: Returns to the previous
phonebook data in read-out when the
talk button is short-pressed.
6. Prompt: “End of list, would you like
to start from the beginning?”
7. Say: [Beep] “No”
8. The procedure returns to Step 3.
Redial Function
Redialing the number of the person
previously dialed using the phone is
possible.
1. Press the pick-up button or talk button
with a short press.
2. Say: [Beep] “Redial”
3. Prompt: “Dialing”
Telephone Number Input
NOTE
Practice this while parked until you are
confident you can do it while driving in a
non-taxing road situation. If you are not
completely comfortable, make all calls
from a safe parking position, and only
start driving when you can devote your
full attention to driving.
1. Press the pick-up button or talk button
with a short press.
2. Say: [Beep] “Dial”
3. Prompt: “Number, please”
4. Say: [Beep] “XXXXXXXXXXX
(Telephone number)”
5. Prompt: “XXXXXXXXXXX.
(Telephone number) After the beep,
continue to add numbers, or say
Go-Back to re-enter the last entered
numbers, or press the Pick-Up button
to execute dialing.”
6. (Dialing)
Press the pick-up button or say “Dial”,
then go to Step 7.
(Adding/inputting telephone
number)
Say, “XXXX” (desired telephone
number), then go to Step 5.
(Telephone number correction)
Say, “Go Back”. The prompt replies,
“Go Back. The last entered numbers
have been removed.”. Then go back to
Step 3.
7. Prompt: “Dialing”
NOTE
The “Dial” command and a telephone
number can be combined.
Ex. In Step 2, say, “Dial 123-4567” then,
Steps 3 and 4 can be skipped.
Interior Features
Audio Set [Type A (non-touchscreen)]
5-57
MX-5_8GF7-EA-17J_Edition2 2017-10-31 14:07:27
Page 281 of 576

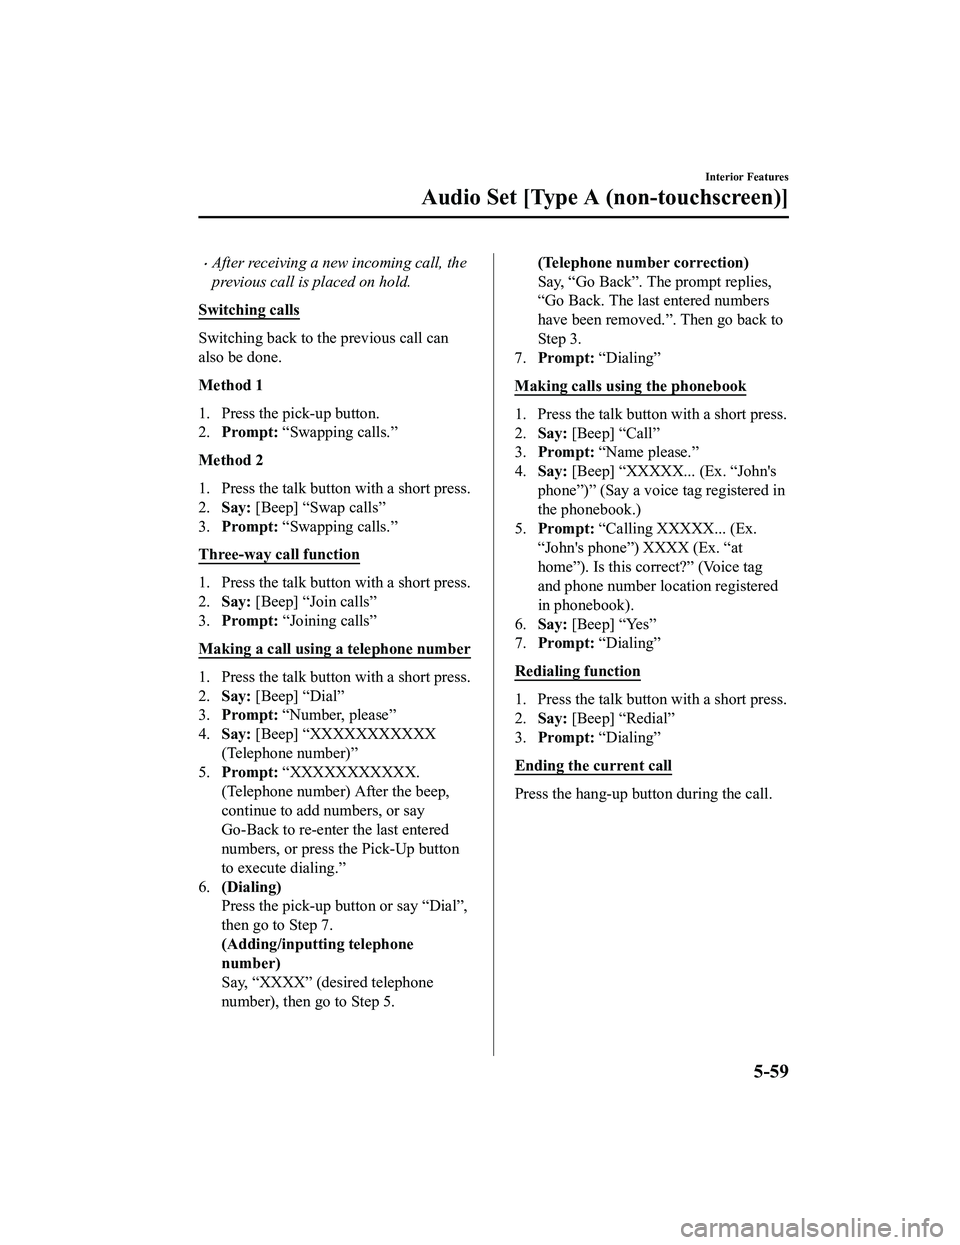
After receiving a new incoming call, the
previous call is placed on hold.
Switching calls
Switching back to the previous call can
also be done.
Method 1
1. Press the pick-up button.
2. Prompt: “Swapping calls.”
Method 2
1. Press the talk butto n with a short press.
2. Say: [Beep] “Swap calls”
3. Prompt: “Swapping calls.”
Three-way call function
1. Press the talk butto n with a short press.
2. Say: [Beep] “Join calls”
3. Prompt: “Joining calls”
Making a call using a telephone number
1. Press the talk butto n with a short press.
2. Say: [Beep] “Dial”
3. Prompt: “Number, please”
4. Say: [Beep] “XXXXXXXXXXX
(Telephone number)”
5. Prompt: “XXXXXXXXXXX.
(Telephone number) After the beep,
continue to add numbers, or say
Go-Back to re-enter the last entered
numbers, or press the Pick-Up button
to execute dialing.”
6. (Dialing)
Press the pick-up bu tton or say “Dial”,
then go to Step 7.
(Adding/inputting telephone
number)
Say, “XXXX” (desired telephone
number), then go to Step 5.
(Telephone number correction)
Say, “Go Back”. The prompt replies,
“Go Back. The last entered numbers
have been removed.”. Then go back to
Step 3.
7. Prompt: “Dialing”
Making calls using the phonebook
1. Press the talk butto n with a short press.
2. Say: [Beep] “Call”
3. Prompt: “Name please.”
4. Say: [Beep] “XXXXX... (Ex. “John's
phone”)” (Say a voice tag registered in
the phonebook.)
5. Prompt: “Calling XXXXX... (Ex.
“John's phone”) XXXX (Ex. “at
home”). Is this correct?” (Voice tag
and phone number location registered
in phonebook).
6. Say: [Beep] “Yes”
7. Prompt: “Dialing”
Redialing function
1. Press the talk butto n with a short press.
2. Say: [Beep] “Redial”
3. Prompt: “Dialing”
Ending the current call
Press the hang-up button during the call.
Interior Features
Audio Set [Type A (non-touchscreen)]
5-59
MX-5_8GF7-EA-17J_Edition2 2017-10-31 14:07:27
Page 287 of 576

NOTE
When the OS of the device is updated, the pairing information may be deleted. If this
happens, reprogram the pairing information to the Bluetooth
® unit.
If you pair your phone which has already been paired to your vehicle more than once in
the past, you need to delete “Mazda” on your mobile device. Then, execute the
Bluetooth
® search on your mobile device once again, and pair to a newly detected
“Mazda”.
Before you pair your device, make sure that Bluetooth® is “ON”, both on your phone and
on the vehicle.
If Bluetooth®-enabled devices are used in the following locations or conditions,
connection via Bluetooth
® may not be possible.
The device is in a location hidden from the unit such as behind or under a seat, or
inside the glove compartment.
The device contacts or is covered by a metal object or body.
The device is set to power-saving mode.
Different Bluetooth®-enabled devices can be used for Bluetooth® Hands-Free and
Bluetooth
® audio. For example, device A can be connected as a Bluetooth® Hands-Free
device and device B can be connected as a Bluetooth
® audio device. However, the
following may occur when they are used at the same time.
The Bluetooth® connection of the device is disconnected.
Noise occurs in the Hands-Free audio.
Hands-Free operates slowly.
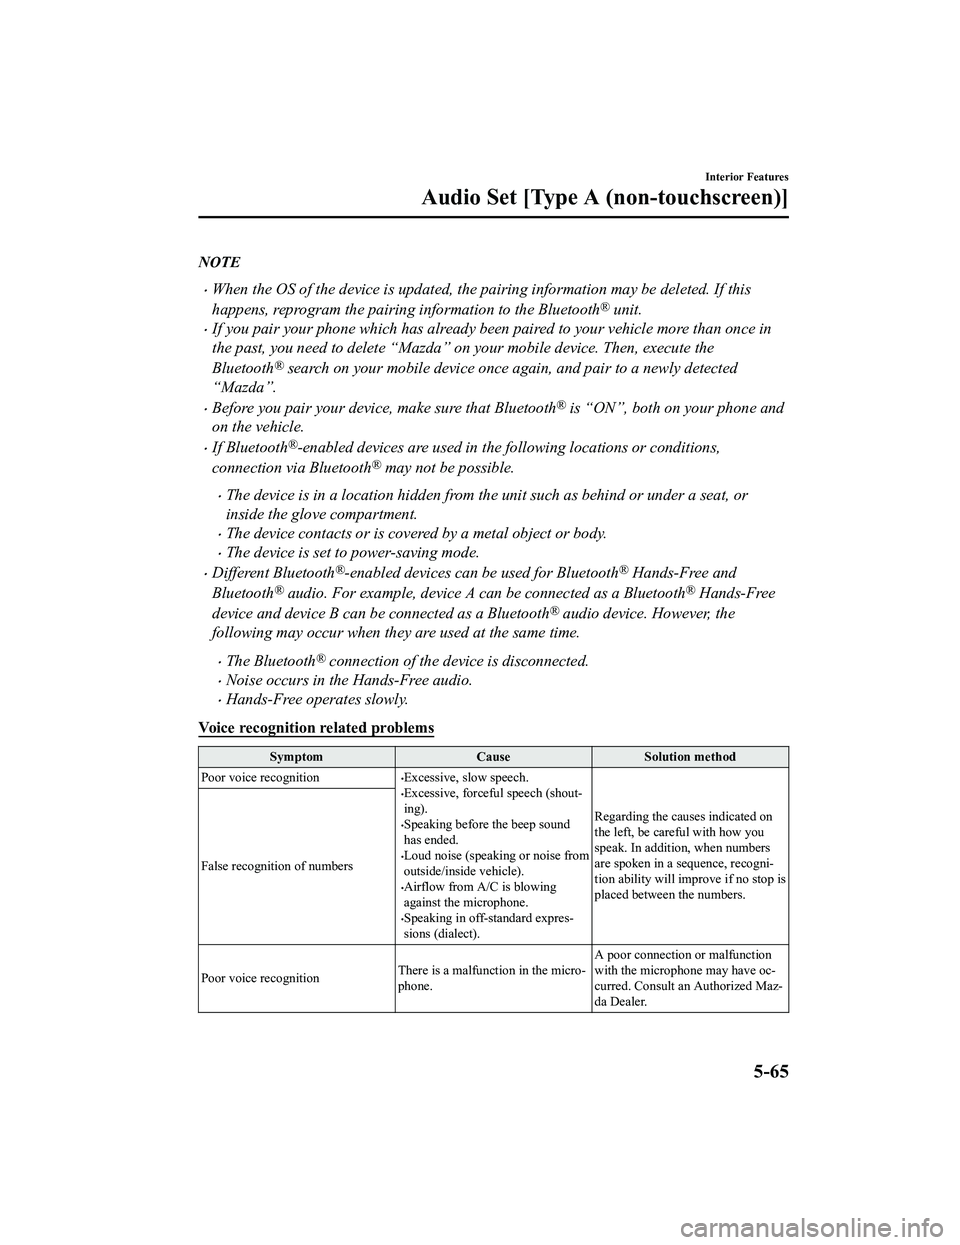
Voice recognition related problems
Symptom CauseSolution method
Poor voice recognition
Excessive, slow speech.Excessive, forceful speech (shout-
ing).
Speaking before the beep sound
has ended.
Loud noise (speaking or noise from
outside/inside vehicle).
Airflow from A/C is blowing
against the microphone.
Speaking in off-standard expres-
sions (dialect). Regarding the causes indicated on
the left, be careful with how you
speak. In addition,
when numbers
are spoken in a sequence, recogni-
tion ability will improve if no stop is
placed between the numbers.
False recognition of numbers
Poor voice recognition
There is a malfunction in the micro-
phone.A poor connection or malfunction
with the microphone may have oc-
curred. Consult an Authorized Maz-
da Dealer.
Interior Features
Audio Set [Type A (non-touchscreen)]
5-65
MX-5_8GF7-EA-17J_Edition2
2017-10-31 14:07:27
Page 350 of 576

NOTE
When the OS of the device is updated, the pairing information may be deleted. If this
happens, reprogram the pairing information to the Bluetooth
® unit.
If you pair your phone which has already been paired to your vehicle more than once in
the past, you need to delete “Mazda” on your mobile device. Then, execute the
Bluetooth
® search on your mobile device once again, and pair to a newly detected
“Mazda”.
Before you pair your device, make sure that Bluetooth® is “ON”, both on your phone and
on the vehicle.
If Bluetooth®-enabled devices are used in the following locations or conditions,
connection via Bluetooth
® may not be possible.
The device is in a location hidden from the center display such as behind or under a
seat, or inside the glove compartment.
The device contacts or is covered by a metal object or body.
The device is set to power-saving mode.
Different Bluetooth®-enabled devices can be used for Bluetooth® Hands-Free and
Bluetooth
® audio. For example, device A can be connected as a Bluetooth® Hands-Free
device and device B can be connected as a Bluetooth
® audio device. However, the
following may occur when they are used at the same time.
The Bluetooth® connection of the device is disconnected.
Noise occurs in the Hands-Free audio.
Hands-Free operates slowly.
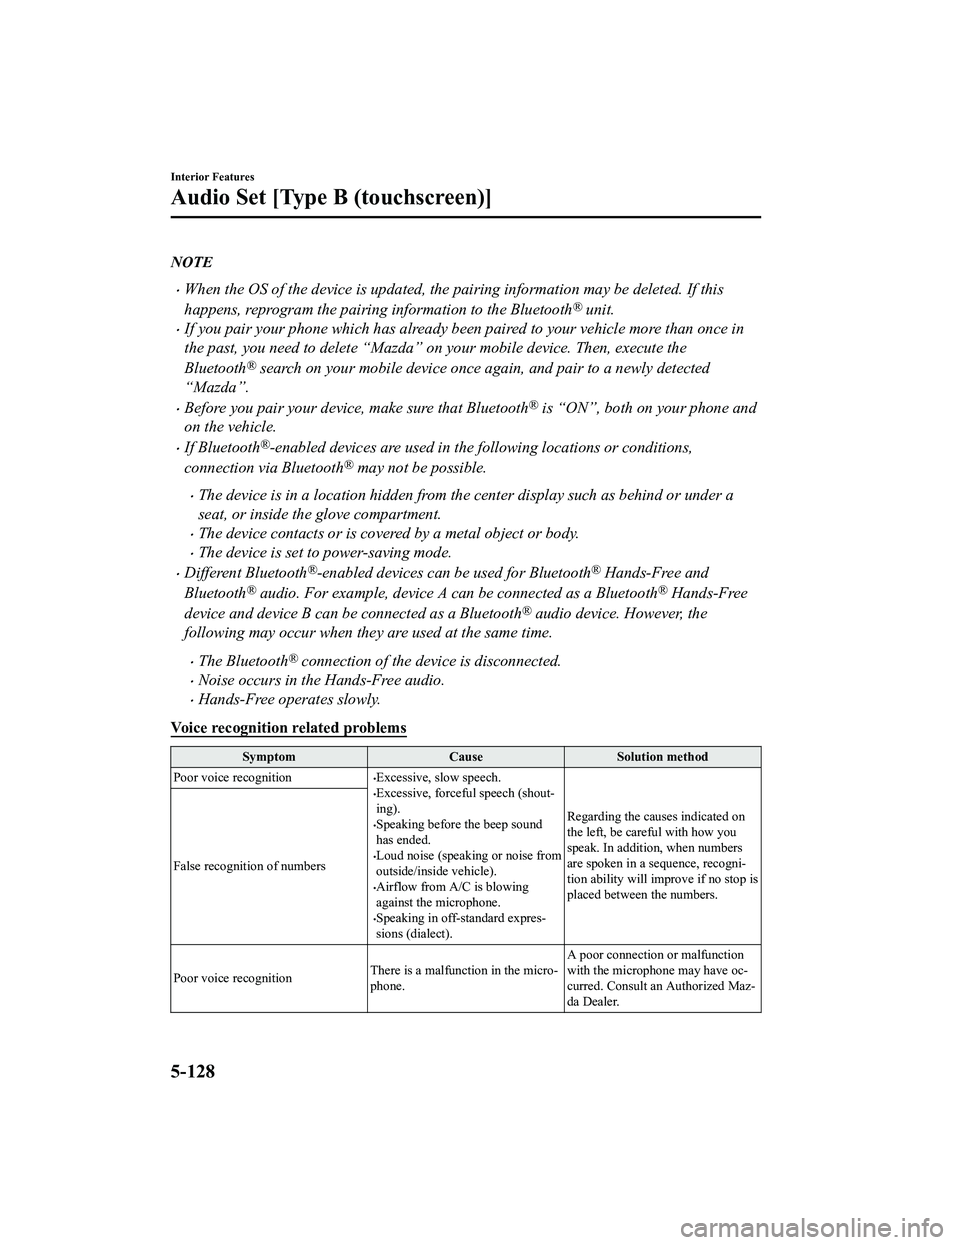
Voice recognition related problems
Symptom CauseSolution method
Poor voice recognition
Excessive, slow speech.Excessive, forceful speech (shout-
ing).
Speaking before the beep sound
has ended.
Loud noise (speaking or noise from
outside/inside vehicle).
Airflow from A/C is blowing
against the microphone.
Speaking in off-standard expres-
sions (dialect). Regarding the causes indicated on
the left, be careful with how you
speak. In addition, when numbers
are spoken in a sequence, recogni-
tion ability will imp
rove if no stop is
placed between the numbers.
False recognition of numbers
Poor voice recognition
There is a malfunction in the micro-
phone.A poor connection or malfunction
with the microphone may have oc-
curred. Consult an Authorized Maz-
da Dealer.
Interior Features
Audio Set [Type B (touchscreen)]
5-128
MX-5_8GF7-EA-17J_Edition2
2017-10-31 14:07:27
Page 366 of 576
Installing cup holders
CAUTION
When installing a cup holder, insert it all the way into the installation hole and make sure that
it is secured in place. Otherwise, the cup holder may fall off while the vehicle is being driven
and cause the beverage to spill.
Interior Features
Interior Equipment
5-144
MX-5_8GF7-EA-17J_Edition2 2017-10-31 14:07:27
Page 369 of 576
▼Back Trim Storage Box
Small items can be stored in the back trim
storage box.
(Soft top model)
(Hardtop model)
To use the back trim storage box
1. Slide the seat all the way forward and
fold the seatback forward.
Refer to Seat Operation on page 2-4.
2. Remove the lids.
When finished, return the seat to its
original position a nd secure it. After
returning the seat to its original position,
make sure the seat is secured by
attempting to lightly move it forward and
backward.
CAUTION
Do not forcefully push objects into the back
trim storage box. Otherwise, the box could
be damaged.
Interior Features
Interior Equipment
5-147
MX-5_8GF7-EA-17J_Edition2 2017-10-31 14:07:27
Page 389 of 576
Hood
WA R N I N G
Always check that the hood is closed and
securely locked:
A hood that is not closed and securely
locked is dangerous as it could fly open
while the vehicle is moving and block the
driver's vision which could result in a
serious accident.
▼ Opening the Hood
1. With the vehicle parked, pull the
release handle to unlock the hood.
Release handle
2. Insert your hand into the hood
opening, slide the latch lever to the
right, and lift up the hood.
Lever
3. Grasp the support rod in the paddedarea and secure it in the support rod
hole indicated by the arrow to hold the
hood open.
Pad
Support rod
Clip
Maintenance and Care
Owner Maintenance
6-19
MX-5_8GF7-EA-17J_Edition2 2017-10-31 14:07:27
Page 390 of 576
▼Closing the Hood
1. Check under the hood area to make
certain all filler caps are in place and
all loose items (e.g. tools, oil
containers, etc.) have been removed.
2. Lift the hood, grasp the padded area on the support rod, and secure the support
rod in the clip. Verify that the support
rod is secured in the clip before closing
the hood.
Clip
Pad
3. Lower the hood slowly to a height of
about 20 cm (7.9 in) above its closed
position and then let it drop.
CAUTION
When closing the hood, do not push it
excessively such as by applying your
weight. Otherwise, the hood could be
deformed.
Maintenance and Care
Owner Maintenance
6-20
MX-5_8GF7-EA-17J_Edition2 2017-10-31 14:07:27