Page 101 of 551

Features of your vehicle
14
4
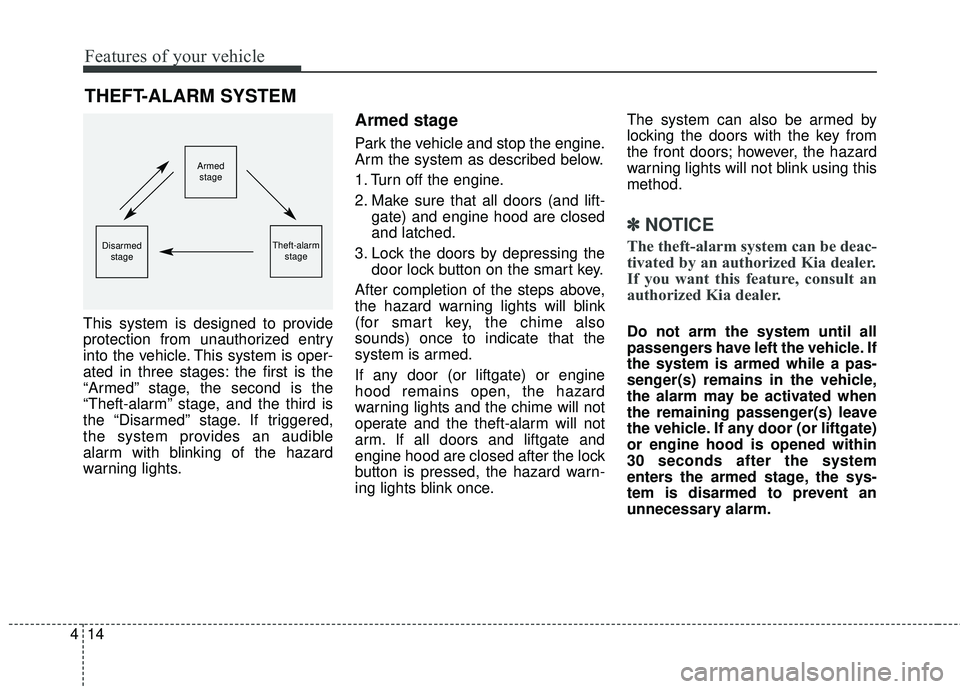
This system is designed to provide
protection from unauthorized entry
into the vehicle. This system is oper-
ated in three stages: the first is the
“Armed” stage, the second is the
“Theft-alarm” stage, and the third is
the “Disarmed” stage. If triggered,
the system provides an audible
alarm with blinking of the hazard
warning lights.
Armed stage
Park the vehicle and stop the engine.
Arm the system as described below.
1. Turn off the engine.
2. Make sure that all doors (and lift-
gate) and engine hood are closed
and latched.
3. Lock the doors by depressing the door lock button on the smart key.
After completion of the steps above,
the hazard warning lights will blink
(for smart key, the chime also
sounds) once to indicate that the
system is armed.
If any door (or liftgate) or engine
hood remains open, the hazard
warning lights and the chime will not
operate and the theft-alarm will not
arm. If all doors and liftgate and
engine hood are closed after the lock
button is pressed, the hazard warn-
ing lights blink once. The system can also be armed by
locking the doors with the key from
the front doors; however, the hazard
warning lights will not blink using this
method.
✽ ✽
NOTICE
The theft-alarm system can be deac-
tivated by an authorized Kia dealer.
If you want this feature, consult an
authorized Kia dealer.
Do not arm the system until all
passengers have left the vehicle. If
the system is armed while a pas-
senger(s) remains in the vehicle,
the alarm may be activated when
the remaining passenger(s) leave
the vehicle. If any door (or liftgate)
or engine hood is opened within
30 seconds after the system
enters the armed stage, the sys-
tem is disarmed to prevent an
unnecessary alarm.
THEFT-ALARM SYSTEM
Armed
stage
Theft-alarm stageDisarmedstage
Page 102 of 551

415
Features of your vehicle
Theft-alarm stage
The alarm will be activated if any of
the following occurs while the system
is armed.
A front or rear door is opened with-out using the smart key.
The liftgate is opened without using
the smart key.
The engine hood is opened.
The horn will sound and the hazard
warning lights will blink continuously
for approximately 30 seconds, and
repeat the horn 2 times unless the
system is disarmed. To turn off the
system, unlock the doors with the
smart key.
Disarmed stage
The system will be disarmed when
The doors (and liftgate) are unlocked with the smart key.
After depressing the unlock button,
the hazard warning lights will blink
and the chime will sound twice (in
smart key) to indicate that the sys-
tem is disarmed.
After depressing the unlock button, if
any door (or liftgate) is not opened
within 30 seconds, the system will be
rearmed.
Avoid trying to start the engine while the alarm is activated. The
vehicle starting motor is disabled
during the theft-alarm stage.
If the system is not disarmed with
the smart key, open the doors by
using the mechanical key and start
the engine by directly pressing the
engine Start/Stop button with the
smart key.
If you lose your keys, consult your authorized Kia dealer.
✽ ✽ NOTICE
Malfunctions caused by improper
alterations, adjustments or modifi-
cations to the theft-alarm system are
not covered by your vehicle manu-
facturer warranty.
CAUTION - Adjusting
alarm system
Do not change, alter or adjust
the theft-alarm system becauseit could cause the theft-alarmsystem to malfunction.
Page 117 of 551

Features of your vehicle
30
4
On a vehicle equipped with a smart
key, the liftgate can be opened with
no-touch activation using the Smart
Liftgate system.
How to use the Smart Liftgate
The liftgate can be opened with no-
touch activation satisfying all the
conditions below.
After 15 seconds when all doors
are closed and locked
Positioned in the detecting area for more than 3 seconds.
✽ ✽ NOTICE
• The Smart Liftgate does not oper-
ate when:
- The smart key is detected within15 seconds after the doors are
closed and locked, and is contin-
uously detected.
- The smart key is detected within 15 seconds after the doors are
closed and locked, and 1.5 m (60
inches) from the front door han-
dles. (for vehicles equipped with
Welcome Light)
- A door is not locked or closed.
- The smart key is in the vehicle.
1. Setting
To activate the Smart Liftgate, go to
User Settings Mode and select
Smart Liftgate on the LCD display.
❈ For more details, refer to “LCD
Display” in this chapter.
SMART LIFTGATE (IF EQUIPPED)
OCK047021
Page 118 of 551

431
Features of your vehicle
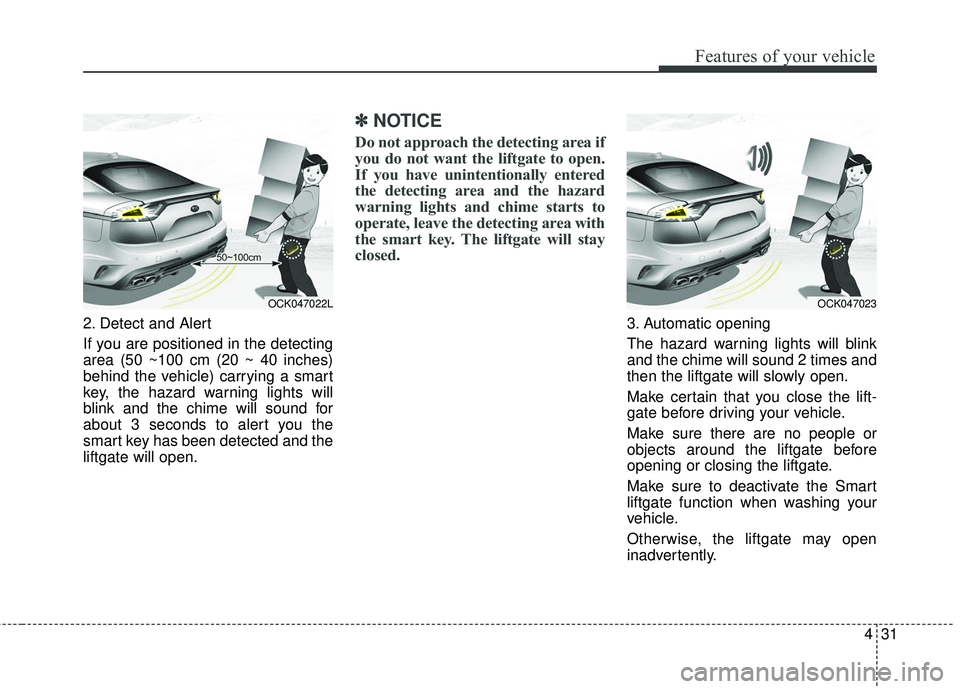
2. Detect and Alert
If you are positioned in the detecting
area (50 ~100 cm (20 ~ 40 inches)
behind the vehicle) carrying a smart
key, the hazard warning lights will
blink and the chime will sound for
about 3 seconds to alert you the
smart key has been detected and the
liftgate will open.
✽ ✽NOTICE
Do not approach the detecting area if
you do not want the liftgate to open.
If you have unintentionally entered
the detecting area and the hazard
warning lights and chime starts to
operate, leave the detecting area with
the smart key. The liftgate will stay
closed.
3. Automatic opening
The hazard warning lights will blink
and the chime will sound 2 times and
then the liftgate will slowly open.
Make certain that you close the lift-
gate before driving your vehicle.
Make sure there are no people or
objects around the liftgate before
opening or closing the liftgate.
Make sure to deactivate the Smart
liftgate function when washing your
vehicle.
Otherwise, the liftgate may open
inadvertently.
OCK047022LOCK047023
Page 122 of 551

435
Features of your vehicle
Power windows
The Engine Start/Stop Button must
be in the ON position for power win-
dows to operate.
Each door has a power window
switch that controls the door's win-
dow. The driver has a power window
lock button which can block the oper-
ation of rear passenger windows.
The power windows can be operated
for approximately 30 seconds after
the engine start/stop button turned to
the ACC or LOCK position.
However, if the front doors are
opened, the power windows cannot
be operated even within the 30 sec-
onds period.
The driver’s door has a master power
window switch that controls all the
windows in the vehicle.
If the window cannot be close
because it is blocked by objects,
remove the objects and close the
window.
✽ ✽NOTICE
While driving with the rear windows
down or with the sunroof (if
equipped) in an open (or partially
open) position, your vehicle may
demonstrate a wind buffeting or
pulsation noise. This noise is a nor-
mal occurrence and can be reduced
or eliminated by taking the follow-
ing actions. If the noise occurs with
one or both of the rear windows
down, partially lower both front
windows approximately 2.5 cm (1
in.). If you experience the noise with
the sunroof open, slightly reduce the
size of the sunroof opening.
Window opening and closing
The driver’s door has a master power
window switch that controls all the
windows in the vehicle.
To open or close a window, press
down or pull up the front portion of
the corresponding switch to the first
detent position (5).
OCK047027
CAUTION
Do not install any accessories
in the vehicle that extend intothe open window area. Suchobjects will impact the properfunction of the Automatic rever-sal “jam protection” featuredescribed in this chapter.
WARNING- Power
Windows
Do not extend your face or arms
outside of the window opening
while the vehicle is in motion.
Doing so could result in signifi-
cant injury.
Page 126 of 551
439
Features of your vehicle
Opening the hood
1. Pull the release lever to unlatchthe hood. The hood should pop
open slightly.
Open the hood after turning off the
engine on a flat surface, press the P
(Parking) button to parking position
and setting the parking brake. 2. Go to the front of the vehicle, raise
the hood slightly, push the second-
ary latch (1) left side of the hood
center and lift the hood (2).
3. Raise the hood. It will completely rise by itself after it has been
raised about halfway.
Hood open warning
The warning message will appear on
the LCD display when hood is open.
The warning chime will operate when
the vehicle is being driven at or
above 3 km/h (2 mph) with the hood
open.
HOOD
OCK047029
OCK047030
OCK047110L
Page 127 of 551

Features of your vehicle
40
4
Closing the hood
1. Before closing the hood, check the
following:
ment must be correctly installed.
bustible material must be
removed from the engine com-
partment.
2. Return the support rod to its clip to prevent it from rattling.
3.Lower the hood until it is about 30 cm (12 in.) above the closed posi-
tion and let it drop. Make sure that
it locks into place.
4. Check that the hood has engaged properly. If the hood can be raised
slightly, it is not properly engaged.
Open it again and close it with a lit-
tle more force.
WARNING - Fire risk
Do not leave gloves, rags or any
other combustible material in the
engine compartment. Doing so
may cause a heat-induced fire.
WARNING - Unsecured
engine hood
Always double check to be sure
that the hood is firmly latched
before driving away. If it is not
latched, the hood could fly open
while the vehicle is being driv-
en, causing a total loss of visi-
bility, which might result in an
accident.CAUTION - Hood obstruc-
tion
Before closing the hood, ensure that all obstructions are removedfrom the hood opening. Closingthe hood with an obstructionpresent in the hood opening mayresult in property damage.
Page 128 of 551

441
Features of your vehicle
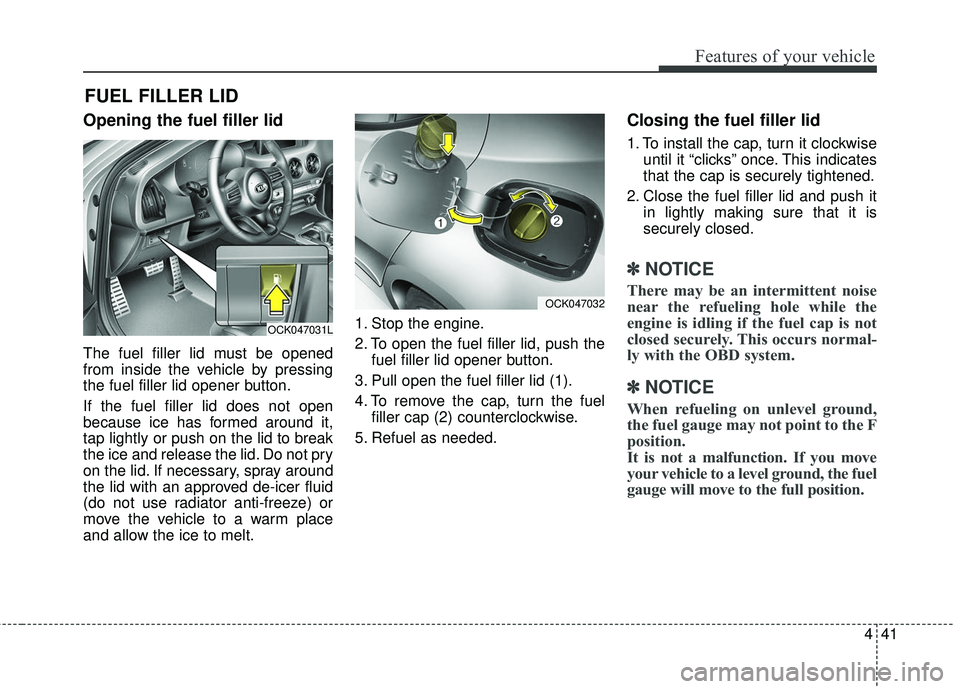
Opening the fuel filler lid
The fuel filler lid must be opened
from inside the vehicle by pressing
the fuel filler lid opener button.
If the fuel filler lid does not open
because ice has formed around it,
tap lightly or push on the lid to break
the ice and release the lid. Do not pry
on the lid. If necessary, spray around
the lid with an approved de-icer fluid
(do not use radiator anti-freeze) or
move the vehicle to a warm place
and allow the ice to melt.1. Stop the engine.
2. To open the fuel filler lid, push the
fuel filler lid opener button.
3. Pull open the fuel filler lid (1).
4. To remove the cap, turn the fuel filler cap (2) counterclockwise.
5. Refuel as needed.
Closing the fuel filler lid
1. To install the cap, turn it clockwise until it “clicks” once. This indicates
that the cap is securely tightened.
2. Close the fuel filler lid and push it in lightly making sure that it is
securely closed.
✽ ✽NOTICE
There may be an intermittent noise
near the refueling hole while the
engine is idling if the fuel cap is not
closed securely. This occurs normal-
ly with the OBD system.
✽ ✽NOTICE
When refueling on unlevel ground,
the fuel gauge may not point to the F
position.
It is not a malfunction. If you move
your vehicle to a level ground, the fuel
gauge will move to the full position.
FUEL FILLER LID
OCK047031L
OCK047032