Page 99 of 605
413
Features of your vehicle
Door LockUsing the door handle button
- Carry the smart key.
- Close all doors, engine hood andliftgate.
- Press the button of the outside door handle.
- The hazard warning lights will blink and the chime will sound once.
- Make sure that doors are locked by pulling the outside door handle.
✽ ✽ NOTICE
• The button will only operate when
the smart key is within 28~40in.
(0.7~1m) from the outside door
handle.
• Even though you press the outside door handle button, the doors will
not lock and the chime will sound
for 3 seconds if any of following
occur:- The smart key is in the vehicle.
- The engine start/stop button is in ACC or ON position.
- Any door except the liftgate is open.
Using the button on the smart key
- Close all doors, engine hood and
liftgate.
- Press the lock button(1).
- The hazard warning lights will blink and the chime will sound once.
- Make sure that doors are locked by pulling the outside door handle.
OYDDCO2004
OQL045001
Page 100 of 605
Features of your vehicle
14
4
Unlocking
Using the door handle button
1. Carry the smart key.
2. Press the button of the driver's
outside door handle.
3. The driver’s door will unlock. The hazard warning lights will blink and
the chime will sound two times.
4. Press the button twice within 4 seconds and all doors and the lift-
gate will unlock and the hazard
warning lights will blink and the
chime will sound two times.
✽ ✽NOTICE
• The button will only operate when
the smart key is within 28~40in.
(0.7~1m) from the outside door
handle.
• When the smart key is recognized in the area of 28~40in. (0.7~1m) from
the front outside door handle, other
people can also open the doors.
• After unlocking the driver’s door or all doors, the door(s) will lock
automatically unless the door is
opened.
Using the button on the smart key
1. Press the unlock button(2) of the
smart key.
2. The driver’s door will unlock. The hazard warning lights will blink and
the chime will sound two times.
3. Press the unlock button(2) twice within 4 seconds and all doors and
the liftgate will unlock. The hazard
warning lights will blink and the
chime will sound two times.
✽ ✽NOTICE
After pressing the button, the doors
will lock automatically unless any
door is opened within 30 seconds.
✽ ✽NOTICE
You can activate or deactivate the
Two Turn Unlock function. Refer to
"User settings" in this chapter.
Liftgate unlocking
Using the liftgate handle button
1. Carry the smart key.
2. Press the liftgate handle button.
3. When all doors are locked, the
hazard warning lights will blink two
times.
Once the liftgate is opened and
then closed, the liftgate will lock
automatically.
✽ ✽ NOTICE
The button will only operate when
the smart key is within 28~40in.
(0.7~1m) from the liftgate handle.
Page 101 of 605
415
Features of your vehicle
Using the button on the smart key
1. Press the liftgate unlock button (3)for more than 1 second.
2. When all doors are locked, the hazard warning lights will blink two
times.
For Power Liftgate Only:
The Power Liftgate will open if the
button is pressed for more than 1
second. Also, once the liftgate is
opened and then closed, the liftgate
will be locked again automatically.
For detailed information refer to the
"Power liftgate" in this chapter.Panic
1. Press the panic button (4) for more than 1 second.
2. The horn sounds and hazard warning light flash for about 27
seconds.
✽ ✽NOTICE
To stop the horn and lights, press
any button on the smart key.
Start-up
You can start the engine without
inserting the key. For detailed infor-
mation refer to the “Engine start/stop
button” in chapter 6.
Page 105 of 605
419
Features of your vehicle
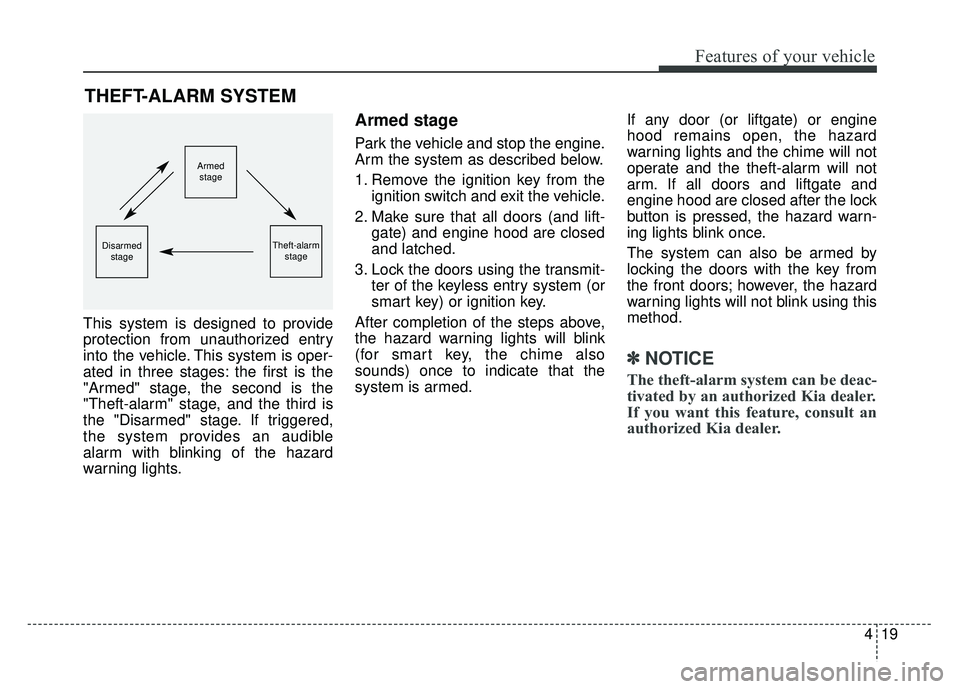
This system is designed to provide
protection from unauthorized entry
into the vehicle. This system is oper-
ated in three stages: the first is the
"Armed" stage, the second is the
"Theft-alarm" stage, and the third is
the "Disarmed" stage. If triggered,
the system provides an audible
alarm with blinking of the hazard
warning lights.
Armed stage
Park the vehicle and stop the engine.
Arm the system as described below.
1. Remove the ignition key from theignition switch and exit the vehicle.
2. Make sure that all doors (and lift- gate) and engine hood are closed
and latched.
3. Lock the doors using the transmit- ter of the keyless entry system (or
smart key) or ignition key.
After completion of the steps above,
the hazard warning lights will blink
(for smart key, the chime also
sounds) once to indicate that the
system is armed. If any door (or liftgate) or engine
hood remains open, the hazard
warning lights and the chime will not
operate and the theft-alarm will not
arm. If all doors and liftgate and
engine hood are closed after the lock
button is pressed, the hazard warn-
ing lights blink once.
The system can also be armed by
locking the doors with the key from
the front doors; however, the hazard
warning lights will not blink using this
method.
✽ ✽
NOTICE
The theft-alarm system can be deac-
tivated by an authorized Kia dealer.
If you want this feature, consult an
authorized Kia dealer.
THEFT-ALARM SYSTEM
Armed
stage
Theft-alarm stageDisarmedstage
Page 106 of 605
Features of your vehicle
20
4
Do not arm the system until all
passengers have left the vehicle. If
the system is armed while a pas-
senger(s) remains in the vehicle,
the alarm may be activated when
the remaining passenger(s) leave
the vehicle. If any door (or liftgate
) or engine hood is opened within
30 seconds after the system
enters the armed stage, the sys-
tem is disarmed to prevent an
unnecessary alarm.Theft-alarm stage
The alarm will be activated if any of
the following occurs while the system
is armed.
A front or rear door is opened with-
out using the ignition key or trans-
mitter (or smart key).
The liftgate is opened without using the transmitter (or smart key).
The engine hood is opened.
The horn will sound and the hazard
warning lights will blink continuously
for approximately 27 seconds, and
repeat the horn 3 times unless the
system is disarmed. To turn off the
system, unlock the doors with the igni-
tion key or transmitter (or smart key).
Disarmed stage
The system will be disarmed when
The doors (and liftgate) are unlocked with the transmitter (or
smart key) or the ignition key.
After depressing the unlock button,
the hazard warning lights will blink
and the chime will sound twice (in
smart key) to indicate that the sys-
tem is disarmed.
After depressing the unlock button, if
any door (or liftgate) is not opened
within 30 seconds, the system will be
rearmed.
Page 121 of 605
435
Features of your vehicle
1. Setting
To activate the Smart Power Liftgate,
go to User Settings Mode and select
Smart Power Liftgate on the LCD
display.
For more information, refer to the
"LCD Display" section in this
chapter.2. Detect and Alert
If you are positioned in the detecting
area (20~40 inches (50 ~100 cm)
behind the vehicle) carrying a smart
key, the hazard warning lights will
blink and chime will sound for about
3 seconds to alert you the smart key
has been detected and the liftgate
will open.✽ ✽NOTICE
Do not approach the detecting area
if you do not want the liftgate to
open. If you have unintentionally
entered the detecting area and the
hazard warning lights and chime
starts to operate, leave the detecting
area with the smart key. The liftgate
will stay closed.
OQLA045017
Page 122 of 605
Features of your vehicle
36
4
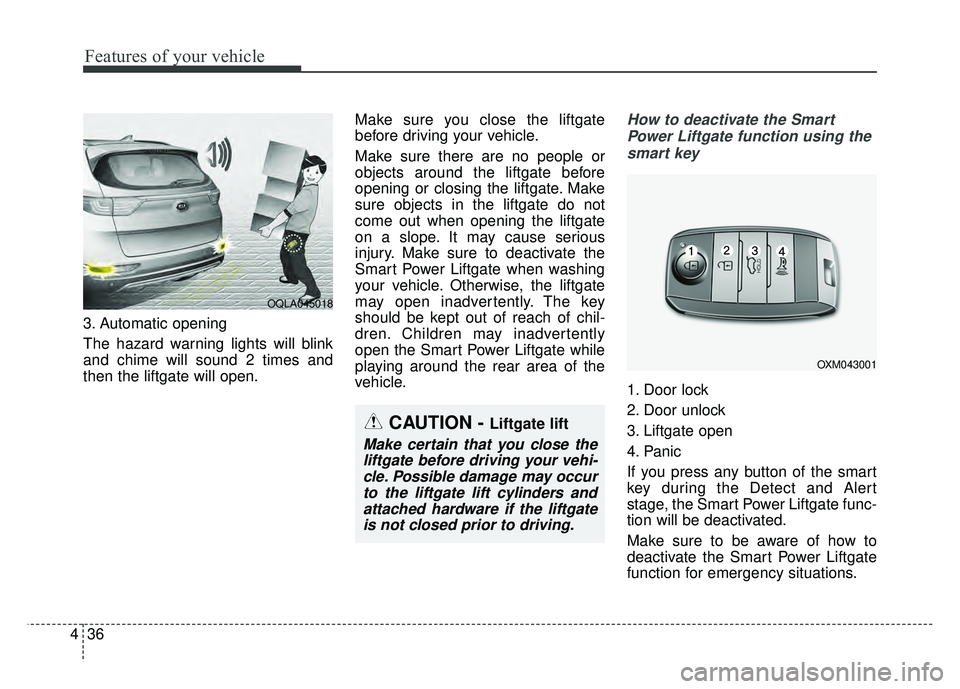
3. Automatic opening
The hazard warning lights will blink
and chime will sound 2 times and
then the liftgate will open. Make sure you close the liftgate
before driving your vehicle.
Make sure there are no people or
objects around the liftgate before
opening or closing the liftgate. Make
sure objects in the liftgate do not
come out when opening the liftgate
on a slope. It may cause serious
injury. Make sure to deactivate the
Smart Power Liftgate when washing
your vehicle. Otherwise, the liftgate
may open inadvertently. The key
should be kept out of reach of chil-
dren. Children may inadvertently
open the Smart Power Liftgate while
playing around the rear area of the
vehicle.
How to deactivate the Smart
Power Liftgate function using thesmart key
1. Door lock
2. Door unlock
3. Liftgate open
4. Panic
If you press any button of the smart
key during the Detect and Alert
stage, the Smart Power Liftgate func-
tion will be deactivated.
Make sure to be aware of how to
deactivate the Smart Power Liftgate
function for emergency situations.
OQLA045018
CAUTION - Liftgate lift
Make certain that you close theliftgate before driving your vehi-cle. Possible damage may occurto the liftgate lift cylinders andattached hardware if the liftgateis not closed prior to driving.
OXM043001
Page 125 of 605
439
Features of your vehicle
Power windows
The ignition switch must be in the ON
position for power windows to operate.
Each door has a power window
switch that controls the door's win-
dow. The driver has a power window
lock button which can block the oper-
ation of rear seat windows. The
power windows can be operated for
approximately 30 seconds after the
ignition key is removed or turned to
the ACC or LOCK (or OFF) position.
If the front doors are opened; howev-
er, the power windows cannot be
operated even within the 30 second
period.
If the window cannot be close
because it is blocked by objects,
remove the objects and close the
window.
✽ ✽NOTICE
While driving with the rear windows
down or with the sunroof (if
equipped) in an open (or partially
open) position, your vehicle may
demonstrate a wind buffeting or
pulsation noise. This noise is a nor-
mal occurrence and can be reduced
or eliminated by taking the follow-
ing actions. If the noise occurs with
one or both of the rear windows
down, partially lower both front
windows approximately one inch. If
you experience the noise with the
sunroof open, slightly reduce the
size of the sunroof opening.
Window opening and closing
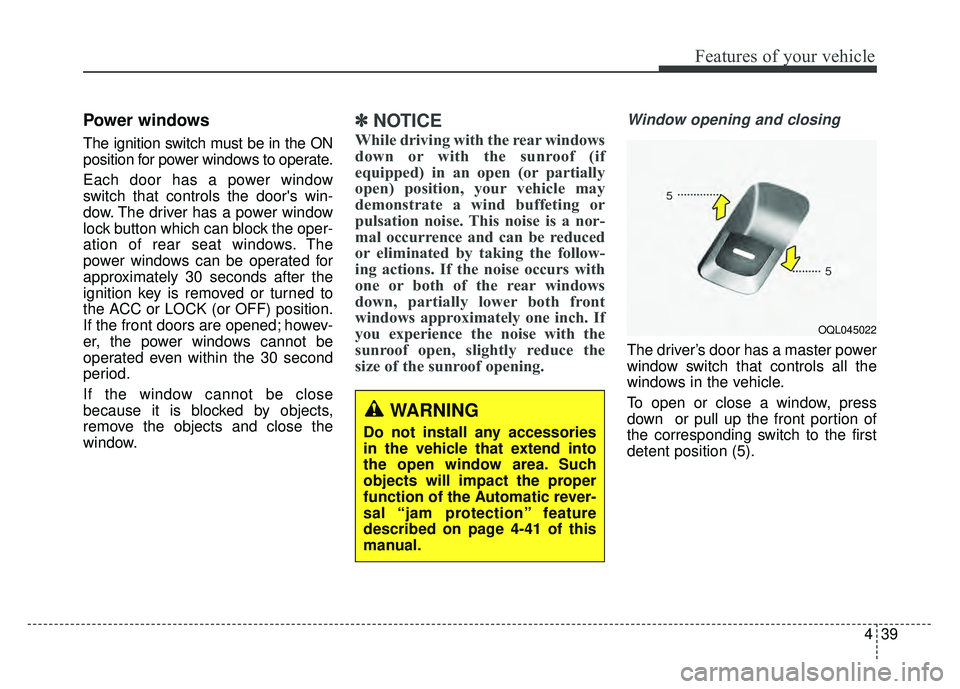
The driver’s door has a master power
window switch that controls all the
windows in the vehicle.
To open or close a window, press
down or pull up the front portion of
the corresponding switch to the first
detent position (5).
OQL045022
WARNING
Do not install any accessories
in the vehicle that extend into
the open window area. Such
objects will impact the proper
function of the Automatic rever-
sal “jam protection” feature
described on page 4-41 of this
manual.