Page 498 of 605

Maintenance
28
8
ENGINE COOLANT
The high-pressure cooling system
has a reservoir filled with year round
antifreeze coolant. The reservoir is
filled at the factory.
Check the antifreeze protection and
coolant level at least once a year: at
the beginning of the winter season,
and before traveling to a colder cli-
mate.Checking the coolant level Turn the engine off and wait until it
cools down. Use extreme care
when removing the radiator cap.
Wrap a thick towel around it, and
turn it counterclockwise slowly to
the first stop. Step back while the
pressure is released from the cool-
ing system.
When you are sure all the pressure
has been released, press down on
the cap, using a thick towel, and
continue turning counterclockwise
to remove it.
Even if the engine is not operating, do not remove the radiator cap or
the drain plug while the engine and
radiator are hot. Hot coolant and
steam may still blow out under
pressure, causing serious injury.
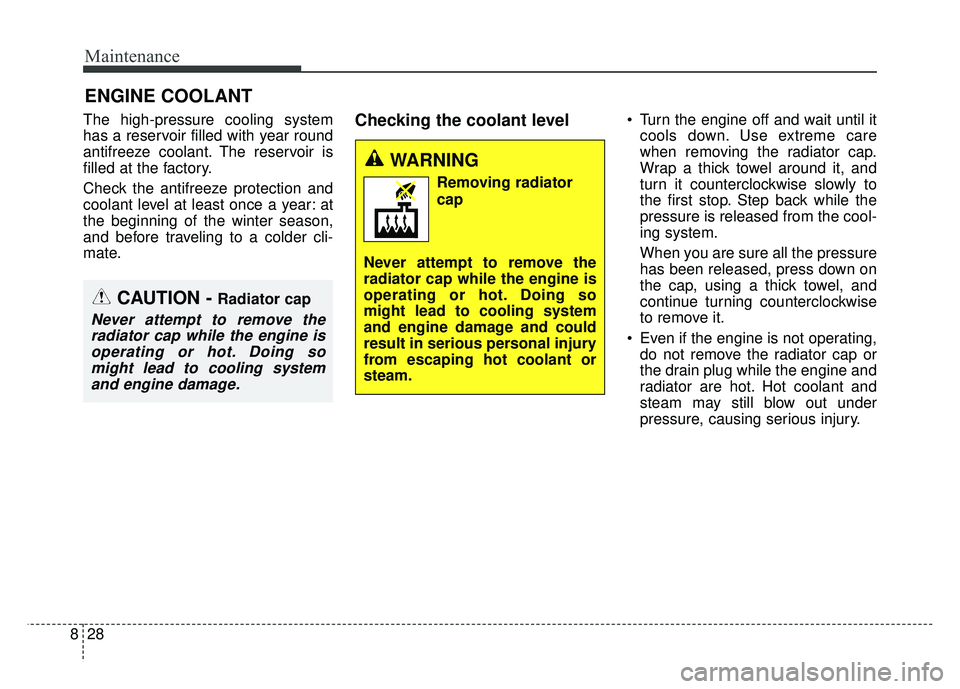
WARNING
Removing radiator
cap
Never attempt to remove the
radiator cap while the engine is
operating or hot. Doing so
might lead to cooling system
and engine damage and could
result in serious personal injury
from escaping hot coolant or
steam.
CAUTION - Radiator cap
Never attempt to remove the radiator cap while the engine isoperating or hot. Doing somight lead to cooling systemand engine damage.
Page 533 of 605

863
Maintenance
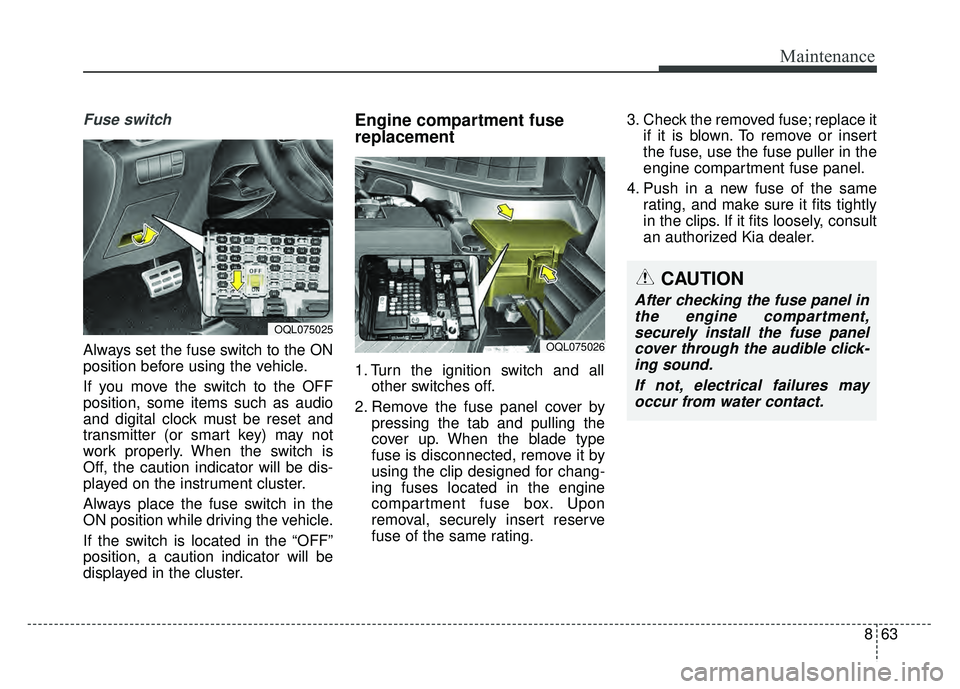
Fuse switch
Always set the fuse switch to the ON
position before using the vehicle.
If you move the switch to the OFF
position, some items such as audio
and digital clock must be reset and
transmitter (or smart key) may not
work properly. When the switch is
Off, the caution indicator will be dis-
played on the instrument cluster.
Always place the fuse switch in the
ON position while driving the vehicle.
If the switch is located in the “OFF”
position, a caution indicator will be
displayed in the cluster.
Engine compartment fuse
replacement
1. Turn the ignition switch and allother switches off.
2. Remove the fuse panel cover by pressing the tab and pulling the
cover up. When the blade type
fuse is disconnected, remove it by
using the clip designed for chang-
ing fuses located in the engine
compartment fuse box. Upon
removal, securely insert reserve
fuse of the same rating. 3. Check the removed fuse; replace it
if it is blown. To remove or insert
the fuse, use the fuse puller in the
engine compartment fuse panel.
4. Push in a new fuse of the same rating, and make sure it fits tightly
in the clips. If it fits loosely, consult
an authorized Kia dealer.
OQL075025
CAUTION
After checking the fuse panel inthe engine compartment,securely install the fuse panelcover through the audible click-ing sound.
If not, electrical failures mayoccur from water contact.
OQL075026
Page 552 of 605
Maintenance
82
8
Headlamp (High/Low beam)
bulb replacement
1. Open the hood.
2. Remove the headlamp bulb cover
by turning it counterclockwise.
3. Disconnect the headlamp bulb socket-connector.
4. Remove the bulb-socket from the headlamp assembly by turning the
bulb-socket counterclockwise until
the tabs on the bulb-socket align
with the slots on the headlamp
assembly. 5. Install a new bulb-socket assem-
bly in the headlamp assembly by
aligning the tabs on the bulb-sock-
et with the slots in the headlamp
assembly. Push the bulb-socket
into the headlamp assembly and
turn the bulb-socket clockwise.
6. Install the headlamp bulb cover by turning it clockwise.
Headlamp bulb
OQL075049
OQL075058
WARNING- Halogen
bulbs
Handle halogen bulbs with care.
Halogen bulbs contain pres- surized gas that will produce
flying pieces of glass if bro-
ken.
Page 553 of 605

883
Maintenance
Always handle them carefully, andavoid scratches and abrasions. If
the bulbs are lit, avoid contact with
liquids. Never touch the glass with
bare hands. Residual oil may
cause the bulb to overheat and
burst when lit. A bulb should be
operated only when installed in a
headlamp.
If a bulb becomes damaged or cracked, replace it immediately
and carefully dispose of it.
Wear eye protection when chang- ing a bulb. Allow the bulb to cool
down before handling it.Front turn signal lamp bulb
replacement
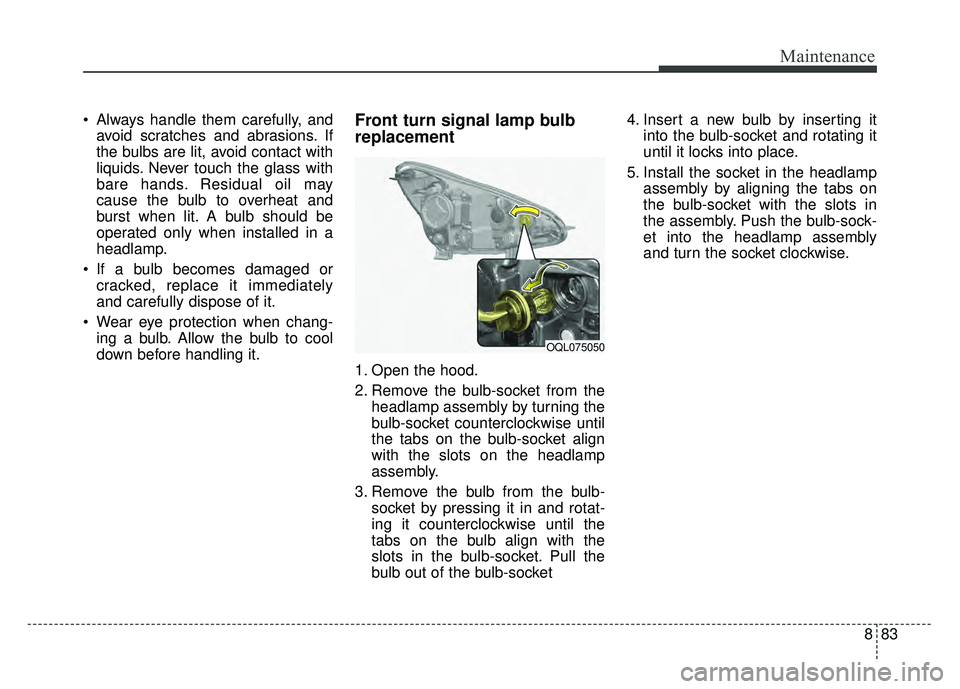
1. Open the hood.
2. Remove the bulb-socket from the headlamp assembly by turning the
bulb-socket counterclockwise until
the tabs on the bulb-socket align
with the slots on the headlamp
assembly.
3. Remove the bulb from the bulb- socket by pressing it in and rotat-
ing it counterclockwise until the
tabs on the bulb align with the
slots in the bulb-socket. Pull the
bulb out of the bulb-socket 4. Insert a new bulb by inserting it
into the bulb-socket and rotating it
until it locks into place.
5. Install the socket in the headlamp assembly by aligning the tabs on
the bulb-socket with the slots in
the assembly. Push the bulb-sock-
et into the headlamp assembly
and turn the socket clockwise.
OQL075050
Page 554 of 605
Maintenance
84
8
Position lamp + DRL bulb
replacement
1. Open the hood.
2. Remove the bulb-socket from the
headlamp assembly by turning the
bulb-socket counterclockwise until
the tabs on the bulb-socket align
with the slots on the headlamp
assembly.
3. Remove the bulb from the bulb- socket by pressing it in and rotat-
ing it counterclockwise until the
tabs on the bulb align with the
slots in the bulb-socket. Pull the
bulb out of the bulb-socket 4. Insert a new bulb by inserting it
into the bulb-socket and rotating it
until it locks into place.
5. Install the socket in the headlamp assembly by aligning the tabs on
the bulb-socket with the slots in
the assembly. Push the bulb-sock-
et into the headlamp assembly
and turn the socket clockwise.
Front fog lamp (Bulb and LED
type) bulb replacement
If the front fog lamp (Bulb and LED
type) does not operate, we recom-
mend that you checked an author-
ized Kia dealer.
OQL075051
OQL075052
OQL075053
■Type A
■Type B
Page 555 of 605
885
Maintenance
Stop and tail lamp bulb
replacement
1. Open the tailgate.
2. Open the service cover.
3. Loosen the light assembly retain-ing screws with a cross-tip screw-
driver. 4. Remove the rear combination
lamp assembly from the body of
the vehicle.
5. Disconnect the rear combination lamp connector. 6. Remove the socket from the
assembly by turning the socket
counterclockwise until the tabs on
the socket align with the slots on
the assembly.
7. Remove the bulb from the socket by pressing it in and rotating it counter-
clockwise until the tabs on the bulb
align with the slots in the socket.
Pull the bulb out of the socket.
8. Insert a new bulb by inserting it into the socket and rotating it until
it locks into place.
OQL075059
OQL075060OQL075061
Page 556 of 605
Maintenance
86
8
9. Install the socket in the assembly
by aligning the tabs on the socket
with the slots in the assembly.
Push the socket into the assembly
and turn the socket clockwise.
10. Install the rear combination lamp assembly to the body of the vehi-
cle.
11. Install the service cover.Tail lamp (inside) bulb replace-
ment
1. Open the tailgate.
2. Remove the service cover. 3. Remove the socket from the
assembly by turning the socket
counterclockwise until the tabs on
the socket align with the slots on
the assembly.
4. Remove the bulb from the socket by pressing it in and rotating it
counter-clockwise until the tabs on
the bulb align with the slots in the
socket. Pull the bulb out of the
socket.
5. Insert a new bulb by inserting it into the socket and rotating it until
it locks into place.
OQL075062
OQL075063
Page 557 of 605
887
Maintenance
6. Install the socket in the assemblyby aligning the tabs on the socket
with the slots in the assembly.
Push the socket into the assembly
and turn the socket clockwise.
7. Install the service cover by putting it into the service hole.Stop and tail lamp (LED type)
bulb replacement
If the stop and tail lamp (LED) does
not operate, we recommend that you
checked an authorized Kia dealer.
Back-up lamp and Rear turn
signal lamp bulb replacement
If the Back-up lamp and Rear turn
signal lamp does not operate, we
recommend that you checked an
authorized Kia dealer.
OQL075069OQLE075070