2018 KIA SOUL maintenance reset
[x] Cancel search: maintenance resetPage 139 of 620

453
Features of your vehicle
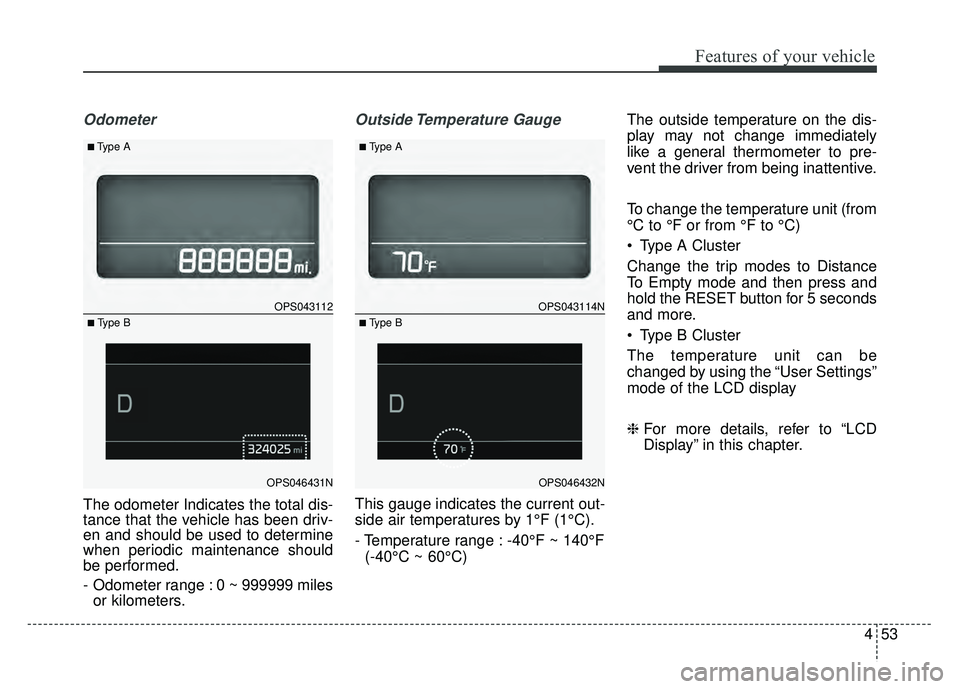
Odometer
The odometer Indicates the total dis-
tance that the vehicle has been driv-
en and should be used to determine
when periodic maintenance should
be performed.
- Odometer range : 0 ~ 999999 milesor kilometers.
Outside Temperature Gauge
This gauge indicates the current out-
side air temperatures by 1°F (1°C).
- Temperature range : -40°F ~ 140°F
(-40°C ~ 60°C) The outside temperature on the dis-
play may not change immediately
like a general thermometer to pre-
vent the driver from being inattentive.
To change the temperature unit (from
°C to °F or from °F to °C)
Type A Cluster
Change the trip modes to Distance
To Empty mode and then press and
hold the RESET button for 5 seconds
and more.
Type B Cluster
The temperature unit can be
changed by using the “User Settings”
mode of the LCD display
❈
For more details, refer to “LCD
Display” in this chapter.
OPS043112
OPS046431N
■Type A
■ Type B
OPS043114N
OPS046432N
■Type A
■ Type B
Page 143 of 620

457
Features of your vehicle
Service Mode
Service Interval
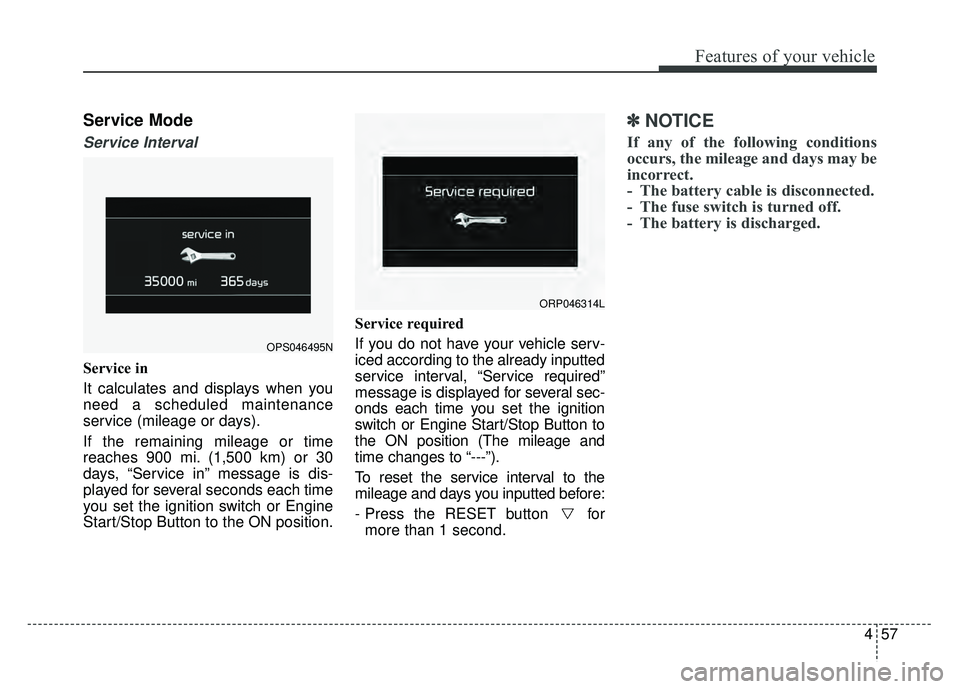
Service in
It calculates and displays when you
need a scheduled maintenance
service (mileage or days).
If the remaining mileage or time
reaches 900 mi. (1,500 km) or 30
days, “Service in” message is dis-
played for several seconds each time
you set the ignition switch or Engine
Start/Stop Button to the ON position.Service required
If you do not have your vehicle serv-
iced according to the already inputted
service interval, “Service required”
message is displayed for several sec-
onds each time you set the ignition
switch or Engine Start/Stop Button to
the ON position (The mileage and
time changes to “---”).
To reset the service interval to the
mileage and days you inputted before:
- Press the RESET button for
more than 1 second.
✽ ✽ NOTICE
If any of the following conditions
occurs, the mileage and days may be
incorrect.
- The battery cable is disconnected.
- The fuse switch is turned off.
- The battery is discharged.
OPS046495N
ORP046314L
Page 533 of 620

Maintenance
58
8
When recharging the battery,
observe the following precautions:
The battery must be removed from
the vehicle and placed in an area
with good ventilation.
Do not allow cigarettes, sparks, or flame near the battery.
Watch the battery during charging, and stop or reduce the charging
rate if the battery cells begin
gassing (boiling) violently or if the
temperature of the electrolyte of
any cell exceeds 120°F (49°C).
Wear eye protection when check- ing the battery during charging.
Disconnect the battery charger in the following order. 1.Turn off the battery charger main
switch.
2.Unhook the negative clamp from the negative battery terminal.
3.Unhook the positive clamp from the positive battery terminal.
Before performing maintenance or recharging the battery, turn off all
accessories and stop the engine.
The negative battery cable must be removed first and installed last
when the battery is disconnected.Reset items
Items should be reset after the bat-
tery has been discharged or the bat-
tery has been disconnected.
Auto up/down window (See chapter 4)
Sunroof (See chapter 4)
Trip computer (See chapter 4)
Climate control system (See chapter 4)
Clock (See chapter 4)
Audio (See chapter 5)
Page 537 of 620

Maintenance
62
8
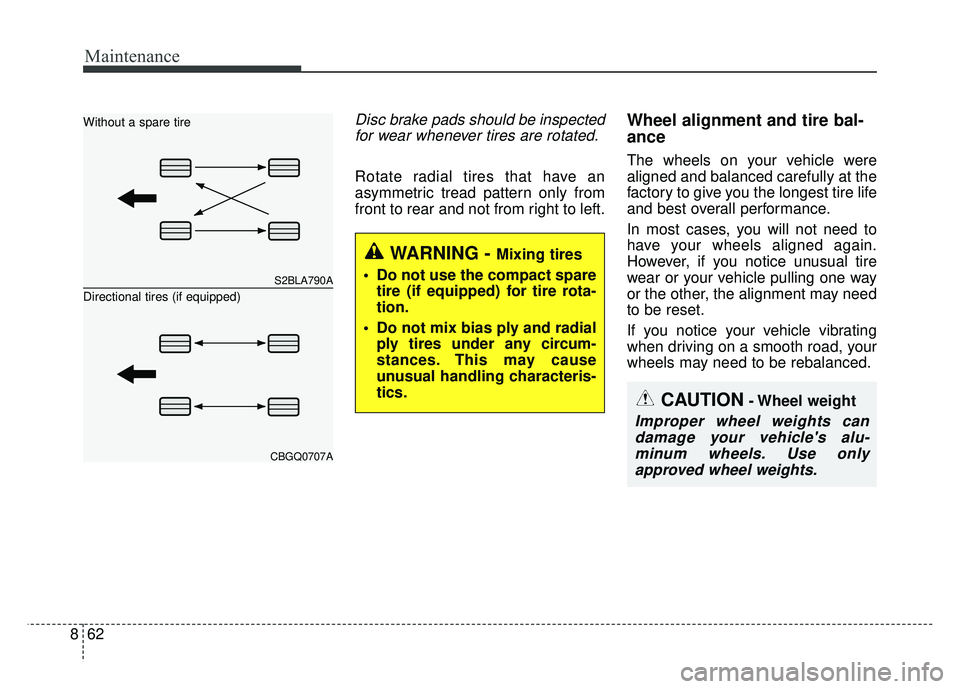
Disc brake pads should be inspected
for wear whenever tires are rotated.
Rotate radial tires that have an
asymmetric tread pattern only from
front to rear and not from right to left.
Wheel alignment and tire bal-
ance
The wheels on your vehicle were
aligned and balanced carefully at the
factory to give you the longest tire life
and best overall performance.
In most cases, you will not need to
have your wheels aligned again.
However, if you notice unusual tire
wear or your vehicle pulling one way
or the other, the alignment may need
to be reset.
If you notice your vehicle vibrating
when driving on a smooth road, your
wheels may need to be rebalanced.
S2BLA790A
CBGQ0707A
Without a spare tire
Directional tires (if equipped)
CAUTION- Wheel weight
Improper wheel weights candamage your vehicle's alu-minum wheels. Use onlyapproved wheel weights.
WARNING - Mixing tires
Do not use the compact spare tire (if equipped) for tire rota-
tion.
Do not mix bias ply and radial ply tires under any circum-
stances. This may cause
unusual handling characteris-
tics.
Page 552 of 620

877
Maintenance
Fuse switch
Always, put the fuse switch at the ON
position.
If you move the switch to the OFF
position, some items such as audio
and digital clock must be reset and
transmitter (or smart key) may not
work properly.
✽ ✽NOTICE
If you need to park your vehicle for
prolonged periods more than 1
month, move the transportation fuse
switch to the OFF position to pre-
vent the battery being discharged.
Engine compartment fuse
replacement
1. Turn the ignition switch and all
other switches off.
2. Remove the fuse panel cover by pressing the tab and pulling the
cover up. When the blade type
fuse is disconnected, remove it by
using the clip designed for chang-
ing fuses located in the engine
room fuse box. Upon removal,
securely insert reserve fuse of
equal quantity.
OPS073016
OPS073015
Page 616 of 620

Index
8I
Online factory authorized manuals (U.S. Only) . . . . . . 9-16
Owner maintenance . . . . . . . . . . . . . . . . . . . . . . . . . . . . 8-8Owner maintenance schedule. . . . . . . . . . . . . . . . . . . 8-8
Panoramic sunroof . . . . . . . . . . . . . . . . . . . . . . . . . . . . 4-34 Closing the sunroof . . . . . . . . . . . . . . . . . . . . . . . . . 4-37
Resetting the sunroof . . . . . . . . . . . . . . . . . . . . . . . . 4-38
Sliding the sunroof . . . . . . . . . . . . . . . . . . . . . . . . . . 4-35
Sunroof open warning . . . . . . . . . . . . . . . . . . . . . . . 4-35
Sunshade. . . . . . . . . . . . . . . . . . . . . . . . . . . . . . . . . . 4-37\
Tilting the sunroof . . . . . . . . . . . . . . . . . . . . . . . . . . 4-36
Parking brake . . . . . . . . . . . . . . . . . . . . . . . . . . . . . . . . 8-48 Checking the parking brake . . . . . . . . . . . . . . . . . . . 8-48
Rear camera display . . . . . . . . . . . . . . . . . . . . . . . . . . . 4-87
Recommended lubricants and capacities . . . . . . . . . . . . 9-7 Recommended sae viscosity number . . . . . . . . . . . . . 9-9
Refrigerant label . . . . . . . . . . . . . . . . . . . . . . . . . . . . . . 9-11
Reporting safety defects (U.S. Only) . . . . . . . . . . . . . . 9-16
Road warning . . . . . . . . . . . . . . . . . . . . . . . . . . . . . . . . . 7-2 Hazard warning flasher . . . . . . . . . . . . . . . . . . . . . . . 7-2 Scheduled maintenance service . . . . . . . . . . . . . . . . . . 8-10
Seat belts . . . . . . . . . . . . . . . . . . . . . . . . . . . . . . . . . . . . \
3-18
Care of seat belts . . . . . . . . . . . . . . . . . . . . . . . . . . . 3-30
Pre-tensioner seat belt . . . . . . . . . . . . . . . . . . . . . . . 3-26
Seat belt precautions . . . . . . . . . . . . . . . . . . . . . . . . 3-28
Seat belt restraint system . . . . . . . . . . . . . . . . . . . . . 3-18
Seats . . . . . . . . . . . . . . . . . . . . . . . . . . . . . . . . . . . . \
. . . . 3-4 Front seat adjustment - manual . . . . . . . . . . . . . . . . . 3-7
Front seat adjustment - power . . . . . . . . . . . . . . . . . . 3-8
Rear seat adjustment . . . . . . . . . . . . . . . . . . . . . . . . 3-13
Seatback pocket . . . . . . . . . . . . . . . . . . . . . . . . . . . . 3-13
Smart cruise control system (SCC) . . . . . . . . . . . . . . . 6-67 Limitations of the system . . . . . . . . . . . . . . . . . . . . . 6-78
Speed setting (SCC) . . . . . . . . . . . . . . . . . . . . . . . . . 6-69
To adjust the sensitivity of smart cruise control . . . 6-77
To convert to cruise control mode . . . . . . . . . . . . . . 6-77
Vehicle to vehicle distance setting (SCC) . . . . . . . . 6-73
Smart key . . . . . . . . . . . . . . . . . . . . . . . . . . . . . . . . . . . 4-\
10 Battery replacement . . . . . . . . . . . . . . . . . . . . . . . . . 4-16
Loss of the smart key . . . . . . . . . . . . . . . . . . . . . . . . 4-13
Record your key number . . . . . . . . . . . . . . . . . . . . . 4-10
Smart key function . . . . . . . . . . . . . . . . . . . . . . . . . . 4-10
Smart key immobilizer system. . . . . . . . . . . . . . . . . 4-14
Smart key precautions . . . . . . . . . . . . . . . . . . . . . . . 4-13
O
P
R
S