2018 KIA SOUL ABS
[x] Cancel search: ABSPage 577 of 620

Maintenance
102
8
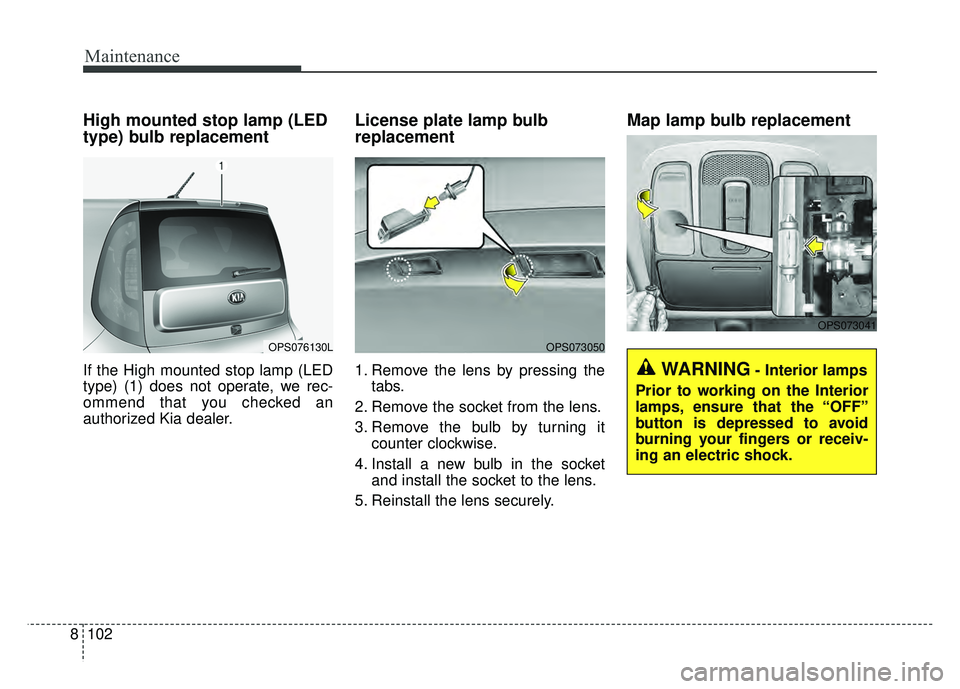
High mounted stop lamp (LED
type) bulb replacement
If the High mounted stop lamp (LED
type) (1) does not operate, we rec-
ommend that you checked an
authorized Kia dealer.
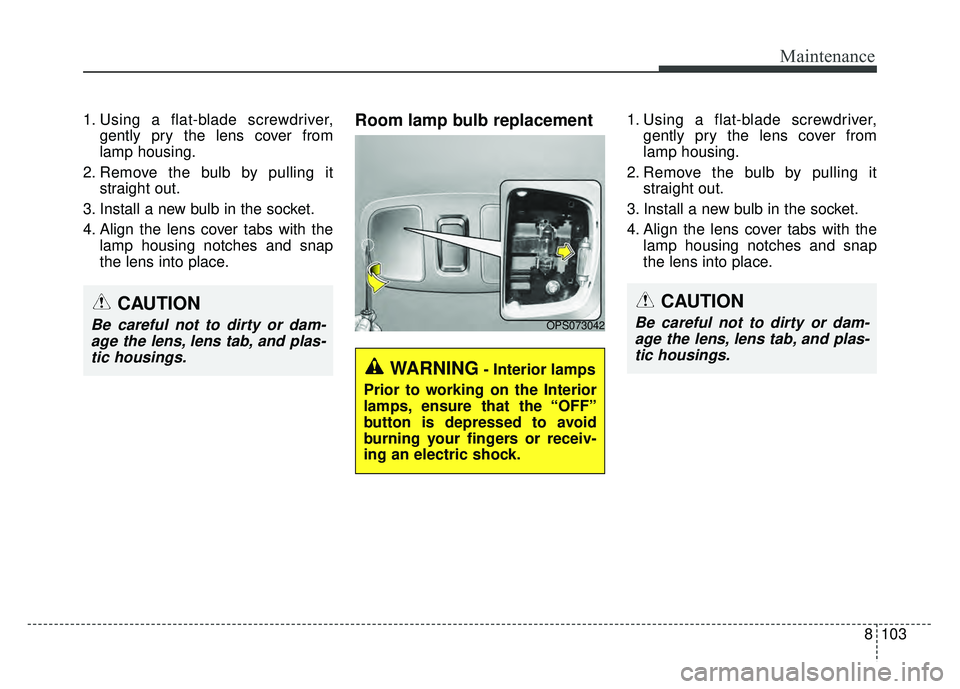
License plate lamp bulb
replacement
1. Remove the lens by pressing the
tabs.
2. Remove the socket from the lens.
3. Remove the bulb by turning it counter clockwise.
4. Install a new bulb in the socket and install the socket to the lens.
5. Reinstall the lens securely.
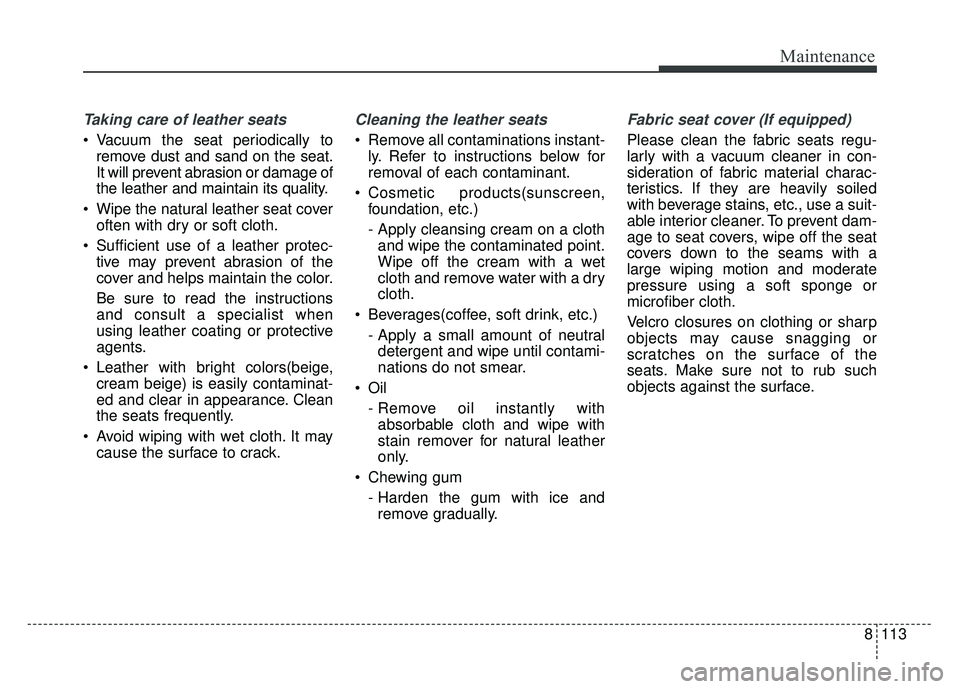
Map lamp bulb replacement
OPS076130LOPS073050
OPS073041
WARNING- Interior lamps
Prior to working on the Interior
lamps, ensure that the “OFF”
button is depressed to avoid
burning your fingers or receiv-
ing an electric shock.
Page 578 of 620

8103
Maintenance
1. Using a flat-blade screwdriver,gently pry the lens cover from
lamp housing.
2. Remove the bulb by pulling it straight out.
3. Install a new bulb in the socket.
4. Align the lens cover tabs with the lamp housing notches and snap
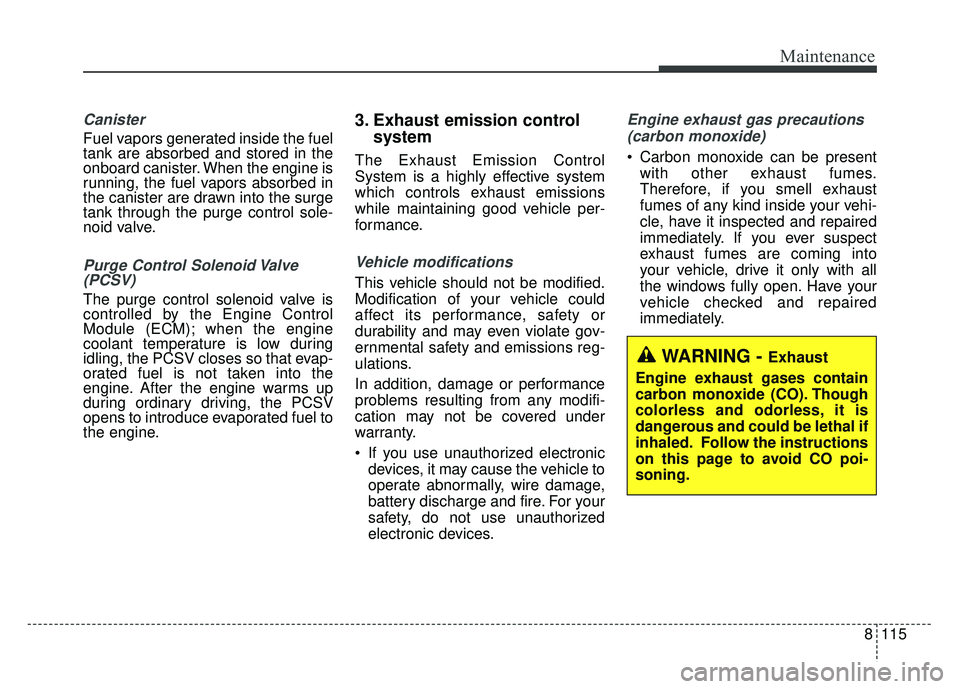
the lens into place.Room lamp bulb replacement 1. Using a flat-blade screwdriver,gently pry the lens cover from
lamp housing.
2. Remove the bulb by pulling it straight out.
3. Install a new bulb in the socket.
4. Align the lens cover tabs with the lamp housing notches and snap
the lens into place.
CAUTION
Be careful not to dirty or dam-age the lens, lens tab, and plas-tic housings.
CAUTION
Be careful not to dirty or dam-age the lens, lens tab, and plas-tic housings.OPS073042
WARNING- Interior lamps
Prior to working on the Interior
lamps, ensure that the “OFF”
button is depressed to avoid
burning your fingers or receiv-
ing an electric shock.
Page 588 of 620

8113
Maintenance
Taking care of leather seats
Vacuum the seat periodically toremove dust and sand on the seat.
It will prevent abrasion or damage of
the leather and maintain its quality.
Wipe the natural leather seat cover often with dry or soft cloth.
Sufficient use of a leather protec- tive may prevent abrasion of the
cover and helps maintain the color.
Be sure to read the instructions
and consult a specialist when
using leather coating or protective
agents.
Leather with bright colors(beige, cream beige) is easily contaminat-
ed and clear in appearance. Clean
the seats frequently.
Avoid wiping with wet cloth. It may cause the surface to crack.
Cleaning the leather seats
Remove all contaminations instant-ly. Refer to instructions below for
removal of each contaminant.
Cosmetic products(sunscreen, foundation, etc.)
- Apply cleansing cream on a clothand wipe the contaminated point.
Wipe off the cream with a wet
cloth and remove water with a dry
cloth.
Beverages(coffee, soft drink, etc.) - Apply a small amount of neutraldetergent and wipe until contami-
nations do not smear.
Oil - Remove oil instantly withabsorbable cloth and wipe with
stain remover for natural leather
only.
Chewing gum - Harden the gum with ice andremove gradually.
Fabric seat cover (If equipped)
Please clean the fabric seats regu-
larly with a vacuum cleaner in con-
sideration of fabric material charac-
teristics. If they are heavily soiled
with beverage stains, etc., use a suit-
able interior cleaner. To prevent dam-
age to seat covers, wipe off the seat
covers down to the seams with a
large wiping motion and moderate
pressure using a soft sponge or
microfiber cloth.
Velcro closures on clothing or sharp
objects may cause snagging or
scratches on the surface of the
seats. Make sure not to rub such
objects against the surface.
Page 590 of 620

8115
Maintenance
Canister
Fuel vapors generated inside the fuel
tank are absorbed and stored in the
onboard canister. When the engine is
running, the fuel vapors absorbed in
the canister are drawn into the surge
tank through the purge control sole-
noid valve.
Purge Control Solenoid Valve(PCSV)
The purge control solenoid valve is
controlled by the Engine Control
Module (ECM); when the engine
coolant temperature is low during
idling, the PCSV closes so that evap-
orated fuel is not taken into the
engine. After the engine warms up
during ordinary driving, the PCSV
opens to introduce evaporated fuel to
the engine.
3. Exhaust emission control
system
The Exhaust Emission Control
System is a highly effective system
which controls exhaust emissions
while maintaining good vehicle per-
formance.
Vehicle modifications
This vehicle should not be modified.
Modification of your vehicle could
affect its performance, safety or
durability and may even violate gov-
ernmental safety and emissions reg-
ulations.
In addition, damage or performance
problems resulting from any modifi-
cation may not be covered under
warranty.
If you use unauthorized electronic
devices, it may cause the vehicle to
operate abnormally, wire damage,
battery discharge and fire. For your
safety, do not use unauthorized
electronic devices.
Engine exhaust gas precautions
(carbon monoxide)
Carbon monoxide can be present with other exhaust fumes.
Therefore, if you smell exhaust
fumes of any kind inside your vehi-
cle, have it inspected and repaired
immediately. If you ever suspect
exhaust fumes are coming into
your vehicle, drive it only with all
the windows fully open. Have your
vehicle checked and repaired
immediately.
WARNING - Exhaust
Engine exhaust gases contain
carbon monoxide (CO). Though
colorless and odorless, it is
dangerous and could be lethal if
inhaled. Follow the instructions
on this page to avoid CO poi-
soning.
Page 611 of 620

I3
Index
Limitations of the system . . . . . . . . . . . . . . . . . . . . . 6-56
Sensor to detect the distance from the vehicle in front (front radar) . . . . . . . . . . . . . . . . . . . . . . . . . . 6-53
System malfunction . . . . . . . . . . . . . . . . . . . . . . . . . 6-54
System setting and activation . . . . . . . . . . . . . . . . . . 6-48
Battery. . . . . . . . . . . . . . . . . . . . . . . . . . . . . . . . . . . . \
. . 8-56 Battery recharging . . . . . . . . . . . . . . . . . . . . . . . . . . 8-57
For best battery service . . . . . . . . . . . . . . . . . . . . . . 8-56
Reset items . . . . . . . . . . . . . . . . . . . . . . . . . . . . . . . . 8-58
Before driving . . . . . . . . . . . . . . . . . . . . . . . . . . . . . . . . . 6-4 Before entering vehicle . . . . . . . . . . . . . . . . . . . . . . . 6-4
Before starting . . . . . . . . . . . . . . . . . . . . . . . . . . . . . . 6-4
Necessary inspections . . . . . . . . . . . . . . . . . . . . . . . . 6-4
Blind spot detection system (BSD) . . . . . . . . . . . . . . . 6-91 BSD (Blind Spot Detection)/LCA (Lane Change Assist) . . . . . . . . . . . . . . . . . . . . . . . 6-92
Driver's Attention . . . . . . . . . . . . . . . . . . . . . . . . . . . 6-97
RCTA (Rear cross traffic alert) . . . . . . . . . . . . . . . . 6-95
Brake system. . . . . . . . . . . . . . . . . . . . . . . . . . . . . . . . . 6-35 Anti-lock brake system (ABS) . . . . . . . . . . . . . . . . . 6-39
Electronic stability control (ESC) . . . . . . . . . . . . . . 6-41
Good braking practices . . . . . . . . . . . . . . . . . . . . . . 6-46
Hill-start assist control (HAC) . . . . . . . . . . . . . . . . . 6-46
Parking brake - Hand type . . . . . . . . . . . . . . . . . . . . 6-37 Power brakes . . . . . . . . . . . . . . . . . . . . . . . . . . . . . . 6-35
Vehicle stability management (VSM) . . . . . . . . . . . 6-45
Brake/clutch fluid . . . . . . . . . . . . . . . . . . . . . . . . . . . . . 8-45 Checking the brake/clutch* fluid level . . . . . . . . . . 8-45
Bulb wattage . . . . . . . . . . . . . . . . . . . . . . . . . . . . . . . . . . 9-4
California perchlorate notice . . . . . . . . . . . . . . . . . . . 8-117
Capacity/weight . . . . . . . . . . . . . . . . . . . . . . . . . . . . . . . 9-6
Checking fluid levels . . . . . . . . . . . . . . . . . . . . . . . . . . 8-39
Child restraint system (CRS) . . . . . . . . . . . . . . . . . . . . 3-31 Children Always in the Rear . . . . . . . . . . . . . . . . . . 3-31
Installing a Child Restraint System (CRS) . . . . . . . 3-35
Selecting a Child Restraint System (CRS) . . . . . . . 3-32
Clean air . . . . . . . . . . . . . . . . . . . . . . . . . . . . . . . . . . . 4-\
132
Climate control air filter . . . . . . . . . . . . . . . . . . . . . . . . 8-50 Filter inspection . . . . . . . . . . . . . . . . . . . . . . . . . . . . 8-50
Filter replacement. . . . . . . . . . . . . . . . . . . . . . . . . . . 8-50
Consumer assistance (U.S. Only) . . . . . . . . . . . . . . . . . 9-12
Cruise Control system . . . . . . . . . . . . . . . . . . . . . . . . . 6-62 Cruise control switch . . . . . . . . . . . . . . . . . . . . . . . . 6-63
To cancel cruise control, do one of the following . . 6-65
To decrease the cruising speed . . . . . . . . . . . . . . . . . 6-64
To increase cruise control set speed . . . . . . . . . . . . . 6-64
To resume cruising speed at more than approximately 20 mph (30 km/h) . . . . . . . . . . . . . . . . . . . . . . . . . 6-65
To set cruise control speed . . . . . . . . . . . . . . . . . . . . 6-63
BC