Page 12 of 620
Your vehicle at a glance
Exterior overview . . . . . . . . . . . . . . . . . . . . . . . . . . . 2-2
Interior overview . . . . . . . . . . . . . . . . . . . . . . . . . . . 2-4
Instrument panel overview . . . . . . . . . . . . . . . . . . . 2-5
Engine compartment . . . . . . . . . . . . . . . . . . . . . . . . 2-6
2
Page 15 of 620

Your vehicle at a glance
42
INTERIOR OVERVIEW
1. Inside door handle ................................4-18
2. Power window switch ............................4-24
3. Central Door lock/unlock switch ............4-19
4. Power window lock button .....................4-28
5. Outside rearview mirror control.............4-46
6. Outside rearview mirror folding .............4-46
7. Fuel filler lid open lever .........................4-31
8. Instrument panel illumination controlswitch ...................................................4-49
9. BSD On/Off button ................................6-92
10. LDWS On/OFF button .........................6-85
11. Steering wheel heater On/Off Button..4-41
12. ESC Off button ....................................6-41
13. Speaker lights .......................................5-4
14. Steering wheel ....................................4-39
15. Tilt and telescopic steering control lever.....................................................4-40
16. Inner fuse panel ..................................8-79
17. Hood release lever ..............................4-29
18. Transaxle shift lever ..........6-14, 6-19, 6-25
19. Seat .......................................................3-4
OPS016004N❈ The actual shape may differ from the illustration.
Page 16 of 620

25
Your vehicle at a glance
INSTRUMENT PANEL OVERVIEW
1. Audio remote control buttons..................5-3
2. Driver’s front air bag .............................3-56
3. Horn ......................................................4-41
4. Cruise control button ............................6-63
5. Instrument cluster .................................4-48
6. Lighting control lever.............................4-89
7.Wiper and washer control lever .............4-93
8. Ignition switch or Engine start/stopbutton...............................................6-6, 6-9
9. Audio ...........................................5-10, 5-46
10. Hazard warning flasher.........................7-2
11. Climate control system ..........4-103, 4-114
12. Front seat warmer/ Seat air ventilation .................4-137, 4-139
13. Power outlet ......................................4-141
14. Center console storage box..............4-133
15. Glove box ..........................................4-134
16. Passenger’s front air bag ....................3-56
17. Parking brake......................................6-37
18. Drive mode button ..............................6-84
OPS013003N
❈The actual shape may differ from the illustration.
Page 26 of 620

Safety features of your vehicle
83
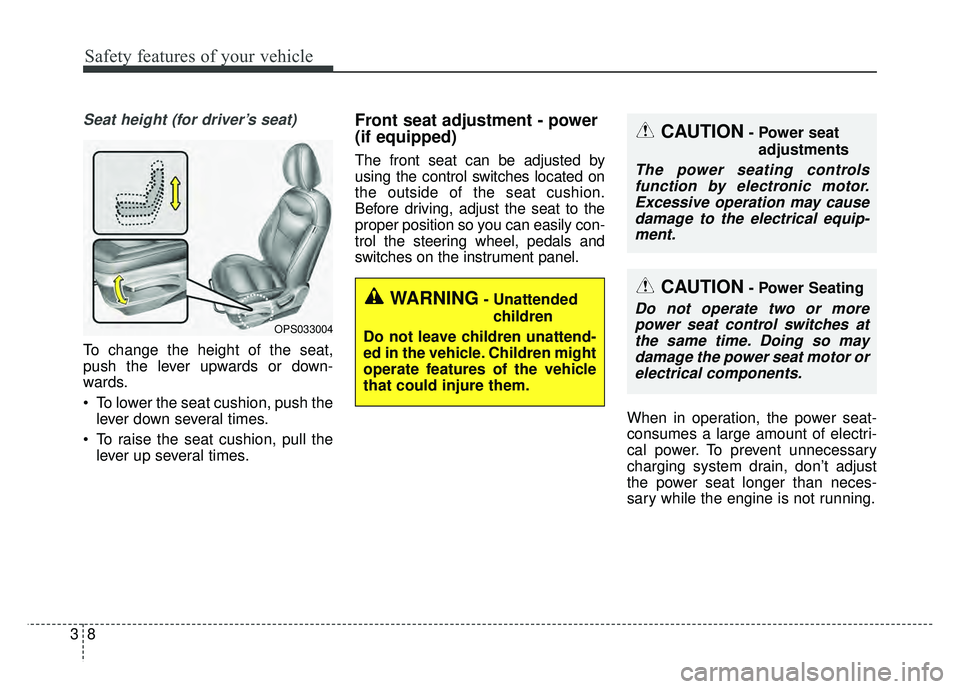
Seat height (for driver’s seat)
To change the height of the seat,
push the lever upwards or down-
wards.
To lower the seat cushion, push thelever down several times.
To raise the seat cushion, pull the lever up several times.
Front seat adjustment - power
(if equipped)
The front seat can be adjusted by
using the control switches located on
the outside of the seat cushion.
Before driving, adjust the seat to the
proper position so you can easily con-
trol the steering wheel, pedals and
switches on the instrument panel.
When in operation, the power seat-
consumes a large amount of electri-
cal power. To prevent unnecessary
charging system drain, don’t adjust
the power seat longer than neces-
sary while the engine is not running.
OPS033004
WARNING- Unattendedchildren
Do not leave children unattend-
ed in the vehicle. Children might
operate features of the vehicle
that could injure them.
CAUTION- Power seat adjustments
The power seating controlsfunction by electronic motor.Excessive operation may causedamage to the electrical equip-ment.
CAUTION- Power Seating
Do not operate two or morepower seat control switches atthe same time. Doing so maydamage the power seat motor orelectrical components.
Page 45 of 620

327
Safety features of your vehicle
Both the driver's and front passen-ger's seat belt pre-tensioner sys-
tem may be activated not only in
certain frontal collision but also in
certain side collision or rollover, if
the vehicle is equipped with a side
or curtain air bag.
Because the sensor that activates the SRS air bag is connected with
the pre-tensioner seat belt, the
SRS air bag warning light on
the instrument panel will illuminate
for approximately 6 seconds after
the ignition switch has been turned
to the ON position, and then it
should turn off. If the pre-tensioner seat belt system
are not working properly, this warning
light will illuminate even if there is no
malfunction of the SRS air bag. If the
SRS air bag warning light does not
illuminate when the ignition switch is
turned ON, or if it remains illuminated
after illuminating for approximately 6
seconds, or if it illuminates while the
vehicle is being driven, have an
authorized Kia dealer inspect the pre-
tensioner seat belt and SRS air bag
system as soon as possible.
Pre-tensioners are designed to
operate only one time. After activa-
tion, pre-tensioner seat belts must
be replaced. All seat belts, of any
type, should always be replaced
after they have been worn during a
collision.
Do not strike the pre-tensioner seat belt assemblies.
✽ ✽ NOTICE
Do not attempt to service or repair
the pre-tensioner seat belt system in
any manner. Do not attempt to
inspect or replace the pre-tensioner
seat belts yourself. This must be
done by an authorized Kia dealer.
WARNING
-
Hot pretensioner
Do not touch the pre-tensioner
seat belt assemblies for several
minutes after they have been
activated. When the pre-tension-
er seat belt mechanism fires dur-
ing a collision the pre-tensioner
becomes hot and can burn you.
WARNING - Skin irritation
Wash all exposed skin areas
thoroughly after an accident in
which the pre-tensioner seat
belts were activated. The fine
dust from the pre-tensioner
activation may cause skin irrita-
tion and should not be breathed
for prolonged periods.
Page 62 of 620

Safety features of your vehicle
44
3
Noise and smoke
When inflated, the air bags make a
loud noise and leave smoke and
powder in the air inside the vehicle.
This is normal and is a result of the
ignition of the air bag inflator. After
the air bag inflates, you may feel sub-
stantial discomfort in breathing due
to the contact of your chest with both
the seat belt and the air bag, as well
as from breathing the smoke and
powder. Open your doors and/or
windows as soon as possible after
impact in order to reduce discom-
fort and prevent prolonged expo-
sure to the smoke and powder.
Though smoke and powder are non-
toxic, it may cause irritation to the
skin (eyes, nose and throat, etc). If
this is the case, wash and rinse with
cold water immediately and consult a
doctor if the symptom persists.WARNING- Hot compo-
nents
Do not touch the air bag storage
area's internal components
immediately after airbag infla-
tion. The air bag related parts in
the steering wheel, instrument
panel and the roof rails above
the front and rear doors are
very hot. Hot components can
result in burn injuries.WARNING- Airbag infla- tion
Sit as far back as possible from
the steering wheel while still
maintaining comfortable con-
trol of your vehicle. A distance
of at least 10" from your chest
to the steering wheel is recom-
mended. Failure to do so can
result in airbag inflation injuries
to the driver.
WARNING
Do not install or place any
accessories near air bag
deployment areas, such as the
instrument panel, windows, pil-
lars, and roof rails. Such objects
may become dangerous projec-
tiles if the airbag inflates.
Page 63 of 620

345
Safety features of your vehicle
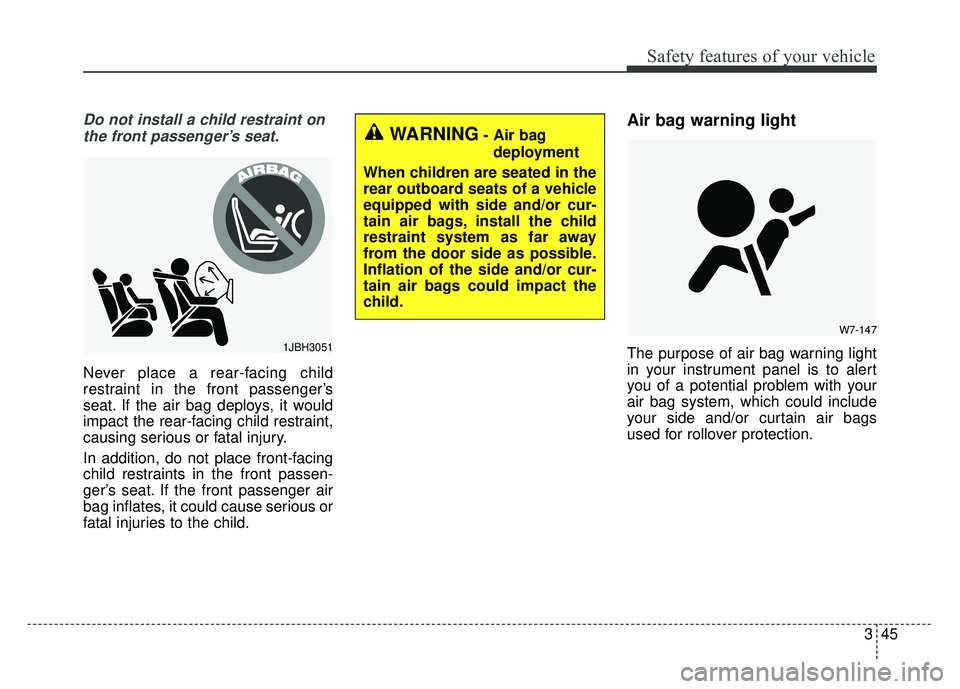
Do not install a child restraint onthe front passenger’s seat.
Never place a rear-facing child
restraint in the front passenger’s
seat. If the air bag deploys, it would
impact the rear-facing child restraint,
causing serious or fatal injury.
In addition, do not place front-facing
child restraints in the front passen-
ger’s seat. If the front passenger air
bag inflates, it could cause serious or
fatal injuries to the child.
Air bag warning light
The purpose of air bag warning light
in your instrument panel is to alert
you of a potential problem with your
air bag system, which could include
your side and/or curtain air bags
used for rollover protection.1JBH3051
W7-147
WARNING- Air bag deployment
When children are seated in the
rear outboard seats of a vehicle
equipped with side and/or cur-
tain air bags, install the child
restraint system as far away
from the door side as possible.
Inflation of the side and/or cur-
tain air bags could impact the
child.
Page 66 of 620
Safety features of your vehicle
48
3
Upon deployment, tear seams mold-
ed directly into the pad covers will
separate under pressure from the
expansion of the air bags. Further
opening of the covers then allows full
inflation of the air bags. A fully inflated air bag, in combina-
tion with a properly worn seat belt,
slows the driver's or the passenger's
forward motion, reducing the risk of
head and chest injury.
After complete inflation, the air bag
immediately starts deflating, enabling
the driver to maintain forward visibility
and the ability to steer or operate
other controls.
B240B02L
Driver’s front air bag (2)
B240B03L
Driver’s front air bag (3)
B240B05L
Passenger’s front air bag
WARNING- Air bag
obstructions
Do not install or place any
accessories on the steering
wheel, instrument panel, or on
the front passenger's panel
above the glove box in a vehi-
cle. Such objects may become
dangerous projectiles if the air
bag deploys.