Page 351 of 496
539
Driving your vehicle
Travel lightly. Don't carry unneces-sary weight in your vehicle. Weight
reduces energy economy.
Open windows at high speeds can reduce energy economy.
Energy economy is less in cross- winds and headwinds. To help off-
set some of this loss, slow down
when driving in these conditions.
Keeping a vehicle in good operating
condition is important both for econ-
omy and safety. Therefore, have an
authorized Kia dealer perform
scheduled inspections and mainte-
nance.
WARNING
- Vehicle off during motion
Never turn the POWER button
off to coast down hills or any-
time the vehicle is in motion.
The power steering and power
brakes will not function proper-
ly without the vehicle is in the
ready ( ) mode. In addition,
turning off the POWER button
while driving could engage the
steering wheel lock resulting in
loss of vehicle steering. Keep
the vehicle is in the ready ( )
mode and gear lever in
B(Braking) position for engine
braking effect.
Page 361 of 496
549
Driving your vehicle
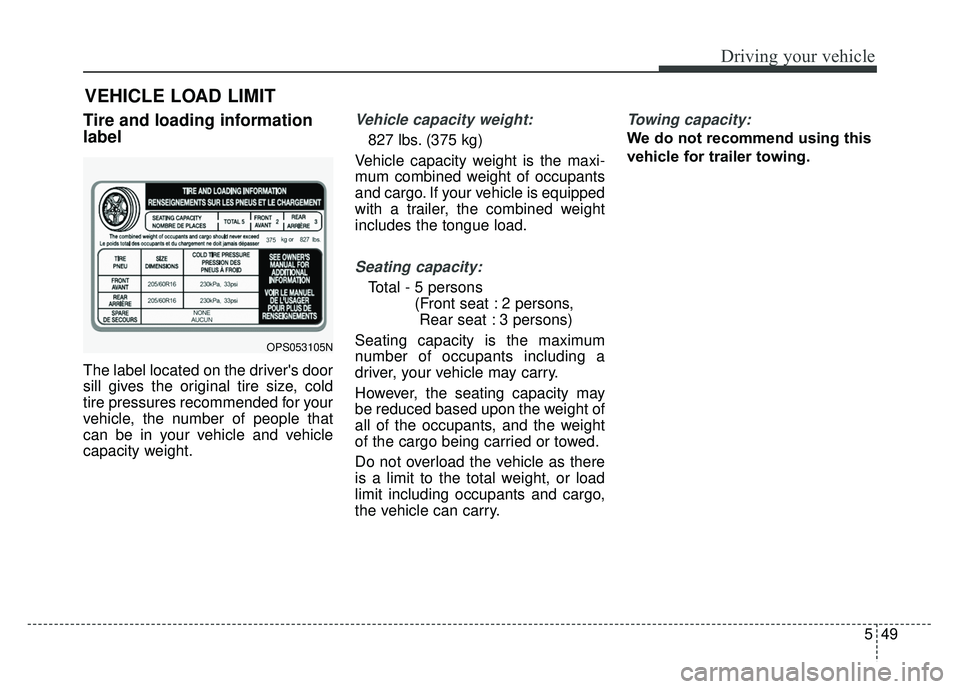
Tire and loading information
label
The label located on the driver's door
sill gives the original tire size, cold
tire pressures recommended for your
vehicle, the number of people that
can be in your vehicle and vehicle
capacity weight.
Vehicle capacity weight:
827 lbs. (375 kg)
Vehicle capacity weight is the maxi-
mum combined weight of occupants
and cargo. If your vehicle is equipped
with a trailer, the combined weight
includes the tongue load.
Seating capacity:
Total - 5 persons (Front seat : 2 persons, Rear seat : 3 persons)
Seating capacity is the maximum
number of occupants including a
driver, your vehicle may carry.
However, the seating capacity may
be reduced based upon the weight of
all of the occupants, and the weight
of the cargo being carried or towed.
Do not overload the vehicle as there
is a limit to the total weight, or load
limit including occupants and cargo,
the vehicle can carry.
Towing capacity:
We do not recommend using this
vehicle for trailer towing.
VEHICLE LOAD LIMIT
OPS053105N
Page 362 of 496
Driving your vehicle
50
5
Cargo capacity:
The cargo capacity of your vehicle
will increase or decrease depending
on the weight and the number of
occupants and the tongue load, if
your vehicle is equipped with a trail-
er.
Steps for determining correct
load limit
1. Locate the statement "The com- bined weight of occupants and
cargo should never exceed XXX
kg or XXX lbs.'' on your vehicle's
placard.
2. Determine the combined weight of the driver and passengers that will
be riding in your vehicle.
3. Subtract the combined weight of the driver and passengers from
XXX kg or XXX lbs.
4. The resulting figure equals the available amount of cargo and lug-
gage load capacity. For example, if
the "XXX" amount equals 1400
lbs. and there will be five 150 lbs.
passengers in your vehicle, the
amount of available cargo and lug-
gage load capacity is 650 lbs.
(1400-750 (5 x 150) = 650 lbs.)
5. Determine the combined weight of luggage and cargo being loaded
on the vehicle. That weight may
not safely exceed the available
cargo and luggage load capacity
calculated in Step 4. 6. If your vehicle will be towing a trail-
er, load from your trailer will be
transferred to your vehicle.
Consult this manual to determine
how this reduces the available
cargo and luggage load capacity
of your vehicle.
Page 363 of 496
551
Driving your vehicle
Refer to your vehicle’s tire and loading information label for specific information about your vehicle's capacity weight
and seating positions. The combined weight of the driver, passengers and cargo should never exceed your vehicle's
capacity weight.
C190F01JM
Item Description TotalA Vehicle Capacity 1400 lbs
Weight (635 kg)
Subtract Occupant
B Weight 300 lbs
150 lbs (68 kg) × 2 (136 kg)
C
Available Cargo and1100 lbs
Luggage weight (499 kg)
Example 1
ABC
C190F02JM
Item Description TotalA Vehicle Capacity 1400 lbs
Weight (635 kg)
Subtract Occupant
B Weight 750 lbs
150 lbs (68 kg) × 5 (340 kg)
C
Available Cargo and650 lbs
Luggage weight (295 kg)
ABC
Example 2
C190F03JM
Item Description Total
A Vehicle Capacity 1400 lbs
Weight (635 kg)
Subtract Occupant
B Weight 860 lbs
172 lbs (78 kg) × 5 (390 kg)
C
Available Cargo and540 lbs
Luggage weight (245 kg)
ABC
Example 3
Page 364 of 496
Driving your vehicle
52
5
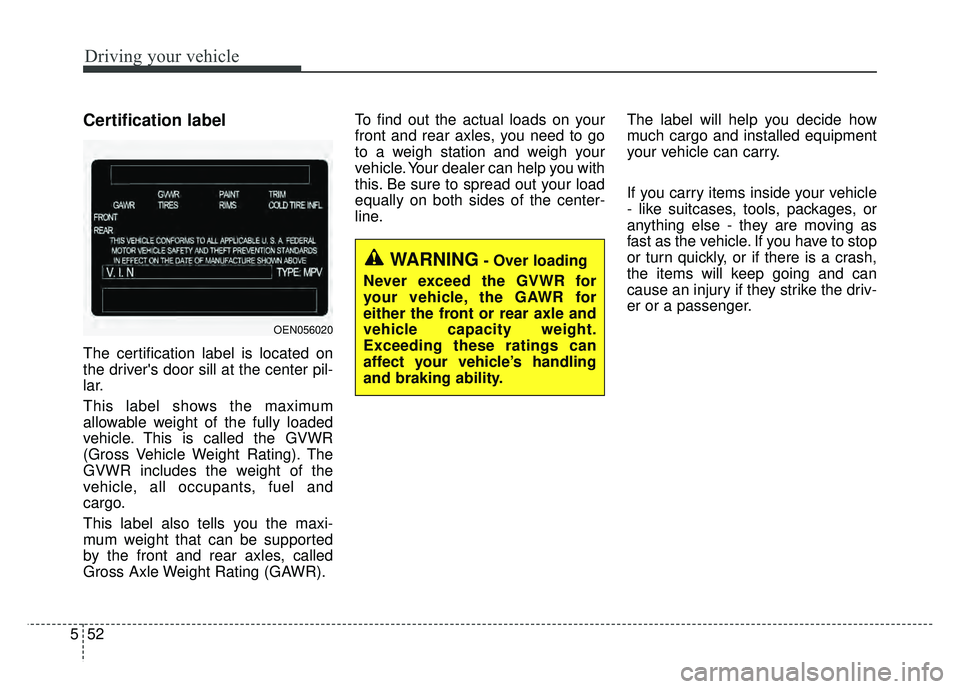
Certification label
The certification label is located on
the driver's door sill at the center pil-
lar.
This label shows the maximum
allowable weight of the fully loaded
vehicle. This is called the GVWR
(Gross Vehicle Weight Rating). The
GVWR includes the weight of the
vehicle, all occupants, fuel and
cargo.
This label also tells you the maxi-
mum weight that can be supported
by the front and rear axles, called
Gross Axle Weight Rating (GAWR). To find out the actual loads on your
front and rear axles, you need to go
to a weigh station and weigh your
vehicle. Your dealer can help you with
this. Be sure to spread out your load
equally on both sides of the center-
line.
The label will help you decide how
much cargo and installed equipment
your vehicle can carry.
If you carry items inside your vehicle
- like suitcases, tools, packages, or
anything else - they are moving as
fast as the vehicle. If you have to stop
or turn quickly, or if there is a crash,
the items will keep going and can
cause an injury if they strike the driv-
er or a passenger.
OEN056020
WARNING- Over loading
Never exceed the GVWR for
your vehicle, the GAWR for
either the front or rear axle and
vehicle capacity weight.
Exceeding these ratings can
affect your vehicle’s handling
and braking ability.
Page 366 of 496
This section will guide you in the
proper loading of your vehicle and/or
trailer, to keep your loaded vehicle
weight within its design rating capa-
bility, with or without a trailer.
Properly loading your vehicle will
provide maximum return of the vehi-
cle design performance. Before load-
ing your vehicle, familiarize yourself
with the following terms for determin-
ing your vehicle's weight ratings, with
or without a trailer, from the vehicle's
specifications and the certification
label:
Base curb weight
This is the weight of the vehicle
including all standard equipment. It
does not include passengers, cargo,
or optional equipment.
Vehicle curb weight
This is the weight of your new vehicle
when you picked it up from your deal-
er plus any aftermarket equipment.
Cargo weight
This figure includes all weight added
to the Base Curb Weight, including
cargo and optional equipment.
GAW (Gross axle weight)
This is the total weight placed on
each axle (front and rear) - including
vehicle curb weight and all payload.
GAWR
(Gross axle weight rating)
This is the maximum allowable
weight that can be carried by a single
axle (front or rear). These numbers
are shown on the certification label.
The total load on each axle must
never exceed its GAWR.
GVW (Gross vehicle weight)
This is the Base Curb Weight plus
actual Cargo Weight plus passen-
gers.
GVWR
(Gross vehicle weight rating)
This is the maximum allowable
weight of the fully loaded vehicle
(including all options, equipment,
passengers and cargo). The GVWR
is shown on the certification label
located on the driver’s door sill.
VEHICLE WEIGHT GLOSSARY
554
Driving your vehicle
Page 385 of 496

619
What to do in an emergency
Checking the tire inflation pres-
sure
1. After driving approximately 4~6miles (7~10km or about 10min),
stop at a safety location.
2. Connect connection hose (9) of the compressor directly to the tire
valve.
3. Plug the compressor power cord into the vehicle power outlet.
4. Adjust the tire inflation pressure to the recommended tire inflation.
With the ignition switched on, pro- ceed as follows.
- To increase the inflation pres- sure : Switch on the compres-
sor, position I. To check the cur-
rent inflation pressure setting,
briefly switch off the compressor.✽ ✽ NOTICE
The pressure gauge may show high-
er than actual reading when the
compressor is running. To get an
accurate tire pressure, the compres-
sor needs to be turned off.
- To reduce the inflation pres-
sure: Loosen the screw cap (8)
on the compressor hose. Technical Data
System voltage: DC 12 V
Working voltage: DC 10 - 15 V
Amperage rating: max. 15 A
Suitable for use at temperatures:
-22 ~ +158°F (-30 ~ +70°C)
Max. working pressure: 87 psi (6 bar)
Size
Compressor: 6.7 x 5.9 x 2.4 in. (170 x 150 x 60 mm)
Sealant bottle: 3.03 x 3.4 ø in. (77 x 85 ø mm)
Compressor weight: 1.77 lbs (0.8 kg)
Sealant volume: 12.2 cu. in. (200 ml)
CAUTION - Tire pressuresensor
When you use the Tire MobilityKit including sealant notapproved by Kia, the tire pres-sure sensors may be damagedby sealant. The sealant on thetire pressure sensor and wheelshould be removed when youreplace the tire with a new oneand inspect the tire pressuresensors in authorized dealer.
Page 426 of 496
Maintenance
36
7
TIRES AND WHEELS
Tire care
For proper maintenance, safety, and
maximum fuel economy, you must
always maintain recommended tire
inflation pressures and stay within
the load limits and weight distribution
recommended for your vehicle.
Recommended cold tire infla-
tion pressures
All tire pressures should be checked
when the tires are cold. “Cold Tires”
means the vehicle has not been driv-
en for at least three hours or driven
less than one mile (1.6 km).
Recommended pressures must be
maintained for the best ride, vehicle
handling, and minimum tire wear.
For recommended inflation pressure,
refer to “Tire and wheels” in chapter
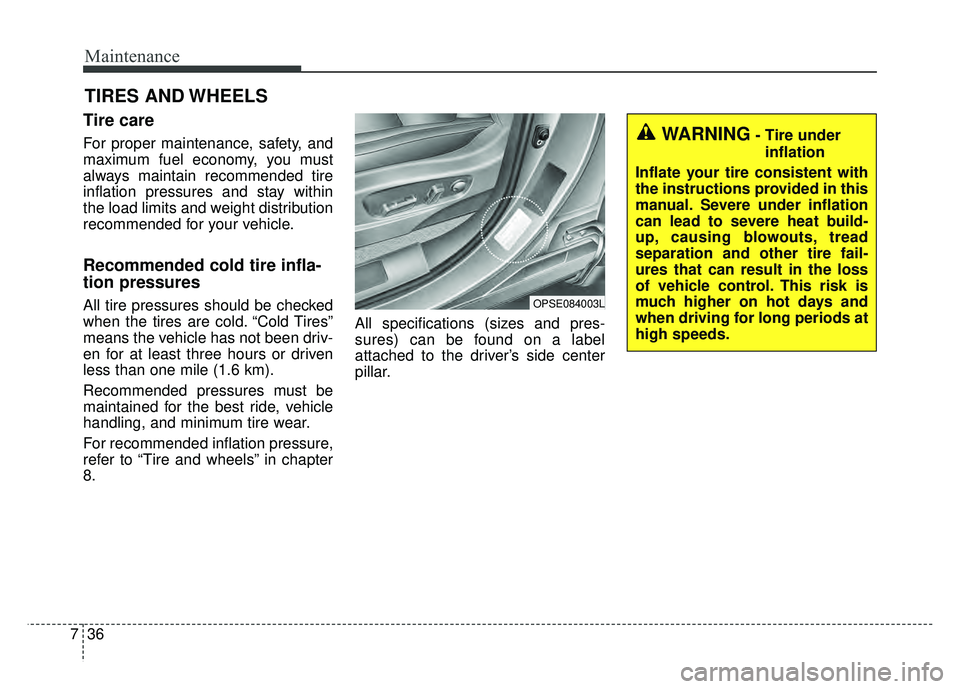
8. All specifications (sizes and pres-
sures) can be found on a label
attached to the driver’s side center
pillar.OPSE084003L
WARNING- Tire under
inflation
Inflate your tire consistent with
the instructions provided in this
manual. Severe under inflation
can lead to severe heat build-
up, causing blowouts, tread
separation and other tire fail-
ures that can result in the loss
of vehicle control. This risk is
much higher on hot days and
when driving for long periods at
high speeds.