Page 398 of 536

What to do in an emergency
66
Jump starting procedure
1.Make sure the booster battery is12-volt and that its negative termi-
nal is grounded.
2.If the booster battery is in another vehicle, do not allow the vehicles to
come in contact.
3.Turn off all unnecessary electrical loads.
4.Connect the jumper cables in the exact sequence shown in the illus-
tration. First connect one end of a
jumper cable to the positive termi-
nal of the discharged battery (1),
then connect the other end to the
positive terminal of the booster
battery (2).
Proceed to connect one end of the
other jumper cable to the negative
terminal of the booster battery (3),
then the other end to a solid, sta-
tionary, metallic point (for example,
the engine lifting bracket) away
from the battery (4). Do not con-
nect it to or near any part that
moves when the engine is cranked. Do not allow the jumper cables to
contact anything except the correct
battery terminals or the correct
ground. Do not lean over the bat-
tery when making connections.
5.Start the engine of the vehicle with the booster battery and let it run at
2,000 rpm, then start the engine of
the vehicle with the discharged
battery.
If the cause of your battery discharg-ing is not apparent, you should haveyour vehicle checked by an author-ized Kia dealer.
Push-starting
Vehicles equipped with automatic
transaxle lock system cannot be
push-started.
Follow the directions in this section
for jump-starting.
WARNING - Tow starting
vehicle
Never tow a vehicle to start it
because the sudden surge for-
ward when the engine starts
could cause a collision with the
tow vehicle.
WARNING - Battery cables
Do not connect the jumper cable
from the negative terminal of the
booster battery to the negative
terminal of the discharged bat-
tery. This can cause the dis-
charged battery to overheat and
crack, releasing battery acid.
Make sure to connect one end of
the jumper cable to the negative
terminal of the booster battery,
and the other end to a metalic
point, far away from the battery.
Page 400 of 536

What to do in an emergency
86
IF YOU HAVE A FLAT TIRE
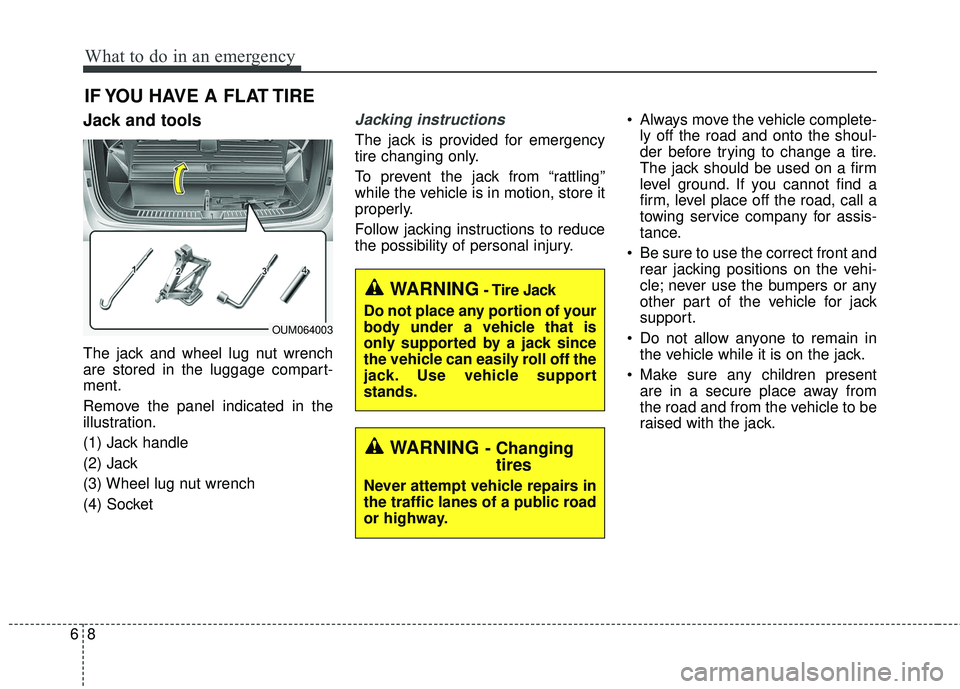
Jack and tools
The jack and wheel lug nut wrench
are stored in the luggage compart-
ment.
Remove the panel indicated in the
illustration.
(1) Jack handle
(2) Jack
(3) Wheel lug nut wrench
(4) Socket
Jacking instructions
The jack is provided for emergency
tire changing only.
To prevent the jack from “rattling”
while the vehicle is in motion, store it
properly.
Follow jacking instructions to reduce
the possibility of personal injury. Always move the vehicle complete-
ly off the road and onto the shoul-
der before trying to change a tire.
The jack should be used on a firm
level ground. If you cannot find a
firm, level place off the road, call a
towing service company for assis-
tance.
Be sure to use the correct front and rear jacking positions on the vehi-
cle; never use the bumpers or any
other part of the vehicle for jack
support.
Do not allow anyone to remain in the vehicle while it is on the jack.
Make sure any children present are in a secure place away from
the road and from the vehicle to be
raised with the jack.
WARNING- Changingtires
Never attempt vehicle repairs in
the traffic lanes of a public road
or highway.
OUM064003
WARNING- Tire Jack
Do not place any portion of your
body under a vehicle that is
only supported by a jack since
the vehicle can easily roll off the
jack. Use vehicle support
stands.
Page 408 of 536

What to do in an emergency
16
6
When using a compact spare tire,
observe the following precautions:
Under no circumstances should
you exceed 80 km/h (50 mph); a
higher speed could damage the
tire.
Ensure that you drive slowly enough for the road conditions to
avoid all hazards. Any road hazard,
such as a pothole or debris, could
seriously damage the compact
spare.
Any continuous road use of this tire could result in tire failure, loss of
vehicle control, and possible per-
sonal injury.
Do not exceed the vehicle’s maxi- mum load rating or the load-carry-
ing capacity shown on the sidewall
of the compact spare tire.
Avoid driving over obstacles. The compact spare tire diameter is
smaller than the diameter of a con-
ventional tire and reduces the
ground clearance approximately
25 mm (1 inch), which could result
in damage to the vehicle. Do not take this vehicle through an
automatic vehicle wash while the
compact spare tire is installed.
Do not use the compact spare tire on any other vehicle because this
tire has been designed especially
for your vehicle.
The compact spare tire’s tread life is shorter than a regular tire.
Inspect your compact spare tire
regularly and replace worn com-
pact spare tires with the same size
and design, mounted on the same
wheel.
The compact spare tire should not be used on any other wheels, nor
should standard tires, snow tires,
wheel covers or trim rings be used
with the compact spare wheel. If
such use is attempted, damage to
these items or other vehicle com-
ponents may occur. Do not use more than one compact
spare tire at a time.
Do not tow a trailer while the com- pact spare tire is installed.
Page 410 of 536

What to do in an emergency
18
6
TOWING
Towing service
If emergency towing is necessary,
we recommend having it done by an
authorized Kia dealer or a commer-
cial tow-truck service. Proper lifting
and towing procedures are neces-
sary to prevent damage to the vehi-
cle. The use of wheel dollies or
flatbed is recommended.
For trailer towing guidelines informa-
tion, refer to “Trailer towing” in sec-tion 5.
On AWD vehicles, your vehicle must
be towed with a wheel lift and dollies
or flatbed equipment with all the
wheels off the ground.
On FWD vehicles, it is acceptable to
tow the vehicle with the rear wheels
on the ground (without dollies) and
the front wheels off the ground.
If any of the loaded wheels or sus-
pension components are damaged
or the vehicle is being towed with the
front wheels on the ground, use a
towing dolly under the front wheels.
When being towed by a commercial
tow truck and wheel dollies are not
used, the front of the vehicle should
always be lifted, not the rear.
OUM064022 dolly
dolly
WARNING - Side and
curtain Air bag
If your vehicle is equipped with
side and curtain air bag, set the
ignition switch to LOCK or ACC
position when the vehicle is
being towed.
The side and curtain air bag
may deploy when the ignition is
ON, and the rollover sensor
detects the situation as a
rollover.
CAUTION
The AWD vehicle should never be towed with the wheels on theground. This can cause seriousdamage to the transaxle or theAWD system.
Page 411 of 536
619
What to do in an emergency
When towing your vehicle in an
emergency without wheel dollies :
1. Set the ignition switch in the ACCposition.
2. Place the transaxle shift lever in N (Neutral).
3. Release the parking brake.
CAUTION - Towing
Do not tow the vehicle back- wards with the front wheels onthe ground as this may causedamage to the vehicle.
Do not tow with sling-type equipment. Use wheel lift orflatbed equipment.
CAUTION - Towing gear
position
Failure to place the transaxleshift lever in N (Neutral) maycause internal damage to thetransaxle.
OUM064013
OUM064012
Page 421 of 536

Maintenance
10
7
SCHEDULED MAINTENANCE SERVICE
Follow the Normal Maintenance
Schedule if the vehicle is usually
operated where none of the following
conditions apply. If any of the follow-
ing conditions apply, follow the
Maintenance Under Severe Usage
Conditions.
Repeated driving short distance of
less than 8 km (5 miles) in normal
temperature or less than 16 km (10
miles) in freezing temperature
Extensive engine idling or low speed driving for long distances
Driving on rough, dusty, muddy, unpaved, graveled or salt-spread
roads
Driving in areas using salt or other corrosive materials or in very cold
weather
Driving in heavy dust condition
Driving in heavy traffic area
Driving on uphill, downhill, or mountain road repeatedly Towing a trailer or using a camper,
or roof rack
Driving as a patrol car, taxi, other commercial use of vehicle towing
Driving over 170 km/h (106 mile/h)
Frequently driving in stop-and-go conditionIf your vehicle is operated under theabove conditions, you shouldinspect, replace or refill more fre-quently than the following NormalMaintenance Schedule. After 120months or 240,000km (150,000miles) continue to follow the pre-scribed maintenance intervals.
Page 439 of 536

Maintenance
28
7
SEVERE DRIVING CONDITIONS
A - Repeatedly driving short distance of less than 8 km (5 miles)
in normal temperature or less than 16 km (10 miles) in freez-
ing temperature
B - Extensive engine idling or low speed driving for long dis- tances
C - Driving on rough, dusty, muddy, unpaved, graveled or salt- spread roads
D - Driving in areas using salt or other corrosive materials or in very cold weather
E - Driving in heavy dust condition F - Driving in heavy traffic area
G- Driving on uphill, downhill, or mountain road
H - Towing a Trailer, or using a camper, or roof rack
I - Driving as a patrol car, taxi, other commercial use or vehicle
towing
J - Driving over 170 km/h (106 mph)
K - Frequently driving in stop-and-go conditions
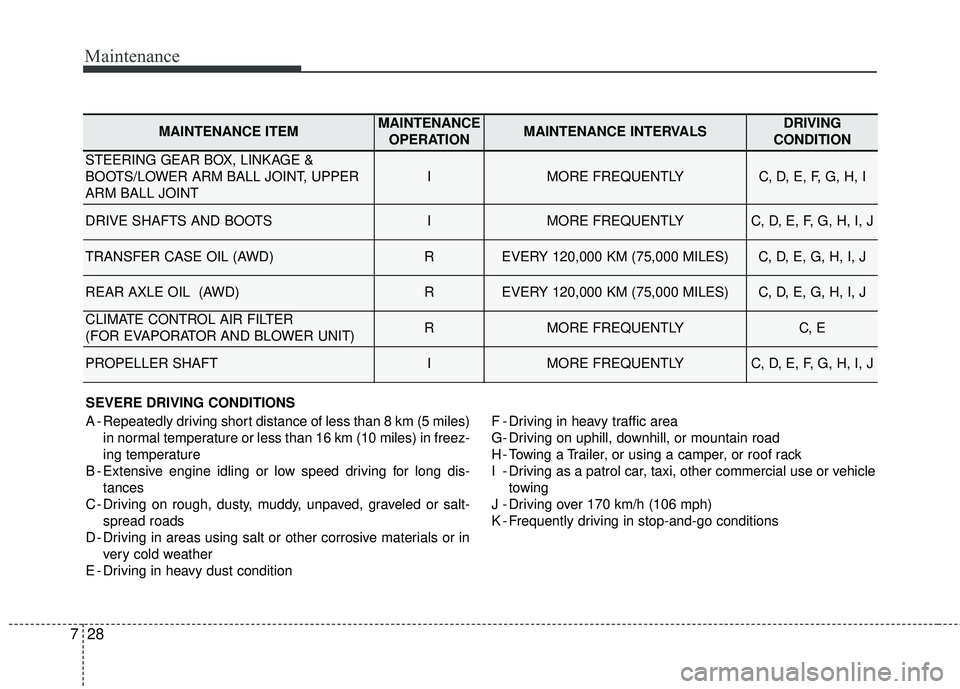
MAINTENANCE ITEMMAINTENANCE OPERATIONMAINTENANCE INTERVALSDRIVING
CONDITION
STEERING GEAR BOX, LINKAGE &
BOOTS/LOWER ARM BALL JOINT, UPPER
ARM BALL JOINT
IMORE FREQUENTLYC, D, E, F, G, H, I
DRIVE SHAFTS AND BOOTSIMORE FREQUENTLYC, D, E, F, G, H, I, J
TRANSFER CASE OIL (AWD) REVERY 120,000 KM (75,000 MILES)C, D, E, G, H, I, J
REAR AXLE OIL (AWD)REVERY 120,000 KM (75,000 MILES)C, D, E, G, H, I, J
CLIMATE CONTROL AIR FILTER
(FOR EVAPORATOR AND BLOWER UNIT)RMORE FREQUENTLYC, E
PROPELLER SHAFTIMORE FREQUENTLYC, D, E, F, G, H, I, J
Page 447 of 536

Maintenance
36
7
ENGINE COOLANT
The high-pressure cooling system
has a reservoir filled with year round
antifreeze coolant. The reservoir is
filled at the factory.
Check the antifreeze protection and
coolant level at least once a year: at
the beginning of the winter season,
and before traveling to a colder cli-
mate.Checking the coolant level Turn the engine off and wait until it
cools down. Use extreme care
when removing the radiator cap.
Wrap a thick towel around it, and
turn it counterclockwise slowly to
the first stop. Step back while the
pressure is released from the cool-
ing system.
When you are sure all the pressure
has been released, press down on
the cap, using a thick towel, and
continue turning counterclockwise
to remove it.
Even if the engine is not operating, do not remove the radiator cap or
the drain plug while the engine and
radiator are hot. Hot coolant and
steam may still blow out under
pressure, causing serious injury.
WARNING
Removing radiator
cap
Never attempt to remove the
radiator cap while the engine is
operating or hot. Doing so
could result in serious personal
injury from escaping hot
coolant or steam.
CAUTION - Radiator cap
Never attempt to remove theradiator cap while the engine isoperating or hot. Doing somight lead to cooling systemand engine damage.