Page 162 of 492
Features of your vehicle
90
4
High beam operation
To turn on the high beam headlights,
push the lever away from you. Pull it
back for low beams.
The high-beam indicator will light
when the headlight high beams are
switched on. To prevent the battery from being
discharged, do not leave the lights
on for a prolonged time while the
engine is not running.
To flash the headlights, pull the lever
towards you. It will return to the normal
(low-beam) position when released.
The headlight switch does not need to
be on to use this flashing feature.
WARNING - High beams
Do not use high beam when
there are other vehicles. Using
high beam could obstruct the
other driver's vision.
OSC047418N
OSC047404N
■ Type A
■ Type B
OSC047419N
OSC047405N
■ Type A
■ Type B
Page 167 of 492

495
Features of your vehicle
Windshield washers (front)
In the OFF position, pull the lever
gently toward you to spray washer
fluid on the windshield and to run the
wipers 1-3 cycles.
Use this function when the wind-
shield is dirty.The spray and wiper operation will
continue until you release the lever. If
the washer does not work, check the
washer fluid level.
If the fluid level is not sufficient, you
add appropriate non-abrasive wind-
shield washer fluid to the washer
reservoir.
The reservoir filler neck is located in
the front of the engine compartment
on the passenger side.
CAUTION
When washing the vehicle, set
the wiper switch in the off posi-tion to stop the auto wiper oper-ation.
The wiper may operate and bedamaged if the switch is set inthe AUTO mode while washingthe vehicle.
Do not remove the sensor coverlocated on the upper end of thepassenger side windshieldglass. Damage to system partscould occur and may not becovered by your vehicle warran-ty.
When starting the vehicle inwinter, set the wiper switch inthe off position. Otherwise,wipers may operate and ice maydamage the windshield wiperblades. Always remove all snowand ice and defrost the wind-shield properly prior to operat-ing the windshield wipers.
OSC047424N
OSC047429N
■ Type A
■ Type BCAUTION - Washer pump
To prevent possible damage tothe washer pump, do not oper-ate the washer when the fluidreservoir is empty.
Page 170 of 492
Features of your vehicle
98
4
Do not use the interior lights for
extended periods when the engine is
not running.
It may cause battery discharge.Automatic turn off function
(if equipped)
The interior lights automatically turn
off approximately 20 minutes after
the ignition switch is turned off.
If your vehicle is equipped with the
theft alarm system, the interior lights
automatically turn off approximately
5 seconds after the system is in
armed stage.
Map lamp (if equipped)
Push the lens (1) to turn the map lamp
on or off. This light produces a spot
beam for convenient use as a map
lamp at night or as a personal lamp for
the driver and front passenger.
INTERIOR LIGHT
WARNING - Interior light
Do not use the interior lights
when driving in the dark. The
glare from the interior lights
may obstruct your view and
cause an accident.
OYB046456
OYB046403
■ Type A
■ Type B
Page 175 of 492

4103
Features of your vehicle
If you want to defrost and defog the
front windshield, refer to “Windshield
Defrosting and Defogging” in this
section.
Rear window defroster
The defroster heats the window to
remove frost, fog and thin ice from
the interior and exterior of the rear
window, while the engine is running.
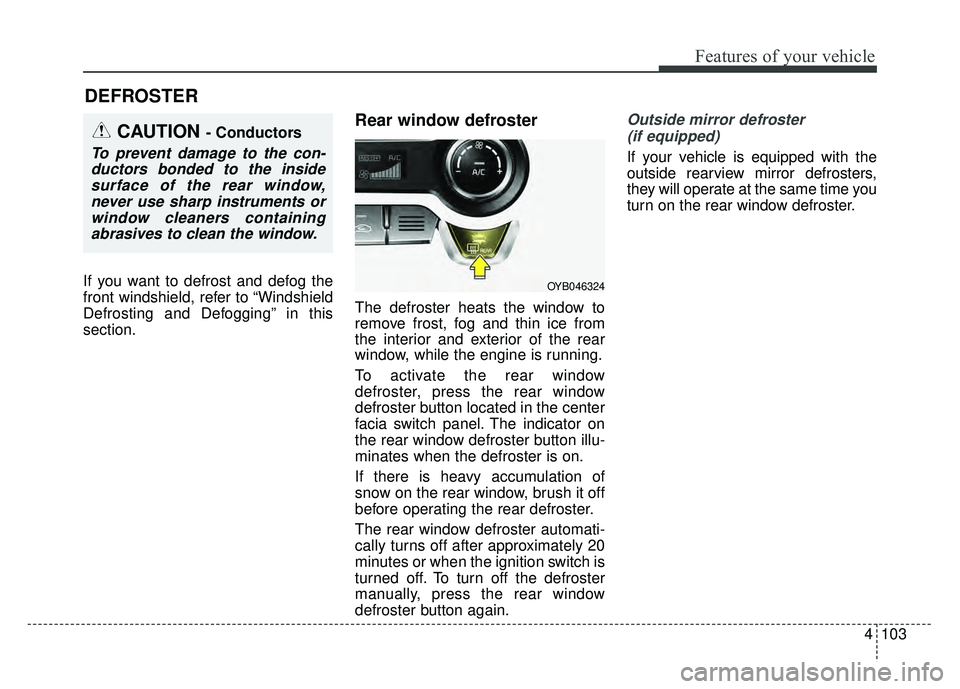
To activate the rear window
defroster, press the rear window
defroster button located in the center
facia switch panel. The indicator on
the rear window defroster button illu-
minates when the defroster is on.
If there is heavy accumulation of
snow on the rear window, brush it off
before operating the rear defroster.
The rear window defroster automati-
cally turns off after approximately 20
minutes or when the ignition switch is
turned off. To turn off the defroster
manually, press the rear window
defroster button again.
Outside mirror defroster (if equipped)
If your vehicle is equipped with the
outside rearview mirror defrosters,
they will operate at the same time you
turn on the rear window defroster.
DEFROSTER
OYB046324
CAUTION - Conductors
To prevent damage to the con-ductors bonded to the insidesurface of the rear window,never use sharp instruments orwindow cleaners containingabrasives to clean the window.
Page 177 of 492
4105
Features of your vehicle
Heating and air conditioning
1. Start the engine.
2. Set the mode to the desired posi-tion.
To improve the effectiveness ofheating and cooling :
- Heating:
- Cooling:
3. Set the temperature control to the desired position.
4. Set the air intake control to the outside (fresh) air or recirculated
air position.
5. Set the fan speed control to the desired speed.
6. If air conditioning is desired, turn the air conditioning system (if
equipped) on.
OYB046302
(if equipped)
(if equipped)
Page 183 of 492

4111
Features of your vehicle
Air conditioning (if equipped)
Kia Air Conditioning Systems are
filled with R-1234yf refrigerant.
1. Start the engine. Push the air con-ditioning button.
2. Set the mode to the position.
3. Set the air intake control to the recirculated air position. However,
prolonged operation in the recircu-
lated air position will excessively
dry the air. In this case, change the
air position.
4. Adjust the fan speed control and temperature control to maintain
maximum comfort.
When maximum cooling is desired, set the temperature control to the
extreme left position, set the mode
control to the MAX A/C position,
then set the fan speed control to
the highest speed. Air conditioning system operation tips
If the vehicle has been parked in
direct sunlight during hot weather,
open the windows for a short time
to let the hot air inside the vehicle
escape.
To help reduce moisture inside of the windows on rainy or humid
days, decrease the humidity inside
the vehicle by operating the air
conditioning system.
During air conditioning system operation, you may occasionally
notice a slight change in engine
speed as the air conditioning com-
pressor cycles. This is a normal
system operation characteristic.
Use the air conditioning system every month only for a few minutes
to ensure maximum system per-
formance.
When using the air conditioning system, you may notice clear water
dripping (or even puddling) on the
ground under the passenger side
of the vehicle. This is a normal sys-
tem operation characteristic.CAUTION - Excessive AC
While using the air conditioningsystem, monitor the tempera-ture gauge closely while drivingup hills or in heavy traffic whenoutside temperatures are high.Air conditioning system opera-tion may cause engine over-heating and potential enginedamage. Continue to use theblower fan but turn the air con-ditioning system off if the tem-perature gauge indicates engineoverheating.
Page 186 of 492
Features of your vehicle
114
4
AUTOMATIC CLIMATE CONTROL SYSTEM (IF EQUIPPED)
OYB046300
1. Temperature control knob
2. AUTO (automatic control) button
3. Climate control display
4. Fan speed control knob
5. OFF button
6. Front windshield defroster button
7. Rear window defroster button
8. Mode selection button
9. Air conditioning button (if equipped)
10. Air intake control button
CAUTION
Operating the blower when the
ignition switch is in the ON posi-tion could cause the battery todischarge. It is best to operate theblower when the engine is run-ning.
Page 188 of 492

Features of your vehicle
116
4
✽
✽
NOTICE
Never place anything over the sen-
sor located on the instrument panel
to ensure better control of the heat-
ing and cooling system.
Manual heating and air condi-
tioning
The heating and cooling system can
be controlled manually by pushing
buttons other than the AUTO button.
In this case, the system works
sequentially according to the order of
buttons selected.
1. Start the engine.
2. Set the mode to the desired position.
To improve the effectiveness ofheating and cooling :
- Heating:
- Cooling:
3. Set the temperature control to the desired position.
4. Set the air intake control to the outside (fresh) air or recirculated
air position.
5. Set the fan speed control to the desired speed.
6. If air conditioning is desired, turn the air conditioning system on.
Press the AUTO button in order to
convert to full automatic control of
the system.
Mode selection
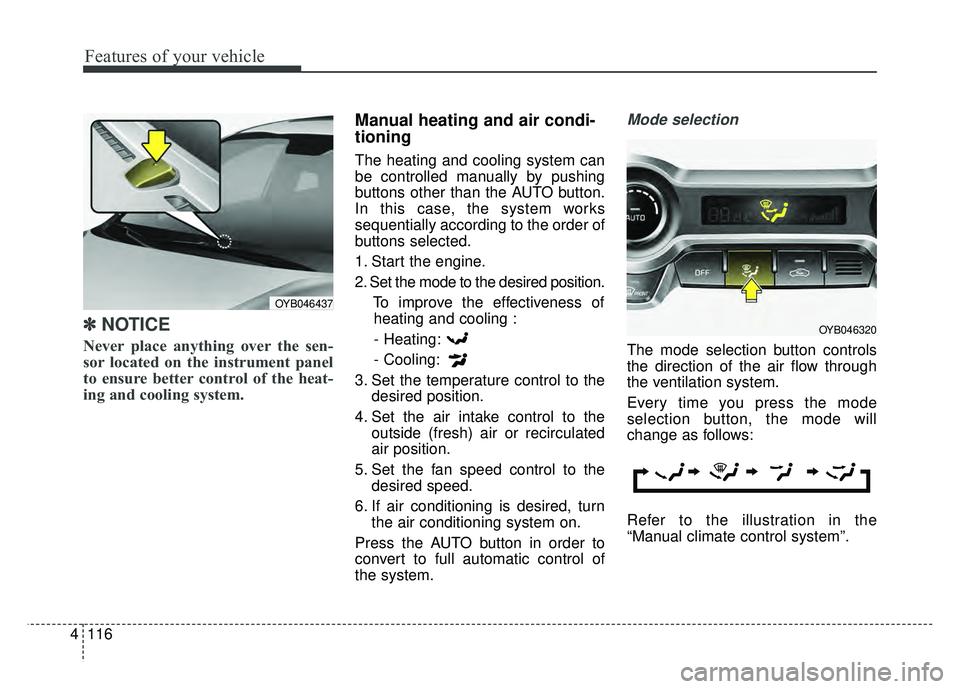
The mode selection button controls
the direction of the air flow through
the ventilation system.
Every time you press the mode
selection button, the mode will
change as follows:
Refer to the illustration in the
“Manual climate control system”.
OYB046437
OYB046320