Page 266 of 348
TIPS CONTROLS AND
GENERAL INFORMATION
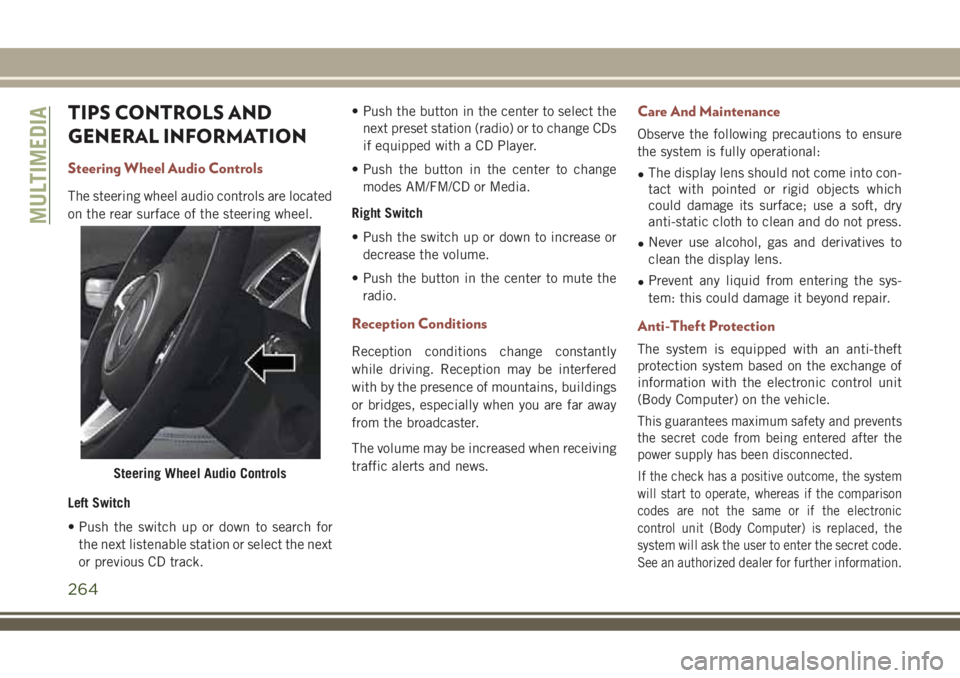
Steering Wheel Audio Controls
The steering wheel audio controls are located
on the rear surface of the steering wheel.
Left Switch
• Push the switch up or down to search for
the next listenable station or select the next
or previous CD track.• Push the button in the center to select the
next preset station (radio) or to change CDs
if equipped with a CD Player.
• Push the button in the center to change
modes AM/FM/CD or Media.
Right Switch
• Push the switch up or down to increase or
decrease the volume.
• Push the button in the center to mute the
radio.
Reception Conditions
Reception conditions change constantly
while driving. Reception may be interfered
with by the presence of mountains, buildings
or bridges, especially when you are far away
from the broadcaster.
The volume may be increased when receiving
traffic alerts and news.
Care And Maintenance
Observe the following precautions to ensure
the system is fully operational:
•The display lens should not come into con-
tact with pointed or rigid objects which
could damage its surface; use a soft, dry
anti-static cloth to clean and do not press.
•Never use alcohol, gas and derivatives to
clean the display lens.
•Prevent any liquid from entering the sys-
tem: this could damage it beyond repair.
Anti-Theft Protection
The system is equipped with an anti-theft
protection system based on the exchange of
information with the electronic control unit
(Body Computer) on the vehicle.
This guarantees maximum safety and prevents
the secret code from being entered after the
power supply has been disconnected.
If the check has a positive outcome, the system
will start to operate, whereas if the comparison
codes are not the same or if the electronic
control unit (Body Computer) is replaced, the
system will ask the user to enter the secret code.
See an authorized dealer for further information.Steering Wheel Audio Controls
MULTIMEDIA
264
Page 268 of 348
CAUTION!
Do NOT attach any object to the touchscreen,
doing so can result in damage to the touch-
screen.
Clock Setting
To start the clock setting procedure:
1. Push the MORE button on the faceplate.
2. Press the Settings button on the touch-
screen, then press the “Clock and Date”
button.
3. Press the “Set Time” button on the
touchscreen.
4. Press the “Up” or “Down” arrows to ad-
just the hours or minutes, then select the
“AM” or “PM” button on the touchscreen.
You can also select 12hr or 24hr format
by pressing the desired button on the
touchscreen.
5. Once the time is set press the “Done”
button on the touchscreen to exit the time
screen.NOTE:
In the Clock Setting Menu you can also select
Display Clock. Display Clock turns the clock
display in the status bar on or off.
Audio Setting
1. Push the MORE button on the faceplate.
2. Press the “Settings” button on the
touchscreen.
3. Scroll down and press the “Audio” button
on the touchscreen to open the Audio
menu.
4. The Audio Menu shows the following op-
tions for you to customize your audio
settings.
Equalizer
Press the “Equalizer” button on the touch-
screen to adjust the Bass, Mid and Treble.
Use the “+” or “-” button on the touchscreen
to adjust the equalizer to your desired set-
tings.Balance/Fade
Press the “Balance/Fade” button on the touch-
screen to adjust the sound from the speakers.
Use the arrow buttons on the touchscreen to
adjust the sound level from the front and rear or
right and left side speakers. Press the Center
“C” button on the touchscreen to reset the
balance and fade to the factory setting.
Speed Adjusted Volume — If Equipped
Press the “Speed Adjusted Volume” button
on the touchscreen to select between OFF, 1,
2 or 3. This will decrease the radio volume
relative to a decrease in vehicle speed.
Loudness — If Equipped
Press the “Loudness” button on the touch-
screen to select the Loudness feature. When
this feature is activated it improves sound
quality at lower volumes.
Surround Sound — If Equipped
Press the “Surround Sound” button on the
touchscreen, select On or Off followed by
pressing the back arrow button on the touch-
screen. When this feature is activated, it
provides simulated surround sound mode.
MULTIMEDIA
266
Page 269 of 348
Radio Operation
Radio Operation
1 — Radio Station Preset
2 — All Presets
3 — Seek Next
4 — Audio Settings5 — Station Information
6 — Direct Tune
7 — Radio Band
8 — Seek Previous
267
Page 270 of 348
Store Radio Presets Manually
The Radio stores up to 12 presets in each of
the Radio modes. There are four visible pre-
sets at the top of the radio screen. Pressing
the “All” button on the touchscreen on the
radio home screen displays all of the preset
stations for that mode.
To store a radio preset manually, follow the
steps below:
1. Tune to the desired station.
2. Press and hold the desired numbered but-
ton on the touchscreen for more than two
seconds, or until you hear a confirmation
beep.
Seek Next/Previous Buttons
• Press the Seek up or Seek down button to
seek through radio stations in AM, FM or
DAB bands.
• Hold either button to bypass stations with-
out stopping.USB/Audio Jack (AUX)/Bluetooth
Operation
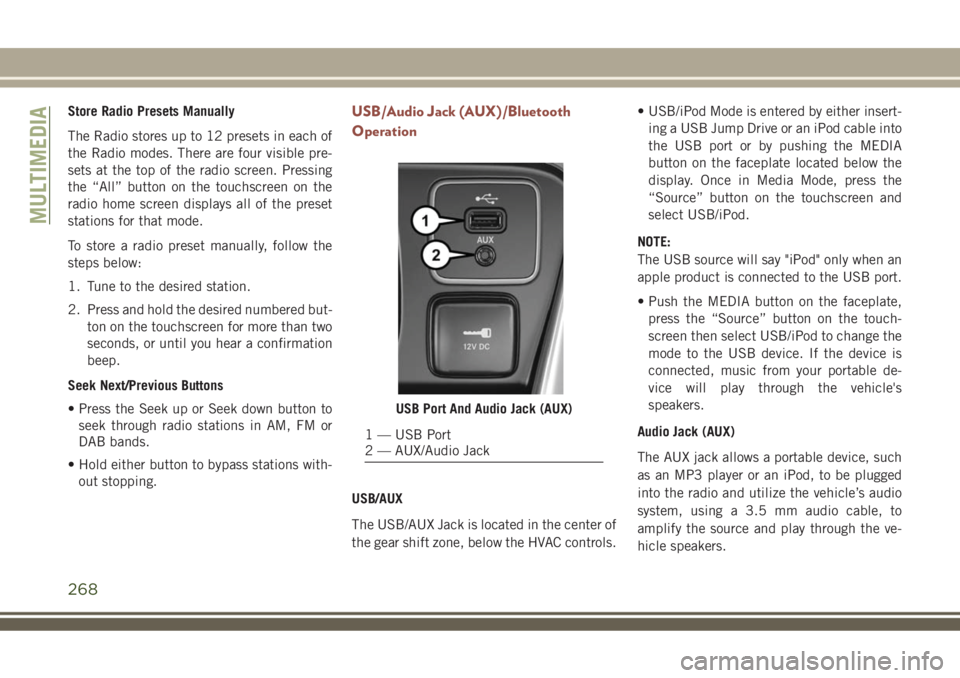
USB/AUX
The USB/AUX Jack is located in the center of
the gear shift zone, below the HVAC controls.• USB/iPod Mode is entered by either insert-
ing a USB Jump Drive or an iPod cable into
the USB port or by pushing the MEDIA
button on the faceplate located below the
display. Once in Media Mode, press the
“Source” button on the touchscreen and
select USB/iPod.
NOTE:
The USB source will say "iPod" only when an
apple product is connected to the USB port.
• Push the MEDIA button on the faceplate,
press the “Source” button on the touch-
screen then select USB/iPod to change the
mode to the USB device. If the device is
connected, music from your portable de-
vice will play through the vehicle's
speakers.
Audio Jack (AUX)
The AUX jack allows a portable device, such
as an MP3 player or an iPod, to be plugged
into the radio and utilize the vehicle’s audio
system, using a 3.5 mm audio cable, to
amplify the source and play through the ve-
hicle speakers.
USB Port And Audio Jack (AUX)
1 — USB Port
2 — AUX/Audio Jack
MULTIMEDIA
268
Page 275 of 348
Radio
Uconnect 4 With 7–inch Display Radio
1 — Radio Station Presets
2 — Toggle Between Presets
3 — Status Bar
4 — Main Category Bar
5 — Audio Settings6 — Seek Up
7 — Direct Tune To A Radio Station
8 — Seek Down
9 — Browse And Manage Presets
10 — Radio Bands
273
Page 276 of 348
WARNING!
ALWAYS drive safely with your hands on
the wheel. You have full responsibility and
assume all risks related to the use of the
Uconnect features and applications in this
vehicle. Only use Uconnect when it is safe
to do so. Failure to do so may result in an
accident involving serious injury or death.
• To access the Radio mode, press the “Ra-
dio” button on the touchscreen.
Selecting Radio Stations
• Press the desired radio band (AM, FM or
DAB) button on the touchscreen.
Seek Up/Seek Down
• Press the Seek up or down arrow buttons on
the touchscreen for less than two seconds
to seek through radio stations.
• Press and hold either arrow button on the
touchscreen for more than two seconds to
bypass stations without stopping. The radio
will stop at the next listenable station once
the arrow button on the touchscreen is
released.Direct Tune
• Tune directly to a radio station by pressing
the “Tune” button on the screen, and en-
tering the desired station number.
Store Radio Presets Manually
Your radio can store 36 total preset stations,
12 presets per band (AM, FM and DAB). They
are shown at the top of your radio screen. To
see the 12 preset stations per band, press the
arrow button on the touchscreen at the top
right of the screen to toggle between the two
sets of six presets.
To store a radio preset manually, follow the
steps below:
1. Tune to the desired station.
2. Press and hold the desired numbered but-
ton on the touchscreen for more than two
seconds or until you hear a confirmation
beep.
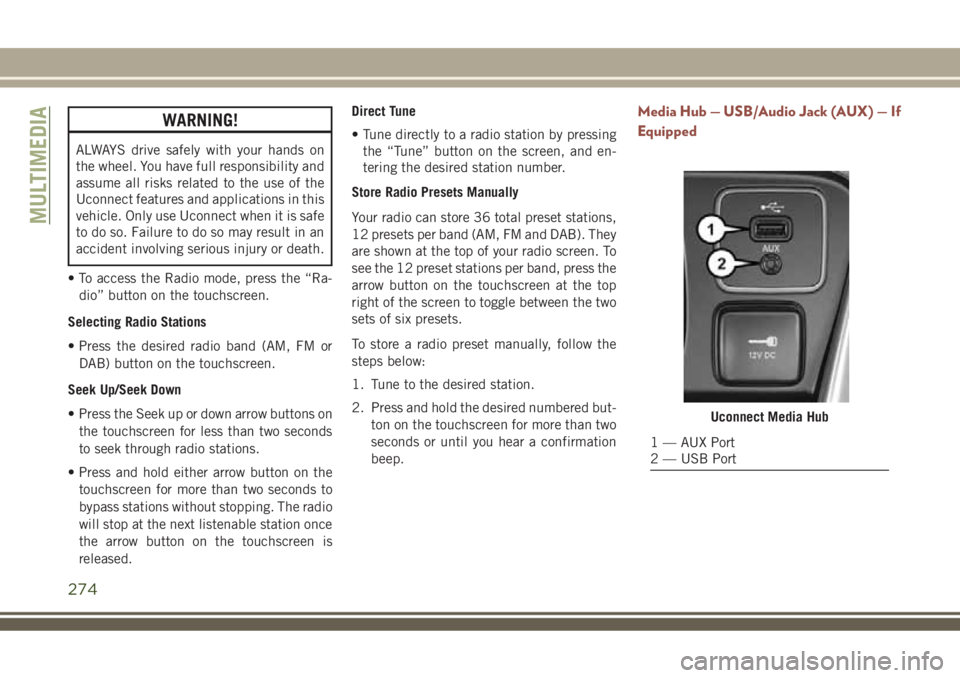
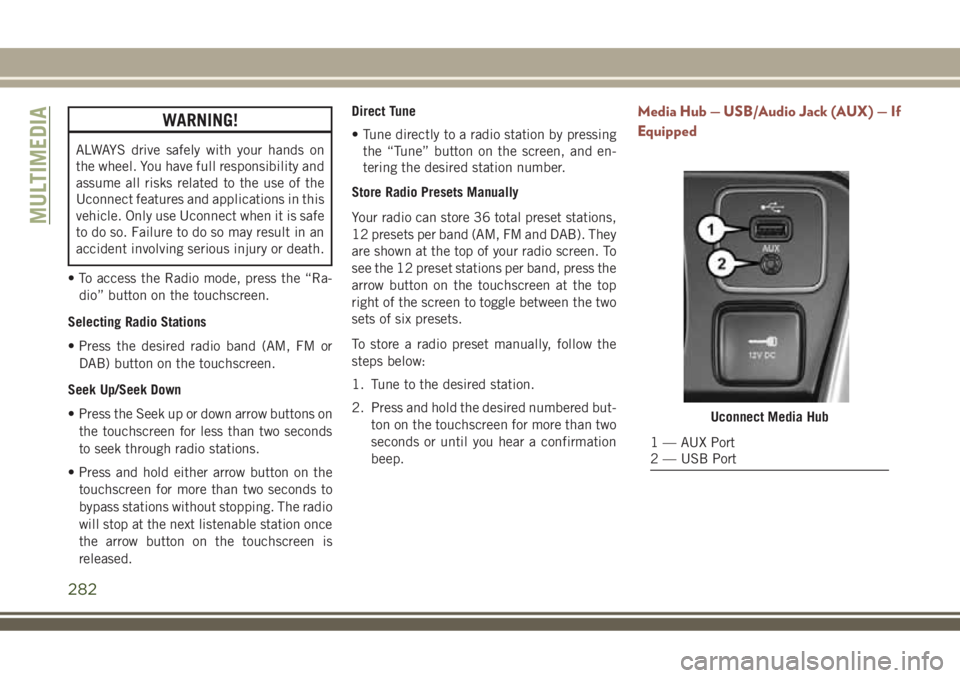
Media Hub — USB/Audio Jack (AUX) — If
Equipped
Uconnect Media Hub
1 — AUX Port
2 — USB Port
MULTIMEDIA
274
Page 283 of 348
Radio
Uconnect 4C/4C NAV With 8.4–inch Display Radio
1 — Radio Station Presets
2 — Toggle Between Presets
3 — Status Bar
4 — View Small Navigation Map
5 — HD Radio
6 — Main Category Bar7 — Audio Settings
8 — Seek Up
9 — Direct Tune To A Radio Station
10 — Seek Down
11 — Browse And Manage Presets
12 — Radio Bands
281
Page 284 of 348
WARNING!
ALWAYS drive safely with your hands on
the wheel. You have full responsibility and
assume all risks related to the use of the
Uconnect features and applications in this
vehicle. Only use Uconnect when it is safe
to do so. Failure to do so may result in an
accident involving serious injury or death.
• To access the Radio mode, press the “Ra-
dio” button on the touchscreen.
Selecting Radio Stations
• Press the desired radio band (AM, FM or
DAB) button on the touchscreen.
Seek Up/Seek Down
• Press the Seek up or down arrow buttons on
the touchscreen for less than two seconds
to seek through radio stations.
• Press and hold either arrow button on the
touchscreen for more than two seconds to
bypass stations without stopping. The radio
will stop at the next listenable station once
the arrow button on the touchscreen is
released.Direct Tune
• Tune directly to a radio station by pressing
the “Tune” button on the screen, and en-
tering the desired station number.
Store Radio Presets Manually
Your radio can store 36 total preset stations,
12 presets per band (AM, FM and DAB). They
are shown at the top of your radio screen. To
see the 12 preset stations per band, press the
arrow button on the touchscreen at the top
right of the screen to toggle between the two
sets of six presets.
To store a radio preset manually, follow the
steps below:
1. Tune to the desired station.
2. Press and hold the desired numbered but-
ton on the touchscreen for more than two
seconds or until you hear a confirmation
beep.
Media Hub — USB/Audio Jack (AUX) — If
Equipped
Uconnect Media Hub
1 — AUX Port
2 — USB Port
MULTIMEDIA
282