2018 JEEP COMPASS manual transmission
[x] Cancel search: manual transmissionPage 150 of 348

To engage REVERSE gear from the NEUTRAL
position, lift the REVERSE ring, located be-
low the knob and move the gear selector all
the way left and then forward.
Shifting
Fully press the clutch pedal before shifting
gears. As you release the clutch pedal, lightly
press the accelerator pedal.You should always use first gear when starting
from a standing position.
Recommended Vehicle Shift Speeds
To utilize your manual transmission effi-
ciently for fuel economy and performance, it
should be upshifted as listed in the recom-mended shift speed chart. Shift at the ve-
hicle speeds listed for acceleration. When
heavily loaded or pulling a trailer, these rec-
ommended up-shift speeds may not apply.
Manual Transmission Shift Speeds in MPH (KM/H)
All EnginesGear Selection 2 to 3 3 to 4 4 to 5 5 to 6
Accel. 24 (39) 34 (55) 47 (76) 56 (90)
Cruise 19 (31) 27 (43) 37 (60) 41 (66)
NOTE:
A certain amount of noise from the transmis-
sion is normal. This noise can be most notice-
able when the vehicle is idling in NEUTRAL
with the clutch engaged (clutch pedal re-
leased), but it may also be heard when driv-
ing. The noise may also be more noticeable
when the transmission is warm. This noise is
normal and is not an indication of a problem
with your clutch or transmission.Downshifting
Moving from a high gear down to a lower gear
is recommended to preserve brakes when
driving down steep hills. In addition, down-
shifting at the right time provides better ac-
celeration when you desire to resume speed.
Downshift progressively. Do not skip gears to
avoid overspeeding the engine and clutch.
WARNING!
Do not downshift for additional engine
braking on a slippery surface. The drive
wheels could lose their grip, and the ve-
hicle could skid.
STARTING AND OPERATING
148
Page 151 of 348

CAUTION!
• Skipping gears and downshifting into
lower gears at higher vehicle speeds can
damage the engine and clutch systems,
Any attempt to shift into lower gear with
clutch pedal depressed may result dam-
age to the clutch system. Shifting into
lower gear and releasing the clutch may
result in engine damage.
• When descending a hill, be very careful
to downshift one gear at a time to pre-
vent overspeeding the engine which can
cause engine damage, and/or clutch
CAUTION!
damage, even if the clutch pedal is
pressed. If transfer case is in low range
the vehicle speeds to cause engine and
clutch damage are significantly lower.
• Failure to follow the maximum recom-
mended downshifting speeds may cause
the engine damage and/or damage the
clutch, even if the clutch pedal is
pressed.
• Descending a hill in low range with
clutch pedal depressed could result in
clutch damage.
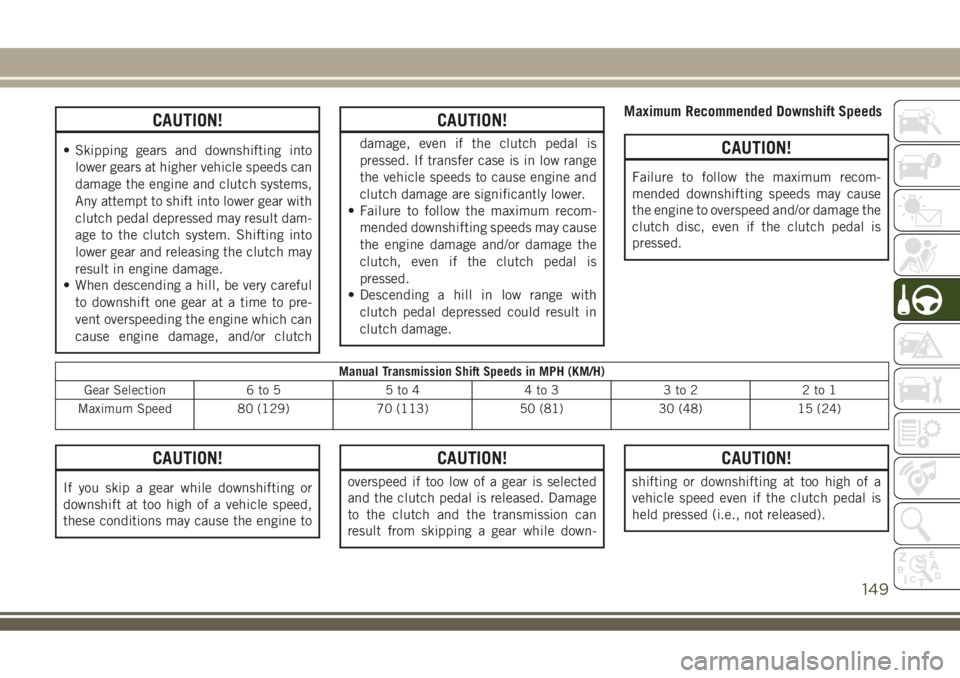
Maximum Recommended Downshift Speeds
CAUTION!
Failure to follow the maximum recom-
mended downshifting speeds may cause
the engine to overspeed and/or damage the
clutch disc, even if the clutch pedal is
pressed.
Manual Transmission Shift Speeds in MPH (KM/H)
Gear Selection 6 to 5 5 to 4 4 to 3 3 to 2 2 to 1
Maximum Speed 80 (129) 70 (113) 50 (81) 30 (48) 15 (24)
CAUTION!
If you skip a gear while downshifting or
downshift at too high of a vehicle speed,
these conditions may cause the engine to
CAUTION!
overspeed if too low of a gear is selected
and the clutch pedal is released. Damage
to the clutch and the transmission can
result from skipping a gear while down-
CAUTION!
shifting or downshifting at too high of a
vehicle speed even if the clutch pedal is
held pressed (i.e., not released).
149
Page 154 of 348

Six-Speed Or Nine-Speed Automatic
Transmission
NOTE:
Your vehicle may be equipped with a six-
speed or nine-speed automatic transmission,
depending on model. This section describes
operation of both the six-speed and nine-
speed transmission.
The transmission gear range (PRND) is dis-
played both beside the gear selector and in
the instrument cluster. To select a gear range,
push the lock button on the gear selector and
move the selector rearward or forward. You
must also press the brake pedal to shift the
transmission out of PARK (or NEUTRAL,
when the vehicle is stopped or moving at low
speeds). Select the DRIVE range for normal
driving.
NOTE:
In the event of a mismatch between the gear
selector position and the actual transmission
gear (for example, driver selects REVERSE
while driving forward), the position indicator
will blink continuously until the selector is
returned to the proper position, or the re-
quested shift can be completed.The electronically-controlled transmission
adapts its shift schedule based on driver
inputs, along with environmental and road
conditions. The transmission electronics are
self-calibrating; therefore, the first few shifts
on a new vehicle may be somewhat abrupt.
This is a normal condition, and precision
shifts will develop within a few hundred miles
(kilometers).
The nine-speed transmission has been devel-
oped to meet the needs of current and future
FWD/AWD vehicles. Software and calibration
is refined to optimize the customer’s driving
experience and fuel economy. By design,
some vehicle and driveline combinations uti-
lize 9th gear only in very specific driving
situations and conditions.
Only shift from DRIVE to PARK or REVERSE
when the accelerator pedal is released and
the vehicle is stopped. Be sure to keep your
foot on the brake pedal when shifting be-
tween these gears.
The transmission gear selector provides
PARK, REVERSE, NEUTRAL, DRIVE, and
AutoStick (+/-) shift positions. Manual shifts
can be made using the AutoStick shift con-trol. Moving the gear selector into the
AutoStick (+/-) position (beside the DRIVE
position) activates AutoStick mode, provid-
ing manual shift control and displaying the
current gear in the instrument cluster (as 1,
2, 3, etc.). Toggling the gear selector forward
(-) or rearward (+) while in the AutoStick
position will manually select the transmis-
sion gear. Refer to "AutoStick" in this section
for further information.
NOTE:
If the gear selector cannot be moved to the
PARK, REVERSE, or NEUTRAL position
(when pushed forward) it is probably in the
AutoStick (+/-) position (beside the DRIVE
position). In AutoStick mode, the transmis-
sion gear (1, 2, 3, etc.) is displayed in the
instrument cluster. Move the gear selector to
the right (into the DRIVE [D] position) for
access to PARK, REVERSE, and NEUTRAL.
STARTING AND OPERATING
152
Page 157 of 348

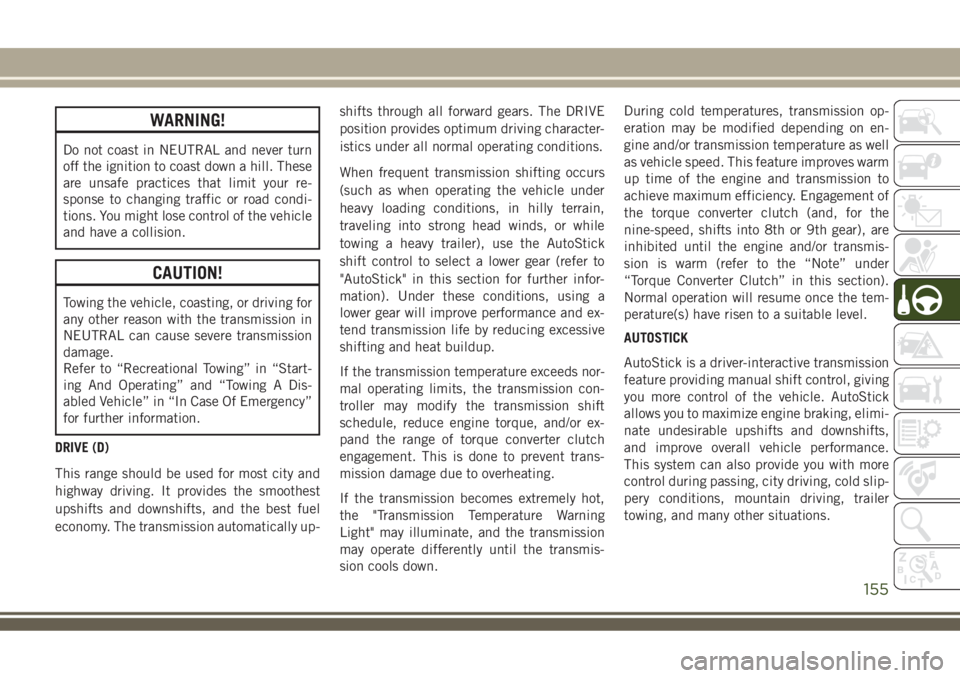
WARNING!
Do not coast in NEUTRAL and never turn
off the ignition to coast down a hill. These
are unsafe practices that limit your re-
sponse to changing traffic or road condi-
tions. You might lose control of the vehicle
and have a collision.
CAUTION!
Towing the vehicle, coasting, or driving for
any other reason with the transmission in
NEUTRAL can cause severe transmission
damage.
Refer to “Recreational Towing” in “Start-
ing And Operating” and “Towing A Dis-
abled Vehicle” in “In Case Of Emergency”
for further information.
DRIVE (D)
This range should be used for most city and
highway driving. It provides the smoothest
upshifts and downshifts, and the best fuel
economy. The transmission automatically up-shifts through all forward gears. The DRIVE
position provides optimum driving character-
istics under all normal operating conditions.
When frequent transmission shifting occurs
(such as when operating the vehicle under
heavy loading conditions, in hilly terrain,
traveling into strong head winds, or while
towing a heavy trailer), use the AutoStick
shift control to select a lower gear (refer to
"AutoStick" in this section for further infor-
mation). Under these conditions, using a
lower gear will improve performance and ex-
tend transmission life by reducing excessive
shifting and heat buildup.
If the transmission temperature exceeds nor-
mal operating limits, the transmission con-
troller may modify the transmission shift
schedule, reduce engine torque, and/or ex-
pand the range of torque converter clutch
engagement. This is done to prevent trans-
mission damage due to overheating.
If the transmission becomes extremely hot,
the "Transmission Temperature Warning
Light" may illuminate, and the transmission
may operate differently until the transmis-
sion cools down.During cold temperatures, transmission op-
eration may be modified depending on en-
gine and/or transmission temperature as well
as vehicle speed. This feature improves warm
up time of the engine and transmission to
achieve maximum efficiency. Engagement of
the torque converter clutch (and, for the
nine-speed, shifts into 8th or 9th gear), are
inhibited until the engine and/or transmis-
sion is warm (refer to the “Note” under
“Torque Converter Clutch” in this section).
Normal operation will resume once the tem-
perature(s) have risen to a suitable level.
AUTOSTICK
AutoStick is a driver-interactive transmission
feature providing manual shift control, giving
you more control of the vehicle. AutoStick
allows you to maximize engine braking, elimi-
nate undesirable upshifts and downshifts,
and improve overall vehicle performance.
This system can also provide you with more
control during passing, city driving, cold slip-
pery conditions, mountain driving, trailer
towing, and many other situations.
155
Page 158 of 348

Operation
When the gear selector is in the AutoStick
position (beside the DRIVE position), it can
be moved forward and rearward. This allows
the driver to manually select the transmission
gear being used. Moving the gear selector
forward (-) triggers a downshift and rearward
(+) an upshift. The current gear is displayed
in the instrument cluster.
In AutoStick mode, the transmission will
shift up or down when the driver moves the
gear selector rearward (+) or forward (-), un-
less an engine lugging or overspeed condition
would result. It will remain in the selected
gear until another upshift or downshift is
chosen, except as described below.
• Six-speed transmissions will automatically
upshift when necessary to prevent engine
over-speed.
• The transmission will automatically down-
shift as the vehicle slows (to prevent engine
lugging) and will display the current gear.• The transmission will automatically down-
shift to first gear when coming to a stop.
After a stop, the driver should manually
upshift (+) the transmission as the vehicle
is accelerated.
• You can start out, from a stop, in first or
second gear (or third gear, in six-speed
models, or in 4LO range, Snow mode, or
Sand mode, where available). Tapping (+)
(at a stop) will allow starting in second gear.
Starting out in second gear can be helpful
in snowy or icy conditions.
• If a requested downshift would cause the
engine to over-speed, that shift will not
occur.
• The system will ignore attempts to upshift
at too low of a vehicle speed.
• Transmission shifting will be more notice-
able when AutoStick is enabled.
• The system may revert to automatic shift
mode if a fault or overheat condition is
detected.
NOTE:
When Selec-Speed or Hill Descent Control is
enabled, AutoStick is not active.To disengage AutoStick, return the gear se-
lector to the DRIVE position. You can shift in
or out of the AutoStick position at any time
without taking your foot off the accelerator
pedal.
WARNING!
Do not downshift for additional engine
braking on a slippery surface. The drive
wheels could lose their grip and the ve-
hicle could skid, causing a collision or
personal injury.
Transmission Limp Home Mode
Transmission function is monitored electroni-
cally for abnormal conditions. If a condition
is detected that could result in transmission
damage, Transmission Limp Home Mode is
activated. In this mode, the transmission
may operate only in a fixed gear, or may
remain in NEUTRAL. The Malfunction Indi-
cator Light (MIL) may be illuminated. Limp
Home Mode may allow the vehicle to be
driven to an authorized dealer for service
without damaging the transmission.
STARTING AND OPERATING
156
Page 162 of 348

•SNOW: This mode allows you to have greater
stability under conditions of bad weather.
For use on and off road on surfaces with
poor traction, such as roads covered with
snow. When in SNOW mode (depending on
certain operating conditions), the transmis-
sion may use second gear (rather than first
gear) during launches, to minimize wheel
slippage.
•SAND: For off-road driving or use on sur-
faces with poor traction, such as dry sand.
The transmission is set to provide maxi-
mum traction.
•MUD: For off-road driving or use on surfaces
with poor traction, such as roads covered by
mud or wet grass.
•ROCK(Trailhawk only): This mode is only
available in 4WD LOW range. The device
sets the vehicle to maximize traction and
allow the highest steering capacity for off-
road surfaces. This mode gives you the
maximum performance off-road. Use for
low speed obstacles such as large rocks,
deep ruts, etc.NOTE:
• Rock mode is only available on the vehicles
equipped with the Off-Road package.
• Activate the Hill Descent Control for steep
downhill control. See “Electronic Brake
Control System” in “Safety” for further
information.
STOP/START SYSTEM — IF
EQUIPPED
The Stop/Start function is developed to re-
duce fuel consumption. The system will stop
the engine automatically during a vehicle
stop if the required conditions are met. Re-
leasing the brake pedal, clutch pedal or
pressing the accelerator pedal will automati-
cally re-start the engine.
WARNING!
Before opening the hood, make sure that
the engine is off and that the ignition is in
the OFF mode. Follow the indications on
the plate underneath the hood. We recom-
WARNING!
mend that you remove the key fob if other
people remain in the vehicle. The vehicle
should only be exited after the key fob has
been removed and the ignition is on the
OFF mode. During refueling, make sure
that the engine is off (ignition device in the
OFF mode).
CAUTION!
When replacing the battery, always con-
tact your authorized dealer. Replace the
battery with the same type (HEAVY DUTY)
and with the same specifications.
Operating Modes
Engine stopping mode
Models equipped with a manual transmis-
sion:
With the vehicle stopped, the engine stops
with transmission in neutral and clutch pedal
released.
STARTING AND OPERATING
160
Page 163 of 348

Models equipped with an automatic trans-
mission:
With vehicle at a standstill and brake pedal
pressed, the engine switches off if the gear
selector is in a position other than REVERSE.
In the event of stops uphill, the engine
switching will be disabled to activate the "Hill
Start Assist" function (works only with the
engine running).
The warning light on the instrument panel
switches on to signal that the engine was
stopped.
Engine Restarting Mode
Models equipped with manual transmission:
To restart the engine, press the clutch pedal.
If the vehicle does not start pressing the
clutch, place the gear selector in neutral and
repeat the procedure. If the problem persists,
contact your authorized dealer.
Models equipped with an automatic trans-
mission:
To restart the engine, release the brake pedal.With brake pressed, if the gear selector is in
DRIVE the engine can be restarted moving
the selector to REVERSE or NEUTRAL or
“AutoStick”.
With brake pedal pressed, if the gear selector
is in "AutoStick" mode, the engine can be
restarted moving the selector to "+" or "–", or
REVERSE or NEUTRAL.
When the engine has been stopped automati-
cally, keeping the brake pedal pressed, the
brake can be released keeping the engine off
by quickly shifting the gear selector to PARK.
To restart the engine, just move the selector
out of PARK.
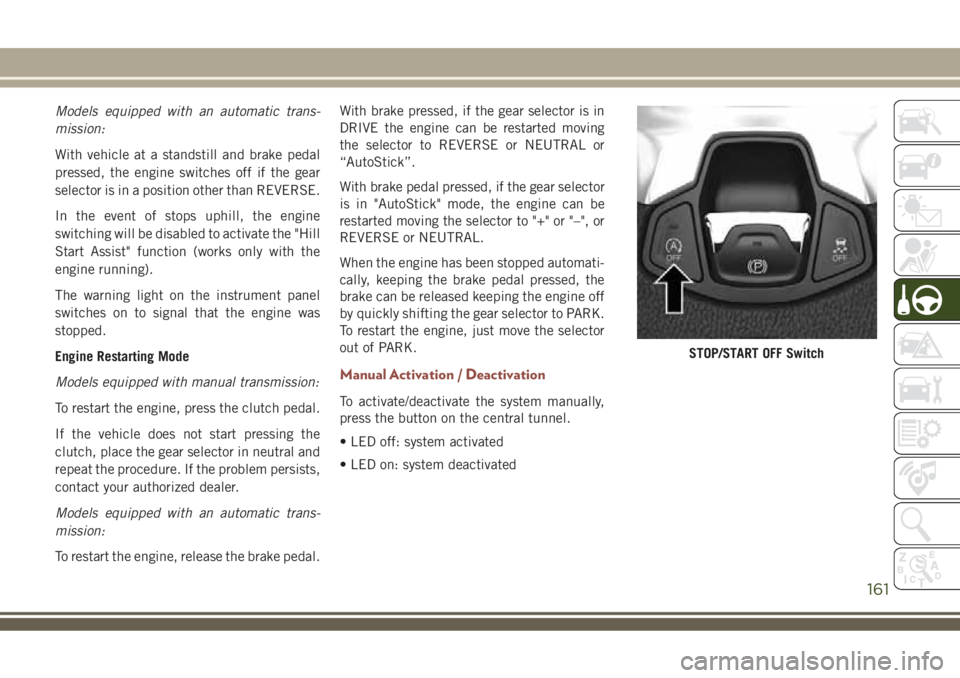
Manual Activation / Deactivation
To activate/deactivate the system manually,
press the button on the central tunnel.
• LED off: system activated
• LED on: system deactivated
STOP/START OFF Switch
161
Page 178 of 348

NOTE:
• The system will not apply torque to the
steering wheel whenever a safety system
engages. (anti-lock brakes, traction control
system, electronic stability control, forward
collision warning, etc.).
• Use of the turn signals and Hazard Warning
flashers also suppresses the warnings.
PARKVIEW REAR BACK-UP
CAMERA
Symbols And Messages On The Display
You can see an on-screen image of the rear of
your vehicle whenever the transmission is
shifted into REVERSE. The ParkView Rear
Back-Up Camera image will be displayed on
the Uconnect Display, located on the center
stack of the instrument panel.
If the Uconnect Display appears foggy, clean
the camera lens located on the rear of the
vehicle above the rear license plate.
Refer to “ParkView Back-Up Camera” in
“Starting And Operating” in your Owner's
Manual for further information.
WARNING!
Drivers must be careful when backing up;
even when using the ParkView Rear
Back-Up Camera. Always check carefully
behind your vehicle, and be sure to check
for pedestrians, animals, other vehicles,
obstructions, or blind spots before backing
up. You must continue to pay attention
while backing up. Failure to do so can
result in serious injury or death.
CAUTION!
• To avoid vehicle damage, ParkView
should only be used as a parking aid.
The ParkView camera is unable to view
every obstacle or object in your drive
path.
• To avoid vehicle damage, the vehicle
must be driven slowly when using
ParkView to be able to stop in time when
an obstacle is seen. It is recommended
that the driver look frequently over his/
her shoulder when using ParkView.
REFUELING THE VEHICLE
The Capless Fuel System uses a flapper
placed at the filler pipe of the fuel tank; it
opens and closes automatically upon
insertion/extraction of the fuel nozzle. In cer-
tain countries, the Capless Fuel System is
designed so that it prevents the filling of an
incorrect type of fuel.
1. Unlock the Fuel Filler Door by pushing the
unlock button on the key fob or the unlock
button on the driver-side door trim panel.
2. Open the fuel filler door by pushing on the
outer edge of the Fuel Door.
STARTING AND OPERATING
176