2018 JEEP CHEROKEE CD player
[x] Cancel search: CD playerPage 28 of 312

The RHRs will automatically return to their
normal position following a rear impact. If the
RHRs do not return to their normal position,
see your authorized dealer immediately.
To raise the head restraint, pull upward on
the head restraint. To lower the head re-
straint, push the adjustment button, located
at the base of the head restraint, and push
downward on the head restraint.WARNING!
• A loose head restraint thrown forward ina collision or hard stop could cause
serious injury or death to occupants of
the vehicle. Always securely stow re-
moved head restraints in a location out-
side the occupant compartment.
• ALL the head restraints MUST be rein-
stalled in the vehicle to properly protect
the occupants. Follow the re-installation
instructions above prior to operating the
vehicle or occupying a seat.
• Do not place items over the top of the
Reactive Head Restraint, such as coats,
seat covers or portable DVD players.
These items may interfere with the op-
eration of the Reactive Head Restraint in
the event of a collision and could result
in serious injury or death.
Front Removal
To remove the head restraint, raise it as far as
it can go. Then, push the release button and
the adjustment button at the base of each
post while pulling the head restraint up.
Seatback angle may need to be adjusted to
fully remove the head restraint. To reinstall
the head restraint, put the head restraint
posts into the holes and push downward.
Then, adjust the head restraint to the appro-
priate height.
WARNING!
• All occupants, including the driver,should not operate a vehicle or sit in a
vehicle’s seat until the head restraints
are placed in their proper positions in
order to minimize the risk of neck injury
in the event of a collision.
• Do not place items over the top of the
Active Head Restraint, such as coats,
seat covers or portable DVD players.
These items may interfere with the op-
eration of the Active Head Restraint in
Front Head Restraint
1 — Adjustment Button
2 — Release Button
GETTING TO KNOW YOUR VEHICLE
26
Page 245 of 312

MULTIMEDIA
CYBERSECURITY...........245
TIPS CONTROLS AND GENERAL
INFORMATION .............246
Steering Wheel Audio Controls ......246
Reception Conditions ............246
Care And Maintenance ...........246
Anti-Theft Protection ............246
UCONNECT 3 WITH 5-INCH
DISPLAY..................247
Controls On The Front Panel .......247
Clock Setting .................248
Equalizer, Balance And Fade .......248
Radio Mode ..................249
Media Mode .................249
Bluetooth Source ..............252
UCONNECT 3C/3C NAV .......253
Uconnect 3C/3C NAV At A Glance . . .253
Drag & Drop Menu Bar...........255
Radio Mode ..................255
Media Mode .................256
UCONNECT SETTINGS ........256IPOD/USB/SD CARD/MEDIA
PLAYER CONTROL
..........257
Audio Jack (AUX)..............257
USB Port ...................257
SD Card ................... .258
Bluetooth Streaming Audio ........258
NAVIGATION...............258
Changing The Navigation Voice
Prompt Volume ...............258
Finding Points Of Interest .........259
Finding A Place By Spelling
The Name ...................259
One-Step Voice Destination Entry . . . .259
Setting Your Home Location ........259
Go Home ...................260
Adding A Stop ................260
Taking A Detour ...............260
UCONNECT PHONE ..........261
Operation...................261
Uconnect Phone Features .........263
Uconnect Phone (Bluetooth Hands
Free Calling) .................263 Pairing (Wirelessly Connecting)
Your Mobile Phone To The
Uconnect System
..............263
Common Phone Commands
(Examples) ..................266
Mute (Or Unmute) Microphone
During Call ..................266
Transfer Ongoing Call Between
Handset And Vehicle ............266
Phonebook ..................267
Voice Command Tips ............267
Changing The Volume ...........267
Using Do Not Disturb ...........267
Incoming Text Messages .........268
Voice Text Reply (Not Compatible
With iPhone) ................269
Helpful Tips And Common Questions
To Improve Bluetooth Performance
With Your Uconnect System ........270UCONNECT VOICE RECOGNITION
QUICK TIPS................271
Introducing Uconnect ...........271
Get Started .................272
MULTIMEDIA
243
Page 252 of 312

Media Mode is entered by pushing the ME-
DIA button located on the faceplate. Once in
Media Mode, press the “Source” button on
the touchscreen and the desired mode button
on the touchscreen. Disc (if equipped), USB,
AUX, and Bluetooth (if equipped), are the
Media sources available. When available, you
can select the “Browse” button on the touch-
screen to be given these options:
• Now Playing
• Artists
• Albums
• Genres
• Songs
• Playlists
• Folders
Source
Press the “Source” button on the touch-
screen to select the desired audio source:
Disc (if equipped), USB, AUX and Bluetooth
(if equipped). This screen will time out after a
few seconds and return to the main radio
screen if no selection is made.You can press the “Source,” “Pause/Play” or
the “Info” button on the touchscreen for artist
information on the current song playing.
Disc Mode — If Equipped
Your vehicle may have a remote Disc player
located in the center console storage bin.
Disc Mode is entered by either inserting a
CD/Disc or by pushing the MEDIA button on
the faceplate. Once in Media Mode, press the
“Source” button on the touchscreen and se-
lect “Disc.”
Inserting Compact Disc
Gently insert one disc into the disc player
with the disc label following the illustration
indicated on the player. The disc automati-
cally pulls into the disc player and the disc
icon illuminates on the radio display. If a disc
does not go into the slot more than 1 inch
(2.5 cm), a disc may already be loaded and
must be ejected before a new disc can be
loaded.
If you insert a disc with the ignition ON and
the radio ON, the unit will switch to disc
mode and begin to play when you insert the
disc. The display will show the track numberand index time in minutes and seconds. Play
will begin at the start of track one.
Browse
Press the “Browse” button on the touch-
screen to scroll through and select a desired
track on the Disc. Press the “Exit” button on
the touchscreen if you wish to cancel the
browse function.
Eject Button — Ejecting a Disc
Push the eject button to eject the disc. If you
have ejected a disc and have not removed it
within ten seconds, it will be reloaded. If the
Disc is not removed, the radio will reinsert
the disc but will not play it.
A disc can be ejected with the radio and
ignition OFF.
USB/iPod Mode
USB/iPod Mode is entered by either inserting
a USB Jump Drive or iPod cable into the USB
port, or by pushing the MEDIA button located
on the faceplate. Once in Media Mode, press
the “Source” button on the touchscreen and
select “USB/iPod.”
MULTIMEDIA
250
Page 259 of 312

lighted, then press the preferred setting until
a check-mark appears next to the setting,
showing that setting has been selected. The
following feature settings are available:
• Display• Engine Off Options
• Voice • Audio
• Clock • Phone/Bluetooth
• Safety & Driving
Assistance • Radio Setup
• Lights • Restore Settings
• Doors & Locks • Clear Personal Data
• Auto-On Comfort • System Information
• Compass
(Uconnect 3)
NOTE:
Depending on the vehicles options, feature
settings may vary.
Refer to “Uconnect Settings” in “Multime-
dia” in the Owner’s Manual for further infor-
mation.
IPOD/USB/SD CARD/MEDIA
PLAYER CONTROL
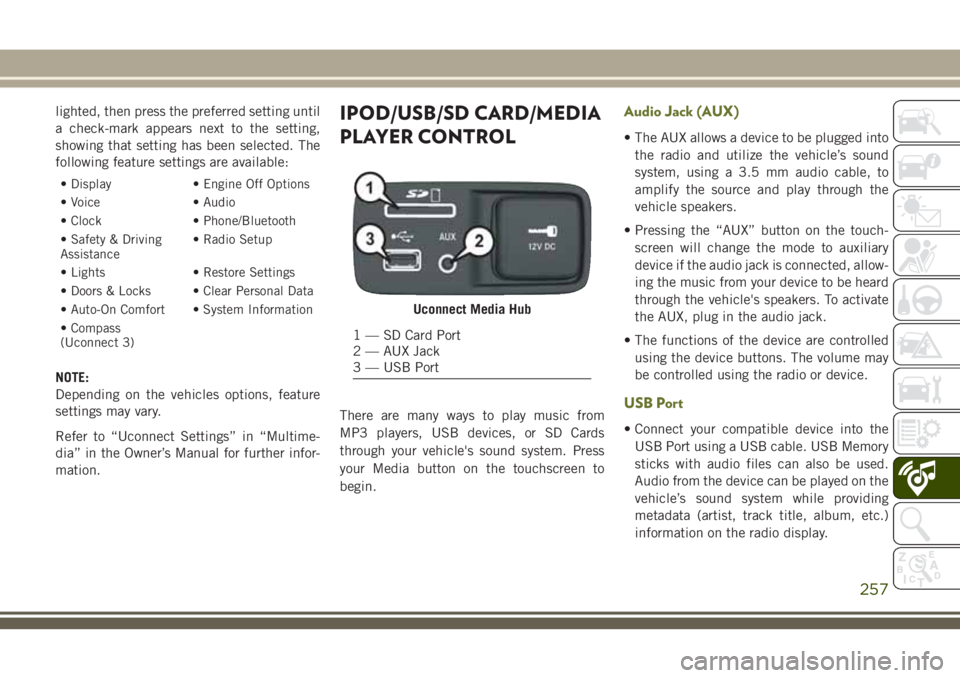
There are many ways to play music from
MP3 players, USB devices, or SD Cards
through your vehicle's sound system. Press
your Media button on the touchscreen to
begin.
Audio Jack (AUX)
• The AUX allows a device to be plugged into the radio and utilize the vehicle’s sound
system, using a 3.5 mm audio cable, to
amplify the source and play through the
vehicle speakers.
• Pressing the “AUX” button on the touch- screen will change the mode to auxiliary
device if the audio jack is connected, allow-
ing the music from your device to be heard
through the vehicle's speakers. To activate
the AUX, plug in the audio jack.
• The functions of the device are controlled using the device buttons. The volume may
be controlled using the radio or device.
USB Port
• Connect your compatible device into theUSB Port using a USB cable. USB Memory
sticks with audio files can also be used.
Audio from the device can be played on the
vehicle’s sound system while providing
metadata (artist, track title, album, etc.)
information on the radio display.
Uconnect Media Hub
1 — SD Card Port
2 — AUX Jack
3 — USB Port
257
Page 275 of 312

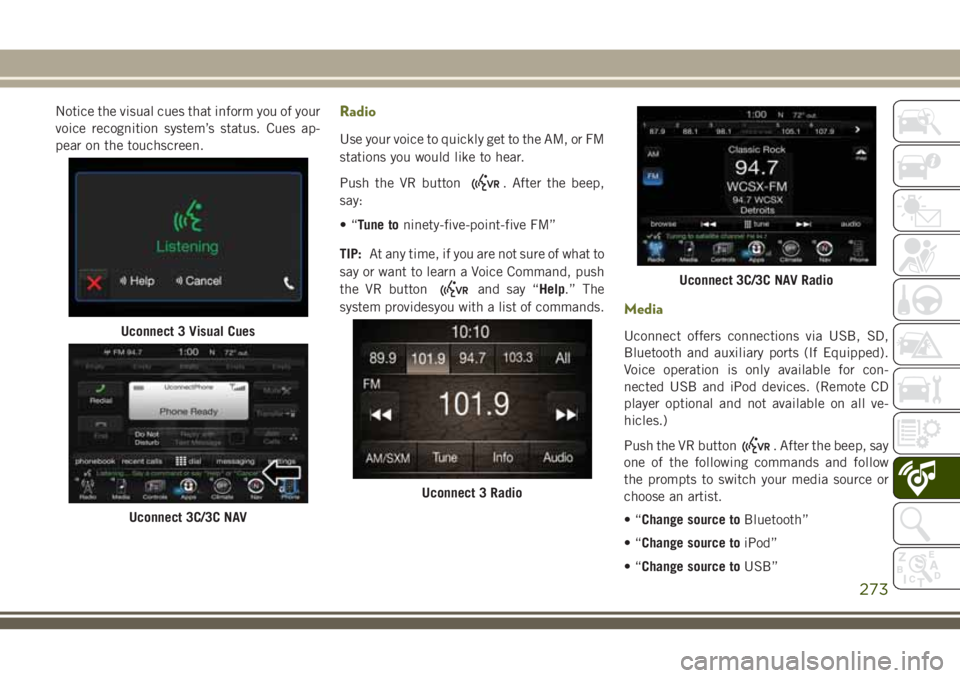
Notice the visual cues that inform you of your
voice recognition system’s status. Cues ap-
pear on the touchscreen.Radio
Use your voice to quickly get to the AM, or FM
stations you would like to hear.
Push the VR button
. After the beep,
say:
•“ Tune to ninety-five-point-five FM”
TIP: At any time, if you are not sure of what to
say or want to learn a Voice Command, push
the VR button
and say “Help.” The
system providesyou with a list of commands.
Media
Uconnect offers connections via USB, SD,
Bluetooth and auxiliary ports (If Equipped).
Voice operation is only available for con-
nected USB and iPod devices. (Remote CD
player optional and not available on all ve-
hicles.)
Push the VR button
. After the beep, say
one of the following commands and follow
the prompts to switch your media source or
choose an artist.
•“ Change source to Bluetooth”
•“ Change source to iPod”
•“ Change source to USB”
Uconnect 3 Visual Cues
Uconnect 3C/3C NAV
Uconnect 3 Radio
Uconnect 3C/3C NAV Radio
273