2018 Hyundai Santa Fe auto light system
[x] Cancel search: auto light systemPage 239 of 570
Features of your vehicle
136
4
Headlamp welcome
When the headlight(light switch in
the headlight or AUTO position) is on
and all doors (and liftgate (tailgate))
are locked and closed, the headlight,
position light and tail light will come
on for 15 seconds if any of the below
is performed.
Without smart key system
- When the door unlock button ispressed on the transmitter.
With the smart key system - When the door unlock button ispressed on the smart key.
At this time, if you press the door lock
button (on the transmitter or smart
key), the lights will turn off immedi-
ately.
Interior light
When the interior light switch is in the
DOOR position and all doors (and
liftgate (tailgate)) are locked and
closed, the room lamp will come on
for 30 seconds if any of the below is
performed.
Without smart key system - When the door unlock button ispressed on the transmitter.
With the smart key system - When the door unlock button ispressed on the smart key.
- When the button of the outside door handle is pressed.
At this time, if you press the door lock
button, the lamps will turn off imme-
diately.
Pocket lamp
When all doors are locked and
closed, the pocket lamp will come on
for 15 seconds if any of the below is
performed.
Without smart key system - When the door unlock button ispressed on the transmitter.
With the smart key system - When the door unlock button ispressed on the smart key.
- When the button of the outside door handle is pressed.
- When the vehicle is approached with the smart key in possession.
At this time, if you press the door lock
button, the lamps will turn off imme-
diately.
WELCOME SYSTEM
Page 258 of 570
4155
Features of your vehicle
Temperature conversion
If the battery has been discharged or
disconnected, the temperature mode
display will reset to Fahrenheit.
To change the temperature unit from
°F to °C or °C to °F:
- On the instrument cluster, go toUser Settings Mode ➝ Other
Features ➝Temperature Unit.
- Press the AUTO button for 3 sec- onds while pressing the OFF but-
ton. (Automatic climate control sys-
tem)
Both the temperature unit on the
cluster LCD display and climate con-
trol screen will change.Air intake control
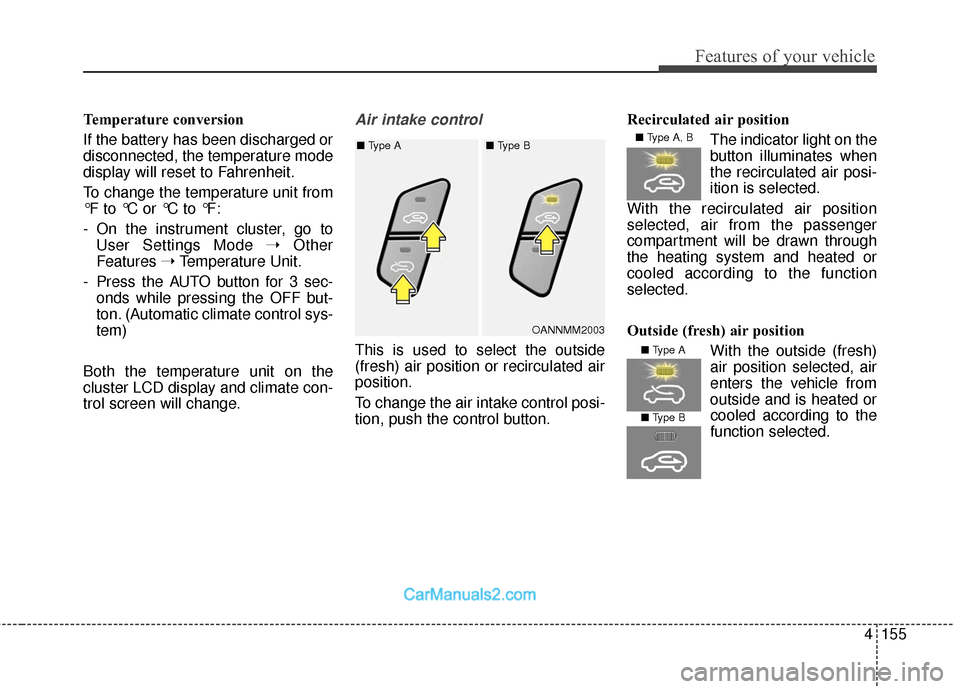
This is used to select the outside
(fresh) air position or recirculated air
position.
To change the air intake control posi-
tion, push the control button. Recirculated air position
The indicator light on the
button illuminates when
the recirculated air posi-
ition is selected.
With the recirculated air position
selected, air from the passenger
compartment will be drawn through
the heating system and heated or
cooled according to the function
selected.
Outside (fresh) air position With the outside (fresh)
air position selected, air
enters the vehicle from
outside and is heated orcooled according to the
function selected.
OANNMM2003
■
Type A ■ Type B
■ Type A, B
■ Type A
■ Type B
Page 272 of 570
4169
Features of your vehicle
If you wish to use the AC
inverter,press the AC inverter button
while the engine is running. The light
on the AC inverter button will illumi-
nate.
If you press the AC inverter button
again, the AC inverter will be deacti-
vated and the light on the AC invert-
er button will turn off.
✽ ✽NOTICE
When turning on the AC inverter, the
indicator on the AC inverter button
is delayed while the system conducts
a self-check.
WARNING
To reduce a risk of serious or
fatal injuries:
Do not use a heated electric
device such as a coffeepot,
toaster, heater, iron, etc.
Do not insert foreign objects into the outlet and do not
touch the outlet as you may
get shocked.
Do not let children touch the AC inverter.
CAUTION
To prevent the battery from being discharged, do not usethe AC inverter while theengine is not running.
When not using the AC invert- er,make sure to turn off the ACinverter (the indicator on thebutton does not illuminate) andclose the AC inverter cover.
After using an electronic accessory or equipment, pullthe plug out. Leaving theaccessory or equipmentplugged in for a long time maycause battery discharge.
Do not use an electronic acces- sory or equipment with thepower consumption greaterthan 150W(115V).
(Continued)
(Continued) Some electronic accessories or equipments can cause elec-tronic interference. It maycause excessive audio noiseand malfunctions in otherelectronic systems or devicesin the vehicle.
Do not use broken electronic accessories or equipments,which may damage the ACinverter and electrical sys-tems of the vehicle.
Do not use two or more elec- tronic accessories or equip-ments at the same time. It maycause damage to the electricalsystems of the vehicle.
When the input voltage is lower, outlet LED will blink andthe AC inverter will turn offautomatically. If the input volt-age goes up to normal, the ACinverter will turn on again.
Do not use extensions or power strips.
(Continued)
Page 315 of 570
523
Driving your vehicle
✽
✽NOTICE
• When driving on normal roads, deactivate the AWD LOCK mode by pushing the AWD LOCK button (the indi-
cator light goes off). Driving on normal roads with AWD LOCK mode(especially, when cornering) may cause
mechanical noise or vibration. The noise and vibration will disappear when the AWD LOCK mode is deactivat-
ed. Some parts of the power train may be damaged by prolonged driving with the noise and vibration.
• When the AWD LOCK mode is deactivated, a shock may be felt as the drive power is delivered entirely to the front wheels. This shock is not a mechanical failure.
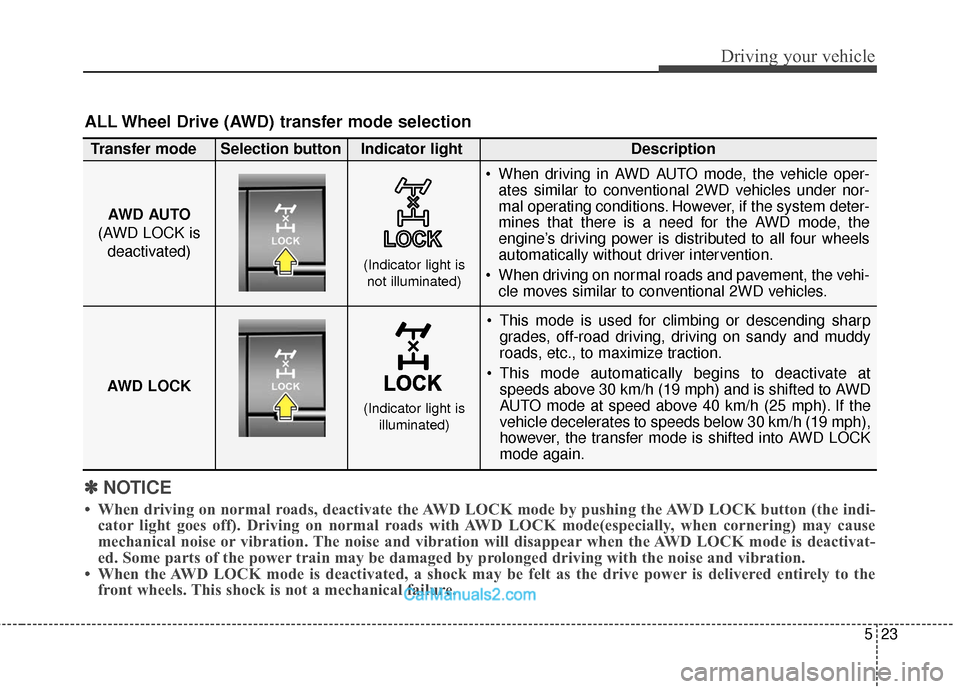
ALL Wheel Drive (AWD) transfer mode selection
This mode is used for climbing or descending sharp
grades, off-road driving, driving on sandy and muddy
roads, etc., to maximize traction.
This mode automatically begins to deactivate at speeds above 30 km/h (19 mph) and is shifted to AWD
AUTO mode at speed above 40 km/h (25 mph). If the
vehicle decelerates to speeds below 30 km/h (19 mph),
however, the transfer mode is shifted into AWD LOCK
mode again.
AWD AUTO
(AWD LOCK is deactivated)
(Indicator light isnot illuminated)
Transfer mode Selection button Indicator light Description
When driving in AWD AUTO mode, the vehicle oper-
ates similar to conventional 2WD vehicles under nor-
mal operating conditions. However, if the system deter-
mines that there is a need for the AWD mode, the
engine’s driving power is distributed to all four wheels
automatically without driver intervention.
When driving on normal roads and pavement, the vehi- cle moves similar to conventional 2WD vehicles.
AWD LOCK
(Indicator light is illuminated)
Page 322 of 570
Driving your vehicle
30
5
When the ECO mode is activated:
The acceleration response may be
slightly reduced.
The air conditioner performance may be limited.
The shift pattern of the automatic transaxle may change.
The engine noise may get louder.
The above situations are normal
conditions when the ECO mode is
activated to improve fuel efficiency.
Limitation of the ECO mode oper- ation:
If the following conditions occur while
ECO mode is operating, fuel efficien-
cy may decrease even though there
is no change in the ECO indicator.
When the coolant temperature is low:
Fuel efficiency may decrease until
engine temperature reaches nor-
mal.
When driving up a hill: Fuel efficiency may decrease to
gain performance when driving
uphill because engine torque is
restricted.
When using the automatic transaxle manual shift mode:
Fuel efficiency may decrease
according to the shift location.
When the accelerator pedal is deeply depressed for a few sec-
onds:
Fuel efficiency may decrease,
judging that the driver wants to
speed up.
SPORT mode
SPORT mode managesthe driving dynamics by
automatically adjusting the
steering wheel, engine
and transaxle system to
optimize performance.
When the SPORT mode is select- ed by pressing the DRIVE MODE
button, the SPORT indicator (yel-
low color) will illuminate.
Restarting of the engine in the SPORT mode resets the DRIVE
mode to the NORMAL mode. Thus,
when necessary, reselect the
SPORT mode.
When the SPORT mode is activat- ed:
- The RPM (revolutions per min-utes) level is maintained over a
certain length of time, even after
releasing the accelerator pedal.
- When accelerating, up-shifting timing is delayed.
✽ ✽ NOTICE
In the SPORT mode, the fuel effi-
ciency may decrease.
Page 323 of 570
531
Driving your vehicle
BRAKE SYSTEM
Power brakes
Your vehicle has power-assisted
brakes that adjust automatically
through normal usage.
In the event that the power-assisted
brakes lose power because of a
stalled engine or some other reason,
you can still stop your vehicle by
applying greater force to the brake
pedal than you normally would. The
stopping distance, however, will be
longer.
When the engine is not running, the
reserve brake power is partially
depleted each time the brake pedal
is applied. Do not pump the brake
pedal when the power assist has
been interrupted.
Pump the brake pedal only when
necessary to maintain steering con-
trol on slippery surfaces.(Continued)
Wet brakes may impair thevehicle’s ability to safely slow
down; the vehicle may also
pull to one side when the
brakes are applied. Applying
the brakes lightly will indicate
whether they have been affect-
ed in this way. Always test your
brakes in this fashion after
driving through deep water. To
dry the brakes, apply them
lightly while maintaining a safe
forward speed until brake per-
formance returns to normal.
Always, confirm the position of the brake and accelerator
pedal before driving. If you
don't check the position of the
accelerator and brake pedal
before driving, you may
depress the accelerator
instead of the brake pedal. It
may cause a serious accident.WARNING - Brakes
Do not drive with your foot resting on the brake pedal.
This will create abnormal high
brake temperatures, exces-
sive brake lining and pad
wear, and increased stopping
distances.
When descending a long or steep hill, shift to a lower gear
and avoid continuous applica-
tion of the brakes. Continuous
brake application will cause
the brakes to overheat and
could result in a temporary
loss of braking performance.
(Continued)
Page 326 of 570
Driving your vehicle
34
5
If the parking brake does not release
or does not release all the way, have
the system checked by an authorized
HYUNDAI dealer.
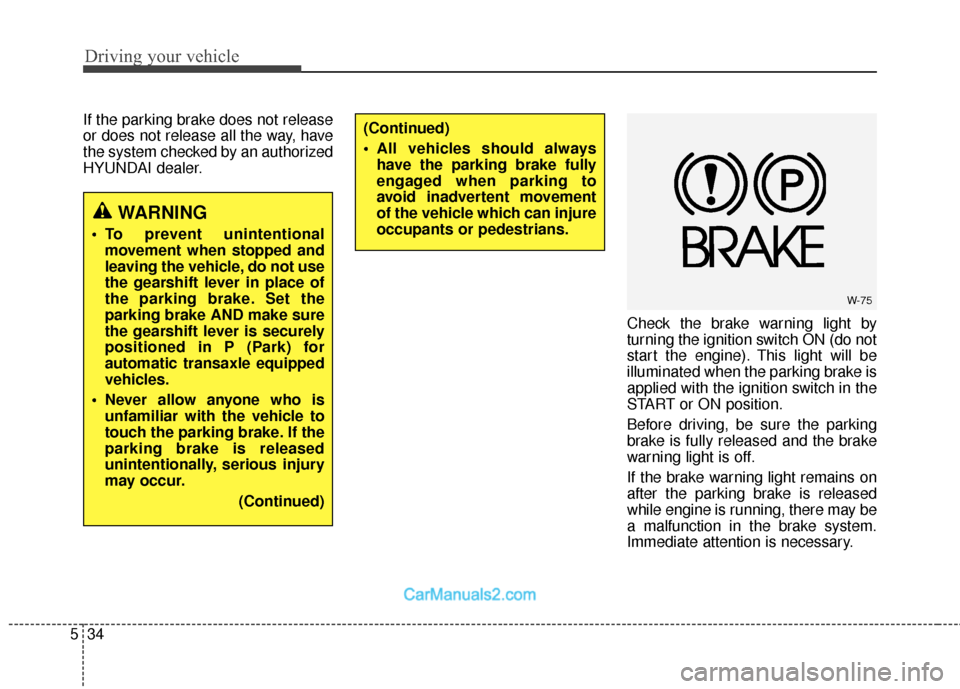
Check the brake warning light by
turning the ignition switch ON (do not
start the engine). This light will be
illuminated when the parking brake is
applied with the ignition switch in the
START or ON position.
Before driving, be sure the parking
brake is fully released and the brake
warning light is off.
If the brake warning light remains on
after the parking brake is released
while engine is running, there may be
a malfunction in the brake system.
Immediate attention is necessary.
WARNING
To prevent unintentionalmovement when stopped and
leaving the vehicle, do not use
the gearshift lever in place of
the parking brake. Set the
parking brake AND make sure
the gearshift lever is securely
positioned in P (Park) for
automatic transaxle equipped
vehicles.
Never allow anyone who is unfamiliar with the vehicle to
touch the parking brake. If the
parking brake is released
unintentionally, serious injury
may occur.
(Continued)
(Continued)
All vehicles should alwayshave the parking brake fully
engaged when parking to
avoid inadvertent movement
of the vehicle which can injure
occupants or pedestrians.
W-75
Page 327 of 570
535
Driving your vehicle
If at all possible, cease driving the
vehicle immediately. If that is not pos-
sible, use extreme caution while
operating the vehicle and only con-
tinue to drive the vehicle until you
can reach a safe location or repair
shop.Electronic parking brake (EPB)
(if equipped)
Applying the parking brake
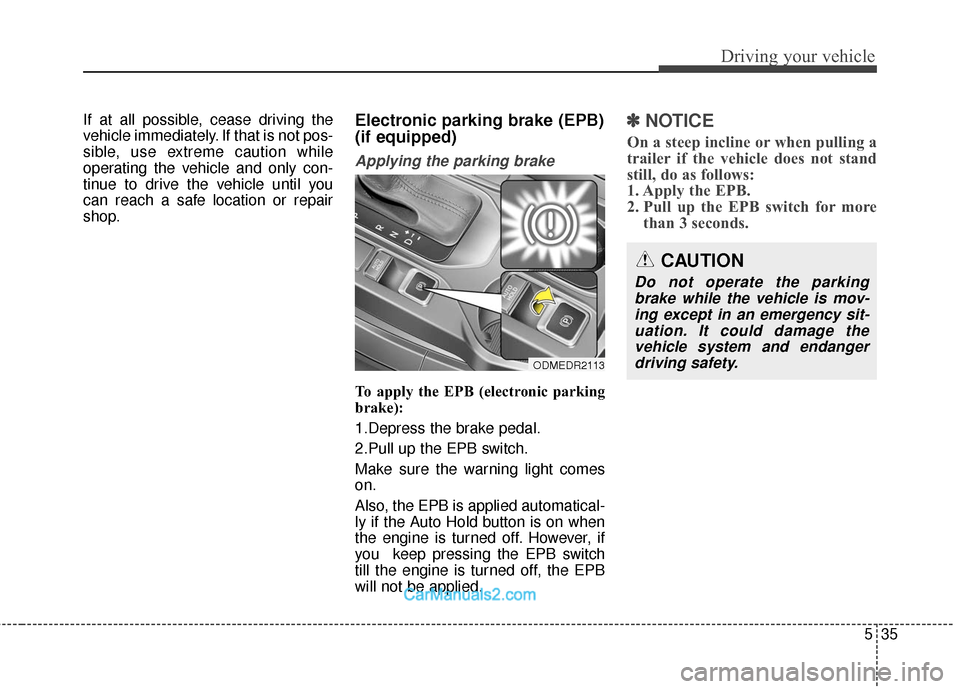
To apply the EPB (electronic parking
brake):
1.Depress the brake pedal.
2.Pull up the EPB switch.
Make sure the warning light comes
on.
Also, the EPB is applied automatical-
ly if the Auto Hold button is on when
the engine is turned off. However, if
you keep pressing the EPB switch
till the engine is turned off, the EPB
will not be applied.
✽ ✽NOTICE
On a steep incline or when pulling a
trailer if the vehicle does not stand
still, do as follows:
1. Apply the EPB.
2. Pull up the EPB switch for more
than 3 seconds.
ODMEDR2113
CAUTION
Do not operate the parking
brake while the vehicle is mov-ing except in an emergency sit-uation. It could damage thevehicle system and endangerdriving safety.