2018 Hyundai Santa Fe headlights
[x] Cancel search: headlightsPage 163 of 570
Features of your vehicle
60
4
MIRRORS
Inside rearview mirror
Adjust the rearview mirror so that the
center view through the rear window
is seen. Make this adjustment before
you start driving.
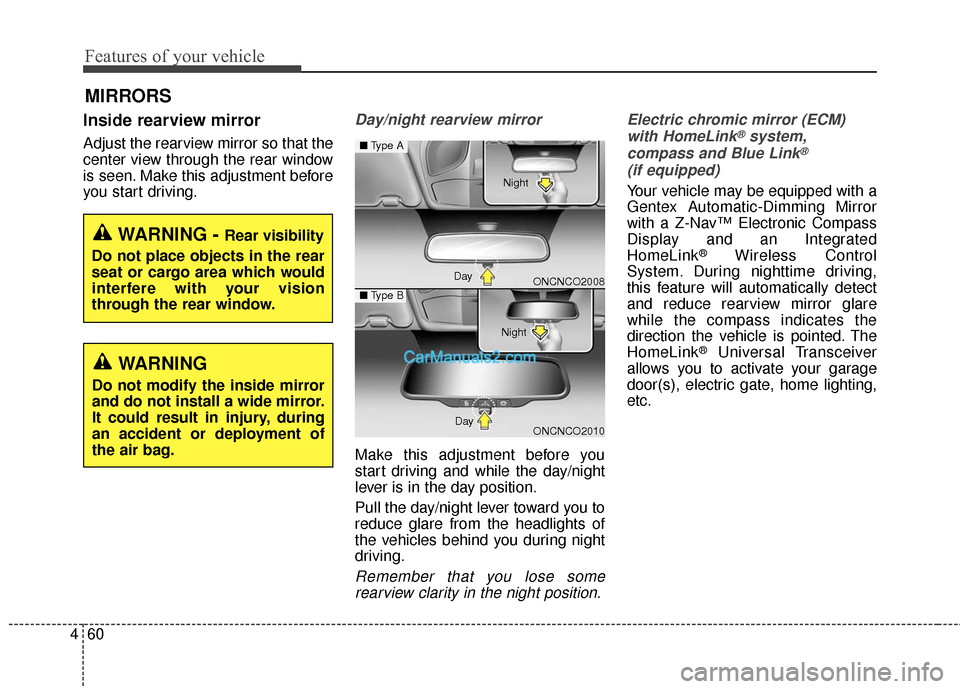
Day/night rearview mirror
Make this adjustment before you
start driving and while the day/night
lever is in the day position.
Pull the day/night lever toward you to
reduce glare from the headlights of
the vehicles behind you during night
driving.
Remember that you lose some
rearview clarity in the night position. Electric chromic mirror (ECM)
with HomeLink
®system,
compass and Blue Link®
(if equipped)
Your vehicle may be equipped with a
Gentex Automatic-Dimming Mirror
with a Z-Nav™ Electronic Compass
Display and an Integrated
HomeLink
®Wireless Control
System. During nighttime driving,
this feature will automatically detect
and reduce rearview mirror glare
while the compass indicates the
direction the vehicle is pointed. The
HomeLink
®Universal Transceiver
allows you to activate your garage
door(s), electric gate, home lighting,
etc.
WARNING - Rear visibility
Do not place objects in the rear
seat or cargo area which would
interfere with your vision
through the rear window.
WARNING
Do not modify the inside mirror
and do not install a wide mirror.
It could result in injury, during
an accident or deployment of
the air bag.
ONCNCO2008
ONCNCO2010
■ Type A
■Type B
Day Night
Day Night
Page 213 of 570
Features of your vehicle
110
4
This indicator light illuminates for 2
seconds and goes off:
When the vehicle can not detect
the smart key which is in the vehi-
cle while the Engine Start/Stop
Button is ON.
In this case, have your vehicle
inspected by an authorized
HYUNDAI dealer.
This indicator light blinks:
When the battery of the smart key is weak.
- At this time, you can not start theengine. However, you can start
the engine if you press the Engine
Start/Stop Button with the smart
key. (For more details, refer to
"Starting the Engine" in section
5).
When there is a malfunction with the immobilizer system.
In this case, have your vehicle
inspected by an authorized
HYUNDAI dealer.Turn Signal Indicator
Light
This indicator light blinks:
When using the turn signals.
If any of the following occurs, there
may be a malfunction with the turn
signal system. In this case, have your
vehicle inspected by an authorized
HYUNDAI dealer.
- The indicator light does not blink but illuminates.
- The indicator light blinks more rap- idly.
- The indicator light does not illumi- nate at all.
High Beam Indicator
Light
This indicator light illuminates:
When the headlights are on and in the high beam position
When the turn signal lever is pulled into the Flash-to-Pass position.
Smart High Beam indi-
cator (if equipped)
This warning light illuminates :
When the high-Beam is on with the light switch in the AUTO light posi-
tion.
If your vehicle detects oncoming or preceding vehicles, the Smart High
Beam system will switch the high
beam to low beam automatically.
For more details, refer to "Smart
High Beam" in this chapter.
Page 214 of 570
4111
Features of your vehicle
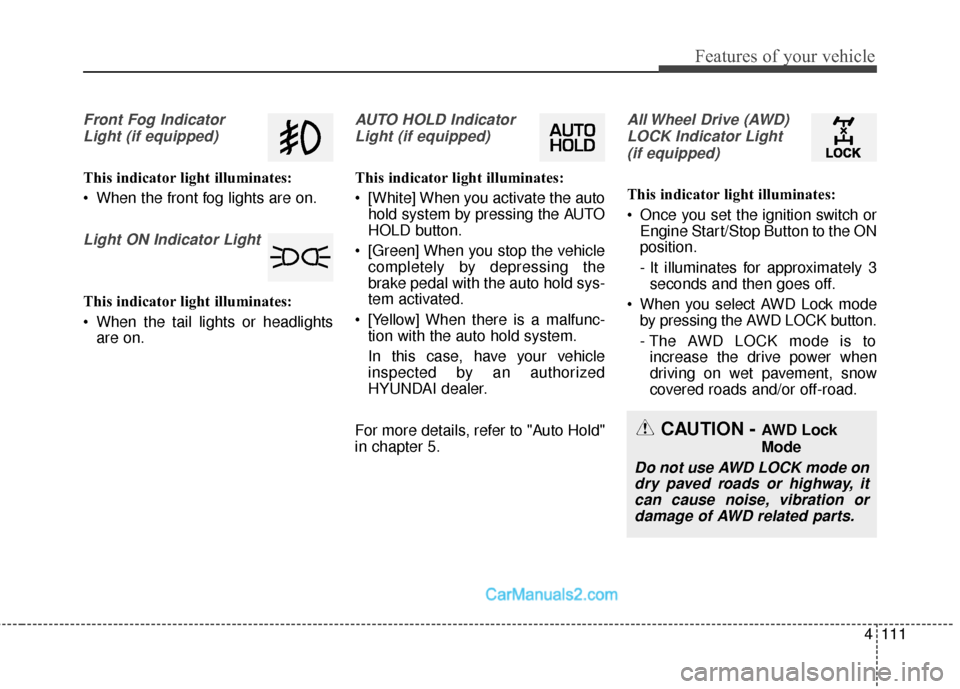
Front Fog IndicatorLight (if equipped)
This indicator light illuminates:
When the front fog lights are on.
Light ON Indicator Light
This indicator light illuminates:
When the tail lights or headlights are on.
AUTO HOLD Indicator
Light (if equipped)
This indicator light illuminates:
[White] When you activate the auto hold system by pressing the AUTO
HOLD button.
[Green] When you stop the vehicle completely by depressing the
brake pedal with the auto hold sys-
tem activated.
[Yellow] When there is a malfunc- tion with the auto hold system.
In this case, have your vehicle
inspected by an authorized
HYUNDAI dealer.
For more details, refer to "Auto Hold"
in chapter 5.
All Wheel Drive (AWD) LOCK Indicator Light (if equipped)
This indicator light illuminates:
Once you set the ignition switch or Engine Start/Stop Button to the ON
position.
- It illuminates for approximately 3seconds and then goes off.
When you select AWD Lock mode by pressing the AWD LOCK button.
- The AWD LOCK mode is toincrease the drive power when
driving on wet pavement, snow
covered roads and/or off-road.
CAUTION - AWD Lock
Mode
Do not use AWD LOCK mode ondry paved roads or highway, itcan cause noise, vibration ordamage of AWD related parts.
Page 223 of 570
Features of your vehicle
120
4
Battery saver function
• The purpose of this feature is to
prevent the battery from being dis-
charged. The system automatically
turns off the parking lights when
the driver removes the ignition key
(smart key : turns off the engine)
and opens the driver-side door.
With this feature, the parking lights will be turned off automatically if
the driver parks on the side of the
road at night.
If necessary, to keep the lights on
when the ignition key is removed
(smart key : turns off the engine),
perform the following:
1) Open the driver-side door.
2) Turn the parking lights OFF and ON again using the light switch
on the steering column.
Headlamp delay (if equipped)
If you turn the ignition switch to the
ACC or OFF position with the head-
lights ON, the headlights remain on
for about 5 minutes. However, if the
driver's door is opened and closed,
the headlights are turned off after 15
seconds.
The headlights can be turned off by
pressing the lock button on the trans-
mitter (or smart key) twice or turning
the light switch to the OFF or Auto
position.
However, if you turn the light switch
to the Auto position when it is dark
outside, the headlights will not be
turned off.
You can activate or deactivate this
feature. Refer to "User Settings" in
this section.
LIGHTING
CAUTION
If the driver gets out of the vehi-cle through other doors (otherthan the driver's door), the bat-tery saver function does notoperate and the headlamp delaydoes not turn off automatically.This will cause the battery to bedischarged. In this case, makesure to turn off the lamp beforegetting out of the vehicle.
Page 224 of 570
4121
Features of your vehicle
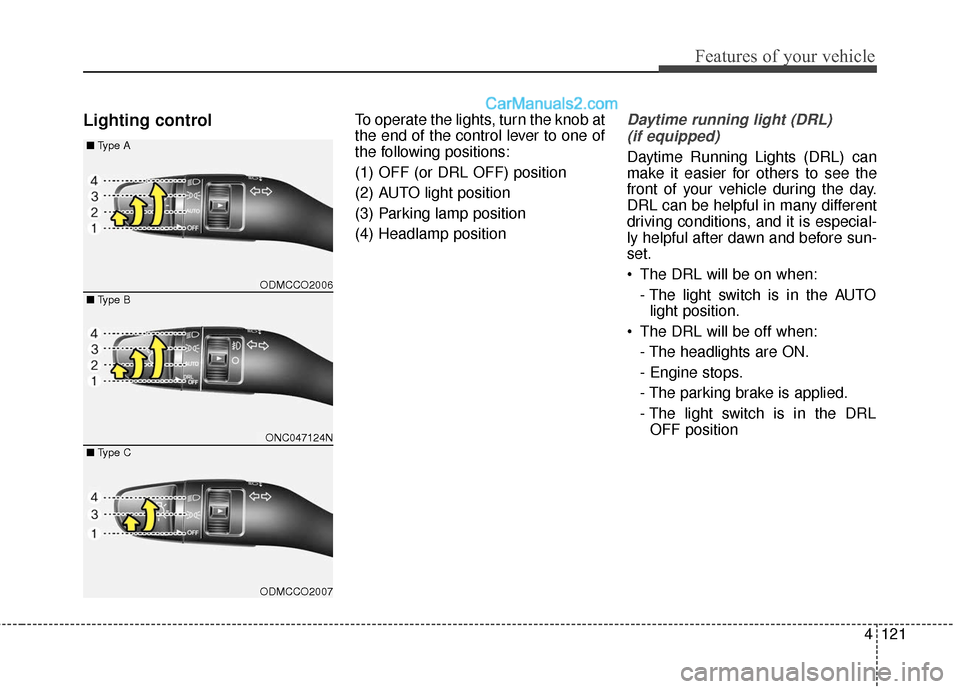
Lighting controlTo operate the lights, turn the knob at
the end of the control lever to one of
the following positions:
(1) OFF (or DRL OFF) position
(2) AUTO light position
(3) Parking lamp position
(4) Headlamp positionDaytime running light (DRL)(if equipped)
Daytime Running Lights (DRL) can
make it easier for others to see the
front of your vehicle during the day.
DRL can be helpful in many different
driving conditions, and it is especial-
ly helpful after dawn and before sun-
set.
The DRL will be on when:
- The light switch is in the AUTOlight position.
The DRL will be off when: - The headlights are ON.
- Engine stops.
- The parking brake is applied.
- The light switch is in the DRLOFF position
ODMCCO2006
ONC047124N
ODMCCO2007
■ Type B
■
Type A
■ Type C
Page 227 of 570
Features of your vehicle
124
4
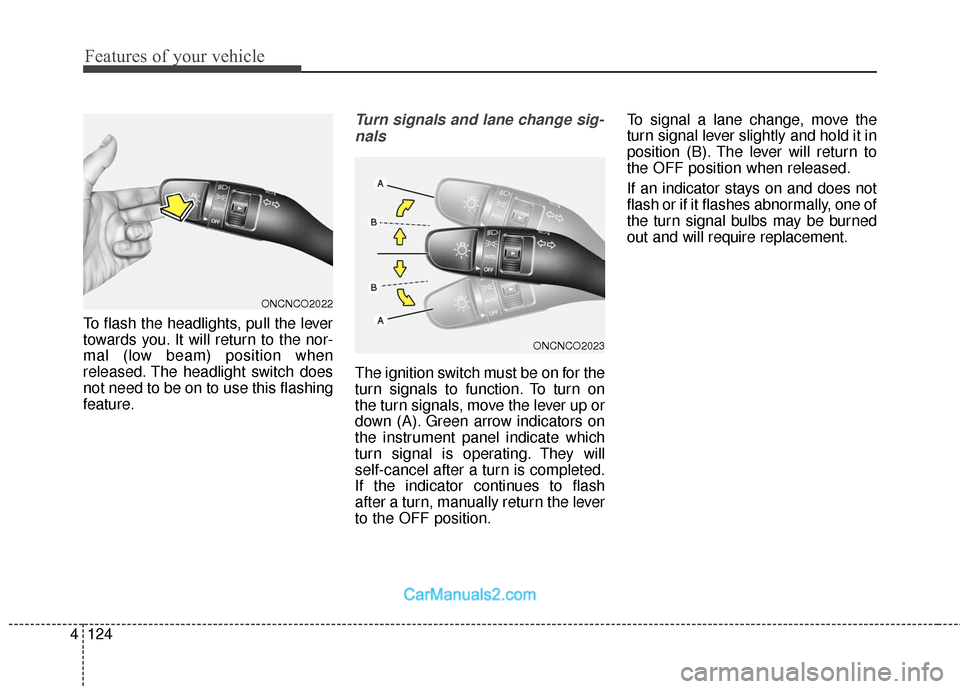
To flash the headlights, pull the lever
towards you. It will return to the nor-
mal (low beam) position when
released. The headlight switch does
not need to be on to use this flashing
feature.
Turn signals and lane change sig-
nals
The ignition switch must be on for the
turn signals to function. To turn on
the turn signals, move the lever up or
down (A). Green arrow indicators on
the instrument panel indicate which
turn signal is operating. They will
self-cancel after a turn is completed.
If the indicator continues to flash
after a turn, manually return the lever
to the OFF position. To signal a lane change, move the
turn signal lever slightly and hold it in
position (B). The lever will return to
the OFF position when released.
If an indicator stays on and does not
flash or if it flashes abnormally, one of
the turn signal bulbs may be burned
out and will require replacement.
ONCNCO2022
ONCNCO2023
Page 398 of 570
Driving your vehicle
106
5
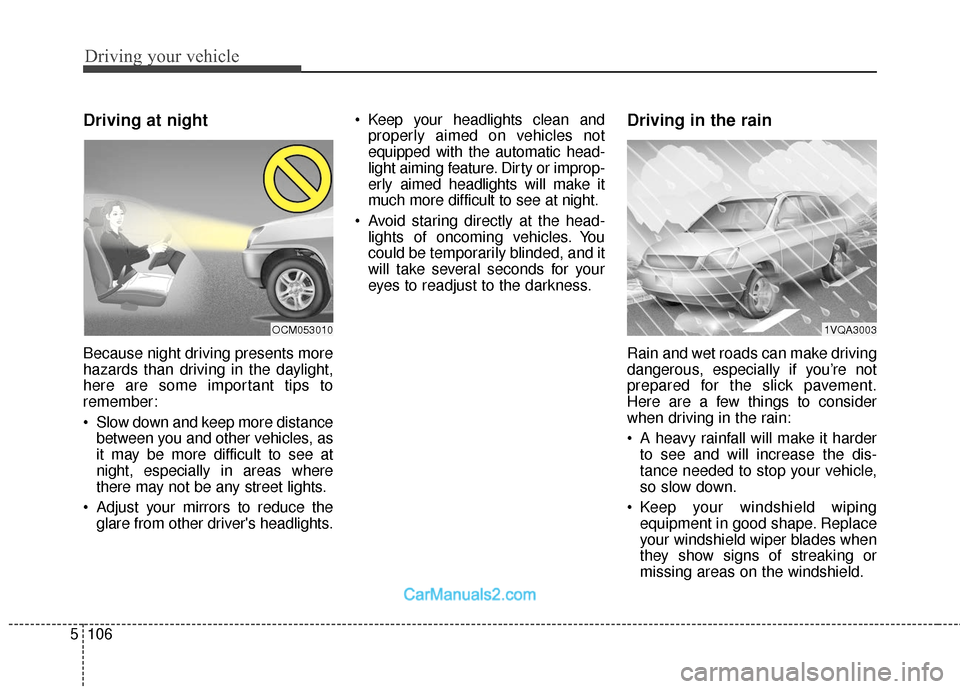
Driving at night
Because night driving presents more
hazards than driving in the daylight,
here are some important tips to
remember:
Slow down and keep more distance
between you and other vehicles, as
it may be more difficult to see at
night, especially in areas where
there may not be any street lights.
Adjust your mirrors to reduce the glare from other driver's headlights. Keep your headlights clean and
properly aimed on vehicles not
equipped with the automatic head-
light aiming feature. Dirty or improp-
erly aimed headlights will make it
much more difficult to see at night.
Avoid staring directly at the head- lights of oncoming vehicles. You
could be temporarily blinded, and it
will take several seconds for your
eyes to readjust to the darkness.
Driving in the rain
Rain and wet roads can make driving
dangerous, especially if you’re not
prepared for the slick pavement.
Here are a few things to consider
when driving in the rain:
A heavy rainfall will make it harderto see and will increase the dis-
tance needed to stop your vehicle,
so slow down.
Keep your windshield wiping equipment in good shape. Replace
your windshield wiper blades when
they show signs of streaking or
missing areas on the windshield.
1VQA3003OCM053010
Page 399 of 570
5107
Driving your vehicle
If your tires are not in good condi-tion, making a quick stop on wet
pavement can cause a skid and
possibly lead to an accident. Be
sure your tires are in good shape.
Turn on your headlights to make it easier for others to see you.
Driving too fast through large pud- dles can affect your brakes. If you
must go through puddles, try to
drive through them slowly.
If you believe you may have gotten your brakes wet, apply them lightly
while driving until normal braking
operation returns.Driving in flooded areas
Avoid driving through flooded areas
unless you are sure the water is no
higher than the bottom of the wheel
hub. Drive through any water slowly.
Allow adequate stopping distance
because brake performance may be
affected.
After driving through water, dry the
brakes by gently applying them sev-
eral times while the vehicle is moving
slowly.
Driving off-road
Drive carefully off-road because your
vehicle may be damaged by rocks or
roots of trees. Become familiar with
the off-road conditions where you
are going to drive before you begin
driving.
Highway driving
Tires:
Adjust the tire inflation pressures to
specification. Low tire inflation pres-
sures will result in overheating and
possible failure of the tires.
Avoid using worn or damaged tires
which may result in reduced traction
or tire failure.
✽ ✽ NOTICE
Never exceed the maximum tire
inflation pressure shown on the tires.
1VQA1004