Page 522 of 570
Maintenance
74
7
DescriptionFuse ratingProtected Component
MULTI
FUSE
MDPS80AMDPS Unit
2 B+60ASmart Junction Box (IPS 1 (4CH), IPS 2 (1CH), IPS 5 (1CH), Fuse - SUNROOF 1, P/SEAT
PASS, P/SEAT DRV), RR A/CON
BLOWER40ABlower Relay
RR HTD40ARear Defogger Relay
ABS140AESC Module, Multipurpose Check Connector
ABS240AESC Module
C/FAN60ACooling Fan Relay
3 B+60ASmart Junction Box (Fuse - MODULE 1, SMART KEY 4, SUNROOF 2, SMART KEY 1, Leak
Current Autocut Device)
FUSE
4 B+50ASmart Junction Box (IPS 3 (4CH), IPS 6 (2CH), Fuse - F/LID, STOP LAMP, DR LOCK, BRAKE
SWITCH), FUEL LID
ECU40AECU Box
IG140AW/O Smart Key : Ignition Switch, With Smart Key - ACC Relay, IG1 Relay
IG240AStart Relay, IG2 Relay, W/O Smart Key : Ignition Switch
TRAILER30ATrailer Power Outlet
1 B+50ASmart Junction Box (Fuse - S/HEATER RR, S/HEATER FRT, P/WDW RH, P/WDW LH)
HORN15AHorn Relay
DEICER15AFront Deicer Relay
POWER OUTLET25APower Outlet Relay
AC INVERTER30AAC Inverter Module
Page 523 of 570
775
Maintenance
DescriptionFuse ratingProtected Component
FUSE
POWER TAILGATE30APower Tail Gate Module
IDB15AIDB Module
4WD20A4WD ECM
AMS10ABattery Sensor
AMS (WIPER)10ABCM, PCM
WIPER FRT25AWiper LO Relay, Front Wiper Motor
B/UP LAMP10AA/T - Rear Combination Lamp (IN) LH/RH, Electro Chromic Mirror, Audio, A/V & Navigation
Head Unit
ABS37.5AESC Module
5 SENSOR7.5APCM
TCU15AA/T : Transaxle Range Switch
F/PUMP15AFuel Pump Relay
1 ECU 15APCM
2 ECU10AIDB Module
3 SENSOR10AFuel Pump Relay
IGN COIL20ACondenser, Ignition Coil #1/#2/#3/#4
2 SENSOR10APurge Control Solenoid Valve, Variable Intake Solenoid Valve(G4KJ), Oil Control Valve #1/#2
1 SENSOR15AOxygen sensor(#1/#2/#3/#4), PCM, Oxygen Sensor(Down), E/R Fuse & Relay Box (Cooling
Fan Relay)
B/A HORN10ABurgl Aralarm Horn Relay
Page 526 of 570

Maintenance
78
7
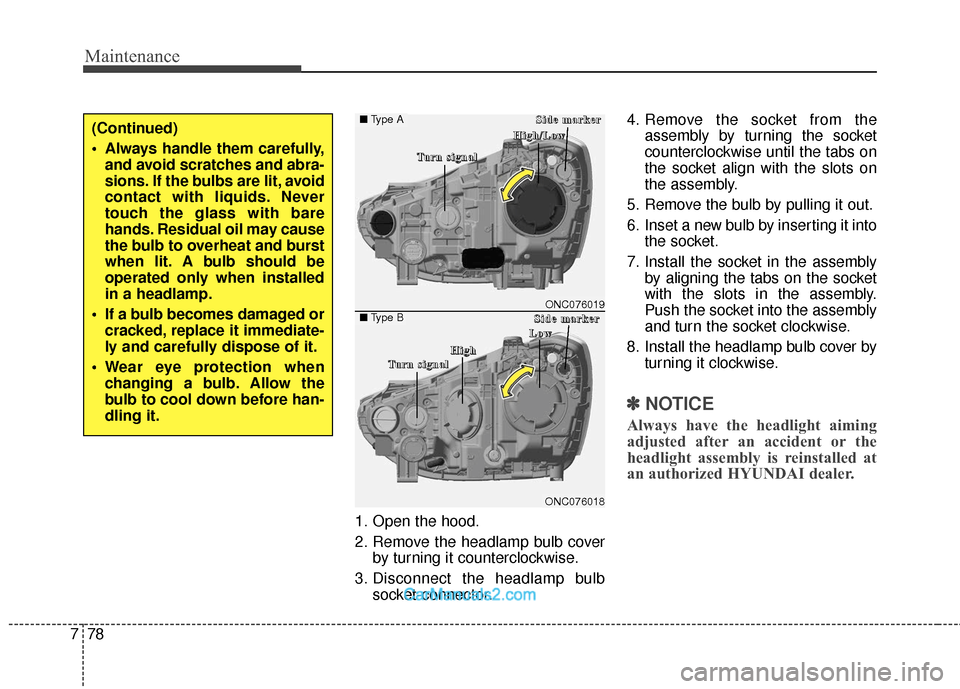
1. Open the hood.
2. Remove the headlamp bulb cover
by turning it counterclockwise.
3. Disconnect the headlamp bulb socket-connector. 4. Remove the socket from the
assembly by turning the socket
counterclockwise until the tabs on
the socket align with the slots on
the assembly.
5. Remove the bulb by pulling it out.
6. Inset a new bulb by inserting it into the socket.
7. Install the socket in the assembly by aligning the tabs on the socket
with the slots in the assembly.
Push the socket into the assembly
and turn the socket clockwise.
8. Install the headlamp bulb cover by turning it clockwise.
✽ ✽NOTICE
Always have the headlight aiming
adjusted after an accident or the
headlight assembly is reinstalled at
an authorized HYUNDAI dealer.
(Continued)
Always handle them carefully,
and avoid scratches and abra-
sions. If the bulbs are lit, avoid
contact with liquids. Never
touch the glass with bare
hands. Residual oil may cause
the bulb to overheat and burst
when lit. A bulb should be
operated only when installed
in a headlamp.
If a bulb becomes damaged or cracked, replace it immediate-
ly and carefully dispose of it.
Wear eye protection when changing a bulb. Allow the
bulb to cool down before han-
dling it.
ONC076018
■ Type A
■Type BONC076019
T
T
T
T
u
u
u
u
r
r
r
r
n
n
n
n
s
s
s
s
i
i
i
i
g
g
g
g
n
n
n
n
a
a
a
a
l
l
l
lS
S
S
S
i
i
i
i
d
d
d
d
e
e
e
e
m
m
m
m
a
a
a
a
r
r
r
r
k
k
k
k
e
e
e
e
r
r
r
r
T
T
T
T
u
u
u
u
r
r
r
r
n
n
n
n
s
s
s
s
i
i
i
i
g
g
g
g
n
n
n
n
a
a
a
a
l
l
l
l
H
H
H
H
i
i
i
i
g
g
g
g
h
h
h
h
/
/
/
/
L
L
L
L
o
o
o
o
w
w
w
w
S
S
S
S
i
i
i
i
d
d
d
d
e
e
e
e
m
m
m
m
a
a
a
a
r
r
r
r
k
k
k
k
e
e
e
e
r
r
r
r
H
H
H
H
i
i
i
i
g
g
g
g
h
h
h
h
L
L
L
L
o
o
o
o
w
w
w
w
Page 528 of 570

Maintenance
80
7
Turn signal lamp/
Side marker lamp (bulb type)
1. Remove the socket from the assembly by turning the socket
counterclockwise until the tabs on
the socket align with the slots on
the assembly.
2. Remove the bulb from the socket by pressing it in and rotating it
counterclockwise until the tabs on
the bulb align with the slots in the
socket. Pull the bulb out of the
socket
3. Insert a new bulb by inserting it into the socket and rotating it until
it locks into place.
4. Install the socket in the assembly by aligning the tabs on the socket
with the slots in the assembly.
Push the socket into the assembly
and turn the socket clockwise.
Daytime running lamp (DRL)/
Position lamp/Fog lamp (LED type)
If the LED lamp does not operate,
have the system checked by an
authorized HYUNDAI dealer.
Side repeater lamp
replacement
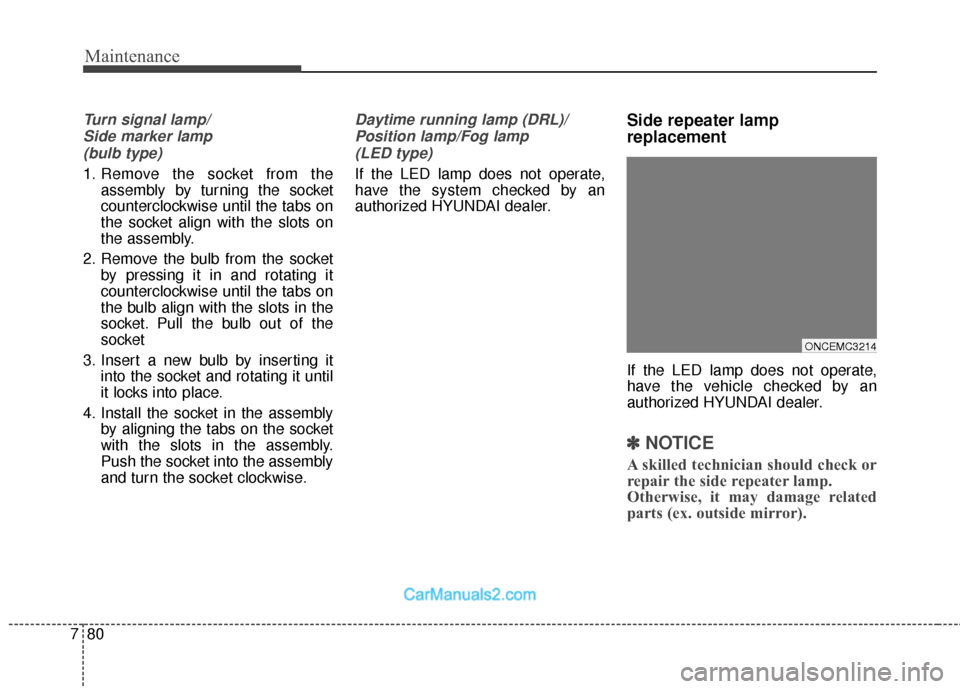
If the LED lamp does not operate,
have the vehicle checked by an
authorized HYUNDAI dealer.
✽ ✽ NOTICE
A skilled technician should check or
repair the side repeater lamp.
Otherwise, it may damage related
parts (ex. outside mirror).
ONCEMC3214
Page 530 of 570
Maintenance
82
7
5. Remove the socket from the
assembly by turning the socket
counterclockwise until the tabs on
the socket align with the slots on
the assembly. 6. Remove the bulb from the socket
by pressing it in and rotating it
counterclockwise until the tabs on
the bulb align with the slots in the
socket. Pull the bulb out of the
socket. (Side marker : Remove the
bulb from the socket by pulling it
out)
7. Insert a new bulb by inserting it into the socket and rotating it until
it locks into place.
8. Install the socket in the assembly by aligning the tabs on the socket
with the slots in the assembly.
Push the socket into the assembly
and turn the socket clockwise.
9. Reinstall the lamp assembly to the body of the vehicle.
Inside lamp
1. Open the liftgate (tailgate).
2. Remove the service cover using aflat-blade screwdriver.
OANNMC2036
ODM076104L
ODM076103L
■
Type A
■ Type B
Page 531 of 570
783
Maintenance
3. Remove the socket from theassembly by turning the socket
counterclockwise until the tabs on
the socket align with the slots on
the assembly.
4. Remove the bulb from the socket by pressing it in and rotating it
counterclockwise until the tabs on
the bulb align with the slots in the
socket. Pull the bulb out of the
socket. (Back-up lamp : Remove
the bulb from the socket by pulling
it out) 5. Insert a new bulb by inserting it
into the socket and rotating it until
it locks into place.
6. Install the socket in the assembly by aligning the tabs on the socket
with the slots in the assembly.
Push the socket into the assembly
and turn the socket clockwise.
7. Install the service cover by putting it into the service hole.
Stop/tail lamp (LED type)
If the LED lamp does not operate,
have the vehicle checked by an
authorized HYUNDAI dealer.
ONCNMC2039
Page 534 of 570
Maintenance
86
7
Interior lamp bulb replacement
1. Using a flat-blade screwdriver,
gently pry the lens from the interi-
or lamp housing.
2. Remove the bulb by pulling it straight out.
3. Install a new bulb in the socket.
4. Align the lens tabs with the interi- or lamp housing notches and snap
the lens into place.
■Map lamp
OXM079044/ODM072041/ODM072043
■Glove box lamp (if equipped)
■Luggage room lamp (if equipped)
■Room lamp
ODM072040/ODM072042/ODM072052■Type A
■Type B
WARNING
Prior to working on the Interior
Lamps, ensure that the "OFF"
button is depressed to avoid
burning your fingers or receiv-
ing an electric shock.
CAUTION
Use care not to dirty or damage
lens, lens tab, and plastic hous-ings.
■ Sunvisor lamp
Page 542 of 570

Maintenance
94
7
Caring for the leather seats
- Vacuum the seat periodically toremove dust and sand on the
seat. It will prevent abrasion or
damage of the leather and main-
tain its quality.
- Wipe the natural leather seat cover often with dry or soft cloth.
- Use of proper leather protective may prevent abrasion of the
cover and helps maintain the
color. Be sure to read the instruc-
tions and consult a specialist
when using leather coating or
protective agent.
- Light colored (beige, cream beige) leather is easily contami-
nated and the stain is noticeable.
Clean the seats frequently.
- Avoid wiping with wet cloth. It may cause the surface to crack. Cleaning the leather seats
- Remove all contaminationsinstantly. Refer to instructions
below for removal of each con-
taminant.
- Cosmetic products (sunscreen, foundation, etc.)
Apply cleansing cream on a cloth
and wipe the contaminate spot.
Wipe off the cream with a wet cloth
and remove water with a dry cloth.
- Beverages (coffee, soft drink, etc.) Apply a small amount of neutral
detergent and wipe until contami-
nations do not smear.
- Oil Remove oil instantly with
absorbable cloth and wipe with
stain remover used only for natu-
ral leather.
- Chewing gum Harden the gum with ice and
remove gradually.Cleaning the lap/shoulder beltwebbing
Clean the belt webbing with any mild
soap solution recommended for
cleaning upholstery or carpet. Follow
the instructions provided with the
soap. Do not bleach or re-dye the
webbing because this may weaken
it.
Cleaning the interior windowglass
If the interior glass surfaces of the
vehicle become fogged (that is, cov-
ered with an oily, greasy or waxy
film), they should be cleaned with
glass cleaner. Follow the directions
on the glass cleaner container.
CAUTION
Do not scrape or scratch theinside of the rear window. Thismay result in damage to the rearwindow defroster grid.