Page 160 of 570

457
Features of your vehicle
(Continued)
• Some noises may be heard whenoperating the steering in low tem-
peratures. When the temperature
rises, the noise will disappear. This
is a normal condition.
• The steering effort may become heavy when the charging system
warning light comes on.Tilt & telescopic steering
A tilt steering wheel allows you to
adjust the steering wheel before you
drive. You can also raise it to give
your legs more room when you exit
and enter the vehicle (if equipped).
The steering wheel should be posi-
tioned so that it is comfortable for
you to drive, while permitting you to
see the instrument panel warning
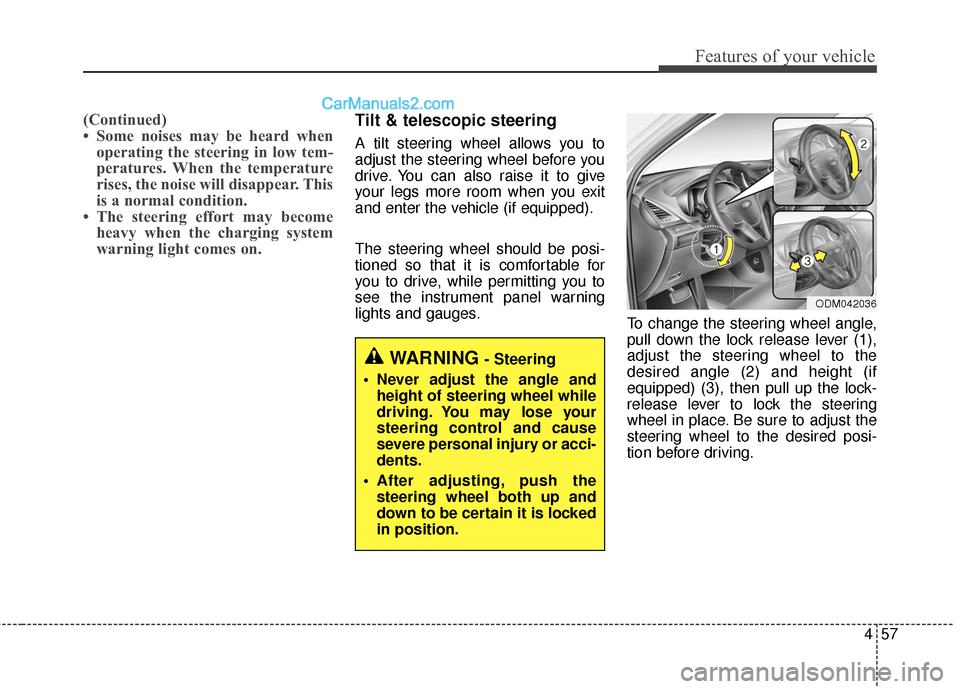
lights and gauges. To change the steering wheel angle,
pull down the lock release lever (1),
adjust the steering wheel to the
desired angle (2) and height (if
equipped) (3), then pull up the lock-
release lever to lock the steering
wheel in place. Be sure to adjust the
steering wheel to the desired posi-
tion before driving.
WARNING - Steering
Never adjust the angle and height of steering wheel while
driving. You may lose your
steering control and cause
severe personal injury or acci-
dents.
After adjusting, push the steering wheel both up and
down to be certain it is locked
in position.
ODM042036
Page 163 of 570

Features of your vehicle
60
4
MIRRORS
Inside rearview mirror
Adjust the rearview mirror so that the
center view through the rear window
is seen. Make this adjustment before
you start driving.
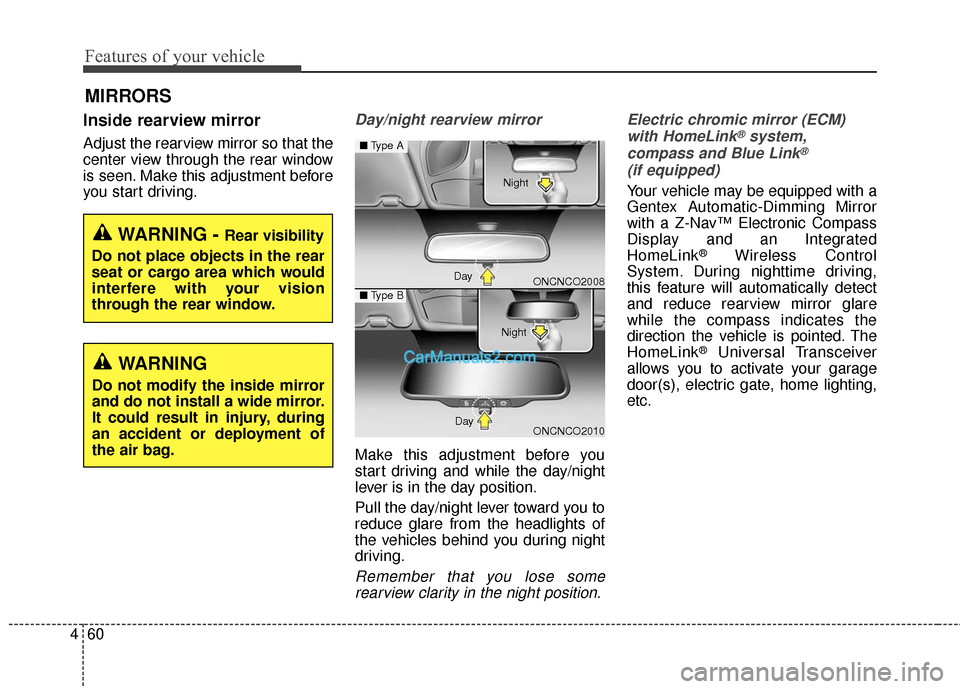
Day/night rearview mirror
Make this adjustment before you
start driving and while the day/night
lever is in the day position.
Pull the day/night lever toward you to
reduce glare from the headlights of
the vehicles behind you during night
driving.
Remember that you lose some
rearview clarity in the night position. Electric chromic mirror (ECM)
with HomeLink
®system,
compass and Blue Link®
(if equipped)
Your vehicle may be equipped with a
Gentex Automatic-Dimming Mirror
with a Z-Nav™ Electronic Compass
Display and an Integrated
HomeLink
®Wireless Control
System. During nighttime driving,
this feature will automatically detect
and reduce rearview mirror glare
while the compass indicates the
direction the vehicle is pointed. The
HomeLink
®Universal Transceiver
allows you to activate your garage
door(s), electric gate, home lighting,
etc.
WARNING - Rear visibility
Do not place objects in the rear
seat or cargo area which would
interfere with your vision
through the rear window.
WARNING
Do not modify the inside mirror
and do not install a wide mirror.
It could result in injury, during
an accident or deployment of
the air bag.
ONCNCO2008
ONCNCO2010
■ Type A
■Type B
Day Night
Day Night
Page 167 of 570

Features of your vehicle
64
4
Retain the original transmitter of the
RF device you are programming for
use in other vehicles as well as for
future HomeLink
®programming. It is
also suggested that upon the sale of
the vehicle, the programmed
HomeLink
®buttons be erased for
security purposes. Programming HomeLink
®
✽ ✽
NOTICE
• When programming a garage
door opener, it is advised to park
the vehicle outside of the garage.
• It is recommended that a new bat- tery be placed in the hand-held
transmitter of the device being
programmed to HomeLink
®for
quicker training and accurate
transmission of the radio-frequen-
cy signal.
• Some vehicles may require the ignition switch to be turned to the
second (or "accessories") position
for programming and/or opera-
tion of HomeLink.
• In the event that there are still pro- gramming difficulties or questions
after following the programming
steps listed below, contact
HomeLink
®at: www.homelink.com
or 1-800-355-3515.
WARNING
Before programming
HomeLink®to a garage door
opener or gate operator, make
sure that people and objects are
out of the way of the device to
prevent potential harm or dam-
age. Do not use HomeLink
®with
any garage door opener that
lacks the safety stop and
reverse features required by
U.S. federal safety standards
(this includes any garage door
opener model manufactured
before April 1, 1982). A garage
door that cannot detect an
object - signaling the door to
stop and reverse - does not
meet current U.S. federal safety
standards. Using a garage door
opener without these features
increases the risk of serious
injury or death.
Page 172 of 570

469
Features of your vehicle
Remote control
The electric remote control mirror
switch allows you to adjust the posi-
tion of the left and right side view mir-
rors.To adjust the position of the mirrors:
1. Place the ignition switch in the ON
position.
2. Move the lever(1) to R (right) or L (left) to select the right side mirror
or the left side mirror.
3. Press a corresponding point on the mirror adjustment control to
position the selected mirror up,
down, left or right.
4. After the adjustment, position the lever in the center to prevent inad-
vertent movement.
CAUTION
If the mirror is jammed with ice,do not adjust the mirror by force.Use an approved spray de-icer(not radiator antifreeze) torelease the frozen mechanism ormove the vehicle to a warmplace and allow the ice to melt.
WARNING
Do not adjust or fold the side
view mirrors while the vehicle is
moving. This could result in
loss of control, and an accident
which could cause death, seri-
ous injury or property damage.
CAUTION
Do not scrape ice off the mirrorface; this may damage the sur-face of the glass. If ice shouldrestrict movement of the mirror,do not force the mirror foradjustment. To remove ice, usea deicer spray, or a sponge orsoft cloth with warm water.
OANNCO2076
CAUTION
The mirrors stop moving when they reach the maximumadjusting angles, but themotor continues to operatewhile the switch is pressed.Do not press the switch longerthan necessary, the motormay be damaged.
Do not attempt to adjust the side view mirrors by hand.Doing so may damage the mir-ror.
Page 174 of 570
471
Features of your vehicle
Blind spot mirror (if equipped)
The Blind Spot Mirror (BSM) is a
supplemental mirror that minimizes
the driver's blind spot zone by
expanding the field of view on the
rear side of the vehicle. The blind
spot mirror is equipped on the dri-
ver's left side view mirror.
WARNING
Always check the road condi-tion while driving for unex-
pected situations even
though the vehicle is
equipped with a blind spot
mirror.
The blind spot mirror is a device made for convenience.
Do not solely rely on the mir-
ror but always pay attention to
traffic around you.
OFS053068
OFS043249
CAUTION
Do not clean the mirror withharsh abrasives, fuel or otherpetroleum based cleaning prod-ucts.
Page 175 of 570
Features of your vehicle
72
4
INSTRUMENT CLUSTER
1. Tachometer
2. Speedometer
3. Engine coolant temperature gauge
4. Fuel gauge
5. LCD display
6. Warning and indicator lights (if equipped)
7. Turn signal indicator lights
ONC047117N/ONC047084N
■
■
Type A
❈The actual cluster in the vehicle may differ
from the illustration.
For more details, refer to the "Gauges" in
this chapter.
■
■ Type B
Page 177 of 570
Features of your vehicle
74
4
Tachometer
The tachometer indicates the
approximate number of engine revo-
lutions per minute (rpm).
Use the tachometer to select the cor-
rect shift points and to prevent lug-
ging and/or over-revving the engine.
Engine Coolant Temperature
Gauge
This gauge indicates the tempera-
ture of the engine coolant when the
ignition switch or Engine Start/Stop
button is ON.
CAUTION
Do not operate the engine with-in the tachometer's RED ZONE.This may cause severe enginedamage.
ODM046733
ODM046734WARNING
Never remove the radiator cap
when the engine is hot. The
engine coolant is under pres-
sure and could severely burn.
Wait until the engine is cool
before adding coolant to the
reservoir.
CAUTION
If the gauge pointer movesbeyond the normal range areatoward the "H" position, it indi-cates overheating that maydamage the engine.
Do not continue driving with anoverheated engine. If your vehi-cle overheats, refer to "If theEngine Overheats" in chapter 6.
Page 178 of 570

475
Features of your vehicle
Fuel Gauge
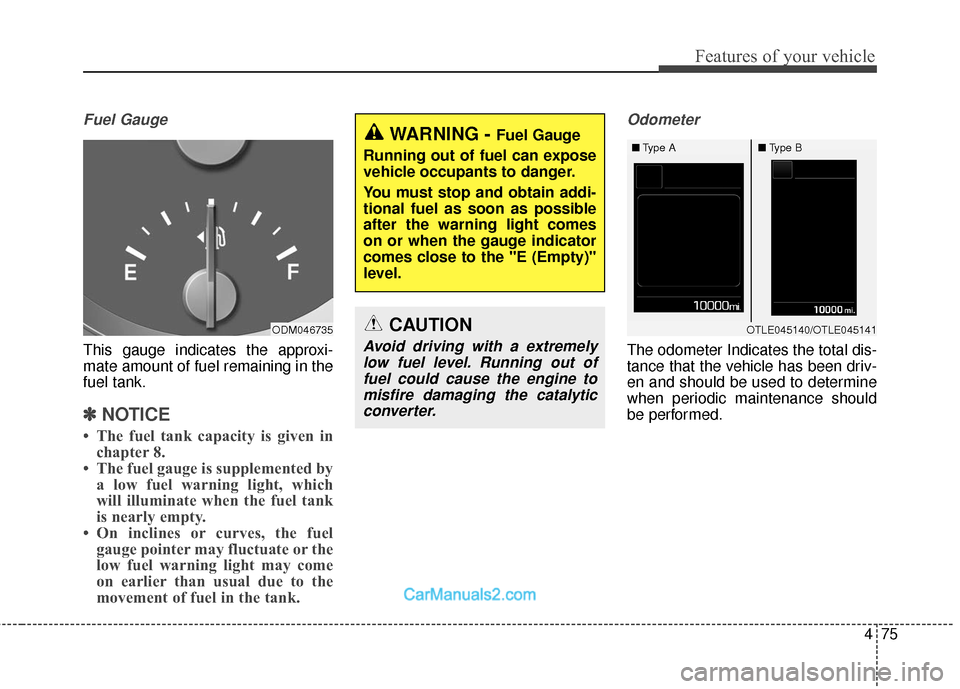
This gauge indicates the approxi-
mate amount of fuel remaining in the
fuel tank.
✽ ✽NOTICE
• The fuel tank capacity is given in
chapter 8.
• The fuel gauge is supplemented by a low fuel warning light, which
will illuminate when the fuel tank
is nearly empty.
• On inclines or curves, the fuel gauge pointer may fluctuate or the
low fuel warning light may come
on earlier than usual due to the
movement of fuel in the tank.
Odometer
The odometer Indicates the total dis-
tance that the vehicle has been driv-
en and should be used to determine
when periodic maintenance should
be performed.
ODM046735
WARNING - Fuel Gauge
Running out of fuel can expose
vehicle occupants to danger.
You must stop and obtain addi-
tional fuel as soon as possible
after the warning light comes
on or when the gauge indicator
comes close to the "E (Empty)"
level.
CAUTION
Avoid driving with a extremely low fuel level. Running out offuel could cause the engine tomisfire damaging the catalyticconverter.
OTLE045140/OTLE045141
■
Type A ■Type B