2018 Hyundai Santa Fe auto light
[x] Cancel search: auto lightPage 66 of 570
345
Safety features of your vehicle
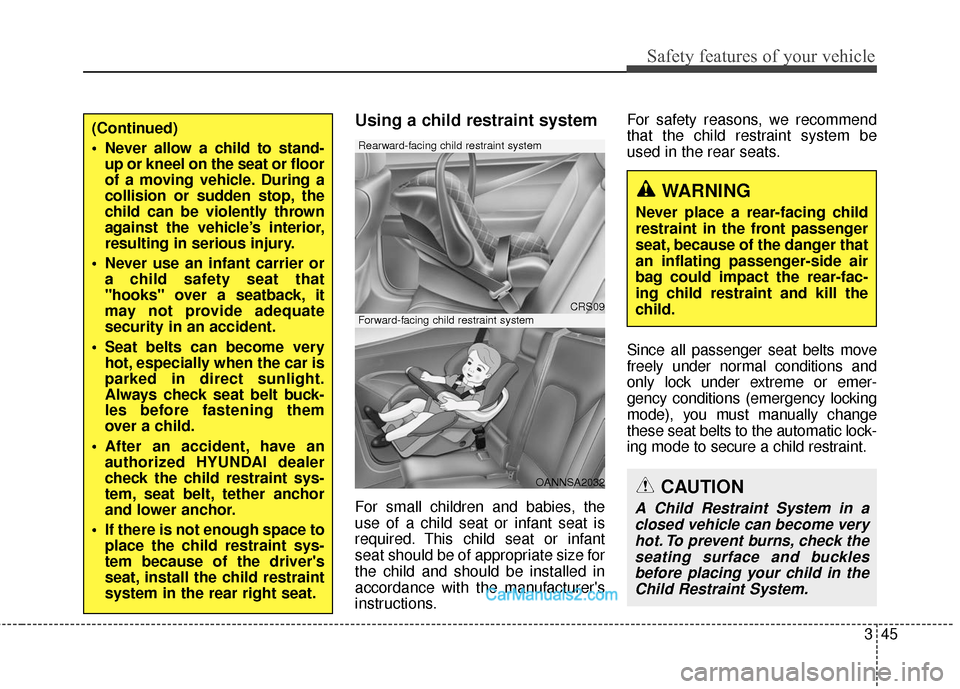
Using a child restraint system
For small children and babies, the
use of a child seat or infant seat is
required. This child seat or infant
seat should be of appropriate size for
the child and should be installed in
accordance with the manufacturer's
instructions.For safety reasons, we recommend
that the child restraint system be
used in the rear seats.
Since all passenger seat belts move
freely under normal conditions and
only lock under extreme or emer-
gency conditions (emergency locking
mode), you must manually change
these seat belts to the automatic lock-
ing mode to secure a child restraint.
WARNING
Never place a rear-facing child
restraint in the front passenger
seat, because of the danger that
an inflating passenger-side air
bag could impact the rear-fac-
ing child restraint and kill the
child.
CRS09
OANNSA2032
Forward-facing child restraint system
Rearward-facing child restraint system
(Continued)
Never allow a child to stand-
up or kneel on the seat or floor
of a moving vehicle. During a
collision or sudden stop, the
child can be violently thrown
against the vehicle’s interior,
resulting in serious injury.
Never use an infant carrier or a child safety seat that
"hooks" over a seatback, it
may not provide adequate
security in an accident.
Seat belts can become very hot, especially when the car is
parked in direct sunlight.
Always check seat belt buck-
les before fastening them
over a child.
After an accident, have an authorized HYUNDAI dealer
check the child restraint sys-
tem, seat belt, tether anchor
and lower anchor.
If there is not enough space to place the child restraint sys-
tem because of the driver's
seat, install the child restraint
system in the rear right seat.
CAUTION
A Child Restraint System in a
closed vehicle can become veryhot. To prevent burns, check theseating surface and bucklesbefore placing your child in theChild Restraint System.
Page 79 of 570
Safety features of your vehicle
58
3
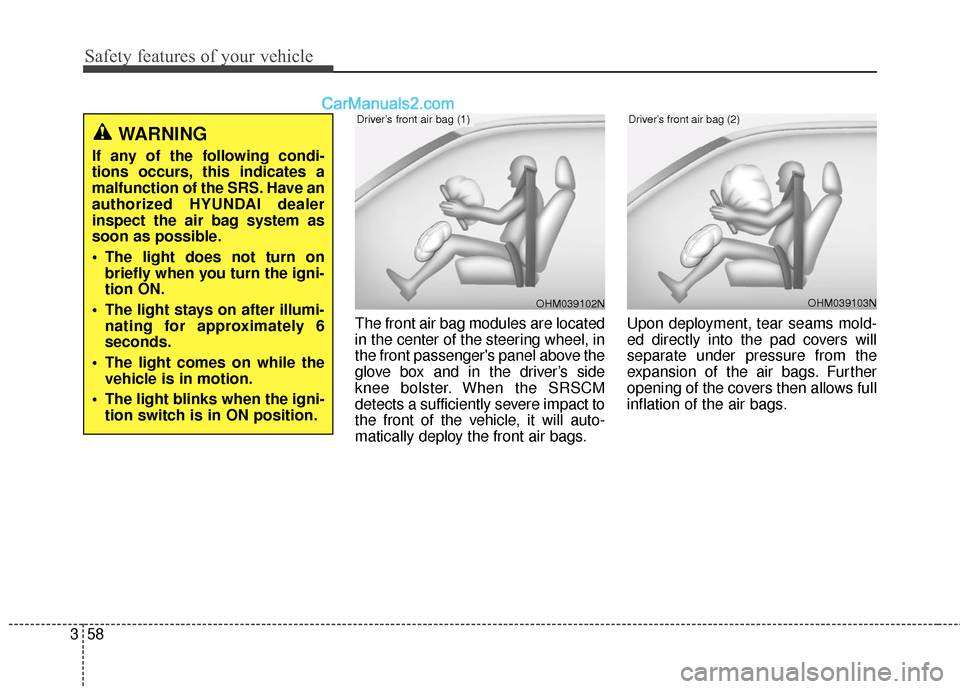
The front air bag modules are located
in the center of the steering wheel, in
the front passenger's panel above the
glove box and in the driver’s side
knee bolster. When the SRSCM
detects a sufficiently severe impact to
the front of the vehicle, it will auto-
matically deploy the front air bags. Upon deployment, tear seams mold-
ed directly into the pad covers will
separate under pressure from the
expansion of the air bags. Further
opening of the covers then allows full
inflation of the air bags.
OHM039103N
Driver’s front air bag (2)
OHM039102N
Driver’s front air bag (1)
WARNING
If any of the following condi-
tions occurs, this indicates a
malfunction of the SRS. Have an
authorized HYUNDAI dealer
inspect the air bag system as
soon as possible.
The light does not turn on
briefly when you turn the igni-
tion ON.
The light stays on after illumi- nating for approximately 6
seconds.
The light comes on while the vehicle is in motion.
The light blinks when the igni- tion switch is in ON position.
Page 109 of 570
Features of your vehicle
64
Liftgate (Tailgate) unlock (3)
The liftgate (tailgate) is unlocked if
the button is pressed for more than 1
second.
Also, once the liftgate (tailgate) is
opened and then closed, the liftgate
(tailgate) will be locked automatically.
Panic (4)
The horn sounds and hazard warn-
ing lights flash for about 30 seconds
if this button is pressed for more than
1 second. To stop the horn and lights,
press any button on the transmitter.
Transmitter precautions
✽ ✽NOTICE
The transmitter will not work if any
of following occur:
• The ignition key is in the ignition
switch.
• You exceed the operating distance limit (about 90 feet [30 m]).
• The battery in the transmitter is weak.
• Other vehicles or objects may be blocking the signal.
• The weather is extremely cold.
• The transmitter is close to a radio transmitter such as a radio substa-
tion or an airport which can inter-
fere with normal operation of the
transmitter.
When the transmitter does not work
correctly, open and close the door
with the ignition key. If you have a
problem with the transmitter, con-
tact an authorized HYUNDAI deal-
er. (Continued)(Continued)
• If the transmitter is in close prox-
imity to your mobile phone, the
signal could be blocked by your
mobile phones normal operational
signals. This is especially impor-
tant when the phone is active such
as making and receiving calls, text
messaging, and/or sending/receiv-
ing emails. Avoid placing the
transmitter and your mobile
phone in the same pants or jacket
pocket and always try to maintain
an adequate distance between the
two devices.
CAUTION
Keep the transmither away from
water or any liquid and fire.
If the inside of the transmittergets damp (due to drinks ormoisture), or is heated, internalcircuit may malfunction.
Page 115 of 570
Features of your vehicle
12
4
Unlocking
Using the door handle button
1. Carry the smart key.
2. Press the button of the driver's
outside door handle.
3. The driver’s door will unlock. The hazard warning lights will blink
and the chime will sound two
times.
4. Press the button twice within 4 seconds and all doors and the lift-
gate (tailgate) will unlock and the
hazard warning lights will blink
and the chime will sound two
times.
❈ If you press the button of the front
passenger’s outside door handle
while carrying the smart key, all
doors will unlock.
✽ ✽
NOTICE
• The door handle button will only
operate when the smart key is
within 28~40in. (0.7~1m) from the
outside door handle.
• When the smart key is recognized in the area of 28~40in. (0.7~1m)
from the front outside door han-
dle, other people can also unlock
the doors by pressing the button of
the front outside door handle.
• After unlocking the driver's door or all doors, the door(s) will lock
automatically unless the door is
opened.
Using the button on the smart key
1. Press the unlock button (2) of the
smart key.
2. The driver’s door will unlock. The hazard warning lights will blink
and the chime will sound two
times.
3. Press the unlock button (2) twice within 4 seconds and all doors and
the liftgate (tailgate) will unlock.
The hazard warning lights will
blink and the chime will sound two
times.
✽ ✽NOTICE
After pressing the button, the doors
will lock automatically unless any
door is opened within 30 seconds.
✽ ✽NOTICE
You can activate or deactivate the
Two Turn Unlock function. Refer to
"User settings" in this section.
Page 116 of 570
413
Features of your vehicle
Liftgate (Tailgate) unlocking
Using the liftgate (tailgate) handle
button
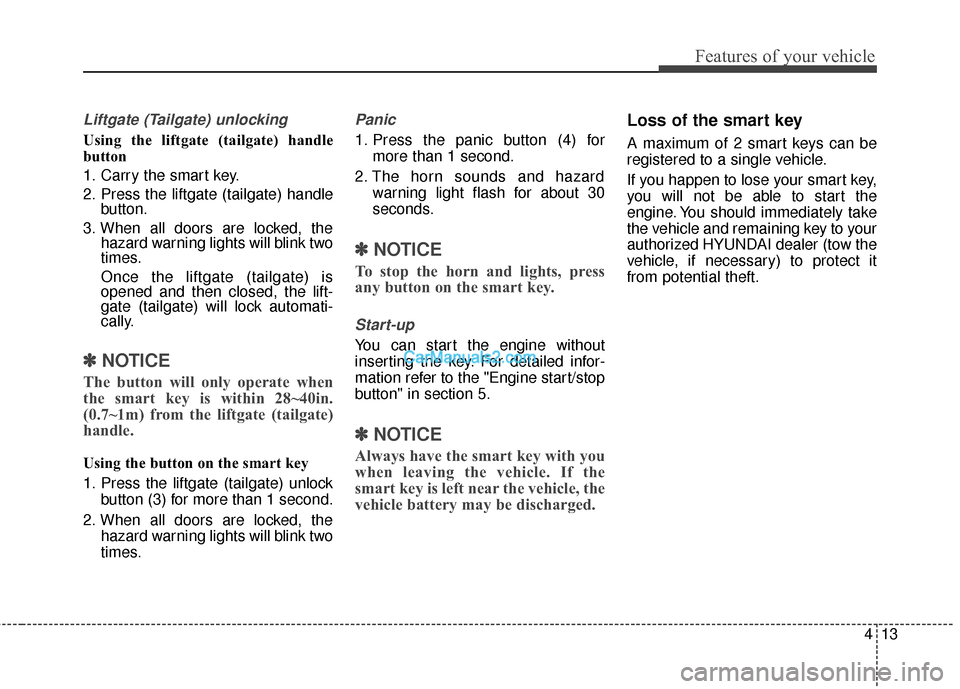
1. Carry the smart key.
2. Press the liftgate (tailgate) handlebutton.
3. When all doors are locked, the hazard warning lights will blink two
times.
Once the liftgate (tailgate) is
opened and then closed, the lift-
gate (tailgate) will lock automati-
cally.
✽ ✽NOTICE
The button will only operate when
the smart key is within 28~40in.
(0.7~1m) from the liftgate (tailgate)
handle.
Using the button on the smart key
1. Press the liftgate (tailgate) unlock
button (3) for more than 1 second.
2. When all doors are locked, the hazard warning lights will blink two
times.
Panic
1. Press the panic button (4) formore than 1 second.
2. The horn sounds and hazard warning light flash for about 30
seconds.
✽ ✽NOTICE
To stop the horn and lights, press
any button on the smart key.
Start-up
You can start the engine without
inserting the key. For detailed infor-
mation refer to the "Engine start/stop
button" in section 5.
✽ ✽NOTICE
Always have the smart key with you
when leaving the vehicle. If the
smart key is left near the vehicle, the
vehicle battery may be discharged.
Loss of the smart key
A maximum of 2 smart keys can be
registered to a single vehicle.
If you happen to lose your smart key,
you will not be able to start the
engine. You should immediately take
the vehicle and remaining key to your
authorized HYUNDAI dealer (tow the
vehicle, if necessary) to protect it
from potential theft.
Page 138 of 570
435
Features of your vehicle
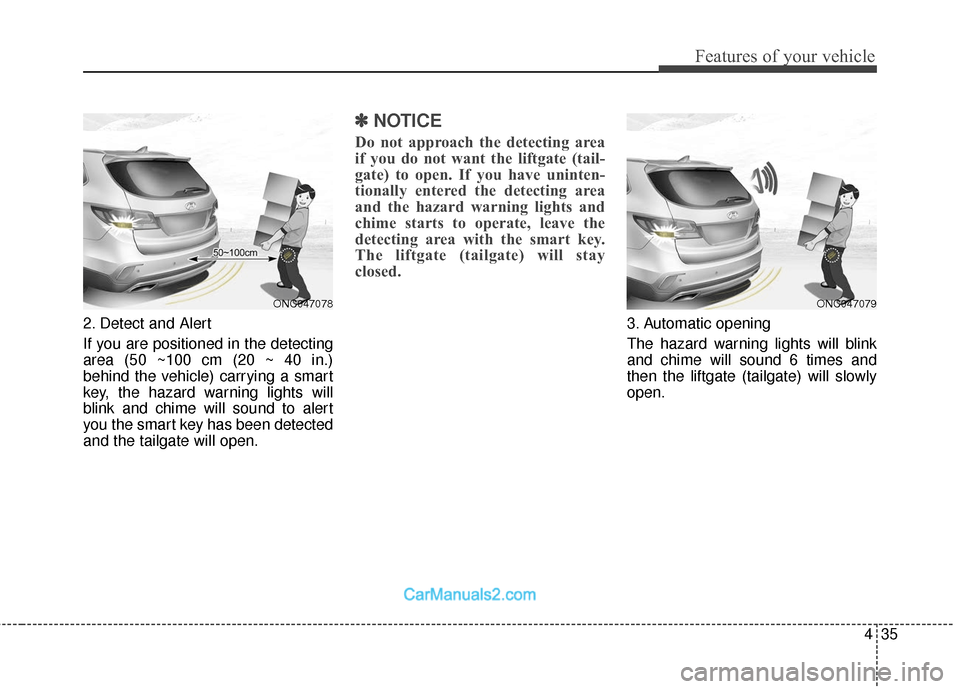
2. Detect and Alert
If you are positioned in the detecting
area (50 ~100 cm (20 ~ 40 in.)
behind the vehicle) carrying a smart
key, the hazard warning lights will
blink and chime will sound to alert
you the smart key has been detected
and the tailgate will open.
✽ ✽NOTICE
Do not approach the detecting area
if you do not want the liftgate (tail-
gate) to open. If you have uninten-
tionally entered the detecting area
and the hazard warning lights and
chime starts to operate, leave the
detecting area with the smart key.
The liftgate (tailgate) will stay
closed.
3. Automatic opening
The hazard warning lights will blink
and chime will sound 6 times and
then the liftgate (tailgate) will slowly
open.
ONC047078ONC047079
Page 151 of 570
Features of your vehicle
48
4
(Continued)
When refueling, always shut
the engine off. Sparks pro-
duced by electrical compo-
nents related to the engine
can ignite fuel vapors causing
a fire. Once refueling is com-
plete, check to make sure the
filler cap and filler door are
securely closed, before start-
ing the engine.
DO NOT use matches or a lighter and DO NOT SMOKE or
leave a lit cigarette in your
vehicle while at a gas station
especially during refueling.
Automotive fuel is highly
flammable and can, when
ignited, result in fire.
If a fire breaks out during refu- eling, leave the vicinity of the
vehicle, and immediately con-
tact the manager of the gas
station and then contact the
local fire department or 911.
Follow any safety instructions
they provide.(Continued)
When using an approvedportable fuel container, be sure
to place the container on the
ground prior to refueling. Static
electricity discharge from the
container can ignite fuel vapors
causing a fire. Once refueling
has begun, contact with the
vehicle should be maintained
until the filling is complete.
Use only approved portable
plastic fuel containers designed
to carry and store gasoline.
Do not use cellular phones while refueling. Electric cur-
rent and/or electronic interfer-
ence from cellular phones can
potentially ignite fuel vapors
causing a fire.
(Continued)CAUTION
Make sure to refuel your vehi-cle according to the "Fuelrequirements" suggested insection 1.
If the fuel filler cap requires replacement, use only a gen-uine HYUNDAI cap or theequivalent specified for yourvehicle. An incorrect fuel fillercap can result in a seriousmalfunction of the fuel systemor emission control system.
Do not spill fuel on the exterior surfaces of the vehicle. Anytype of fuel spilled on paintedsurfaces may damage the paint.
After refueling, make sure the fuel cap is installed securelyto prevent fuel spillage in theevent of an accident.
Page 163 of 570
Features of your vehicle
60
4
MIRRORS
Inside rearview mirror
Adjust the rearview mirror so that the
center view through the rear window
is seen. Make this adjustment before
you start driving.
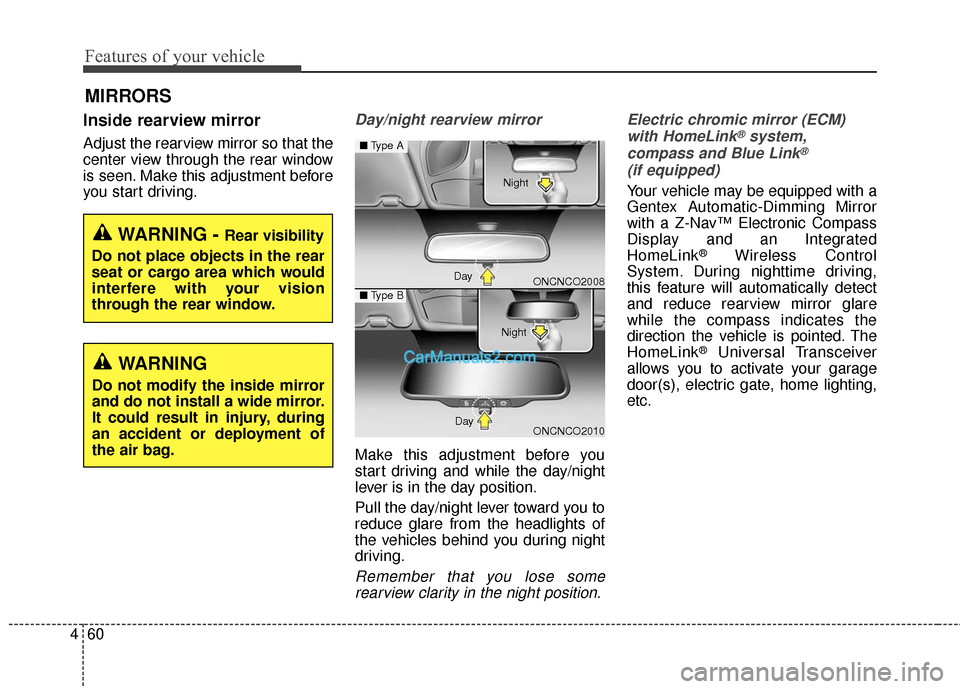
Day/night rearview mirror
Make this adjustment before you
start driving and while the day/night
lever is in the day position.
Pull the day/night lever toward you to
reduce glare from the headlights of
the vehicles behind you during night
driving.
Remember that you lose some
rearview clarity in the night position. Electric chromic mirror (ECM)
with HomeLink
®system,
compass and Blue Link®
(if equipped)
Your vehicle may be equipped with a
Gentex Automatic-Dimming Mirror
with a Z-Nav™ Electronic Compass
Display and an Integrated
HomeLink
®Wireless Control
System. During nighttime driving,
this feature will automatically detect
and reduce rearview mirror glare
while the compass indicates the
direction the vehicle is pointed. The
HomeLink
®Universal Transceiver
allows you to activate your garage
door(s), electric gate, home lighting,
etc.
WARNING - Rear visibility
Do not place objects in the rear
seat or cargo area which would
interfere with your vision
through the rear window.
WARNING
Do not modify the inside mirror
and do not install a wide mirror.
It could result in injury, during
an accident or deployment of
the air bag.
ONCNCO2008
ONCNCO2010
■ Type A
■Type B
Day Night
Day Night