2018 Hyundai Santa Fe navigation
[x] Cancel search: navigationPage 20 of 570

Your vehicle at a glance
62
INSTRUMENT PANEL OVERVIEW
ODM014004❈The actual shape may differ from the illustration. 1. Lighting control lever .........................4-121
2. Audio remote control buttons ............4-177
3. Cruise control button ...........................5-67
4. LCD display control buttons ................4-77
5. Horn.....................................................4-59
6. Driver’s front air bag ............................3-66
7. Wiper and washer control lever .........4-130
8. Ignition switch/
Engine start/stop button ...............5-7, 5-10
9. Audio/Video/Navigation (AVN) system ...............................................4-178
10. Hazard warning flasher ...................4-119
11. Climate control system.........4-139, 4-149
12. Passenger’s front air bag ..................3-66
13. Glove box ........................................4-162
Page 24 of 570

33
Safety features of your vehicle
• ALWAYS set up your mobiledevices (i.e., MP3 players, phones,
navigation units, etc.) when your
vehicle is parked or safely stopped.
ONLY use your mobile device when allowed by laws and when
conditions permit safe use. NEVER
text or email while driving. Most
states have laws prohibiting drivers
from texting. Some states and
cities also prohibit drivers from
using handheld phones.
NEVER let the use of a mobile device distract you from driving.
You have a responsibility to your
passengers and others on the road
to always drive safely, with your
hands on the wheel as well as your
eyes and attention on the road.Control Your Speed
Excessive speed is a major factor in
crash injuries and deaths. Generally,
the higher the speed, the greater the
risk, but serious injuries can also
occur at lower speeds. Never drive
faster than is safe for current condi-
tions, regardless of the maximum
speed posted.
Keep Your Vehicle in Safe
Condition
Having a tire blowout or a mechani-
cal failure can be extremely haz-
ardous. To reduce the possibility of
such problems, check your tire pres-
sures and condition frequently, and
perform all regularly scheduled
maintenance.
Page 171 of 570

Features of your vehicle
68
4
NVS®is a registered trademark and
Z-Nav™ is a trademark of the
Gentex Corporation, Zeeland,
Michigan. HomeLink
®is a registered
trademark owned by Johnson
Controls, Incorporated, Milwaukee,
Wisconsin.
Blue Link®center
For the details, refer to the Blue
Link® Owner’s Guide, navigation
manual or audio manual. The audio
manual is in this section.
Side view mirrors
Be sure to adjust mirror angles
before driving.
Your vehicle is equipped with both
left-hand and right-hand side view
mirrors. The mirrors can be adjusted
remotely with the remote switch. The
mirror heads can be folded back to
prevent damage during an automatic
car wash or when passing in a nar-
row street.
CAUTION - Side view
mirrors
The right side view mirrors is convex. Objects seen in themirror are closer than theyappear.
Use your interior rearview mir- ror or direct observation todetermine the actual distanceof following vehicles whenchanging lanes.
ONCNCO2009
OYF042250N
■Type A
■ Type B
Page 180 of 570

477
Features of your vehicle
LCD Display Control
The LCD display modes can be
changed by using the control buttons
on the steering wheel.
(1) : MODE button for changingmodes
(2) : MOVE button for changing items
(3) : SELECT/RESET button for setting or resetting the
selected item
LCD Modes
LCD DISPLAY
Modes SymbolExplanation
Tr i p
ComputerThis mode displays driving information like the tripmeter,
fuel economy, and so on.
For more details, refer to "Trip Computer" in this chapter.
Tu r n B y Tu r n (if equipped)This mode displays the state of the navigation.
SCC/LDWS
(if equipped)
This mode displays the state of the Advanced Smart
Cruise Control system (SCC) and Lane Departure Warning
System (LDWS). For more details, refer to "Advanced
Smart Cruise Control system (SCC)" or "Lane Departure
Warning System (LDWS)" in chapter 5.
A/V
(if equipped)This mode displays the state of the A/V system.
Service
This mode informs of service interval and pressure sta-
tus of each tire.
This mode informs of warning messages related to
washer fluid or malfunction of Blind Spot Detection
system (BSD) and so on.
When the any door is not closed securely, this symbol is
illuminated.
User SettingsIn this mode, you can change settings of the doors,
lamps and so on.
ODM042224
Page 181 of 570

Features of your vehicle
78
4
Trip Computer Mode
The trip computer mode displays
information related to vehicle driving
parameters including range, fuel
economy, trip meter information and
vehicle speed.
For more information, refer to "Trip
Computer" in this chapter.
Turn By Turn (TBT) Mode
(if equipped)
This mode displays the state of the
navigation.
SCC/LDWS Mode (if equipped)
This mode displays the state of the
Advanced Smart Cruise Control sys-
tem (SCC) or Lane Departure
Warning System (LDWS).
For more information, refer to
"Advanced Smart Cruise Control
system (SCC)" or "Lane Departure
Warning System (LDWS)" in chapter
5.
OTLA045187/OTLA045188
■ Type A ■Type B
ODM046611/ODM046610
■Type A ■Type B
OTLA045175/OTLA045176
■Type A ■Type B
Page 281 of 570

Features of your vehicle
178
4
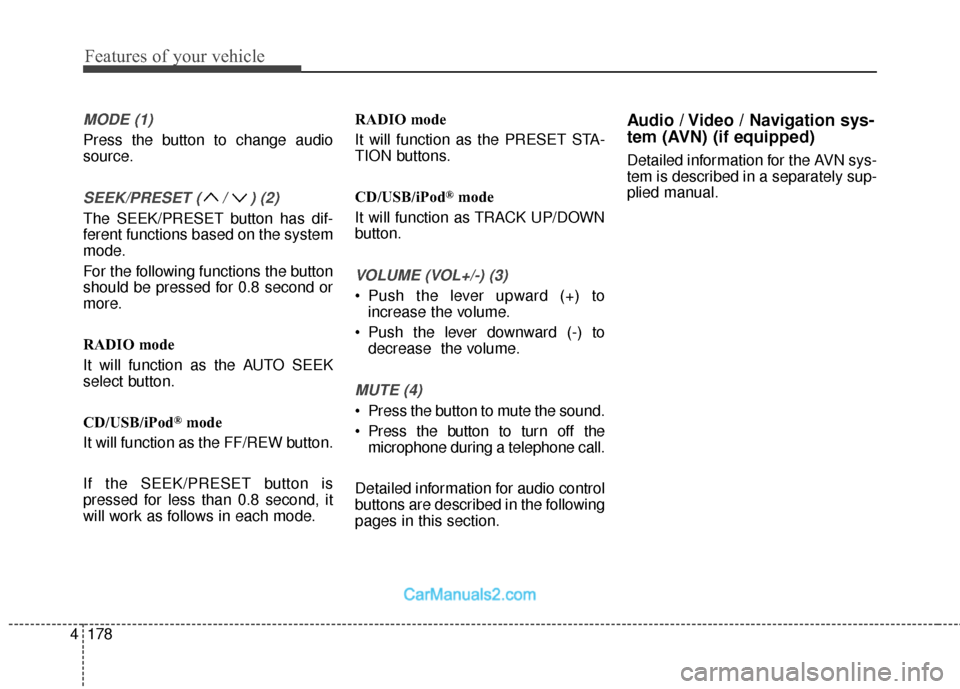
MODE (1)
Press the button to change audio
source.
SEEK/PRESET ( / ) (2)
The SEEK/PRESET button has dif-
ferent functions based on the system
mode.
For the following functions the button
should be pressed for 0.8 second or
more.
RADIO mode
It will function as the AUTO SEEK
select button.
CD/USB/iPod
®mode
It will function as the FF/REW button.
If the SEEK/PRESET button is
pressed for less than 0.8 second, it
will work as follows in each mode. RADIO mode
It will function as the PRESET STA-
TION buttons.
CD/USB/iPod
®mode
It will function as TRACK UP/DOWN
button.
VOLUME (VOL+/-) (3)
• Push the lever upward (+) to increase the volume.
Push the lever downward (-) to decrease the volume.
MUTE (4)
Press the button to mute the sound.
Press the button to turn off themicrophone during a telephone call.
Detailed information for audio control
buttons are described in the following
pages in this section.
Audio / Video / Navigation sys-
tem (AVN) (if equipped)
Detailed information for the AVN sys-
tem is described in a separately sup-
plied manual.
Page 433 of 570

613
What to do in an emergency
Changing a tire with TPMS
If you have a flat tire, the low Tire
Pressure and Position telltales will
come on. Have the system checked
by an authorized HYUNDAI dealer.
Each wheel is equipped with a tire
pressure sensor mounted inside the
tire behind the valve stem. You must
use TPMS specific wheels. It is rec-
ommended that you have your tires
serviced by an authorized HYUNDAI
dealer.If you drive the vehicle for about 20
minutes at speeds above 15.5 mph
(25 km/h) after replacing the low
pressure tire with the spare tire, the
below will happen:
The TPMS malfunction indicator
may blink for approximately 1
minute and then remain continu-
ously illuminated because the
TPMS sensor is not mounted on
the spare wheel.
You may not be able identify a low
tire by simply looking at it. Always
use a good quality tire pressure
gauge to measure the tire's inflation
pressure. Please note that a tire that
is hot (from being driven) will have a
higher pressure measurement than a
tire that is cold (from sitting station-
ary for at least 3 hours and driven
less than 1 mile (1.6 km) during that
3 hour period).
Allow the tire to cool before measur-
ing the inflation pressure. Always be
sure the tire is cold before inflating to
the recommended pressure.CAUTION
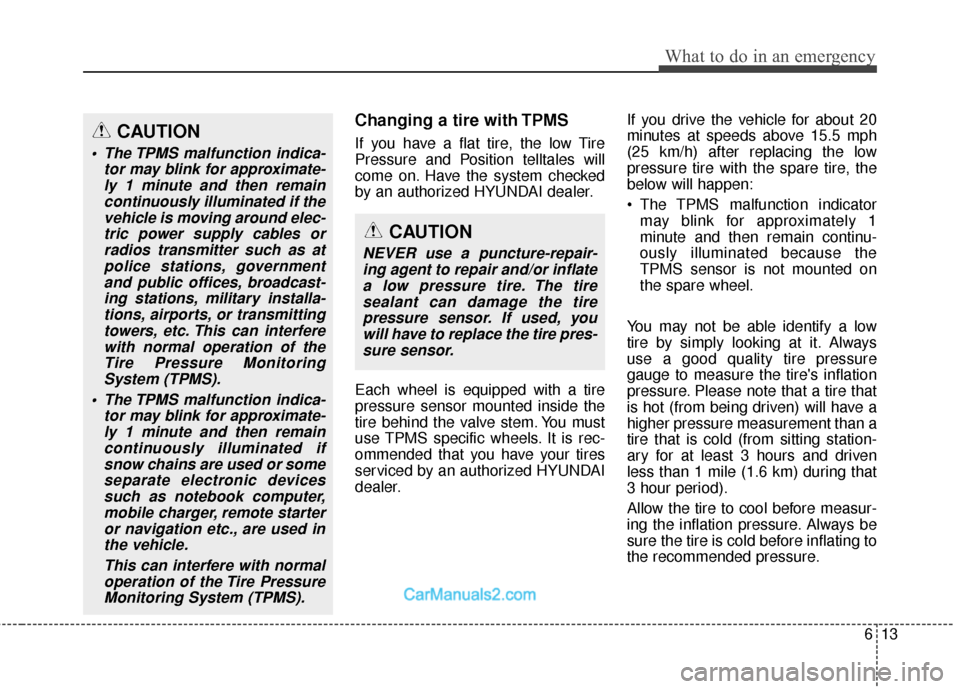
The TPMS malfunction indica- tor may blink for approximate-ly 1 minute and then remaincontinuously illuminated if thevehicle is moving around elec-tric power supply cables orradios transmitter such as atpolice stations, governmentand public offices, broadcast-ing stations, military installa-tions, airports, or transmittingtowers, etc. This can interferewith normal operation of theTire Pressure MonitoringSystem (TPMS).
The TPMS malfunction indica- tor may blink for approximate-ly 1 minute and then remaincontinuously illuminated ifsnow chains are used or someseparate electronic devicessuch as notebook computer,mobile charger, remote starteror navigation etc., are used inthe vehicle.
This can interfere with normaloperation of the Tire PressureMonitoring System (TPMS).
CAUTION
NEVER use a puncture-repair-ing agent to repair and/or inflatea low pressure tire. The tiresealant can damage the tirepressure sensor. If used, youwill have to replace the tire pres-sure sensor.
Page 517 of 570

769
Maintenance
DescriptionFuse ratingProtected Component
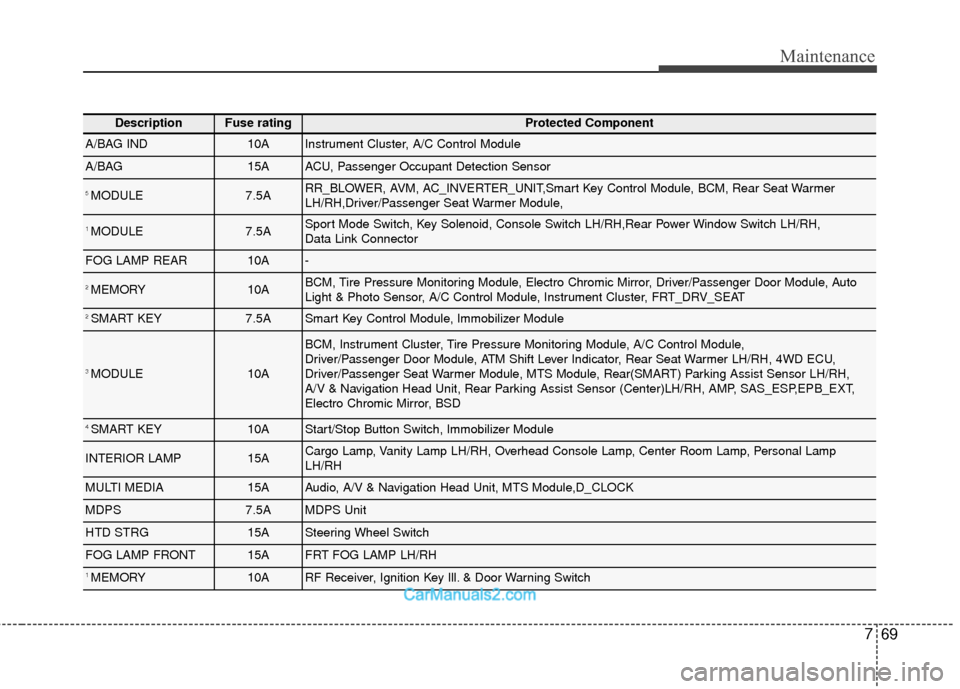
A/BAG IND10AInstrument Cluster, A/C Control Module
A/BAG15AACU, Passenger Occupant Detection Sensor
5 MODULE7.5ARR_BLOWER, AVM, AC_INVERTER_UNIT,Smart Key Control Module, BCM, Rear Seat Warmer
LH/RH,Driver/Passenger Seat Warmer Module,
1 MODULE7.5ASport Mode Switch, Key Solenoid, Console Switch LH/RH,Rear Power Window Switch LH/RH,
Data Link Connector
FOG LAMP REAR10A-
2 MEMORY10ABCM, Tire Pressure Monitoring Module, Electro Chromic Mirror, Driver/Passenger Door Module, Auto
Light & Photo Sensor, A/C Control Module, Instrument Cluster, FRT_DRV_SEAT
2 SMART KEY7.5ASmart Key Control Module, Immobilizer Module
3 MODULE10A
BCM, Instrument Cluster, Tire Pressure Monitoring Module, A/C Control Module,
Driver/Passenger Door Module, ATM Shift Lever Indicator, Rear Seat Warmer LH/RH, 4WD ECU,
Driver/Passenger Seat Warmer Module, MTS Module, Rear(SMART) Parking Assist Sensor LH/RH,
A/V & Navigation Head Unit, Rear Parking Assist Sensor (Center)LH/RH, AMP, SAS_ESP,EPB_EXT,
Electro Chromic Mirror, BSD
4 SMART KEY10AStart/Stop Button Switch, Immobilizer Module
INTERIOR LAMP15ACargo Lamp, Vanity Lamp LH/RH, Overhead Console Lamp, Center Room Lamp, Personal Lamp
LH/RH
MULTI MEDIA15AAudio, A/V & Navigation Head Unit, MTS Module,D_CLOCK
MDPS7.5AMDPS Unit
HTD STRG15ASteering Wheel Switch
FOG LAMP FRONT15AFRT FOG LAMP LH/RH
1 MEMORY10ARF Receiver, Ignition Key Ill. & Door Warning Switch