2018 Hyundai Santa Fe controls
[x] Cancel search: controlsPage 80 of 570
359
Safety features of your vehicle
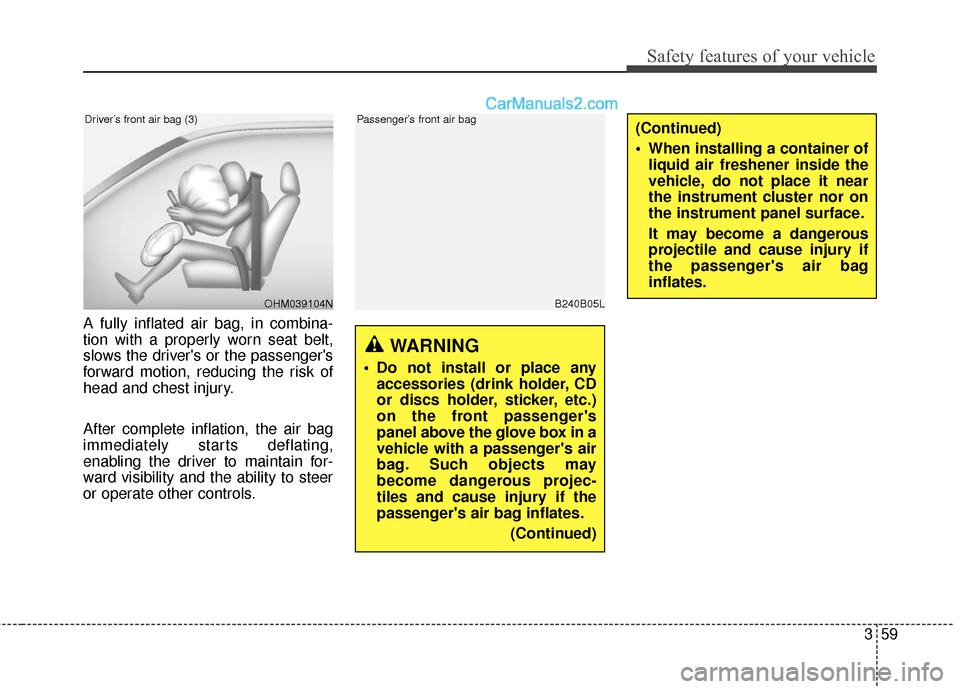
A fully inflated air bag, in combina-
tion with a properly worn seat belt,
slows the driver's or the passenger's
forward motion, reducing the risk of
head and chest injury.
After complete inflation, the air bag
immediately starts deflating,
enabling the driver to maintain for-
ward visibility and the ability to steer
or operate other controls.
B240B05L
Passenger’s front air bag
WARNING
Do not install or place anyaccessories (drink holder, CD
or discs holder, sticker, etc.)
on the front passenger's
panel above the glove box in a
vehicle with a passenger's air
bag. Such objects may
become dangerous projec-
tiles and cause injury if the
passenger's air bag inflates.
(Continued)
(Continued)
When installing a container ofliquid air freshener inside the
vehicle, do not place it near
the instrument cluster nor on
the instrument panel surface.
It may become a dangerous
projectile and cause injury if
the passenger's air bag
inflates.
OHM039104N
Driver’s front air bag (3)
Page 88 of 570

367
Safety features of your vehicle
Your vehicle is equipped with a
Supplemental Restraint (Air Bag)
System and the lap/shoulder belts at
both the driver and passenger seat-
ing positions.
The front air bags are designed to
supplement the three-point seat
belts. For these air bags to provide
protection, the seat belts must be
worn at all times when driving.
The indications of the system's pres-
ence are the letters "SRS AIR BAG"
embossed on the air bag pad cover
in the steering wheel, on the knee
bolster below the steering wheel col-
umn and the passenger's side front
panel pad above the glove box.
The SRS consists of air bags
installed under the pad covers in the
center of the steering wheel , in the
knee bolster below the steering
wheel column and the passenger's
side front panel above the glove box.
The purpose of the SRS is to provide
the vehicle's driver and/or the front
passenger with additional protection
than that offered by the seat belt sys-
tem alone in case of a frontal impact
of sufficient severity.The seat belt buckle sensor deter-
mines if the front passenger's seat
belt is fastened. This sensor provides
the ability to control the SRS deploy-
ment based on whether or not the
seat belt is fastened, and how severe
the impact is.
The advanced SRS offers the ability
to control the air bag inflation within
two levels. A first stage level is pro-
vided for moderate-severity impacts.
A second stage level is provided for
more severe impacts.
According to the impact severity and
seat belt usage, the SRSCM (SRS
Control Module) controls the air bag
inflation. Failure to properly wear
seat belts can increase the risk or
severity of injury in an accident.
Additionally, your vehicle is equipped
with an occupant classification sys-
tem in the front passenger's seat.
The occupant classification system
detects the presence of a passenger
in the front passenger's seat and will
turn off the front passenger's air bag
under certain conditions. For more
detail, see "Occupant classification
system" in this section.
Page 108 of 570
45
Features of your vehicle
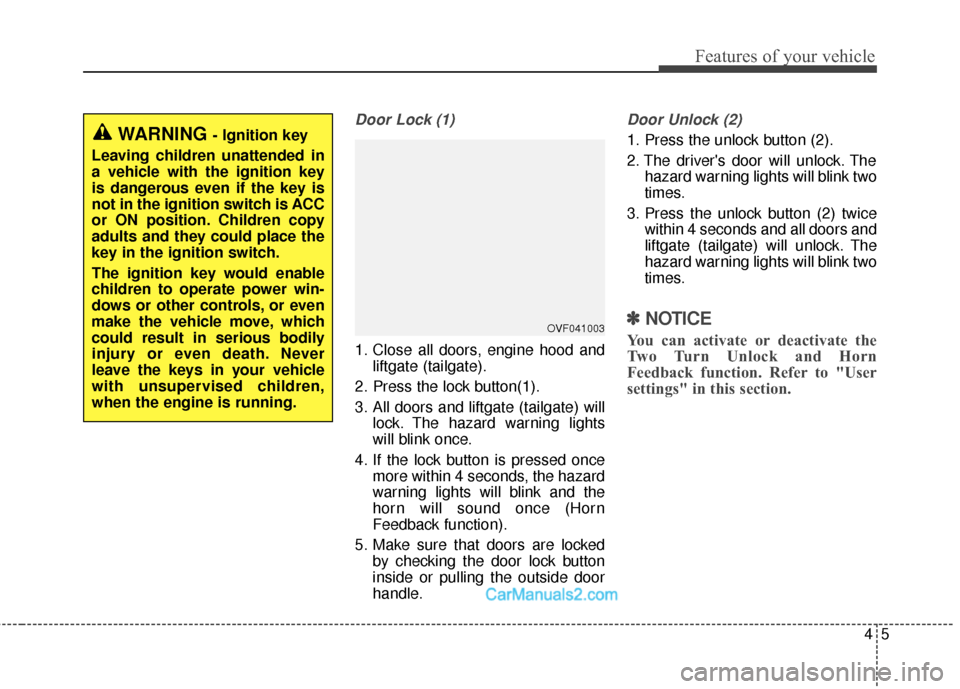
Door Lock (1)
1. Close all doors, engine hood andliftgate (tailgate).
2. Press the lock button(1).
3. All doors and liftgate (tailgate) will lock. The hazard warning lights
will blink once.
4. If the lock button is pressed once more within 4 seconds, the hazard
warning lights will blink and the
horn will sound once (Horn
Feedback function).
5. Make sure that doors are locked by checking the door lock button
inside or pulling the outside door
handle.
Door Unlock (2)
1. Press the unlock button (2).
2. The driver's door will unlock. Thehazard warning lights will blink two
times.
3. Press the unlock button (2) twice within 4 seconds and all doors and
liftgate (tailgate) will unlock. The
hazard warning lights will blink two
times.
✽ ✽NOTICE
You can activate or deactivate the
Two Turn Unlock and Horn
Feedback function. Refer to "User
settings" in this section.
WARNING - Ignition key
Leaving children unattended in
a vehicle with the ignition key
is dangerous even if the key is
not in the ignition switch is ACC
or ON position. Children copy
adults and they could place the
key in the ignition switch.
The ignition key would enable
children to operate power win-
dows or other controls, or even
make the vehicle move, which
could result in serious bodily
injury or even death. Never
leave the keys in your vehicle
with unsupervised children,
when the engine is running.
OVF041003
Page 113 of 570

Features of your vehicle
10
4
Record your key number
The key code num-
ber is stamped or
printed on the key
code tag attached to
the key set. Should
you lose your keys,
this number will enable an author-
ized HYUNDAI dealer to duplicate
the keys easily. Remove the key
code tag and store it in a safe place.
Also, record the key code number
and keep it in a safe and handy
place, but not in the vehicle.
Smart key function
To remove the mechanical key, press
and hold the release button (1) and
remove the mechanical key (2).
To reinstall the mechanical key, put
the key into the hole and push it until
a click sound is heard. With a smart key, you can lock or
unlock a door (and Liftgate (Tailgate))
and start the engine.
Refer to the following for more details.
SMART KEY
ODM042002
WARNING - Smart key
Leaving children unattended in
a vehicle with the smart key is
dangerous even if the Engine
Start/Stop Button is in the ACC
or ON position. Children copy
adults and they could press the
Engine Start/Stop Button.
The smart key would enable
children to operate power win-
dows or other controls, or even
make the vehicle move, which
could result in serious bodily
injury or even death. Never
leave the keys in your vehicle
with unsupervised children,
when the Engine is running.
Page 143 of 570
Features of your vehicle
40
4
Power windows
The ignition switch must be in the ON
position for power windows to operate.
Each door has a power window
switch that controls that door's win-
dow. The driver has a power window
lock switch which can block the oper-
ation of passenger windows. The dri-
ver’s door has a master power win-
dow switch that controls all the win-
dows in the vehicle. The power win-
dows can be operated for approxi-
mately 30 seconds after the ignition
key is removed or turned to the ACC
or LOCK position. However, if the
front doors open, the power windows
cannot be operated within the 30
second period.
✽ ✽
NOTICE
• In cold and wet climates, power
windows may not work properly
due to freezing conditions.
• While driving with the rear win- dows down or with the sunroof (if
equipped) in an open (or partially
open) position, your vehicle may
demonstrate a wind buffeting or
pulsation noise. This noise is a
normal occurrence and can be
reduced or eliminated by taking
the following actions. If the noise
occurs with one or both of the
rear windows down, partially
lower both front windows
approximately one inch. If you
experience the noise with the sun-
roof open, slightly reduce the size
of the sunroof opening.
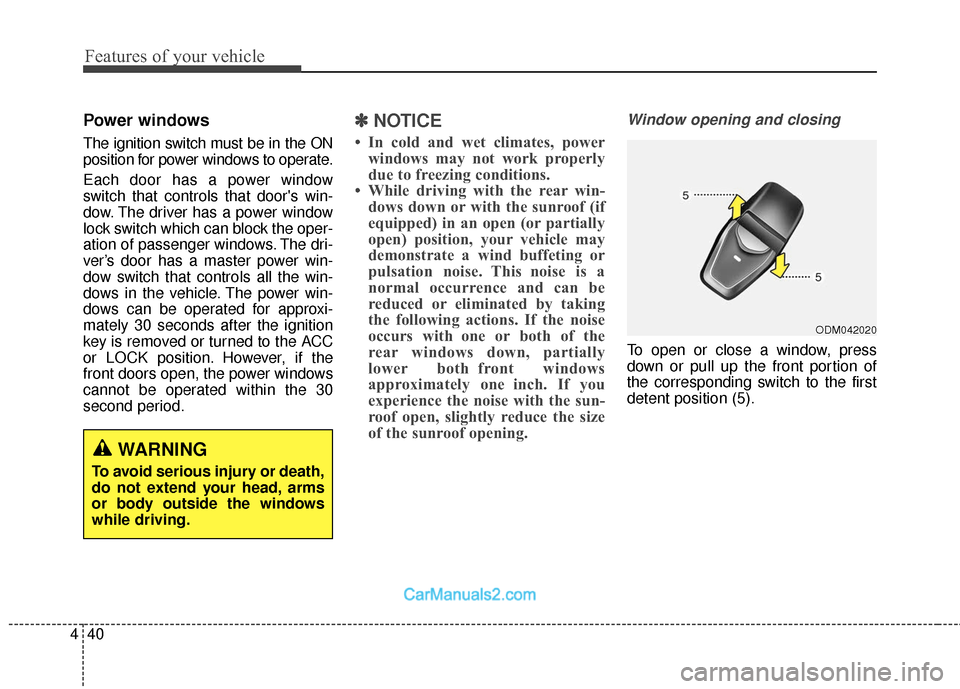
Window opening and closing
To open or close a window, press
down or pull up the front portion of
the corresponding switch to the first
detent position (5).
ODM042020
WARNING
To avoid serious injury or death,
do not extend your head, arms
or body outside the windows
while driving.
Page 171 of 570

Features of your vehicle
68
4
NVS®is a registered trademark and
Z-Nav™ is a trademark of the
Gentex Corporation, Zeeland,
Michigan. HomeLink
®is a registered
trademark owned by Johnson
Controls, Incorporated, Milwaukee,
Wisconsin.
Blue Link®center
For the details, refer to the Blue
Link® Owner’s Guide, navigation
manual or audio manual. The audio
manual is in this section.
Side view mirrors
Be sure to adjust mirror angles
before driving.
Your vehicle is equipped with both
left-hand and right-hand side view
mirrors. The mirrors can be adjusted
remotely with the remote switch. The
mirror heads can be folded back to
prevent damage during an automatic
car wash or when passing in a nar-
row street.
CAUTION - Side view
mirrors
The right side view mirrors is convex. Objects seen in themirror are closer than theyappear.
Use your interior rearview mir- ror or direct observation todetermine the actual distanceof following vehicles whenchanging lanes.
ONCNCO2009
OYF042250N
■Type A
■ Type B
Page 244 of 570
4141
Features of your vehicle
Mode selection
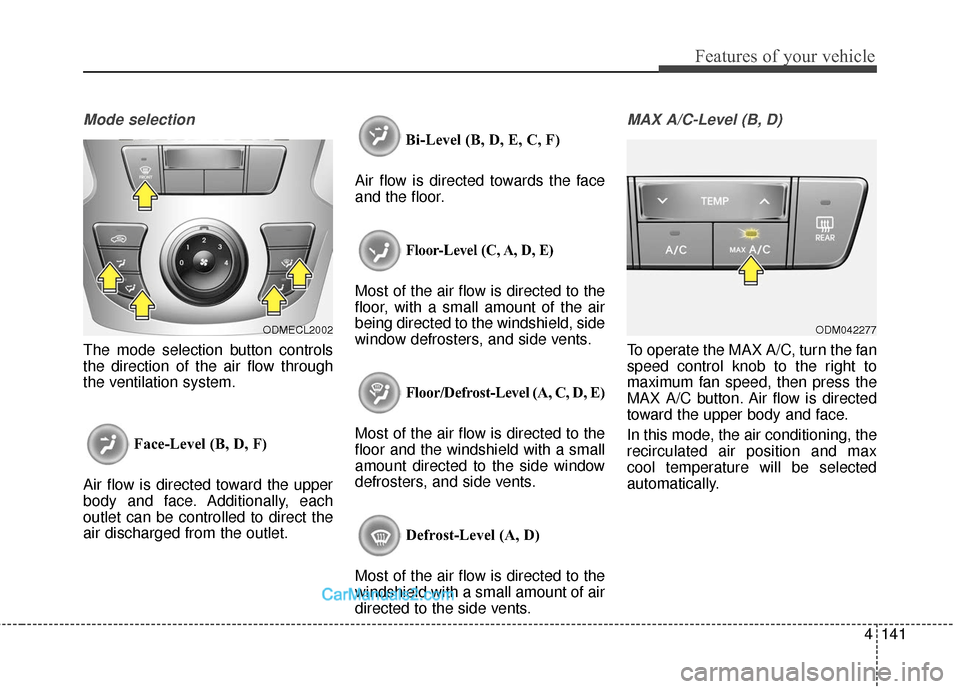
The mode selection button controls
the direction of the air flow through
the ventilation system.Face-Level (B, D, F)
Air flow is directed toward the upper
body and face. Additionally, each
outlet can be controlled to direct the
air discharged from the outlet. Bi-Level (B, D, E, C, F)
Air flow is directed towards the face
and the floor.
Floor-Level (C, A, D, E)
Most of the air flow is directed to the
floor, with a small amount of the air
being directed to the windshield, side
window defrosters, and side vents.
Floor/Defrost-Level (A, C, D, E)
Most of the air flow is directed to the
floor and the windshield with a small
amount directed to the side window
defrosters, and side vents.
Defrost-Level (A, D)
Most of the air flow is directed to the
windshield with a small amount of air
directed to the side vents.
MAX A/C-Level (B, D)
To operate the MAX A/C, turn the fan
speed control knob to the right to
maximum fan speed, then press the
MAX A/C button. Air flow is directed
toward the upper body and face.
In this mode, the air conditioning, the
recirculated air position and max
cool temperature will be selected
automatically.
ODMECL2002ODM042277
Page 255 of 570
Features of your vehicle
152
4
✽
✽
NOTICE
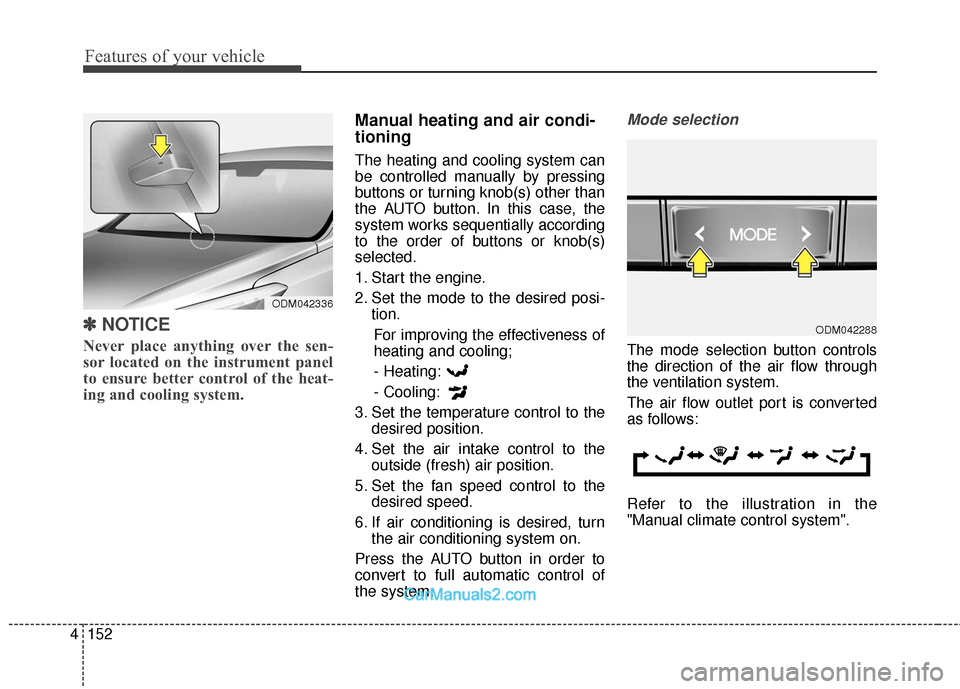
Never place anything over the sen-
sor located on the instrument panel
to ensure better control of the heat-
ing and cooling system.
Manual heating and air condi-
tioning
The heating and cooling system can
be controlled manually by pressing
buttons or turning knob(s) other than
the AUTO button. In this case, the
system works sequentially according
to the order of buttons or knob(s)
selected.
1. Start the engine.
2. Set the mode to the desired posi-
tion.
For improving the effectiveness of
heating and cooling;- Heating:
- Cooling:
3. Set the temperature control to the desired position.
4. Set the air intake control to the outside (fresh) air position.
5. Set the fan speed control to the desired speed.
6. If air conditioning is desired, turn the air conditioning system on.
Press the AUTO button in order to
convert to full automatic control of
the system.
Mode selection
The mode selection button controls
the direction of the air flow through
the ventilation system.
The air flow outlet port is converted
as follows:
Refer to the illustration in the
"Manual climate control system".
ODM042288
ODM042336