2018 Hyundai Kona battery capacity
[x] Cancel search: battery capacityPage 215 of 523

3-132
Convenient features of your vehicle
Sunvisor
To use a sunvisor, pull it downward.
To use a sunvisor for a side window,
pull it downward, unsnap it from the
bracket (1) and swing it to the side (2).
To use the vanity mirror, pull down the
sunvisor and slide the mirror cover (3).
Use the ticket holder (4) to hold tick-
ets.Information
Close the vanity mirror cover securely
and return the sunvisor to its original
position after use. Do not put several tickets in the
ticket holder at one time. This
could cause damage to the ticket
holder.
Power outlet (if equipped)
The power outlet is designed to pro-
vide power for mobile telephones or
other devices designed to operate
with vehicle electrical systems.The devices should draw less than
180 W(Watt) with the engine running.
To prevent damage to the Power Outlets :
Use the power outlet only when
the engine is running and remove
the accessory plug after use.
Using the accessory plug for pro-
longed periods of time with the
engine off could cause the battery
to discharge.
Only use 12V electric accessories which are less than 180 W(Watt) in
electric capacity.
Adjust the air-conditioner or heater to the lowest operating
level when using the power outlet.
Close the cover when not in use.
NOTICE
NOTICE
i
For your safety, do not block your
view when using the sunvisor.
WARNING
OOS047062
OOS047063 Avoid electrical shocks. Do not
place your fingers or foreign
objects (pin, etc.) into a power
outlet or touch the power outletwith a wet hand.
WARNING
Page 413 of 523

7
Maintenance
7
Maintenance
Engine compartment .............................................7-3
Maintenance services ...........................................7-4Owner's responsibility ......................................................7-4
Owner maintenance precautions ..................................7-4
Owner maintenance ...............................................7-5 Owner maintenance schedule ........................................7-5
Scheduled maintenance services.........................7-7 Normal Maintenance Schedule
(Gasoline Engine, for Europe) ........................................7-8
Maintenance Under Severe Usage
and Low Mileage Conditions
(Gasoline Engine, for Europe)......................................7-11Normal Maintenance Schedule
(Gasoline Engine, except Europe) ...............................7-13
Maintenance Under Severe Usage
and Low Mileage Conditions
(Gasoline Engine, except Europe) ...............................7-17
Explanation of scheduled maintenance items .7-19
Engine oil ..............................................................7-21 Checking the engine oil level (Gasoline engine) .....7-21
Checking the engine oil and filter ..............................7-23 Engine coolant......................................................7-23
Checking the engine coolant level..............................7-23
Changing the engine coolant .......................................7-25
Brake/clutch fluid ................................................7-26 Checking the brake/clutch fluid level ........................7-26
Washer fluid .........................................................7-27 Checking the washer fluid level ..................................7-27
Parking brake .......................................................7-27 Checking the parking brake .........................................7-27
Air cleaner ............................................................7-28 Filter replacement ...........................................................7-28
Climate control air filter .....................................7-29 Filter inspection ...............................................................7-29
Filter replacement ...........................................................7-29
Wiper blades .........................................................7-30 Blade inspection ..............................................................7-30
Blade replacement ..........................................................7-30
Battery...................................................................7-32 For best battery service................................................7-33
Battery capacity label ....................................................7-34
Battery recharging .........................................................7-34
Reset items .......................................................................7-35
7
Page 446 of 523

7-34
Maintenance
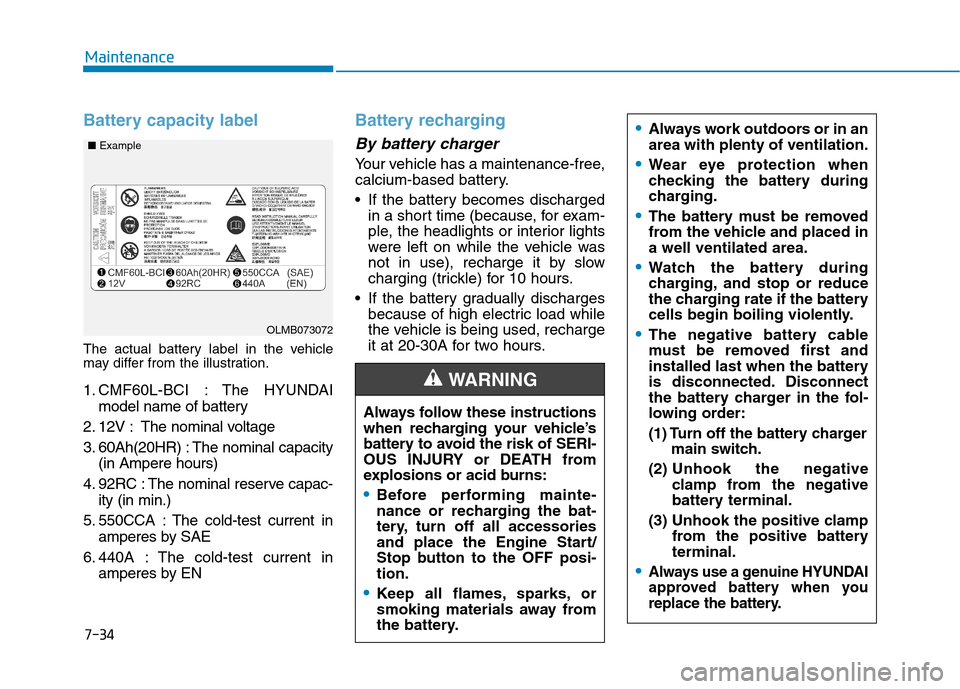
Battery capacity label
The actual battery label in the vehicle
may differ from the illustration.
1. CMF60L-BCI : The HYUNDAImodel name of battery
2. 12V : The nominal voltage
3. 60Ah(20HR) : The nominal capacity (in Ampere hours)
4. 92RC : The nominal reserve capac- ity (in min.)
5. 550CCA : The cold-test current in amperes by SAE
6. 440A : The cold-test current in amperes by EN
Battery recharging
By battery charger
Your vehicle has a maintenance-free,
calcium-based battery.
If the battery becomes dischargedin a short time (because, for exam-
ple, the headlights or interior lights
were left on while the vehicle was
not in use), recharge it by slow
charging (trickle) for 10 hours.
If the battery gradually discharges because of high electric load while
the vehicle is being used, recharge
it at 20-30A for two hours.
OLMB073072
■
Example
Always follow these instructions
when recharging your vehicle’s
battery to avoid the risk of SERI-
OUS INJURY or DEATH from
explosions or acid burns:
Before performing mainte-
nance or recharging the bat-
tery, turn off all accessories
and place the Engine Start/
Stop button to the OFF posi-tion.
Keep all flames, sparks, or
smoking materials away from
the battery.
WARNING
Always work outdoors or in an area with plenty of ventilation.
Wear eye protection when
checking the battery during
charging.
The battery must be removed
from the vehicle and placed ina well ventilated area.
Watch the battery during
charging, and stop or reduce
the charging rate if the battery
cells begin boiling violently.
The negative battery cable
must be removed first and
installed last when the battery
is disconnected. Disconnect
the battery charger in the fol-
lowing order:
(1) Turn off the battery chargermain switch.
(2) Unhook the negative
clamp from the negative
battery terminal.
(3) Unhook the positive clamp from the positive batteryterminal.
Always use a genuine HYUNDAI
approved battery when you
replace the battery.
Page 458 of 523

7-46
MaintenanceF
F UU SSEE SS
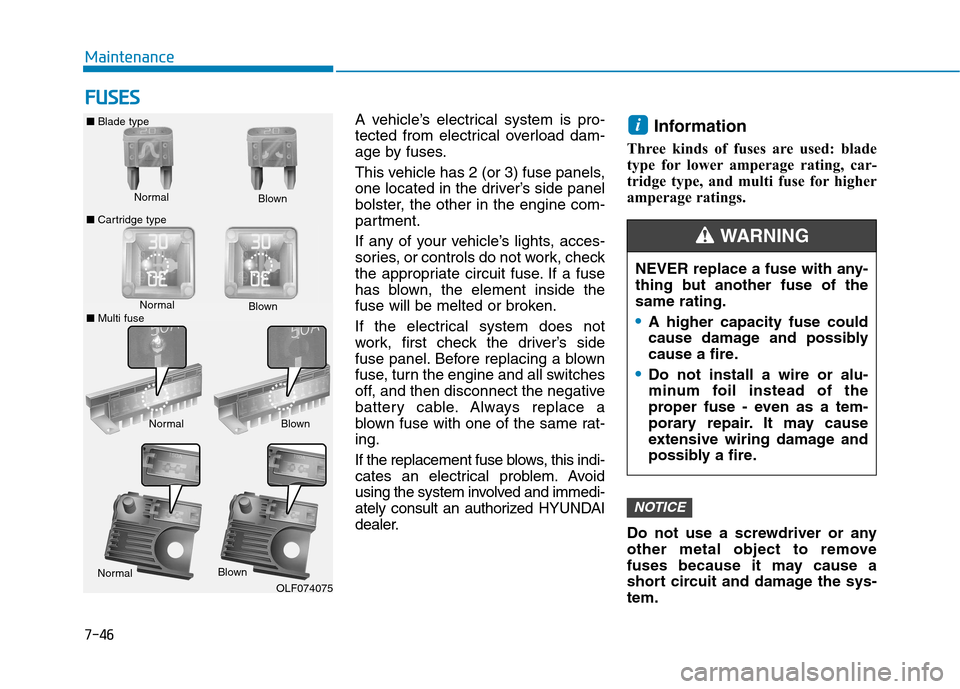
A vehicle’s electrical system is pro-
tected from electrical overload dam-
age by fuses.
This vehicle has 2 (or 3) fuse panels,
one located in the driver’s side panel
bolster, the other in the engine com-
partment.
If any of your vehicle’s lights, acces-
sories, or controls do not work, check
the appropriate circuit fuse. If a fuse
has blown, the element inside the
fuse will be melted or broken.
If the electrical system does not
work, first check the driver’s side
fuse panel. Before replacing a blown
fuse, turn the engine and all switches
off, and then disconnect the negative
battery cable. Always replace a
blown fuse with one of the same rat-ing.
If the replacement fuse blows, this indi-
cates an electrical problem. Avoid
using the system involved and immedi-
ately consult an authorized HYUNDAI
dealer. Information
Three kinds of fuses are used: blade
type for lower amperage rating, car-
tridge type, and multi fuse for higher
amperage ratings.
Do not use a screwdriver or any
other metal object to remove
fuses because it may cause a
short circuit and damage the sys-tem.
NOTICE
i
Normal
■
Blade type
■ Cartridge type Blown
Normal Blown
Normal Blown
OLF074075 NEVER replace a fuse with any-
thing but another fuse of thesame rating.
A higher capacity fuse could
cause damage and possibly
cause a fire.
Do not install a wire or alu-
minum foil instead of the
proper fuse - even as a tem-
porary repair. It may cause
extensive wiring damage and
possibly a fire.
WARNING
Normal
Blown
■ Multi fuse