2018 Hyundai Kona ABS
[x] Cancel search: ABSPage 480 of 523

7-68
Maintenance
5.Insert a new bulb by inserting it intothe socket and rotating it until it
locks into place.
6.Install the socket in the assembly by aligning the tabs on the socket
with the slots in the assembly.
7.Push the socket into the assembly and turn the socket clockwise.
Position lamp and daytime running
light
If the LED lamp does not operate, we
recommend that you have the vehicle
checked by an authorized HYUNDAI
dealer.
Front fog lamp (if equipped)
1. Loosen the pin-type retainers of the under cover and then remove the
undercover.
2. Reach your hand into the back of the front bumper.
3. Disconnect the power connector from the socket.
4. Remove the bulb-socket from the housing by turning the socket coun-
terclockwise until the tabs on the
socket align with the slots of thehousing.
5. Install a new bulb-socket into the housing by aligning the tabs on the
socket with the slots in the housing.
Push the socket into the housing
and turn the socket clockwise.
Headlamp and front fog lamp
aiming (for Europe)
Headlamp aiming
1. Inflate the tires to the specified pressure and remove any loads
from the vehicle except the driver,
spare tire, and tools.
2. The vehicle should be placed on a flat floor.
3. Draw vertical lines (Vertical lines passing through respective head
lamp centers) and a horizontal line
(Horizontal line passing throughcenter of head lamps) on thescreen.
OOS077059L
■Halogen type■LED type
OOS077060L/OOS077061L
Page 487 of 523

7-75
7
Maintenance
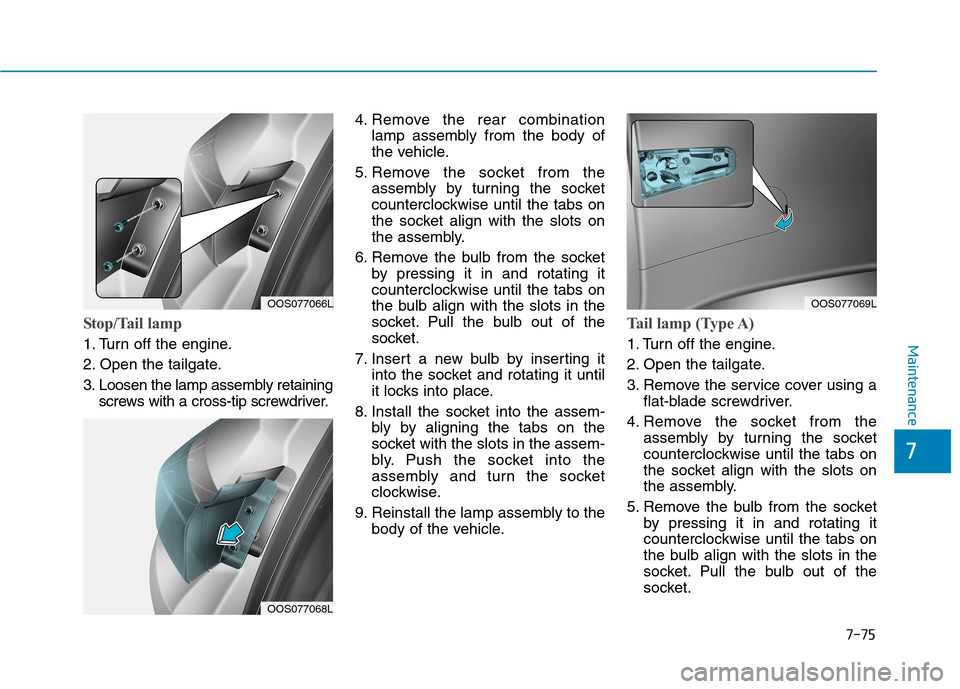
Stop/Tail lamp
1. Turn off the engine.
2. Open the tailgate.
3. Loosen the lamp assembly retainingscrews with a cross-tip screwdriver. 4. Remove the rear combination
lamp assembly from the body of
the vehicle.
5. Remove the socket from the assembly by turning the socket
counterclockwise until the tabs on
the socket align with the slots on
the assembly.
6. Remove the bulb from the socket by pressing it in and rotating it
counterclockwise until the tabs on
the bulb align with the slots in the
socket. Pull the bulb out of the
socket.
7. Insert a new bulb by inserting it into the socket and rotating it until
it locks into place.
8. Install the socket into the assem- bly by aligning the tabs on the
socket with the slots in the assem-
bly. Push the socket into the
assembly and turn the socket
clockwise.
9. Reinstall the lamp assembly to the body of the vehicle.
Tail lamp (Type A)
1. Turn off the engine.
2. Open the tailgate.
3. Remove the service cover using aflat-blade screwdriver.
4. Remove the socket from the assembly by turning the socket
counterclockwise until the tabs on
the socket align with the slots on
the assembly.
5. Remove the bulb from the socket by pressing it in and rotating it
counterclockwise until the tabs on
the bulb align with the slots in the
socket. Pull the bulb out of the
socket.
OOS077068L
OOS077069LOOS077066L
Page 488 of 523

7-76
Maintenance
6. Insert a new bulb by inserting itinto the socket and rotating it until
it locks into place.
7. Install the socket into the assem- bly by aligning the tabs on the
socket with the slots in the assem-
bly. Push the socket into the
assembly and turn the socket
clockwise.
8. Reinstall the lamp assembly to the body of the vehicle.
Tail / Stop lamp (Type B)
If the LED lamp does not operate, we
recommend you to have the vehicle
checked by an authorized HYUNDAI
dealer.
Turn signal lamp / Back up lamp /
Rear fog lamp
If these lamps do not operate, we
recommend you to have the vehicle
checked by an authorized HYUNDAI
dealer.
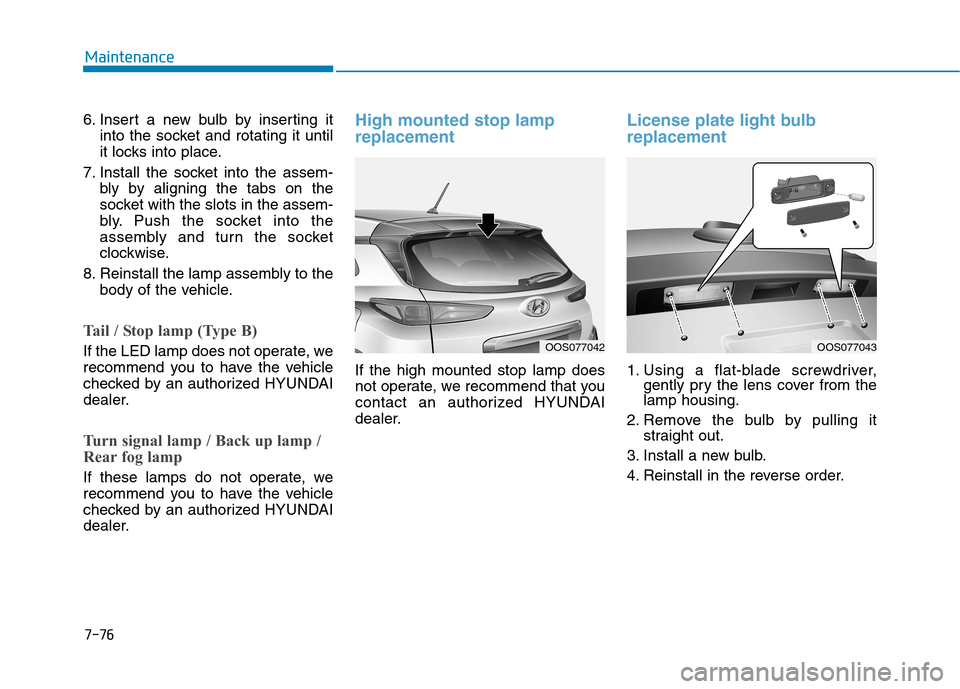
High mounted stop lamp replacement
If the high mounted stop lamp does
not operate, we recommend that you
contact an authorized HYUNDAI
dealer.
License plate light bulb replacement
1. Using a flat-blade screwdriver,gently pry the lens cover from the lamp housing.
2. Remove the bulb by pulling it straight out.
3. Install a new bulb.
4. Reinstall in the reverse order.
OOS077042OOS077043
Page 490 of 523

7-78
Maintenance
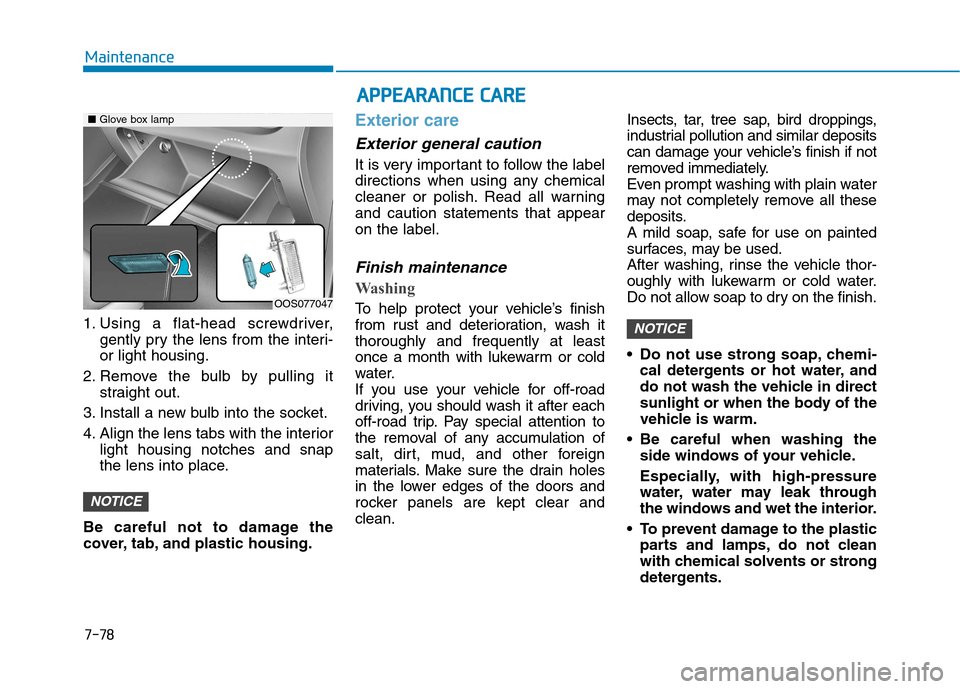
1. Using a flat-head screwdriver,gently pry the lens from the interi- or light housing.
2. Remove the bulb by pulling it straight out.
3. Install a new bulb into the socket.
4. Align the lens tabs with the interior light housing notches and snap
the lens into place.
Be careful not to damage the
cover, tab, and plastic housing.
Exterior care
Exterior general caution
It is very important to follow the label
directions when using any chemical
cleaner or polish. Read all warningand caution statements that appearon the label.
Finish maintenance
Washing
To help protect your vehicle’s finish
from rust and deterioration, wash itthoroughly and frequently at least
once a month with lukewarm or cold
water.
If you use your vehicle for off-road
driving, you should wash it after each
off-road trip. Pay special attention to
the removal of any accumulation of
salt, dirt, mud, and other foreign
materials. Make sure the drain holes
in the lower edges of the doors and
rocker panels are kept clear andclean. Insects, tar, tree sap, bird droppings,
industrial pollution and similar deposits
can damage your vehicle’s finish if not
removed immediately.
Even prompt washing with plain water
may not completely remove all these
deposits.
A mild soap, safe for use on painted
surfaces, may be used.
After washing, rinse the vehicle thor-
oughly with lukewarm or cold water.
Do not allow soap to dry on the finish.
Do not use strong soap, chemi-
cal detergents or hot water, and
do not wash the vehicle in direct
sunlight or when the body of the
vehicle is warm.
Be careful when washing the side windows of your vehicle.
Especially, with high-pressure
water, water may leak through
the windows and wet the interior.
To prevent damage to the plastic parts and lamps, do not clean
with chemical solvents or strong
detergents.
NOTICE
NOTICE
■Glove box lamp
OOS077047
AA PPPPEEAA RRAA NN CCEE CC AA RREE
Page 496 of 523

7-84
Maintenance
Caring for the leather seats- Vacuum the seat periodically toremove dust and sand on the seat.
It will prevent abrasion or damageof the leather and maintain its qual-
ity.
- Wipe the natural leather seat cover often with dry or soft cloth.
- Use of proper leather protector may prevent abrasion of the cover
and helps maintain the color. Be
sure to read the instructions andconsult a specialist when using
leather coating or protective agent.
- Light colored (beige, cream beige) leather is easily contaminated and
the stain is noticeable. Clean the
seats frequently.
- Avoid wiping with wet cloth. It may cause the surface to crack. Cleaning the leather seats
- Remove all contaminations instant-ly. Refer to instructions below for
removal of each contaminant.
- Cosmetic products (sunscreen, foundation, etc.)
Apply cleansing cream on a clothand wipe the contaminated spot.
Wipe off the cream with a wet cloth
and remove water with a dry cloth.
- Beverages (coffee, soft drink, etc.) Apply a small amount of neutraldetergent and wipe until contami-
nations do not smear.
- Oil Remove oil instantly with
absorbable cloth and wipe with
stain remover used only for natu-
ral leather.
- Chewing gum Harden the gum with ice and
remove gradually.Cleaning the lap/shoulder beltwebbing
Clean the belt webbing with any mild
soap solution recommended for clean-
ing upholstery or carpet. Follow the
instructions provided with the soap. Do
not bleach or re-dye the webbing
because this may weaken it.
Cleaning the interior windowglass
If the interior glass surfaces of the
vehicle become fogged (that is, cov-
ered with an oily, greasy or waxy film),
they should be cleaned with glass
cleaner. Follow the directions on the
glass cleaner container.
Do not scrape or scratch the inside
of the rear window. This may result
in damage to the rear window
defroster grid.
NOTICE
Page 497 of 523

7-85
7
Maintenance
EEMM IISS SSIIOO NN CC OO NNTTRR OO LL SS YY SSTT EEMM
The emission control system of your
vehicle is covered by a written limited
warranty. Please see the warranty
information contained in the Service
Passport in your vehicle.
Your vehicle is equipped with an emission control system to meet all
emission regulations. There are three emission control
systems which are as follows.
(1) Crankcase emission control sys-
tem
(2) Evaporative emission control sys- tem
(3) Exhaust emission control systemIn order to ensure the proper function
of the emission control systems, it is
recommended that you have your car
inspected and maintained by an
authorized HYUNDAI dealer in accor-dance with the maintenance schedule
in this manual.
1. Crankcase emission control system
The positive crankcase ventilation
system is employed to prevent air
pollution caused by blow-by gases
being emitted from the crankcase.This system supplies fresh filtered air
to the crankcase through the air
intake hose. Inside the crankcase,
the fresh air mixes with blow-by
gases, which then pass through the
PCV valve into the induction system.
2. Evaporative emission con-trol system
The Evaporative Emission Control
System is designed to prevent fuel
vapors from escaping into the atmos-
phere.
Canister
Fuel vapors generated inside the fueltank are absorbed and stored in the
onboard canister. When the engine is
running, the fuel vapors absorbed in
the canister are drawn into the surgetank through the purge control sole-
noid valve.
Purge Control Solenoid Valve
(PCSV)
The purge control solenoid valve is
controlled by the Engine Control
Module (ECM); when the engine
coolant temperature is low during
idling, the PCSV closes so that evap-
orated fuel is not taken into the
engine. After the engine warms-up
during ordinary driving, the PCSV
opens to introduce evaporated fuel to
the engine.
For the Inspection and Maintenance
Test (with Electronic Stability Control(ESC) system)
To prevent the vehicle from
misfiring during dynamome-
ter testing, turn the Electronic
Stability Control (ESC) sys-
tem off by pressing the ESC
switch.
After dynamometer testing is
completed, turn the ESC sys-
tem back on by pressing the
ESC switch again.
CAUTION
Page 513 of 523

I-2Air bag warning labels .................................................2-64
Air bags.........................................................................2-45
Driver's air bag .........................................................2-48
Passenger's front air bag ..........................................2-48
Passenger's front air bag ON/OFF switch................2-49
Side air bags .............................................................2-51
Curtain air bags ........................................................2-52
How does the air bags system operate? ...................2-53
SRS components and functions ...............................2-53
SRS warning light ....................................................2-54
What to expect after an air bag inflates ...................2-57
Do not install a child restraint on the front passenger seat ........................................................2-58
Air bag collision sensors ..........................................2-58
Why didn't my air bag go off in a collision .............2-58
Air bag inflation conditions .....................................2-60
Air bag non-inflation conditions ..............................2-61
SRS Care ..................................................................2-63
Additional safety precautions ..................................2-63
Air bag warning labels .............................................2-64
Air cleaner ....................................................................7-28
Air conditioner compressor label .................................8-11
Air conditioning refrigerant label .......................3-115, 123
Air conditioning system specification ............................8-5
Alarm system ................................................................3-16
Antenna ...........................................................................4-2
Anti-lock brake system (ABS) .....................................5-31 Appearance care ...........................................................7-78
Exterior care .............................................................7-78
Interior care ..............................................................7-82
Armrest .........................................................................2-14
Audio / Video / Navigation system ................................4-4
Auto defogging system ...............................................3-126
Auto light position ........................................................3-83
Automatic climate control system ..............................3-116
Automatic ventilation .................................................3-127
Aux, USB and iPod ........................................................4-2
Battery...........................................................................7-32 Battery recharging ....................................................7-34
Battery saver function...................................................3-90
Before driving .................................................................5-4
Blade type fuse .............................................................7-48
Blind-spot Collsion Warning (BCW) system ...............5-55
Bluetooth ®
Wireless Technology hands-free ..................4-4
Bottle holder ...............................................................3-131
Brake system.................................................................5-28 Power brakes ............................................................5-28
Disc brakes wear indicator.......................................5-29
Parking brake ...........................................................5-29
Anti-lock brake system (ABS).................................5-31
Electronic stability control (ESC) ............................5-33
Vehicle stability management (VSM) ......................5-36
Hill-start assist control (HAC) .................................5-37
Index
A
B