Page 121 of 343
Features of your vehicle
60 4
WARNING
Do not use high beam when there
are other vehicles. Using high beam
could obstruct the other driver's
vision.
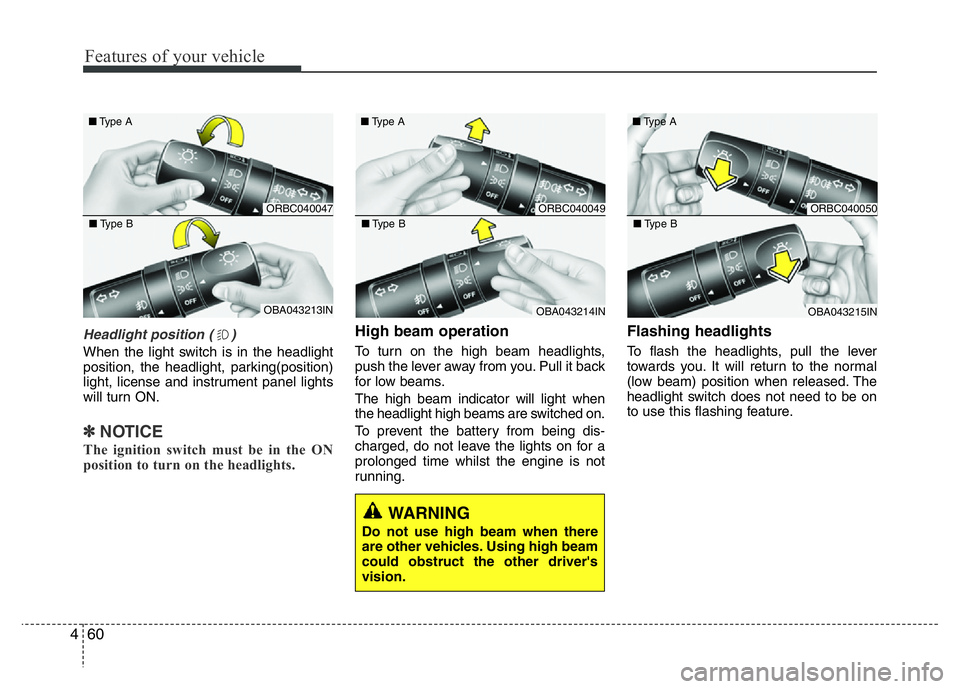
Headlight position ( )
When the light switch is in the headlight
position, the headlight, parking(position)
light, license and instrument panel lights
will turn ON.
✽NOTICE
The ignition switch must be in the ON
position to turn on the headlights.
High beam operation
To turn on the high beam headlights,
push the lever away from you. Pull it back
for low beams.
The high beam indicator will light when
the headlight high beams are switched on.
To prevent the battery from being dis-
charged, do not leave the lights on for a
prolonged time whilst the engine is not
running.
Flashing headlights
To flash the headlights, pull the lever
towards you. It will return to the normal
(low beam) position when released. The
headlight switch does not need to be on
to use this flashing feature.
ORBC040047 ■Type A
OBA043213IN ■Type B
ORBC040049 ■Type A
OBA043214IN ■Type B
ORBC040050 ■Type A
OBA043215IN ■Type B
Page 125 of 343
Features of your vehicle
64 4
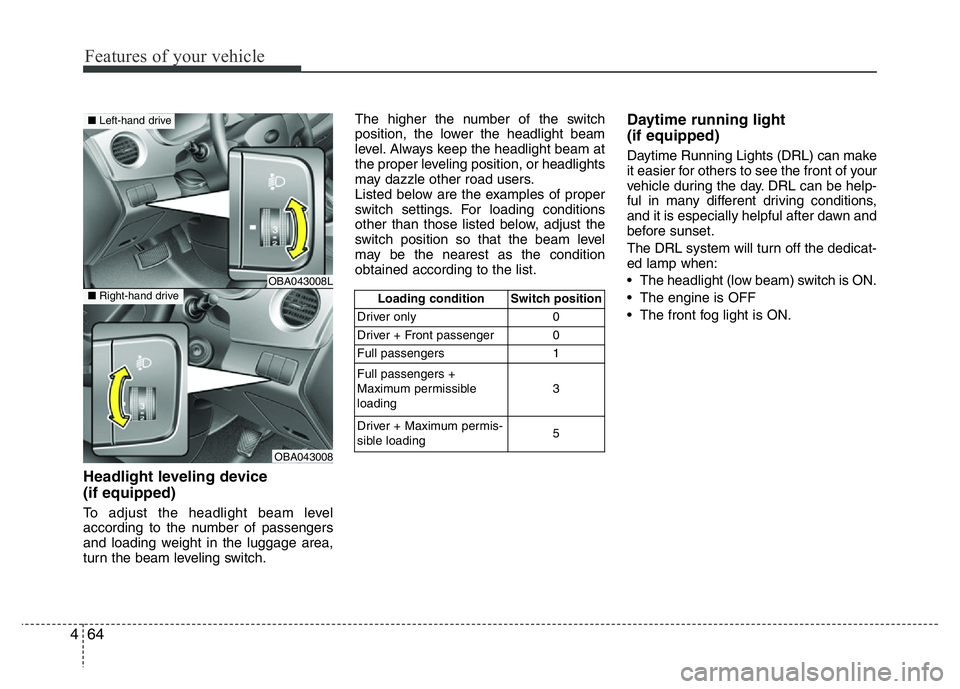
Headlight leveling device
(if equipped)
To adjust the headlight beam level
according to the number of passengers
and loading weight in the luggage area,
turn the beam leveling switch.The higher the number of the switch
position, the lower the headlight beam
level. Always keep the headlight beam at
the proper leveling position, or headlights
may dazzle other road users.
Listed below are the examples of proper
switch settings. For loading conditions
other than those listed below, adjust the
switch position so that the beam level
may be the nearest as the condition
obtained according to the list.
Daytime running light
(if equipped)
Daytime Running Lights (DRL) can make
it easier for others to see the front of your
vehicle during the day. DRL can be help-
ful in many different driving conditions,
and it is especially helpful after dawn and
before sunset.
The DRL system will turn off the dedicat-
ed lamp when:
• The headlight (low beam) switch is ON.
• The engine is OFF
• The front fog light is ON.
Loading condition Switch position
Driver only 0
Driver + Front passenger 0
Full passengers 1
Full passengers +
Maximum permissible
loading3
Driver + Maximum permis-
sible loading 5
OBA043008L
OBA043008
■Left-hand drive
■Right-hand drive
Page 129 of 343
Features of your vehicle
68 4
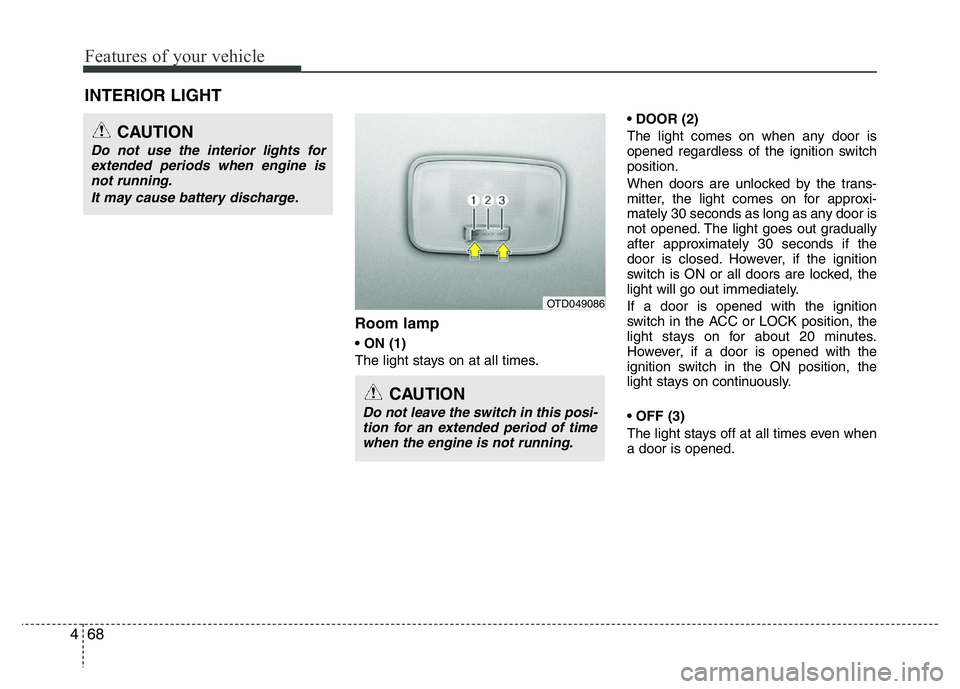
Room lamp
• ON (1)
The light stays on at all times.• DOOR (2)
The light comes on when any door is
opened regardless of the ignition switch
position.
When doors are unlocked by the trans-
mitter, the light comes on for approxi-
mately 30 seconds as long as any door is
not opened. The light goes out gradually
after approximately 30 seconds if the
door is closed. However, if the ignition
switch is ON or all doors are locked, the
light will go out immediately.
If a door is opened with the ignition
switch in the ACC or LOCK position, the
light stays on for about 20 minutes.
However, if a door is opened with the
ignition switch in the ON position, the
light stays on continuously.
• OFF (3)
The light stays off at all times even when
a door is opened.
INTERIOR LIGHT
CAUTION
Do not use the interior lights for
extended periods when engine is
not running.
It may cause battery discharge.
CAUTION
Do not leave the switch in this posi-
tion for an extended period of time
when the engine is not running.
OTD049086
Page 131 of 343
Features of your vehicle
70 4
✽NOTICE
If you want to defrost and defog the
front windshield, refer to “Windshield
defrosting and defogging” in this chap-
ter.
Rear window defroster
(if equipped)
The defroster heats the window to
remove frost, fog and thin ice from the
interior and exterior of the rear window,
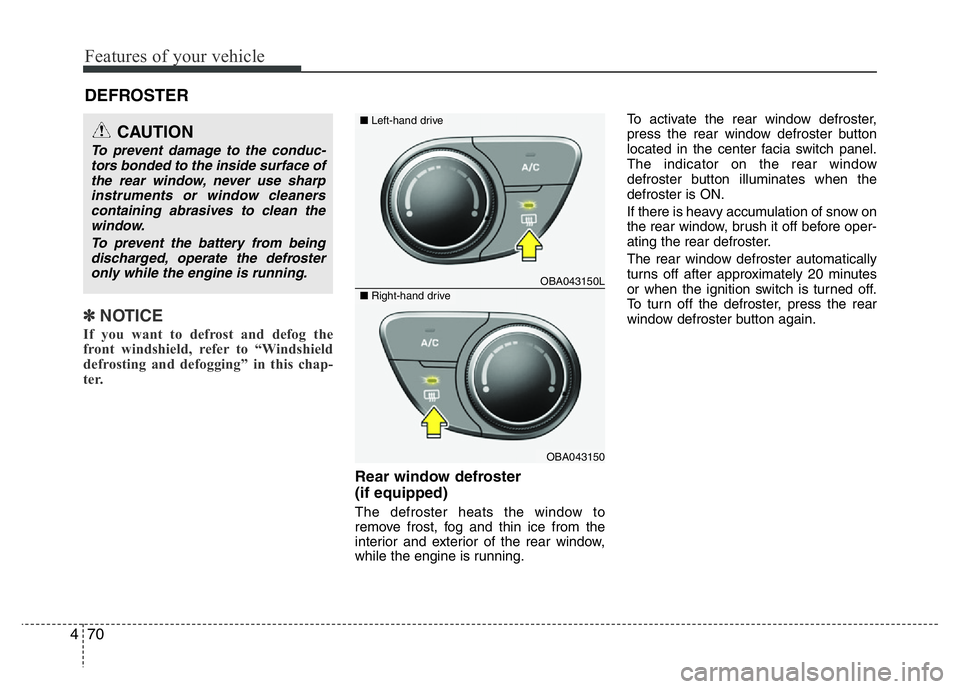
while the engine is running.To activate the rear window defroster,
press the rear window defroster button
located in the center facia switch panel.
The indicator on the rear window
defroster button illuminates when the
defroster is ON.
If there is heavy accumulation of snow on
the rear window, brush it off before oper-
ating the rear defroster.
The rear window defroster automatically
turns off after approximately 20 minutes
or when the ignition switch is turned off.
To turn off the defroster, press the rear
window defroster button again.
DEFROSTER
CAUTION
To prevent damage to the conduc-
tors bonded to the inside surface of
the rear window, never use sharp
instruments or window cleaners
containing abrasives to clean the
window.
To prevent the battery from being
discharged, operate the defroster
only while the engine is running.
OBA043150L
OBA043150
■Left-hand drive
■Right-hand drive
Page 133 of 343
Features of your vehicle
72 4
Heating and air conditioning
1. Start the engine.
2. Set the mode to the desired position.
To improve the effectiveness of heat-
ing and cooling :
- Heating:
- Cooling:
3. Set the temperature control to the
desired position.
4. Set the air intake control to the outside
(fresh) air or recirculated air position.
5. Set the fan speed control to the
desired speed.
6. If air conditioning is desired, turn the air
conditioning system (if equipped) on.
OBA043152L/OBA043152
■Right-hand drive ■Left-hand drive
Page 138 of 343
477
Features of your vehicle
Air conditioning (if equipped)
All HYUNDAI Air Conditioning Systems
are filled with environmentally friendly
R-134a refrigerant.
1. Start the engine. Push the air condi-
tioning button.
2. Set the mode to the position.
3. Set the air intake control to the recircu-
lated air position. However, prolonged
operation of the recirculated air posi-
tion will excessively dry the air. In this
case, change the air position.
4. Adjust the fan speed control and tem-
perature control to maintain maximum
comfort.
When maximum cooling is desired, set
the temperature control to the extreme
left, set the air intake control to the
recirculated air position, then set the
fan speed control to the highest speed.✽NOTICE
• While using the air conditioning sys-
tem, monitor the temperature gauge
closely while driving up hills or in
heavy traffic when outside tempera-
tures are high. Air conditioning sys-
tem operation may cause engine over-
heating. Continue to use the blower
fan but turn the air conditioning sys-
tem off if the temperature gauge indi-
cates engine overheating.
• While opening the windows in humid
weather air conditioning may create
water droplets inside the vehicle.
Since excessive water droplets may
cause damage to electrical equipment,
air conditioning should only be used
with the windows closed.
Air conditioning system operation tips
• If the vehicle has been parked in direct
sunlight during hot weather, open the
windows for a short time to let the hot
air inside the vehicle escape.
• To help reduce moisture inside of the
windows on rainy or humid days,
decrease the humidity inside the vehicle
by operating the air conditioning system.
• During air conditioning system opera-
tion, you may occasionally notice a slight
change in engine speed as the air con-
ditioning compressor cycles. This is a
normal system operation characteristic.
• Use the air conditioning system every
month only for a few minutes to ensure
maximum system performance.
• When using the air conditioning system,
you may notice clear water dripping (or
even puddling) on the ground under the
passenger side of the vehicle. This is a
normal system operation characteristic.
• Operating the air conditioning system
in the recirculated air position provides
maximum cooling, however, continual
operation in this mode may cause the
air inside the vehicle to become stale.
• During cooling operation, you may
occasionally notice a misty air flow
because of rapid cooling and humid air
intake. This is a normal system opera-
tion characteristics.
Page 146 of 343
485
Features of your vehicle
Sunvisor
Use the sunvisor to shield direct light
through the front or side windows.
A mirror (if equipped) and ticket holder (if
equipped) is provided on the sunvisor.
Power outlet
The power outlet is designed to provide
power for mobile telephones or other
devices designed to operate with vehicle
electrical systems. The devices should
draw less than 15 amps with the engine
running.
OBA043209L
OBA043209
OBA043229IN
OBA043031R
■Driver’s side
■Passenger’s side
■Front-Left-hand drive
■Front-Right-hand driveOBA043225IN
■Rear
Page 147 of 343
Features of your vehicle
86 4
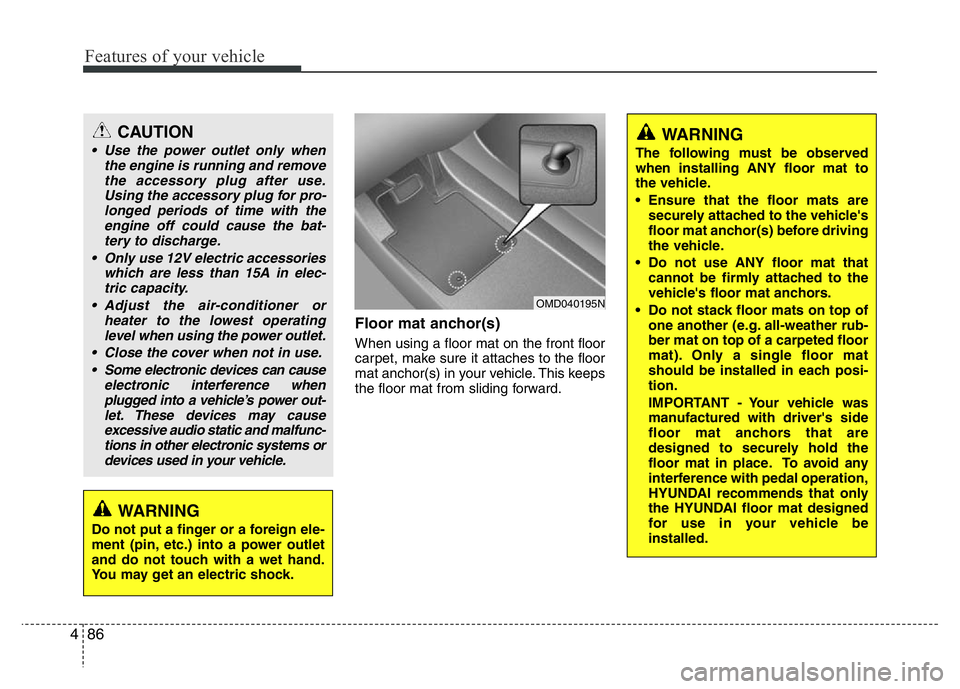
Floor mat anchor(s)
When using a floor mat on the front floor
carpet, make sure it attaches to the floor
mat anchor(s) in your vehicle. This keeps
the floor mat from sliding forward.
OMD040195N
CAUTION
• Use the power outlet only when
the engine is running and remove
the accessory plug after use.
Using the accessory plug for pro-
longed periods of time with the
engine off could cause the bat-
tery to discharge.
• Only use 12V electric accessories
which are less than 15A in elec-
tric capacity.
• Adjust the air-conditioner or
heater to the lowest operating
level when using the power outlet.
• Close the cover when not in use.
• Some electronic devices can cause
electronic interference when
plugged into a vehicle’s power out-
let. These devices may cause
excessive audio static and malfunc-
tions in other electronic systems or
devices used in your vehicle.
WARNING
Do not put a finger or a foreign ele-
ment (pin, etc.) into a power outlet
and do not touch with a wet hand.
You may get an electric shock.
WARNING
The following must be observed
when installing ANY floor mat to
the vehicle.
• Ensure that the floor mats are
securely attached to the vehicle's
floor mat anchor(s) before driving
the vehicle.
• Do not use ANY floor mat that
cannot be firmly attached to the
vehicle's floor mat anchors.
• Do not stack floor mats on top of
one another (e.g. all-weather rub-
ber mat on top of a carpeted floor
mat). Only a single floor mat
should be installed in each posi-
tion.
IMPORTANT - Your vehicle was
manufactured with driver's side
floor mat anchors that are
designed to securely hold the
floor mat in place. To avoid any
interference with pedal operation,
HYUNDAI recommends that only
the HYUNDAI floor mat designed
for use in your vehicle be
installed.