2018 HYUNDAI ELANTRA SPORT ignition
[x] Cancel search: ignitionPage 356 of 534
5-115
Driving your vehicle
5
Information
During normal cruise control opera- tion, when the SET switch is activat-
ed or reactivated after applying the
brakes, the cruise control will ener-
gize after approximately 3 seconds.
This delay is normal.
Before activating the cruise control function, the system will check to
verify that the brake switch is oper-
ating normally. Depress the brake
pedal at least once after turning ON
the ignition or starting the engine.To set Cruise Control speed
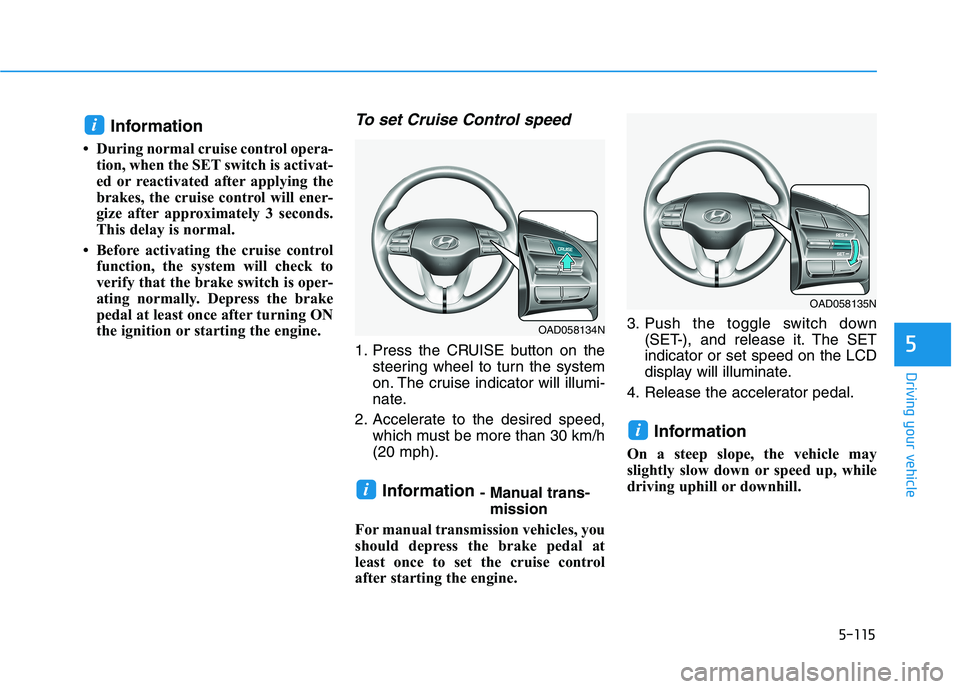
1. Press the CRUISE button on the steering wheel to turn the system
on. The cruise indicator will illumi-
nate.
2. Accelerate to the desired speed, which must be more than 30 km/h(20 mph).
Information - Manual trans-
mission
For manual transmission vehicles, you
should depress the brake pedal at
least once to set the cruise control
after starting the engine. 3. Push the toggle switch down
(SET-), and release it. The SETindicator or set speed on the LCD
display will illuminate.
4. Release the accelerator pedal.
Information
On a steep slope, the vehicle may
slightly slow down or speed up, while
driving uphill or downhill.
i
i
i
OAD058135N
OAD058134N
Page 381 of 534

5-140
Driving your vehicle
Check battery and cables
Winter puts additional burdens on
the battery system. Visually inspect
the battery and cables as described
in chapter 7. The level of charge in
your battery can be checked by an
authorized HYUNDAI dealer or a
service station.
Check spark plugs and ignitionsystem
Inspect your spark plugs as
described in chapter 7 and replace
them if necessary. Also check all
ignition wiring and components to be
sure they are not cracked, worn or
damaged in any way.
Use approved window washeranti-freeze in system
To keep the water in the window
washer system from freezing, add an
approved window washer anti-freeze
solution in accordance with instruc-
tions on the container. Window wash-
er anti-freeze is available from an
authorized HYUNDAI dealer and
most auto parts outlets. Do not useengine coolant or other types of anti-
freeze as these may damage thepaint finish.
Do not let your parking brake
freeze
Under some conditions your parking
brake can freeze in the engaged
position. This is most likely to happen
when there is an accumulation of
snow or ice around or near the rear
brakes or if the brakes are wet. If
there is a risk the parking brake may
freeze, apply it only temporarily while
you put the gear selector lever in P
and block the rear wheels so the car
cannot roll. Then release the parking
brake.
Do not let ice and snow accu-mulate underneath
Under some conditions, snow and
ice can build up under the fenders
and interfere with the steering. When
driving in severe winter conditions
where this may happen, you should
periodically check underneath the
car to be sure the movement of the
front wheels and the steering com-
ponents is not obstructed.
Don't place foreign objects ormaterials in the engine com-
partment
Placement of foreign object or mate-
rials which prevent cooling of the
engine, in the engine compartment,
may cause a failure or combustion.
The manufacturer is not responsible
for the damage caused by suchplacement.
Page 392 of 534
6-3
What to do in an emergency
If the Engine Stalls While Driving
Reduce your speed gradually,keeping a straight line. Move cau-
tiously off the road to a safe place.
Turn on your hazard warning flash- er.
Try to start the engine again. If your vehicle will not start, contact an
authorized HYUNDAI dealer or
seek other qualified assistance.
If the Engine Stalls at a
Crossroad or Crossing
If the engine stalls at a crossroad or
crossing, if safe to do so, move the
shift lever to the N (Neutral) position
and then push the vehicle to a safelocation.
If You Have a Flat Tire While Driving
If a tire goes flat while you are driv- ing:
Take your foot off the acceleratorpedal and let the vehicle slow
down while driving straight ahead.
Do not apply the brakes immedi-ately or attempt to pull off the road
as this may cause loss of vehiclecontrol resulting in an accident.
When the vehicle has slowed to
such a speed that it is safe to do
so, brake carefully and pull off the
road. Drive off the road as far as
possible and park on firm, level
ground. If you are on a divided
highway, do not park in the median
area between the two traffic lanes.
When the vehicle is stopped, press the hazard warning flasher button,
move the shift lever into P(Park),
and apply the parking brake, and
place the ignition switch in theLOCK/OFF position.
Have all passengers get out of the vehicle. Be sure they all get out on
the side of the vehicle that is away
from traffic. When changing a flat tire, follow
the instructions provided later in
this chapter.
IINN CC AA SSEE OO FF AA NN EE MM EERR GG EENN CCYY WW HHIILL EE DD RRIIVV IINN GG
6
Page 394 of 534
6-5
What to do in an emergency
6
InformationAn inappropriately disposedbattery can be harmful to the
environment and human
health. Dispose of the battery
according to your local law(s)
or regulations. To prevent damage to your vehi-
cle:
• Only use a 12-volt power supply
(battery or jumper system) to
jump start your vehicle.
Do not attempt to jump start your vehicle by push-starting.
Jump starting procedure
1. Position the vehicles close enough that the jumper cables will reach,
but do not allow the vehicles totouch.
2. Avoid fans or any moving parts in the engine compartment at all
times, even when the vehicles are
turned off.
3. Turn off all electrical devices such as radios, lights, air conditioning,
etc. Put the vehicles in P (Park)
and set the parking brakes. Turn
both vehicles OFF.
NOTICE
i
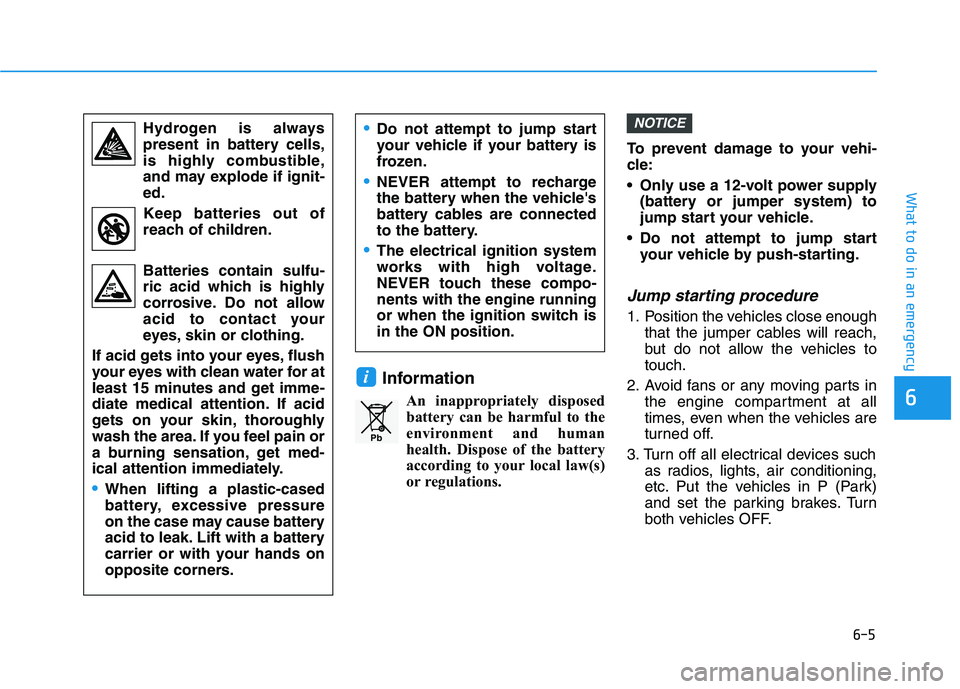
Hydrogen is alwayspresent in battery cells,
is highly combustible,
and may explode if ignit-ed.
Keep batteries out of
reach of children. Batteries contain sulfu-
ric acid which is highly
corrosive. Do not allow
acid to contact your
eyes, skin or clothing.
If acid gets into your eyes, flush
your eyes with clean water for at
least 15 minutes and get imme-
diate medical attention. If acid
gets on your skin, thoroughly
wash the area. If you feel pain or
a burning sensation, get med-
ical attention immediately.
When lifting a plastic-cased
battery, excessive pressure
on the case may cause battery
acid to leak. Lift with a battery
carrier or with your hands on
opposite corners.
Do not attempt to jump start
your vehicle if your battery is
frozen.
NEVER attempt to recharge
the battery when the vehicle's
battery cables are connected
to the battery.
The electrical ignition system
works with high voltage.
NEVER touch these compo-nents with the engine running
or when the ignition switch isin the ON position.
Pb
Page 399 of 534
6-10
What to do in an emergency
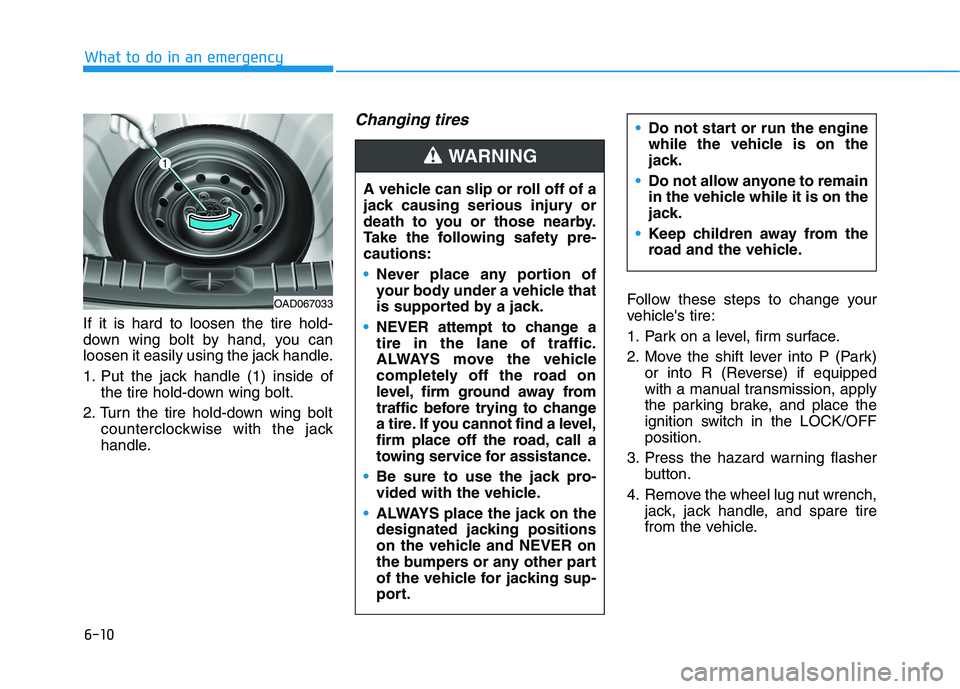
If it is hard to loosen the tire hold-
down wing bolt by hand, you can
loosen it easily using the jack handle.
1. Put the jack handle (1) inside ofthe tire hold-down wing bolt.
2. Turn the tire hold-down wing bolt counterclockwise with the jack
handle.
Changing tires
Follow these steps to change your
vehicle's tire:
1. Park on a level, firm surface.
2. Move the shift lever into P (Park)or into R (Reverse) if equipped
with a manual transmission, apply
the parking brake, and place the
ignition switch in the LOCK/OFFposition.
3. Press the hazard warning flasher button.
4. Remove the wheel lug nut wrench, jack, jack handle, and spare tire
from the vehicle.
A vehicle can slip or roll off of a
jack causing serious injury or
death to you or those nearby.
Take the following safety pre-cautions:
Never place any portion of
your body under a vehicle that
is supported by a jack.
NEVER attempt to change a tire in the lane of traffic.
ALWAYS move the vehicle
completely off the road on
level, firm ground away from
traffic before trying to change
a tire. If you cannot find a level,
firm place off the road, call a
towing service for assistance.
Be sure to use the jack pro-
vided with the vehicle.
ALWAYS place the jack on the
designated jacking positions
on the vehicle and NEVER on
the bumpers or any other part
of the vehicle for jacking sup-
port.
Do not start or run the engine
while the vehicle is on the
jack.
Do not allow anyone to remain
in the vehicle while it is on the
jack.
Keep children away from the
road and the vehicle.
WARNING
OAD067033
Page 409 of 534
6-20
What to do in an emergency
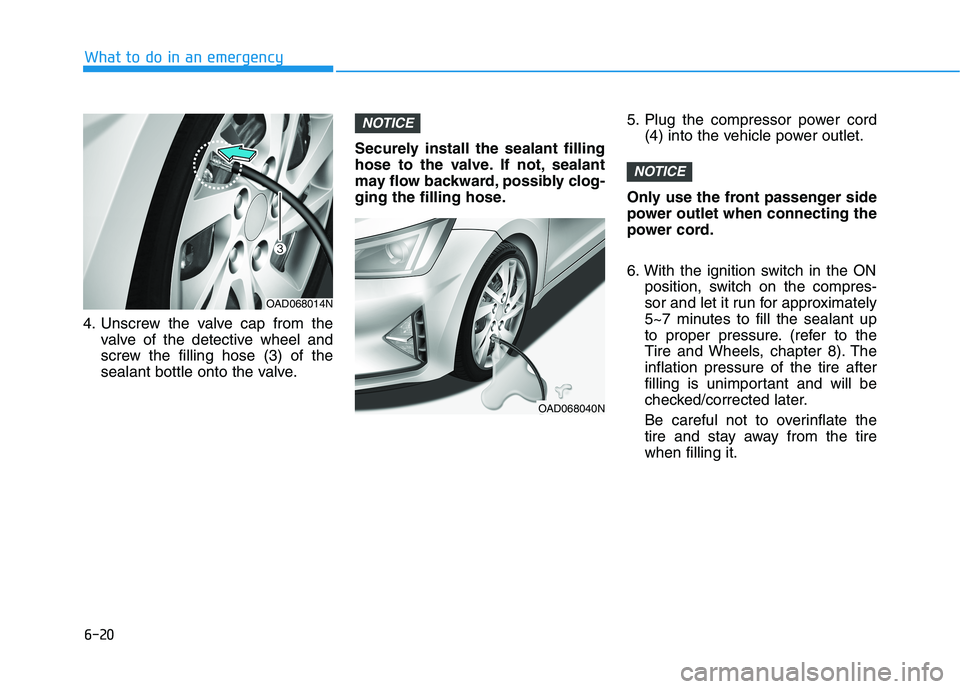
4. Unscrew the valve cap from thevalve of the detective wheel and
screw the filling hose (3) of the
sealant bottle onto the valve. Securely install the sealant filling
hose to the valve. If not, sealant
may flow backward, possibly clog-
ging the filling hose.
5. Plug the compressor power cord
(4) into the vehicle power outlet.
Only use the front passenger side
power outlet when connecting the
power cord.
6. With the ignition switch in the ON position, switch on the compres-
sor and let it run for approximately
5~7 minutes to fill the sealant up
to proper pressure. (refer to the
Tire and Wheels, chapter 8). Theinflation pressure of the tire after
filling is unimportant and will be
checked/corrected later.
Be careful not to overinflate the
tire and stay away from the tirewhen filling it.
NOTICE
NOTICE
OAD068014N
OAD068040N
Page 411 of 534
6-22
What to do in an emergency
Checking the tire inflation pres-sure
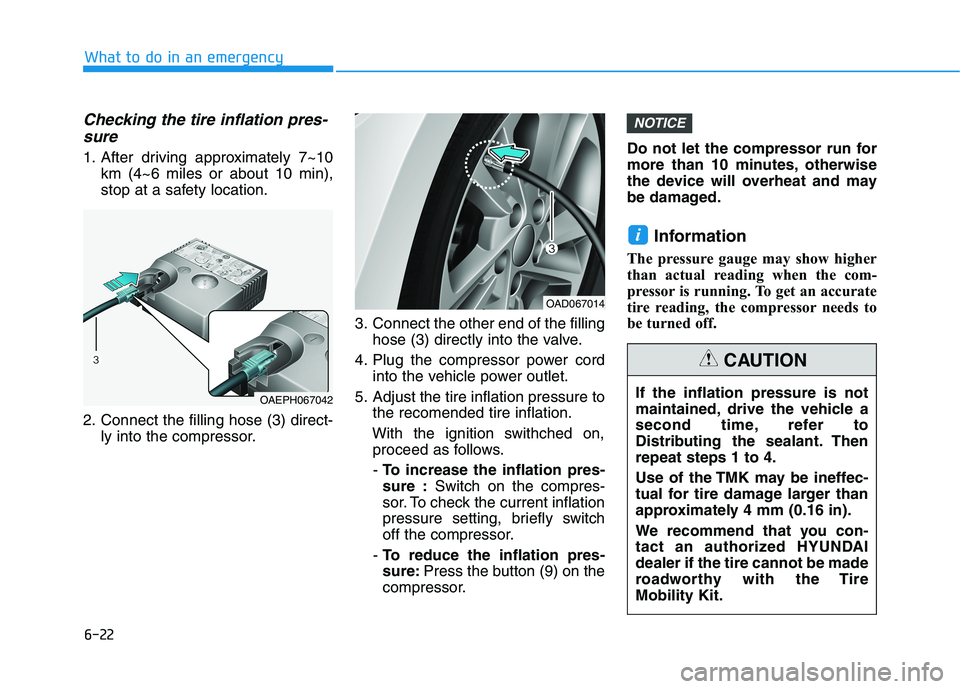
1. After driving approximately 7~10 km (4~6 miles or about 10 min),
stop at a safety location.
2. Connect the filling hose (3) direct- ly into the compressor. 3. Connect the other end of the filling
hose (3) directly into the valve.
4. Plug the compressor power cord into the vehicle power outlet.
5. Adjust the tire inflation pressure to the recomended tire inflation.
With the ignition swithched on, proceed as follows.
- To increase the inflation pres-sure : Switch on the compres-
sor. To check the current inflation
pressure setting, briefly switch
off the compressor.
- To reduce the inflation pres-sure: Press the button (9) on the
compressor. Do not let the compressor run for
more than 10 minutes, otherwise
the device will overheat and may
be damaged.
Information
The pressure gauge may show higher
than actual reading when the com-
pressor is running. To get an accurate
tire reading, the compressor needs to
be turned off.
i
NOTICE
If the inflation pressure is not
maintained, drive the vehicle a
second time, refer to
Distributing the sealant. Thenrepeat steps 1 to 4.
Use of the TMK may be ineffec-
tual for tire damage larger than
approximately 4 mm (0.16 in).
We recommend that you con-
tact an authorized HYUNDAIdealer if the tire cannot be made
roadworthy with the TireMobility Kit.
CAUTION
OAEPH067042
OAD067014
Page 417 of 534
6-28
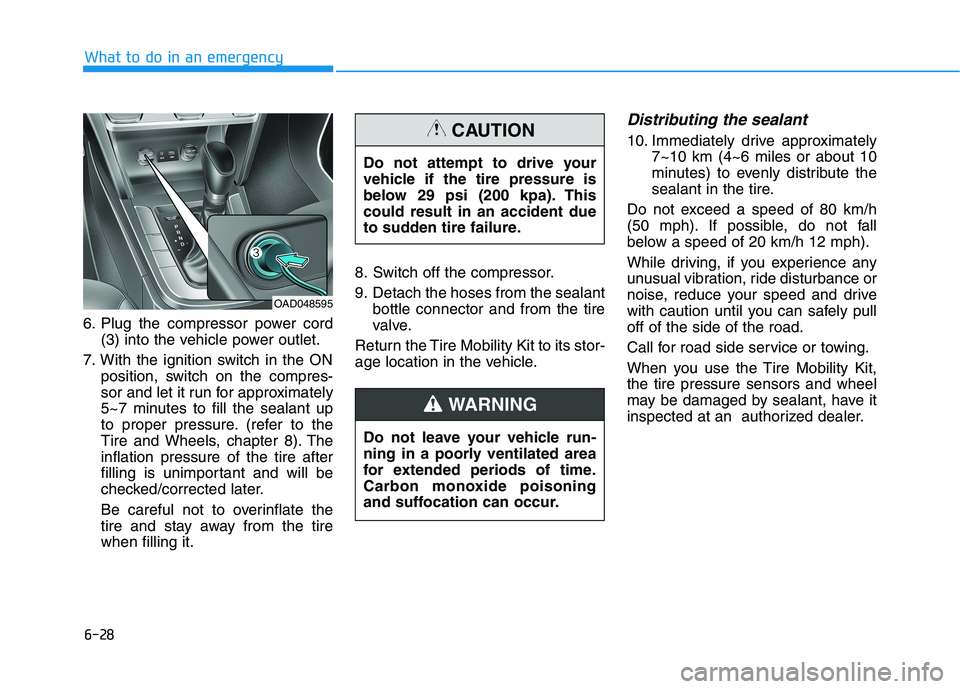
6. Plug the compressor power cord
(3) into the vehicle power outlet.
7. With the ignition switch in the ON position, switch on the compres-
sor and let it run for approximately
5~7 minutes to fill the sealant up
to proper pressure. (refer to the
Tire and Wheels, chapter 8). Theinflation pressure of the tire after
filling is unimportant and will be
checked/corrected later.
Be careful not to overinflate the
tire and stay away from the tirewhen filling it. 8. Switch off the compressor.
9. Detach the hoses from the sealant
bottle connector and from the tire
valve.
Return the Tire Mobility Kit to its stor-
age location in the vehicle.
Distributing the sealant
10. Immediately drive approximately 7~10 km (4~6 miles or about 10
minutes) to evenly distribute the
sealant in the tire.
Do not exceed a speed of 80 km/h
(50 mph). If possible, do not fall
below a speed of 20 km/h 12 mph).
While driving, if you experience any
unusual vibration, ride disturbance or
noise, reduce your speed and drive
with caution until you can safely pulloff of the side of the road.
Call for road side service or towing.
When you use the Tire Mobility Kit, the tire pressure sensors and wheel
may be damaged by sealant, have it
inspected at an authorized dealer.
What to do in an emergency
OAD048595 Do not attempt to drive your
vehicle if the tire pressure is
below 29 psi (200 kpa). Thiscould result in an accident due
to sudden tire failure.
CAUTION
Do not leave your vehicle run-
ning in a poorly ventilated area
for extended periods of time.
Carbon monoxide poisoning
and suffocation can occur.
WARNING