Page 440 of 526

7-22
Maintenance
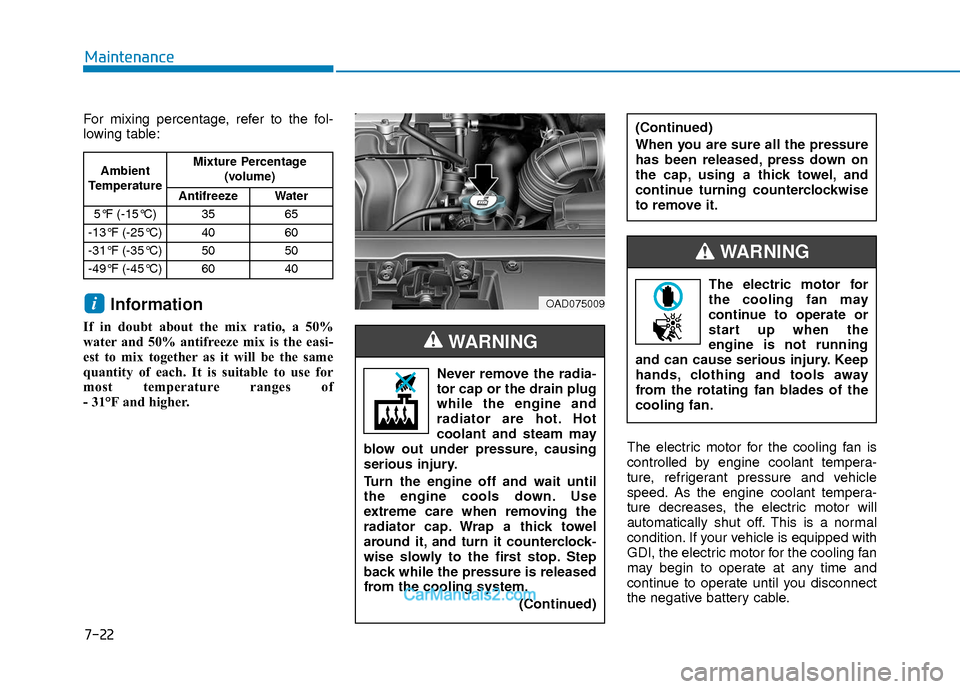
For mixing percentage, refer to the fol-
lowing table:
Information
If in doubt about the mix ratio, a 50%
water and 50% antifreeze mix is the easi-
est to mix together as it will be the same
quantity of each. It is suitable to use for
most temperature ranges of
- 31°F and higher.The electric motor for the cooling fan is
controlled by engine coolant tempera-
ture, refrigerant pressure and vehicle
speed. As the engine coolant tempera-
ture decreases, the electric motor will
automatically shut off. This is a normal
condition. If your vehicle is equipped with
GDI, the electric motor for the cooling fan
may begin to operate at any time and
continue to operate until you disconnect
the negative battery cable.
i
Ambient
Temperature Mixture Percentage
(volume)
Antifreeze Water
5°F (-15°C) 35 65
-13°F (-25°C) 40 60
-31°F (-35°C) 50 50
-49°F (-45°C) 60 40
Never remove the radia-
tor cap or the drain plug
while the engine and
radiator are hot. Hot
coolant and steam may
blow out under pressure, causing
serious injury.
Turn the engine off and wait until
the engine cools down. Use
extreme care when removing the
radiator cap. Wrap a thick towel
around it, and turn it counterclock-
wise slowly to the first stop. Step
back while the pressure is released
from the cooling system.
(Continued)
WARNING
(Continued)
When you are sure all the pressure
has been released, press down on
the cap, using a thick towel, and
continue turning counterclockwise
to remove it.
OAD075009
The electric motor for
the cooling fan may
continue to operate or
start up when the
engine is not running
and can cause serious injury. Keep
hands, clothing and tools away
from the rotating fan blades of the
cooling fan.
WARNING
Page 450 of 526

7-32
Maintenance
By jump starting
After a jump start from a good battery,
drive the vehicle for 20-30 minutes before
it is shutoff. The vehicle may not restart if
you shut it off before the battery had a
chance to adequately recharge. See
"Jump Starting" in chapter 6 for more
information on jump starting procedures.
Information
An inappropriately disposedbattery can be harmful to the
environment and human
health.
Dispose the battery according to your local
law(s) or regulation.
Reset Features
The following items may need to be reset
after the battery has been discharged or
the battery has been disconnected.
Power Windows
Trip Computer
Climate Control System
Clock
Audio System
Sunroof
i
(Continued)
The negative battery cable must
be removed first and installed
last when the battery is discon-
nected. Disconnect the battery
charger in the following order:
(1) Turn off the battery charger main switch.
(2) Unhook the negative clamp
from the negative battery ter-
minal.
(3) Unhook the positive clamp
from the positive battery ter-
minal.
Always use a genuine HYUNDAI
approved battery when you
replace the battery.
Page 468 of 526

7-50
Maintenance
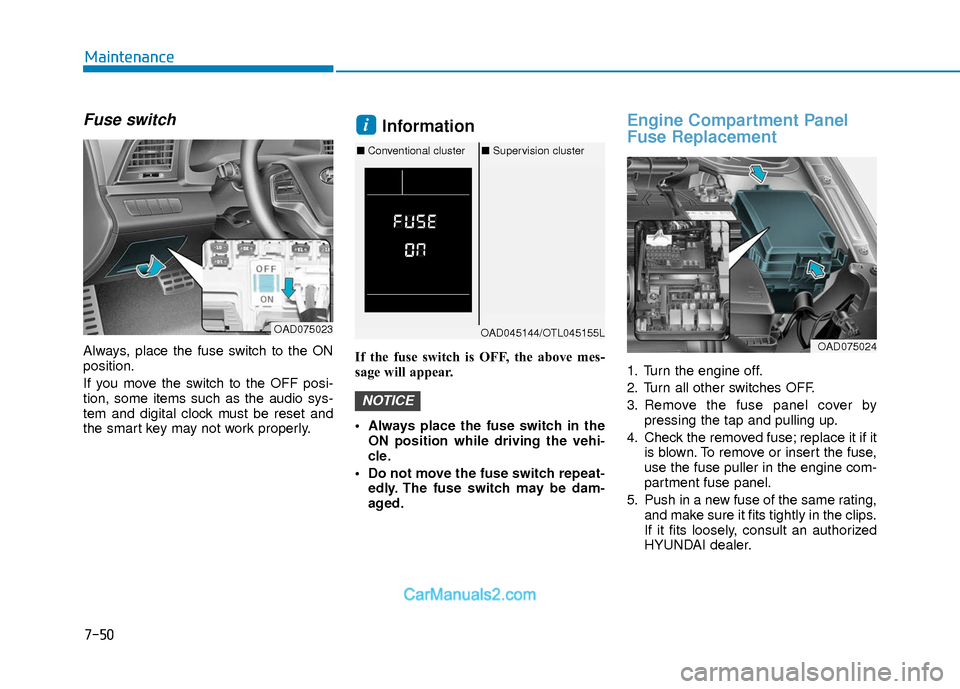
Fuse switch
Always, place the fuse switch to the ON
position.
If you move the switch to the OFF posi-
tion, some items such as the audio sys-
tem and digital clock must be reset and
the smart key may not work properly.
Information
If the fuse switch is OFF, the above mes-
sage will appear.
Always place the fuse switch in theON position while driving the vehi-
cle.
Do not move the fuse switch repeat- edly. The fuse switch may be dam-
aged.
Engine Compartment Panel
Fuse Replacement
1. Turn the engine off.
2. Turn all other switches OFF.
3. Remove the fuse panel cover by pressing the tap and pulling up.
4. Check the removed fuse; replace it if it is blown. To remove or insert the fuse,
use the fuse puller in the engine com-
partment fuse panel.
5. Push in a new fuse of the same rating, and make sure it fits tightly in the clips.
If it fits loosely, consult an authorized
HYUNDAI dealer.
NOTICE
i
OAD075023OAD045144/OTL045155L
■Conventional cluster ■Supervision cluster
OAD075024
Page 478 of 526

7-60
Maintenance
Headlamp (Halogen bulb)
Always handle them carefully, andavoid scratches and abrasions. If the
bulbs are lit, avoid contact with liquids.
Never touch the glass with bare hands. Residual oil may cause the bulb to
overheat and burst when lit.
A bulb should be operated only when installed in a headlamp.
If a bulb becomes damaged or cracked, replace it immediately and
carefully dispose of it.
1. Open the hood.
2. Disconnect the negative battery cable.
3. Remove the headlamp bulb cover byturning it counterclockwise.
4. Disconnect the headlamp bulb socket- connector.
5. Unsnap the headlamp bulb retaining wire by pressing the end and pushing
it upward.
6. Remove the bulb from the headlamp assembly.
7. Install a new headlamp bulb and snap the headlamp bulb retaining wire into
position by aligning the wire with the
groove on the bulb.
8. Connect the headlamp bulb socket- connector.
OLMB073042L
Handle halogen bulbs with care.
Halogen bulbs contain pressur-
ized gas that will produce flying
pieces of glass that could cause
injuries if broken.
Wear eye protection when chang-
ing a bulb. Allow the bulb to cool
down before handling it.
WARNING
OAD075032
■High/Low beam
LowHigh
Page 479 of 526
7-61
7
Maintenance
9. Install the headlamp bulb cover byturning it clockwise.
Information
The headlamp aiming should be adjusted
after an accident or after the headlamp
assembly is reinstalled at an authorized
HYUNDAI dealer.
Turn signal/Parking lamp
1. Open the hood.
2. Disconnect the negative battery cable.
3. Remove the socket from the assemblyby turning the socket counterclock-
wise until the tabs on the socket align
with the slots on the assembly.
4. Remove the bulb from the socket by pressing it in and rotating it counter-
clockwise until the tabs on the bulb
align with the slots in the socket. Pull
the bulb out of the socket.
5. Install a new bulb by inserting it into the socket and rotating it until it locks
into place. 6. Install the socket in the assembly by
aligning the tabs on the socket with
the slots in the assembly.
7. Push the socket into the assembly and turn the socket clockwise.
i
OAD075033
Page 480 of 526
7-62
Maintenance
Side marker
1. Open the hood.
2. Disconnect the negative battery cable.
3. Remove the socket from the assemblyby turning the socket counterclock-
wise until the tabs on the socket align
with the slots on the assembly.
4. Remove the bulb from the socket by pulling out the bulb.
5. Insert a new bulb.
Type B - LED DRL & Position lamp type
(1) Headlamp (Low)
(2) Headlamp (High)
(3) Turn signal lamp
(4) Side marker
(5) Daytime running lamp (DRL) &
Parking lamp
Headlamp (Halogen bulb)
OAD075082N
OAD075078N
OLMB073042L
Handle halogen bulbs with care.
Halogen bulbs contain pressur-
ized gas that will produce flying
pieces of glass that could cause
injuries if broken.
Wear eye protection when chang-
ing a bulb. Allow the bulb to cool
down before handling it.
WARNING
Page 481 of 526

7-63
7
Maintenance
Always handle them carefully, andavoid scratches and abrasions. If the
bulbs are lit, avoid contact with liquids.
Never touch the glass with bare hands. Residual oil may cause the bulb to
overheat and burst when lit.
A bulb should be operated only when installed in a headlamp.
If a bulb becomes damaged or cracked, replace it immediately and
carefully dispose of it.
1. Open the hood.
2. Disconnect the negative battery cable.
3. Remove the headlamp bulb cover byturning it counterclockwise.
4. Disconnect the headlamp bulb socket- connector.
5. Unsnap the headlamp bulb retaining wire by pressing the end and pushing
it upward.
6. Remove the bulb from the headlamp assembly.
7. Install a new headlamp bulb and snap the headlamp bulb retaining wire into
position by aligning the wire with the
groove on the bulb. 8. Connect the headlamp bulb socket-
connector.
9. Install the headlamp bulb cover by turning it clockwise.
Information
The headlamp aiming should be adjusted
after an accident or after the headlamp
assembly is reinstalled at an authorized
HYUNDAI dealer.
i
OAD075032
■High/Low beam
LowHigh
Page 482 of 526

7-64
Maintenance
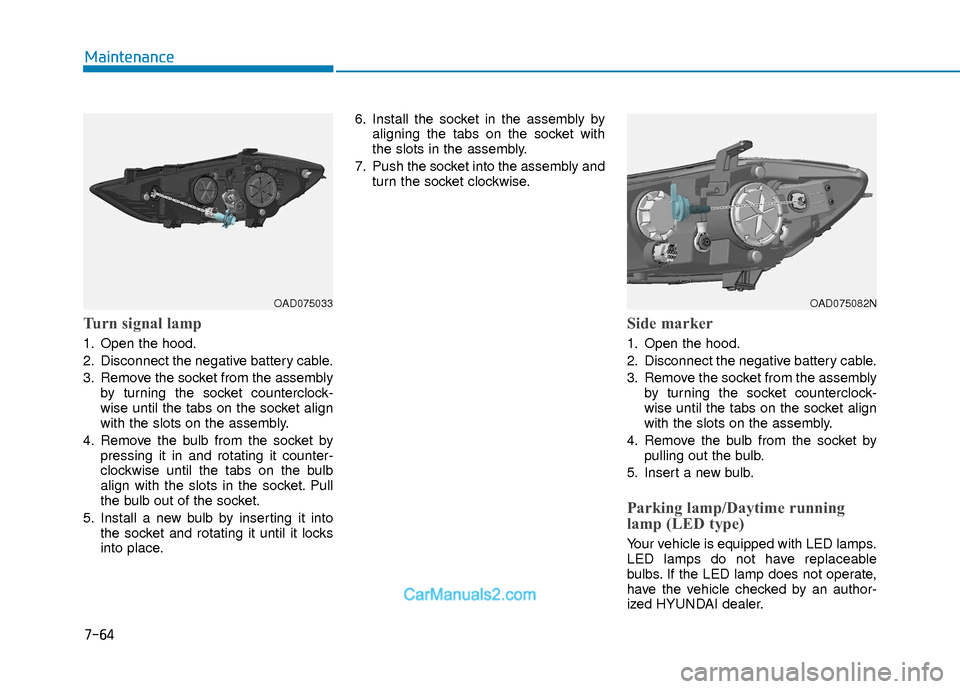
Turn signal lamp
1. Open the hood.
2. Disconnect the negative battery cable.
3. Remove the socket from the assemblyby turning the socket counterclock-
wise until the tabs on the socket align
with the slots on the assembly.
4. Remove the bulb from the socket by pressing it in and rotating it counter-
clockwise until the tabs on the bulb
align with the slots in the socket. Pull
the bulb out of the socket.
5. Install a new bulb by inserting it into the socket and rotating it until it locks
into place. 6. Install the socket in the assembly by
aligning the tabs on the socket with
the slots in the assembly.
7. Push the socket into the assembly and turn the socket clockwise.
Side marker
1. Open the hood.
2. Disconnect the negative battery cable.
3. Remove the socket from the assemblyby turning the socket counterclock-
wise until the tabs on the socket align
with the slots on the assembly.
4. Remove the bulb from the socket by pulling out the bulb.
5. Insert a new bulb.
Parking lamp/Daytime running
lamp (LED type)
Your vehicle is equipped with LED lamps.
LED lamps do not have replaceable
bulbs. If the LED lamp does not operate,
have the vehicle checked by an author-
ized HYUNDAI dealer.
OAD075033OAD075082N