Page 466 of 526

7-48
Maintenance
F
FU
U S
SE
E S
S
A vehicle’s electrical system is protected
from electrical overload damage by
fuses.
This vehicle has 2 (or 3) fuse panels, one
located in the driver's side panel bolster,
the other in the engine compartment
near the battery.
If any of your vehicle’s lights, acces-
sories, or controls do not work, check the
appropriate circuit fuse. If a fuse has
blown, the element inside the fuse will be
melted or broken.
If the electrical system does not work,
first check the driver's side fuse panel.
Before replacing a blown fuse, turn the
engine and all switches off, and then dis-
connect the negative battery cable.
Always replace a blown fuse with one of
the same rating.
If the replacement fuse blows, this indi-
cates an electrical problem. Avoid using
the system involved and immediately
consult an authorized HYUNDAI dealer.
Information
Four kinds of fuses are used : blade type
for lower amperage rating, cartridge type/
Multi fuse/Battery fuse terminal for high-
er amperage ratings. Do not use a screwdriver or any other
metal object to remove fuses because
it may cause a short circuit and dam-
age the system.
NOTICE
i
NEVER replace a fuse with any-
thing but another fuse of the same
rating.
A higher capacity fuse could
cause damage and possibly
cause a fire.
Do not install a wire or aluminum
foil instead of the proper fuse -
even as a temporary repair. It may
cause extensive wiring damage
and possibly a fire.
WARNING ■
Blade type
Normal
■ Cartridge type Blown
Normal
Blown
■ Multi fuse
Normal Blown
■
Battery fuse terminal
Normal Blown
OLF074075
Page 467 of 526

7-49
7
Maintenance
Instrument Panel Fuse
Replacement
1. Turn the engine off.
2. Turn all other switches OFF.
3. Open the fuse panel cover.
4. Refer to the label on the inside of thefuse panel cover to locate the sus-
pected fuse location. 5. Pull the suspected fuse straight out.
Use the removal tool provided in the
engine compartment fuse panel.
6. Check the removed fuse; replace it if it is blown. Spare fuses are provided in
the instrument panel fuse panels (or in
the engine compartment fuse panel).
7. Push in a new fuse of the same rating, and make sure it fits tightly in the clips.
If it fits loosely, consult an authorized
HYUNDAI dealer. In an emergency, if you do not have a
spare fuse, use a fuse of the same rating
from a circuit you may not need for oper-
ating the vehicle.
If the headlamps or other electrical com-
ponents do not work and the fuses are
OK, check the fuse panel in the engine
compartment. If a fuse is blown, it must
be replaced with the same rating.
OAD075022
OAD075021
Page 469 of 526

7-51
7
Maintenance
Main fuse
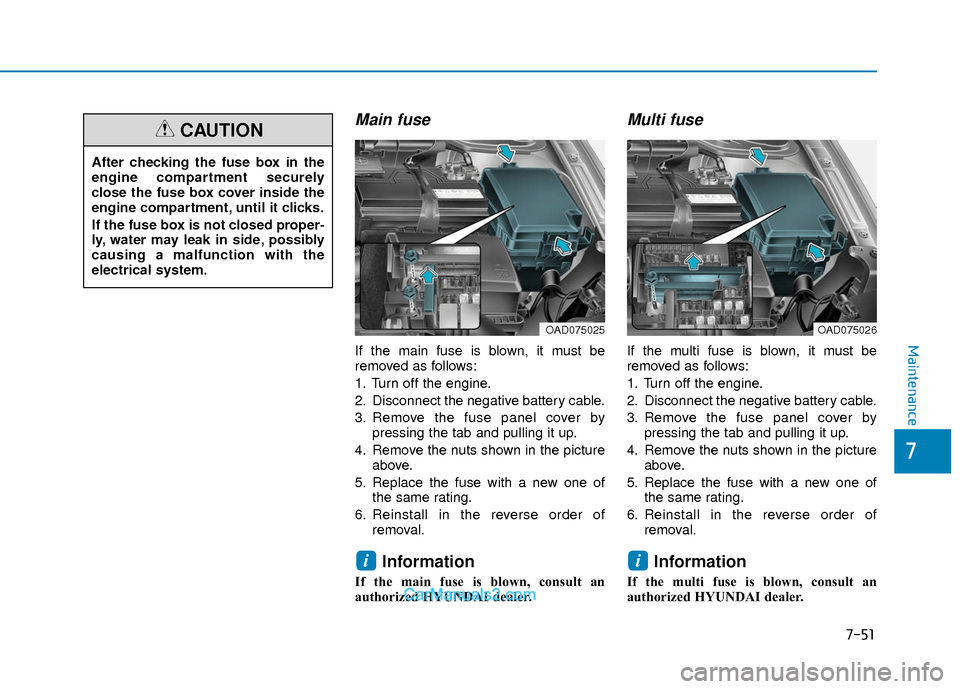
If the main fuse is blown, it must be
removed as follows:
1. Turn off the engine.
2. Disconnect the negative battery cable.
3. Remove the fuse panel cover bypressing the tab and pulling it up.
4. Remove the nuts shown in the picture above.
5. Replace the fuse with a new one of the same rating.
6. Reinstall in the reverse order of removal.
Information
If the main fuse is blown, consult an
authorized HYUNDAI dealer.
Multi fuse
If the multi fuse is blown, it must be
removed as follows:
1. Turn off the engine.
2. Disconnect the negative battery cable.
3. Remove the fuse panel cover bypressing the tab and pulling it up.
4. Remove the nuts shown in the picture above.
5. Replace the fuse with a new one of the same rating.
6. Reinstall in the reverse order of removal.
Information
If the multi fuse is blown, consult an
authorized HYUNDAI dealer.
ii
After checking the fuse box in the
engine compartment securely
close the fuse box cover inside the
engine compartment, until it clicks.
If the fuse box is not closed proper-
ly, water may leak in side, possibly
causing a malfunction with the
electrical system.
CAUTION
OAD075025OAD075026
Page 495 of 526

7-77
7
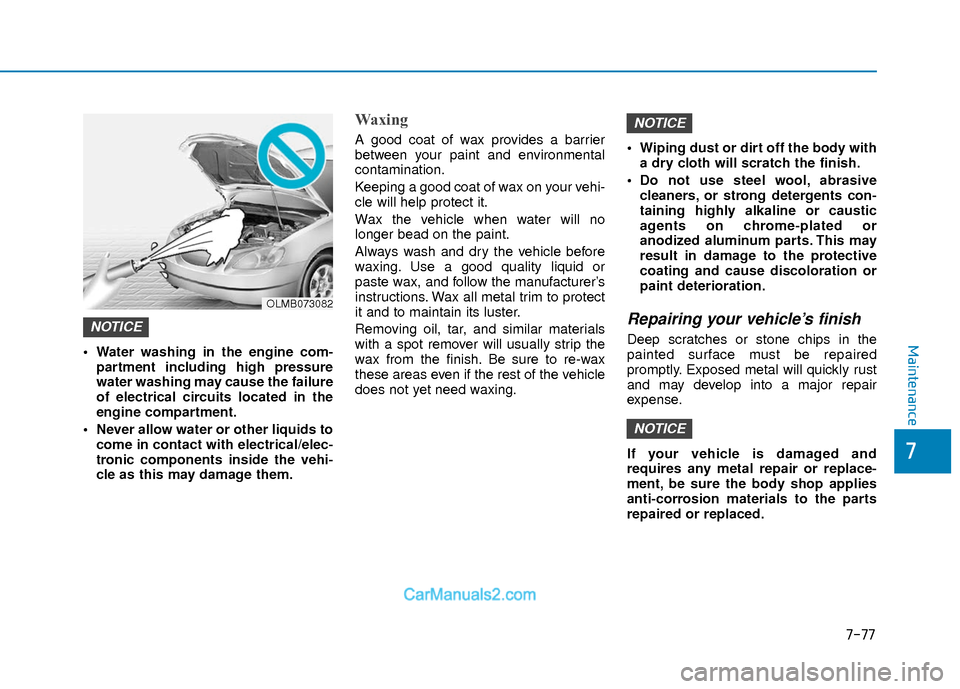
Maintenance Water washing in the engine com-partment including high pressure
water washing may cause the failure
of electrical circuits located in the
engine compartment.
Never allow water or other liquids to come in contact with electrical/elec-
tronic components inside the vehi-
cle as this may damage them.
Waxing
A good coat of wax provides a barrier
between your paint and environmental
contamination.
Keeping a good coat of wax on your vehi-
cle will help protect it.
Wax the vehicle when water will no
longer bead on the paint.
Always wash and dry the vehicle before
waxing. Use a good quality liquid or
paste wax, and follow the manufacturer’s
instructions. Wax all metal trim to protect
it and to maintain its luster.
Removing oil, tar, and similar materials
with a spot remover will usually strip the
wax from the finish. Be sure to re-wax
these areas even if the rest of the vehicle
does not yet need waxing. Wiping dust or dirt off the body with
a dry cloth will scratch the finish.
Do not use steel wool, abrasive cleaners, or strong detergents con-
taining highly alkaline or caustic
agents on chrome-plated or
anodized aluminum parts. This may
result in damage to the protective
coating and cause discoloration or
paint deterioration.
Repairing your vehicle’s finish
Deep scratches or stone chips in the
painted surface must be repaired
promptly. Exposed metal will quickly rust
and may develop into a major repair
expense.
If your vehicle is damaged and
requires any metal repair or replace-
ment, be sure the body shop applies
anti-corrosion materials to the parts
repaired or replaced.
NOTICE
NOTICE
NOTICE
OLMB073082
Page 498 of 526

7-80
Maintenance
Keep your garage dry
Don’t park your car in a damp, poorly
ventilated garage. This creates a favor-
able environment for corrosion. This is
particularly true if you wash your vehicle
in the garage or drive it into the garage
when it is still wet or covered with snow,
ice or mud. Even a heated garage can
contribute to corrosion unless it is well
ventilated so moisture is dispersed.
Keep paint and trim in good condition
Scratches or chips in the finish should be
covered with "touch-up" paint as soon as
possible to reduce the possibility of cor-
rosion. If bare metal is showing through,
the attention of a qualified body and paint
shop is recommended.
Bird droppings are highly corrosive and
may damage painted surfaces in just a
few hours. Always remove bird droppings
as soon as possible.
Interior Care
Interior general precautions
Prevent caustic solutions such as per-
fume and cosmetic oil, from contacting
the interior parts because they may
cause damage or discoloration. If they do
contact the interior parts, wipe them off
immediately. See the instructions for the
proper way to clean vinyl.
Never allow water or other liquids tocome in contact with electrical/elec-
tronic components inside the vehi-
cle as this may damage them.
When cleaning leather products (steering wheel, seats etc.), use neu-
tral detergents or low alcohol con-
tent solutions. If you use high alco-
hol content solutions or acid/ alka-
line detergents, the color of the
leather may fade or the surface may
get stripped off.
Cleaning the upholstery andinterior trim
Vinyl (if equipped)
Remove dust and loose dirt from vinyl
with a whisk broom or vacuum cleaner.
Clean vinyl surfaces with a vinyl cleaner.
Fabric (if equipped)
Remove dust and loose dirt from fabric
with a whisk broom or vacuum cleaner.
Clean with a mild soap solution recom-
mended for upholstery or carpets.
Remove fresh spots immediately with a
fabric spot cleaner. If fresh spots do not
receive immediate attention, the fabric
can be stained and its color can be
affected. Also, its fire-resistant properties
can be reduced if the material is not
properly maintained.
Using anything but recommended
cleaners and procedures may affect
the fabric's appearance and fire-
resistant properties.
NOTICE
NOTICE
Page:
< prev 1-8 9-16 17-24