2018 Hyundai Elantra ignition
[x] Cancel search: ignitionPage 414 of 526

6-33
What to do in an emergency
6
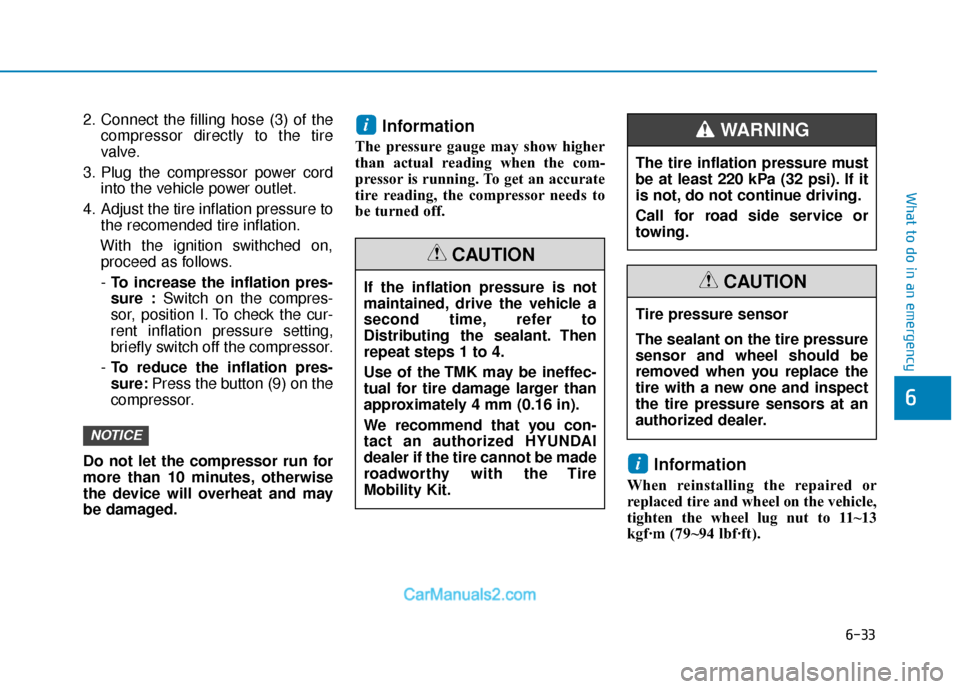
2. Connect the filling hose (3) of thecompressor directly to the tire
valve.
3. Plug the compressor power cord into the vehicle power outlet.
4. Adjust the tire inflation pressure to the recomended tire inflation.
With the ignition swithched on, proceed as follows.
- To increase the inflation pres-
sure : Switch on the compres-
sor, position I. To check the cur-
rent inflation pressure setting,
briefly switch off the compressor.
- To reduce the inflation pres-
sure: Press the button (9) on the
compressor.
Do not let the compressor run for
more than 10 minutes, otherwise
the device will overheat and may
be damaged.Information
The pressure gauge may show higher
than actual reading when the com-
pressor is running. To get an accurate
tire reading, the compressor needs to
be turned off.
Information
When reinstalling the repaired or
replaced tire and wheel on the vehicle,
tighten the wheel lug nut to 11~13
kgf·m (79~94 lbf·ft).
i
i
NOTICE
The tire inflation pressure must
be at least 220 kPa (32 psi). If it
is not, do not continue driving.
Call for road side service or
towing.
WARNING
If the inflation pressure is not
maintained, drive the vehicle a
second time, refer to
Distributing the sealant. Then
repeat steps 1 to 4.
Use of the TMK may be ineffec-
tual for tire damage larger than
approximately 4 mm (0.16 in).
We recommend that you con-
tact an authorized HYUNDAI
dealer if the tire cannot be made
roadworthy with the Tire
Mobility Kit.
CAUTION
Tire pressure sensor
The sealant on the tire pressure
sensor and wheel should be
removed when you replace the
tire with a new one and inspect
the tire pressure sensors at an
authorized dealer.
CAUTION
Page 416 of 526

6-35
What to do in an emergency
6
When towing your vehicle in an emer-
gency without wheel dollies:
1. Place the ignition switch in the ACCposition.
2. Place the shift lever in N (Neutral).
3. Release the parking brake.
Removable Towing Hook 1. Open the trunk, and remove the tow- ing hook from the tool case.
2. Remove the hole cover pressing the lower part of the cover on the front or
rear bumper.
3. Install the towing hook by turning it clockwise into the hole until it is fully
secured.
4. Remove the towing hook and install the cover after use.
If your vehicle is equipped with a
rollover sensor, place the ignition
switch in the LOCK/OFF or ACC
position when the vehicle is being
towed. The side impact and curtain
air bag may deploy if the sensor
detects the situation as a rollover.WARNING
Failure to place the shift lever in N
(Neutral) when being towed with
the front wheels on the ground can
cause internal damage to the
transaxle.
CAUTION
OLF064024
OAD065018
OAD066018
■Front
■Rear (if equipped)
Page 417 of 526

6-36
What to do in an emergency
Emergency towing If towing is necessary, we recommend
you have it done by an authorized
HYUNDAI dealer or a commercial tow
truck service.
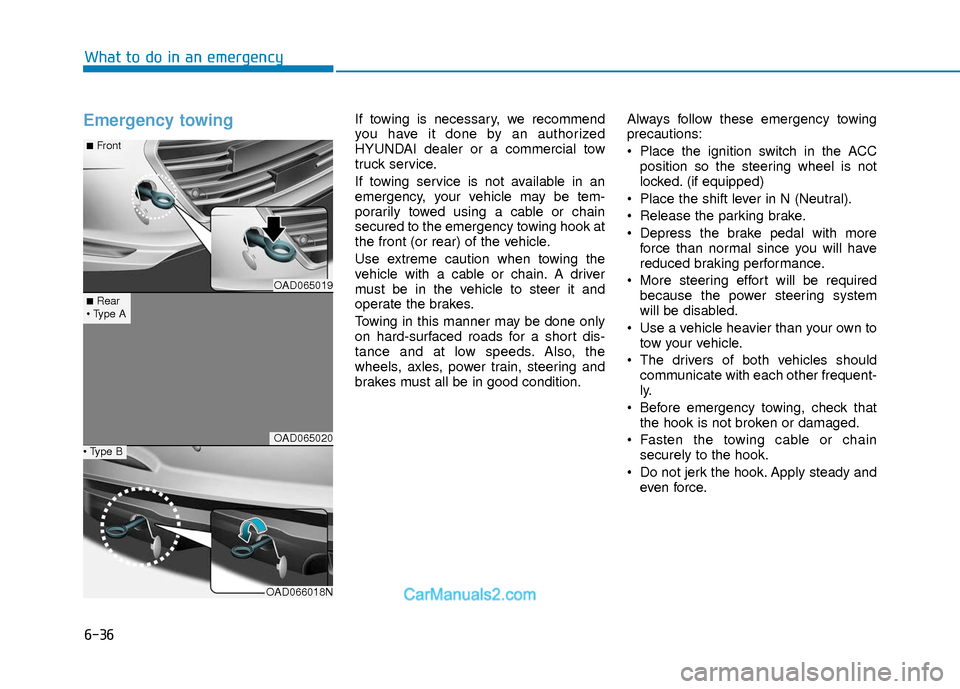
If towing service is not available in an
emergency, your vehicle may be tem-
porarily towed using a cable or chain
secured to the emergency towing hook at
the front (or rear) of the vehicle.
Use extreme caution when towing the
vehicle with a cable or chain. A driver
must be in the vehicle to steer it and
operate the brakes.
Towing in this manner may be done only
on hard-surfaced roads for a short dis-
tance and at low speeds. Also, the
wheels, axles, power train, steering and
brakes must all be in good condition.Always follow these emergency towing
precautions:
Place the ignition switch in the ACC
position so the steering wheel is not
locked. (if equipped)
Place the shift lever in N (Neutral).
Release the parking brake.
Depress the brake pedal with more force than normal since you will have
reduced braking performance.
More steering effort will be required because the power steering system
will be disabled.
Use a vehicle heavier than your own to tow your vehicle.
The drivers of both vehicles should communicate with each other frequent-
ly.
Before emergency towing, check that the hook is not broken or damaged.
Fasten the towing cable or chain securely to the hook.
Do not jerk the hook. Apply steady and even force.
OAD065019
OAD065020
OAD066018N
■Rear
■Front
Page 422 of 526

7-4
Maintenance
M
MA
AI
IN
N T
TE
EN
N A
AN
N C
CE
E
S
S E
E R
R V
V I
IC
C E
E S
S
You should exercise the utmost care to
prevent damage to your vehicle and
injury to yourself whenever performing
any maintenance or inspection proce-
dures.
We recommend you have your vehicle
maintained and repaired by an author-
ized HYUNDAI dealer. An authorized
HYUNDAI dealer meets HYUNDAI’s high
service quality standards and receives
technical support from HYUNDAI in
order to provide you with a high level of
service satisfaction.
Owner's Responsibility
Maintenance service and record reten-
tion are the owner's responsibility.
You should retain documents that show
proper maintenance has been performed
on your vehicle in accordance with the
scheduled maintenance service charts
shown on the following pages. You need
this information to establish your compli-
ance with the servicing and maintenance
requirements of your vehicle warranties.
Detailed warranty information is provided
in your Owner's Handbook & Warranty
Information booklet.
Repairs and adjustments required as a
result of improper maintenance or a lack
of required maintenance are not covered.
Owner Maintenance
Precautions
Inadequate, incomplete or insufficient
servicing may result in operational prob-
lems with your vehicle that could lead to
vehicle damage, an accident, or person-
al injury. This chapter provides instruc-
tions only for the maintenance items that
are easy to perform. Several procedures
can be done only by an authorized
HYUNDAI dealer with special tools.
Your vehicle should not be modified in
any way. Such modifications may
adversely affect the performance, safety
or durability of your vehicle and may, in
addition, violate conditions of the limited
warranties covering the vehicle.
Certain modifications may also be in vio-
lation of regulations established by the
U.S. Department of Transportation and
other federal or state agencies.
Improper owner maintenance during
the warranty period may affect war-
ranty coverage. For details, read the
separate Owner's Handbook &
Warranty Information booklet provid-
ed with the vehicle. If you're unsure
about any service or maintenance
procedure, have it done by an author-
ized HYUNDAI dealer.
NOTICE
O O W
W N
NE
ER
R
M
M A
AI
IN
N T
TE
EN
N A
AN
N C
CE
E
Performing maintenance work on a
vehicle can be dangerous. If you
lack sufficient knowledge and
experience or the proper tools and
equipment to do the work, have it
done by an authorized HYUNDAI
dealer.
ALWAYS follow these precautions
for performing maintenance work:
•Park your vehicle on level
ground, move the shift lever into
the P (Park, for automatic trans-
mission vehicle) position or neu-
tral (for manual transmission
vehicle), apply the parking brake,
place the ignition switch in the
LOCK/OFF position.
Block the tires (front and back) to
prevent the vehicle from moving.
Remove loose clothing or jewelry
that can become entangled in
moving parts.
If you must run the engine during
maintenance, do so out doors or
in an area with plenty of ventila-
tion.
Keep flames, sparks, or smoking
materials away from the battery
and fuel-related parts.
WARNING
Page 448 of 526

7-30
Maintenance
B
BA
A T
TT
TE
ER
R Y
Y
To prevent SERIOUS INJURY or
DEATH to you or bystanders,
always follow these precautions
when working near or handling the
battery:
Always read and follow
instructions carefully when
handling a battery.
Wear eye protection
designed to protect the
eyes from acid splashes.
Keep all flames, sparks, or
smoking materials away
from the battery.
Hydrogen is always present in battery cells, is highly
combustible, and may
explode if ignited.
Keep batteries out of reach
of children. (Continued)
WARNING (Continued)Batteries contain sulfuric
acid which is highly corro-
sive. Do not allow acid to
contact your eyes, skin or
clothing.
If acid gets into your eyes, flush
your eyes with clean water for at
least 15 minutes and get immediate
medical attention. If acid gets on
your skin, thoroughly wash the
area. If you feel pain or a burning
sensation, get medical attention
immediately.
When lifting a plastic-cased bat-
tery, excessive pressure on the
case may cause battery acid to
leak. Lift with a battery carrier or
with your hands on opposite cor-
ners.
Do not attempt to jump start your
vehicle if your battery is frozen.
NEVER attempt to recharge the
battery when the vehicle’s battery
cables are connected to the bat-
tery. (Continued)
(Continued)
The electrical ignition system
works with high voltage. NEVER
touch these components with the
engine running or when the
Engine Start/Stop button is in the
ON position.
Leaked battery electrolyte due to
repeated driving on sharp curves
(e.g. on circuits) may cause safe-
ty problem. Avoid repeated driv-
ing on sharp curves.
CALIFORNIA PROPOSITION 65
WARNING
Battery posts, terminals, and relat-
ed accessories contain lead and
lead compounds, chemicals known
to the State of California to cause
cancer, birth defects and reproduc-
tive harm. Batteries also contain
other chemicals known to the State
of California to cause cancer. Wash
hands after handling.
WARNING
Page 449 of 526

7-31
7
Maintenance
When you do not use the vehicle fora long time in a low temperature
area, disconnect the battery and
keep it indoors.
Always charge the battery fully to prevent battery case damage in low
temperature areas.
For Best Battery Service
Keep the battery securely mounted.
Keep the battery top clean and dry.
Keep the terminals and connectionsclean, tight, and coated with petroleum
jelly or terminal grease.
Rinse any spilled acid from the battery immediately with a solution of water
and baking soda.
Battery RechargingNOTICE
Always follow these instructions
when recharging your vehicle's bat-
tery to avoid the risk of SERIOUS
INJURY or DEATH from explosions
or acid burns:
Before performing maintenance
or recharging the battery, turn off
all accessories and place the
ignition switch to the LOCK/OFF
position.
Keep all flames, sparks, or smok-
ing materials away from the bat-
tery.
Always work outdoors or in an
area with plenty of ventilation.
Wear eye protection when check-
ing the battery during charging.
The battery must be removed
from the vehicle and placed in a
well ventilated area.
Watch the battery during charg-
ing, and stop or reduce the charg-
ing rate if the battery cells begin
boiling violently.
(Continued)
WARNING
OAD075020
Page 472 of 526

7-54
Maintenance
Fuse Name Fuse rating Protected Component
HEATED MIRROR 10A Driver/Passenger Power Outside Mirror, A/C Control Module
WIPER 2 10A PCM, BCM
P/WINDOW RH 25A Power Window RH Relay
P/WINDOW LH 25A Power Window LH Relay, Driver Safety Power Window Module
CLUSTER 10A CLUSTER
DR LOCK 20A Door Lock/Unlock Relay, E/R Junction Block (Two Turn Unlock Relay)
MEMORY 1 10A Driver/Passenger Door Module, Driver IMS Module, A/C Control Module, Instrument Cluster,
Electro Chromic Mirror, BCM, Data Link Connector
S/HEATER RR 15A Rear Seat Warmer Control Module
TRUNK 10A Trunk Relay
INTERIOR LAMP 10A Room Lamp, Front Vanity Lamp LH/RH, Overhead Console Lamp, Ignition Key ILL. & Door Warning
Switch, Trunk Room Lamp
A/BAG IND 7.5A Instrument Cluster, A/C Control Module
MULTI MEDIA 15A CD Player, Audio, A/V & Navigation Head Unit
MEMORY 2 7.5A Not Used
AMP 25A AMP
P/SEAT DRV 30A Driver Seat Manual Switch, Driver IMS Module
MDPS 7.5A MDPS Unit
MODULE 1 7.5A Key Interlock, Driver/Passenger Smart Key Outside Handle, Driver/Passenger Door Module
SUNROOF 20A Sunroof Motor
SPARE 1 10A -
S/HEATER FRT 20A Front Seat Warmer Control Module
MODULE 7 7.5A Front Seat Warmer Control Module, Rear Seat Warmer Control Module, Sunroof Motor
PDM 3 7.5A Smart Key Control Module, Immobilizer Module
BRAKE SWITCH 7.5A Stop Lamp Switch, Smart Key Control Module
Page 473 of 526

7-55
7
Maintenance
Fuse Name Fuse rating Protected Component
PDM 2 7.5A Smart Key Control Module, Immobilizer Module
START 7.5A W/O Smart Key : Ignition Switch, Transmission Range Switch, Ignition Lock Switch
With Smart Key :Transmission Range Switch, Smart Key Control Module, PCM
A/CON 1 7.5A Ionizer, A/C Control Module, E/R Junction Block (A/Con Relay, Blower Relay)
AIR BAG 15A SRS Control Module, Passenger Occupant Detection Sensor
MODULE 3 10A Stop Lamp Switch, BCM, Sport Mode Switch, Driver/Passenger Door Module
IG1 25A PCB Block (Fuse : ABS3, ECU5, TCU2)
PDM 1 15A Smart Key Control Module
HEATED STEERING 15A BCM
MODULE 6 7.5A BCM, Smart Key Control Module
MODULE 5 10A Crash Pad Switch, Electro Chromic Mirror, A/T Shift Lever Indicator, A/V & Navigation Head Unit,
Audio, A/C Control Module, Console Switch LH/RH, Head Lamp LH/RH, Front Seat Warmer Control
Module, Rear Seat Warmer Control Module, Driver IMS Module
AEB 10A AEB Module
A/CON 2 10A E/R Junction Block (Blower Relay), Blower Motor, Blower Resistor, A/C Control Module
WIPER 1 25A Wiper Motor, PCB Block (Front Wiper (Low) Relay)
WASHER 15A Multifunction Switch
MODULE 4 10A DBL Unit, Lane Departure Warning System, Parking Assist Buzzer, BCM, Blind Spot Detection Radar
LH/RH
SPARE 2 10A -
MODULE 2 10A E/R Junction Block (Power Outlet Relay), USB Charging Connector, Smart Key Control Module,
BCM, Audio, A/V & Navigation Head Unit, CD Player, Power Outside Mirror Switch, AMP