2018 HONDA RIDGELINE tow
[x] Cancel search: towPage 155 of 623

153
uuOperating the Switches Around the Steering Wheel uAuto High-Beam (High Beam Support System)*
Controls
■To manually cancel th e system temporarily
You can cancel the operation when you manually change the headlights to high
beams. Push the lever forward until you hear a click, or lightly pull the lever towards
you to flash high beams. The auto high-beam indicator goes off.
If you want the auto high-beam operation to resume at once, pull the lever towards
you.
Disable the system when the vehicle is parked
with the power mode is in ON and the light
switch is in the AUTO position.
To disable the system: Pull the light switch
lever towards you and hold it for 40 seconds.
The auto high-beam indicator in the meter will
blink twice.
To enable the system: Pull the light switch
lever towards you and hold it for 30 seconds.
The auto high-beam indicator in the meter will
blink once.
■To Disable the System
1 Auto High-Beam (High Beam Support System)*
If the Can Not Operate: message appears:•Park your vehicle in a safe place, and clean the
windshield. If the message does not disappear after
you have cleaned the winds hield and driven for a
while, have your vehicle checked by a dealer.
1 To Disable the System
The auto high-beam is in the previously selected
disabled or enabled setti ng each time you start the
engine.
* Not available on all models
Page 156 of 623

154
uuOperating the Switches Around the Steering Wheel uWipers and Washers
Controls
Wipers and Washers
The windshield wipers and washers can be
used when the power mode is in ON.
■MIST
The wipers run at high speed until you release
the lever.
■Wiper switch (OFF, INT*1/AUTO*2, LO, HI)
Move the lever up or down to change the
wiper settings.
■Adjusting wiper operation*
Turn the adjustment ri ng to adjust wiper
operation.
■Washer
Sprays while you pull the lever toward you.
When you release the lever for more than one
second, the spray stops, the wipers sweep two
or three more times to clear the windshield,
then stop.
*1 : Models with manual intermittent operation
*2 : Models with automatic intermittent operation
■Windshield Wipers/Washers1 Wipers and Washers
NOTICE
Do not use the wipers when the windshield is dry.
The windshield will get sc ratched, or the rubber
blades will get damaged.
Turn the washers off if no washer fluid comes out.
The pump may get damaged.
The wiper motor may stop motor operation
temporarily to prevent an overload. Wiper operation
will return to normal within a few minutes, once the
circuit has returned to normal.
If the vehicle speeds up while the wipers are
operating intermittently, the length of the wipe
interval shortens.
When the vehicle speeds up, the wiper operation’s
shortest delay setting ( ) and the LO setting become
the same.
NOTICE
In cold weather, the blades may freeze to the
windshield, becoming stuck.
Operating the wipers in th is condition may damage
the wipers. Use the defrost er and heated windshield
*
to warm the windshield, then turn the wipers on.
If the wipers st op operating due to an obstacle such
as the build-up of snow, pa rk the vehicle in a safe
place as soon as possible.
Rotate the wiper switch to OFF, and set the power
mode to ACCESSORY or VEHICLE OFF (LOCK), then
remove the obstacle.
Intermittent Time
Adjustment Ring
MIST
INT
*1/AUTO*2OFF
LO: Low speed wipe
HI: High speed wipe Pull to
use
washer.
Lower speed, fewer sweeps
Higher speed, more sweeps
* Not available on all models
Page 411 of 623

409
Driving
This chapter discusses driving and refueling.
Before Driving................................... 410
Towing a Trailer ................................ 418
Off-Highway Driving Guidelines ..... 430
When Driving Starting the Engine .......................... 432
Precautions While Driving................. 438
Automatic Transmission ................... 439
Shifting ............................................ 440
ECON Button ................................... 442
Intelligent Traction Management...... 443
Cruise Control
*................................ 445
Front Sensor Camera*...................... 448Road Departure Mi tigation (RDM)
System*...................................... 450
Adaptive Cruise Control (ACC)*....... 455
Lane Keeping Assist System (LKAS)*.... 468Vehicle Stability Assist (VSA ®), aka Electronic
Stability Control (ESC), System ............. 476
Agile Handling Assist ....................... 478
i-VTM4 (Intelligent Variable Torque
Management)-4 ® System
*.............. 479
TPMS with Tire Fill Assist .................. 480
Tire Pressure Monitoring System (TPMS) -
Required Federal Explanation ......... 482
Blind spot inform ation (BSI) System
*.... 484
LaneWatchTM*.................................. 486 Braking
Brake System ................................... 488
Anti-lock Brake System (ABS) ........... 490
Brake Assist System ......................... 491
Collision Mitigation Braking System
TM
(CMBSTM)*..................................... 492
Parking Your Vehicle When Stopped ................................ 501
Parking Sensor System
*................... 502
Cross Traffic Monitor*..................... 506
Multi-View Rear Camera .................. 510
Refueling Fuel Information .............................. 512
How to Refuel ................................. 513
Fuel Economy and CO
2 Emissions .... 515
* Not available on all models
Page 413 of 623

Continued411
uuBefore Driving uDriving Preparation
Driving
• Store or secure all items on board properly.
u Carrying too much cargo, or improperly storing it, can affect your vehicle’s
handling, stability, sto pping distance, and tires, and make it unsafe.
2Maximum Load Limit P. 413
•Do not pile items higher than the seat height.
u They can block your view and may be thrown forward in the event of sudden
braking.
• Do not place anything in the front seat footwells. Make sure to secure the floor
mat.
u An object or unsecured floor mat can in terfere with your brake and accelerator
pedal operation while driving.
• If you have any animals on board, do no t let them move around in the vehicle.
u They may interfere with driv ing and a crash could occur.
• Securely close and lock all doors.
2Locking/Unlocking the Doors from the Inside P. 121
•Adjust your seating position properly.
u Adjust the head restraint, too.
2Adjusting the Seats P. 163
2 Adjusting the front head restraint positions P. 168
•Adjust the mirrors and steering wh eel properly for your driving.
u Adjust them while sitting in the proper driving position.
2 Adjusting the Steering Wheel P. 160
2 Adjusting the Mirrors P. 161
■Interior Checks1Interior Checks
The headlight aim is set by the factory, and does not
need to be adjusted. Howeve r, if you regularly carry
heavy items in the cargo area or tow a trailer, have
the aiming readjusted at a dealer or by a qualified
technician.
Page 415 of 623

413
uuBefore Driving uMaximum Load Limit
Continued
Driving
Maximum Load Limit
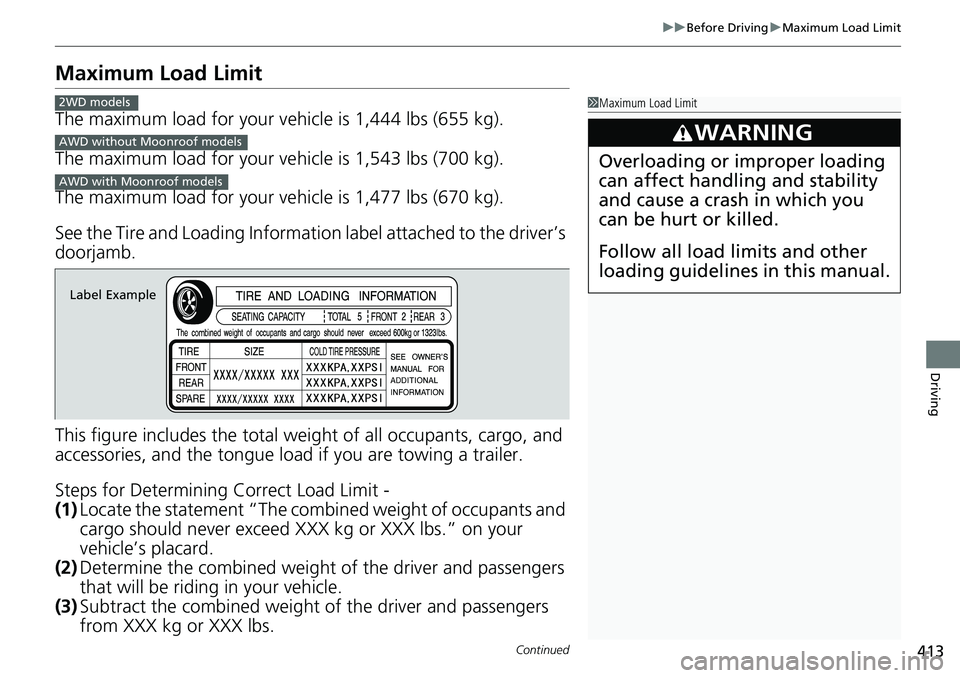
The maximum load for your ve hicle is 1,444 lbs (655 kg).
The maximum load for your ve hicle is 1,543 lbs (700 kg).
The maximum load for your ve hicle is 1,477 lbs (670 kg).
See the Tire and Loading Informatio n label attached to the driver’s
doorjamb.
This figure includes the total weig ht of all occupants, cargo, and
accessories, and the tongue load if you are towing a trailer.
Steps for Determining Correct Load Limit -
(1) Locate the statement “The comb ined weight of occupants and
cargo should never exceed XXX kg or XXX lbs.” on your
vehicle’s placard.
(2) Determine the combined weight of the driver and passengers
that will be riding in your vehicle.
(3) Subtract the combined weight of the driver and passengers
from XXX kg or XXX lbs.
1Maximum Load Limit
3WARNING
Overloading or improper loading
can affect handling and stability
and cause a crash in which you
can be hurt or killed.
Follow all load limits and other
loading guidelines in this manual.
2WD models
AWD without Moonroof models
AWD with Moonroof models
Label Example
Page 416 of 623

uuBefore Driving uMaximum Load Limit
414
Driving
(4) The resulting figure equals the available amount of cargo and
luggage load capacity. For example, if the “XXX” amount
equals 1,400 lbs. and there will be five 150 lb. passengers in
your vehicle, the amount of av ailable cargo and luggage load
capacity is 650 lbs. (1,400 - 750 (5 x 150) = 650 lbs.)
(5) Determine the combined weight of luggage and cargo being
loaded on the vehicle. That we ight may not safely exceed the
available cargo and luggage load capacity calculated in step 4.
(6) If your vehicle will be towing a tra iler, load from your trailer will
be transferred to your vehicl e. Consult this manual to
determine how this reduces th e available cargo and luggage
load capacity of your vehicle.1 Maximum Load Limit
Gross Vehicle Weight Rating (GVWR):
The maximum allowable weight of the vehicle, all
occupants, all a ccessories, all cargo, and the tongue
load. 2 Specifications P. 600
Gross Axle Weight Rating (GAWR):
The maximum allowable weight of the vehicle axle. 2 Specifications P. 600
3WARNING
Never let passengers ride in the
pickup bed, in the trunk space, or
on the bed rails. This could cause
very serious injuries or death. No
one should ride in any position on
your vehicle that is not equipped
with seats and seat belts.
Exceeding load limits or
improperly loading cargo on the
vehicle can cause a crash in which
you can be seriously injured or
killed.
Load the cargo carefully before
starting to drive.
Page 420 of 623

418
Driving
Towing a Trailer
Towing Preparation
Your vehicle can tow a trailer if you carefully observe the load limits, use the proper
equipment, and follow the to wing guidelines. Check the load limits before driving.
■Total trailer weight
Do not exceed the maximum allowable
weight of the trailer, cargo, and everything in
or on it shown in the table.
Towing loads in excess of this can seriously
affect vehicle handling and performance and
can damage the engine and drivetrain.
Each weight limit is calculated based on the following conditions:
• Occupants fill seats from the front of the vehicle to the back
• Each occupant weights 150 lbs (68 kg)
• Each occupant has 15 lbs (7 kg) of cargo in the cargo area
Any additional weight, cargo or accessori es reduce the maximum trailer weight and
maximum tongue load.
■Towing Load Limits1 Towing Load Limits
Check if all loads are within limits at a public scale.
If a public scale is not available, add the estimated
weight of your cargo load to the weight of your
trailer (as quoted by the manufacturer), and then
measure the tongue load with an appropriate scale or
tongue gauge or estima te it based on cargo
distribution.
Refer to the trailer owner’s manual for additional
information.
Break-in Period
Avoid towing a trailer duri ng your vehicle’s first 600
miles (1,000 km).
Never exceed the gross weight ratings.
Gross weight information 2 Vehicle Specifications P. 600
3WARNING
Exceeding any load limit or improperly
loading your vehicle and trailer can cause a
crash in which you can be seriously hurt or
killed.
Check the loading of your vehicle and
trailer carefully before starting to drive.
Total Load
Number of
occupantsAWD models2WD models
25,000 lbs (2,268 kg)3,500 lbs (1,587 kg)
44,750 lbs (2,154 kg)3,250 lbs (1,474 kg)
54,500 lbs (2,041 kg)3,000 lbs (1,360 kg)
Page 421 of 623

419
uuTowing a Trailer uTowing Preparation
Continued
Driving
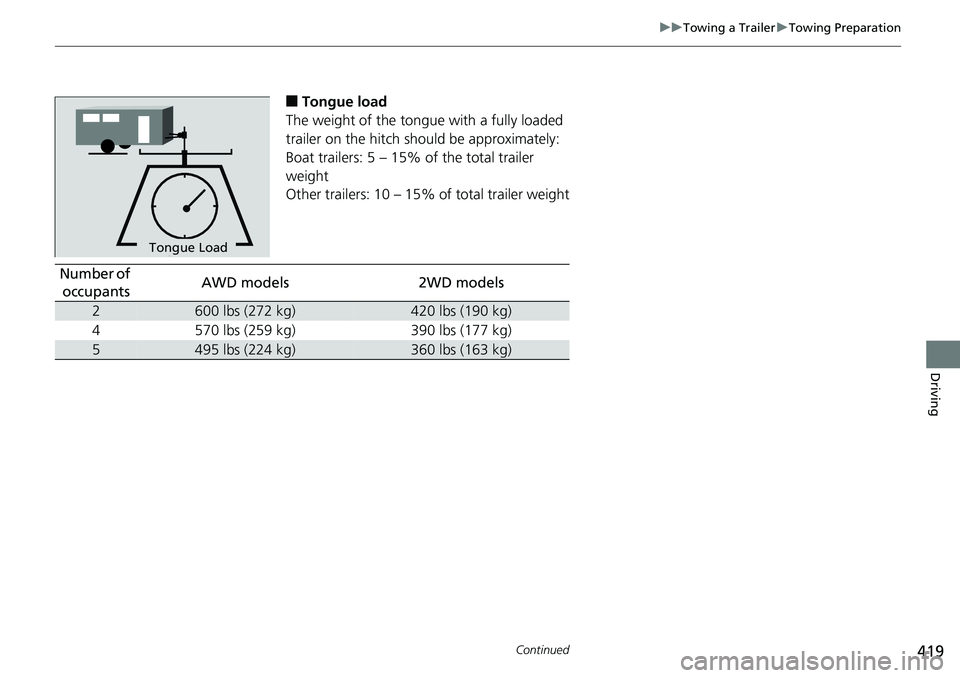
■Tongue load
The weight of the tongue with a fully loaded
trailer on the hitch should be approximately:
Boat trailers: 5 – 15% of the total trailer
weight
Other trailers: 10 – 15% of total trailer weight
Tongue LoadTongue Load
Number of occupantsAWD models2WD models
2600 lbs (272 kg)420 lbs (190 kg)
4570 lbs (259 kg)390 lbs (177 kg)
5495 lbs (224 kg)360 lbs (163 kg)