2018 HONDA ODYSSEY mirror controls
[x] Cancel search: mirror controlsPage 4 of 763

Contents
This owner’s manual should be considered a permanent part of the
vehicle and should remain with the vehicle when it is sold.
This owner’s manual covers all models of your vehicle. You may find
descriptions of equipment and features that are not on your
particular model.
Images throughout this owner’s manu al (including the front cover)
represent features and equipment that are available on some, but
not all, models. Your particular mo del may not have some of these
features.
This owner’s manual is for vehicles sold in the United States and
Canada.
The information and specifications in cluded in this publication were
in effect at the time of approval for printing. Honda Motor Co., Ltd.
reserves the right, however, to discontinue or change specifications
or design at any time without notice and without incurring any
obligation.2 Safe Driving P. 33
For Safe Driving P. 34 Seat Belts P. 38 Airbags P. 47
2Instrument Panel P. 83
Indicators P. 84 Gauges and Displays P. 119
2Controls P. 141
Clock P. 142 Locking and Unlocking the Doors P. 144
Security System P. 179 Opening and Closing the Windows P. 182
Adjusting the Mirrors P. 206 Adjusting the Seats P. 209
2Features P. 259
Audio System P. 260 Audio System Basic Operation P. 267, 285
Blu-ray/DVD Rear Entertainment System* P. 396
CabinWatchTM * P. 521 CabinTalkTM* P. 522
2Driving P. 523
Before Driving P. 524 Towing a Trailer P. 530
Multi-View Rear Camera P. 628 Refueling P. 630
2 Maintenance P. 635
Before Performing Maintenance P. 636 Maintenance MinderTM P. 639
Checking and Maintaining Wiper Blades P. 669
Remote Control and Wireless Headphone Care
* P. 685
2 Handling the Unexpected P. 697
Tools P. 698 If a Tire Goes Flat P. 699
Indicator, Coming On/Blinking P. 716 Fuses P. 722
When You Cannot Open the Tailgate P. 731
2 Information P. 737
Specifications P. 738 Identification Numbers P. 740
Warranty Coverages P. 746 Authorized Manuals P. 748
18 US ODYSSEY-31THR6010.book 2 ページ 2018年12月6日 木曜日 午後4時18分
Page 8 of 763

Visual Index
6
Quick Reference Guide
❙Door Mirror Controls (P207)
❙Master Door Lock Switch (P156)
❙Hood Release Handle (P646)
❙Power Window Switches (P182)
❙Rearview Mirror (P206)
❙Driver Side Fuse Box (P724)
❙Glove Box (P227)
❙Driver’s Front Airbag (P50)
❙Passenger’s Knee Airbag
(P54)
❙Driver’s Knee Airbag (P54)
❙Auxiliary Input Jack (P262)
❙USB Port (P261)
❙Passenger’s Front Airbag
(P50)
❙HomeLink® Buttons* (P468)
18 US ODYSSEY-31THR6010.book 6 ページ 2018年12月6日 木曜日 午後4時18分
Page 143 of 763

141
Controls
This chapter explains how to operate the various controls necessary for driving.
Clock.................................................. 142
Locking and Unlocking the Doors Key Types and Functions .................. 144
Low Remote Signal Strength ............ 146
Locking/Unlocking the Doors from the Outside .... 147
Locking/Unlocking the Doors from the Inside ...154
Childproof Door Locks ..................... 157
Auto Door Locking/Unlocking .......... 158
Opening and Closing the Tailgate ... 159
Opening and Closing the Sliding Doors..... 170Security System
Immobilizer System .......................... 179
Security System Alarm ...................... 179
Opening and Closing the Windows.... 182Opening and Closing the Moonroof*..... 185
Operating the Switches Around the Steering Wheel ENGINE START/STOP Button............. 186
Turn Signals ..................................... 189
Light Switches.................................. 189
Fog Lights
*...................................... 192
Daytime Running Lights ................... 193
Auto High-Beam
*............................ 194
Wipers and Washers ........................ 197
Brightness Control ........................... 200
Rear Defogger/Heated Door Mirror* Button...201
Heated Windshield Button ............... 202
Driving Position Memory System*.... 203
Adjusting the Steering Wheel........... 205
Canadian models
Adjusting the Mirrors ....................... 206
Interior Rearview Mirror ................... 206
Power Door Mirrors .............................. 207
Adjusting the Seats Front Seats ........................................... 209
Head Restraints .................................... 212
Maintain a Proper Sitting Position ......... 215
Interior Lights/Interior Convenience Items...... 225Interior Lights ....................................... 225
Interior Convenience Items ................... 227
Climate Control System
Using Automatic Climate Control ......... 248
Using Automatic Climate Control ......... 252
Automatic Climate Control Sensors ...... 257
Dual-zone climate control system
Tri-zone climate control system
* Not available on all models
18 US ODYSSEY-31THR6010.book 141 ページ 2018年12月6日 木曜日 午後4時18分
Page 203 of 763

201
uuOperating the Switches Around the Steering Wheel uRear Defogger/Heated Door Mirror* Button
Controls
Rear Defogger/Heated Door Mirror* Button
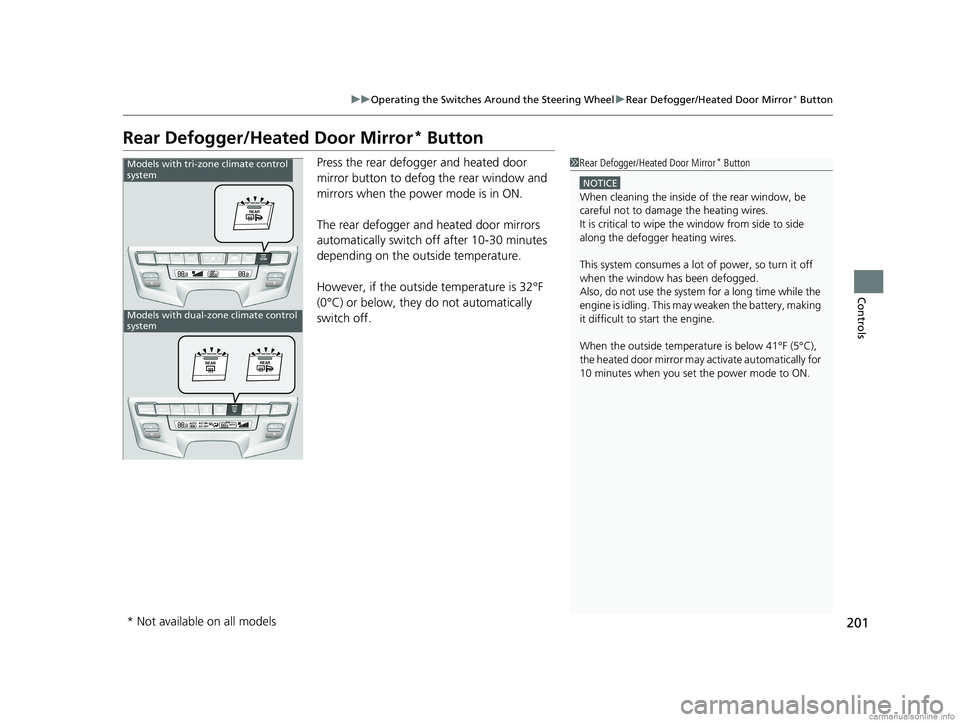
Press the rear defogger and heated door
mirror button to defog the rear window and
mirrors when the power mode is in ON.
The rear defogger and heated door mirrors
automatically switch of f after 10-30 minutes
depending on the outside temperature.
However, if the outside temperature is 32°F
(0°C) or below, they do not automatically
switch off.1 Rear Defogger/Heated Door Mirror* Button
NOTICE
When cleaning the inside of the rear window, be
careful not to damage the heating wires.
It is critical to wipe the window from side to side
along the defogger heating wires.
This system consumes a lot of power, so turn it off
when the window has been defogged.
Also, do not use the system for a long time while the
engine is idling. This may weaken the battery, making
it difficult to start the engine.
When the outside temperature is below 41°F (5°C),
the heated door mirror may activate automatically for
10 minutes when you set the power mode to ON.
Models with tri-zone climate control
system
Models with dual-zone climate control
system
* Not available on all models
18 US ODYSSEY-31THR6010.book 201 ページ 2018年12月6日 木曜日 午後4時18分
Page 205 of 763

203
uuOperating the Switches Around the Steering Wheel uDriving Position Memory System*
Continued
Controls
Driving Position Memory System*
You can store two driver’s seat positions (except for power lumbar) and outside
mirror positions with the driv ing position memory system.
When you unlock and open the driver’s door with a remote, the seat and outside
mirrors adjust automatically to one of the two preset positions.
When you enter the vehicle, the driver information interface briefly shows you which
remote transmitter you used to unlock the vehicle.
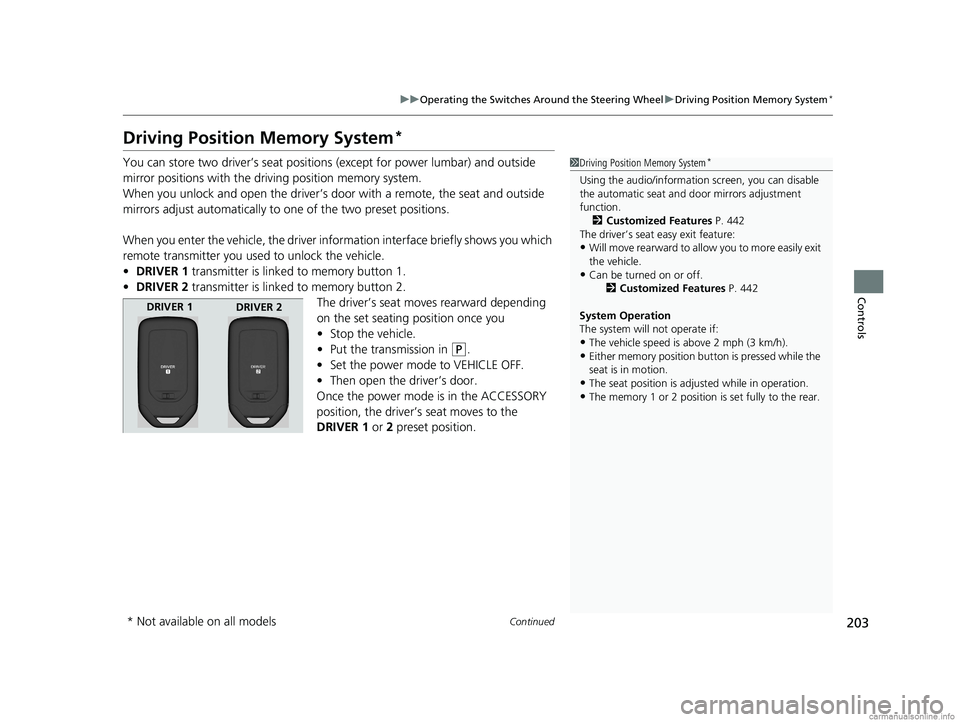
• DRIVER 1 transmitter is linked to memory button 1.
• DRIVER 2 transmitter is linked to memory button 2.
The driver’s seat moves rearward depending
on the set seating position once you
•Stop the vehicle.
• Put the transmission in
(P.
• Set the power mode to VEHICLE OFF.
• Then open the driver’s door.
Once the power mode is in the ACCESSORY
position, the driver’s seat moves to the
DRIVER 1 or 2 preset position.
1 Driving Position Memory System*
Using the audio/informati on screen, you can disable
the automatic seat and d oor mirrors adjustment
function. 2 Customized Features P. 442
The driver’s seat easy exit feature:
•Will move rearward to allow you to more easily exit
the vehicle.
•Can be turned on or off. 2Customized Features P. 442
System Operation
The system will not operate if:
•The vehicle speed is above 2 mph (3 km/h).
•Either memory position button is pressed while the
seat is in motion.
•The seat position is adju sted while in operation.
•The memory 1 or 2 position is set fully to the rear.
DRIVER 1
DRIVER 2
* Not available on all models
18 US ODYSSEY-31THR6010.book 203 ページ 2018年12月6日 木曜日 午後4時18分
Page 206 of 763

uuOperating the Switches Around the Steering Wheel uDriving Position Memory System*
204
Controls
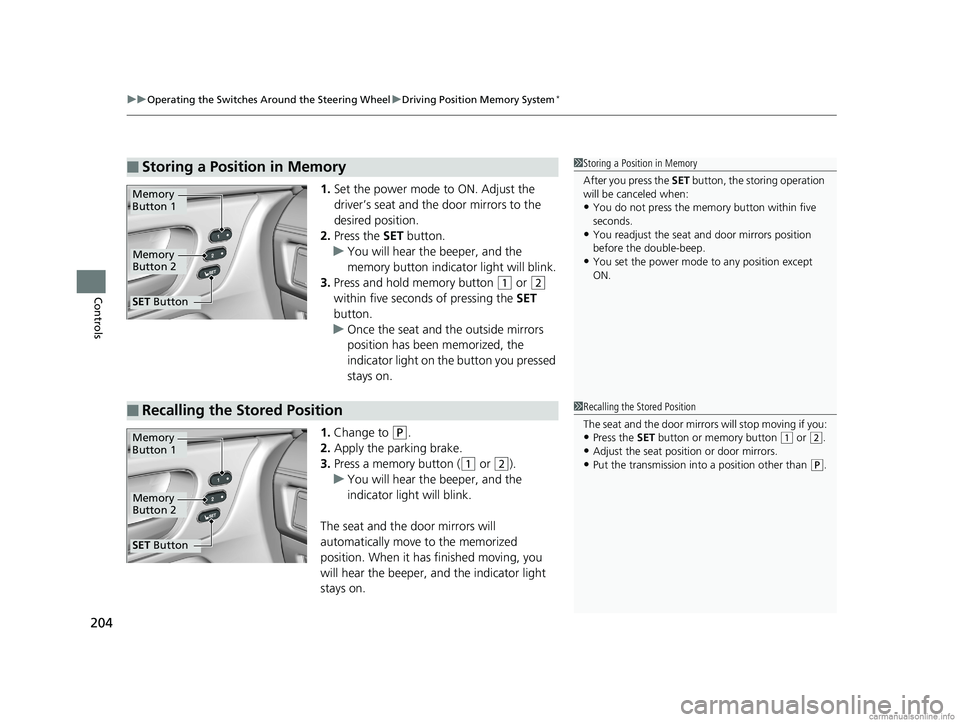
1. Set the power mode to ON. Adjust the
driver’s seat and th e door mirrors to the
desired position.
2. Press the SET button.
u You will hear the beeper, and the
memory button indicator light will blink.
3. Press and hold memory button
(1 or (2
within five seconds of pressing the SET
button.
u Once the seat and the outside mirrors
position has been memorized, the
indicator light on the button you pressed
stays on.
1. Change to
(P.
2. Apply the parking brake.
3. Press a memory button (
(1 or (2).
u You will hear the beeper, and the
indicator light will blink.
The seat and the door mirrors will
automatically move to the memorized
position. When it has finished moving, you
will hear the beeper, and the indicator light
stays on.
■Storing a Position in Memory1 Storing a Position in Memory
After you press the SET button, the storing operation
will be canceled when:
•You do not press the memory button within five
seconds.
•You readjust the seat and door mirrors position
before the double-beep.
•You set the power mode to any position except
ON.
Memory
Button 1
Memory
Button 2
SET Button
■Recalling the Stored Position1Recalling the Stored Position
The seat and the door mirrors will stop moving if you:
•Press the SET button or memory button (1 or (2.
•Adjust the seat position or door mirrors.
•Put the transmission into a position other than (P.
Memory
Button 1
Memory
Button 2
SET Button
18 US ODYSSEY-31THR6010.book 204 ページ 2018年12月6日 木曜日 午後4時18分
Page 208 of 763

206
Controls
Adjusting the Mirrors
Interior Rearview Mirror
Adjust the angle of the rearview mirror when you are sitting in the correct driving
position.
Flip the tab to switch the position.
The night position will help to reduce the glare
from headlights behind you when driving
after dark.
When you are driving after dark, the
automatic dimming rearview mirror reduces
the glare from headlights behind you. Press
the auto button to turn this function on and
off. When activated, the auto indicator comes
on.
■Rearview Mirror with Day and Night Positions*
1Adjusting the Mirrors
Keep the inside and out side mirrors clean and
adjusted for best visibility.
Adjust the mirrors befo re you start driving.
2 Front Seats P. 209
Tab
Daytime
Position Night PositionUp
Down
■Automatic Dimming Rearview Mirror*1Automatic Dimming Rearview Mirror*
The auto dimming function cancels when the
transmission is in
(R.Sensor
Auto Button
* Not available on all models
18 US ODYSSEY-31THR6010.book 206 ページ 2018年12月6日 木曜日 午後4時18分
Page 209 of 763

207
uuAdjusting the Mirrors uPower Door Mirrors
Continued
Controls
Power Door Mirrors
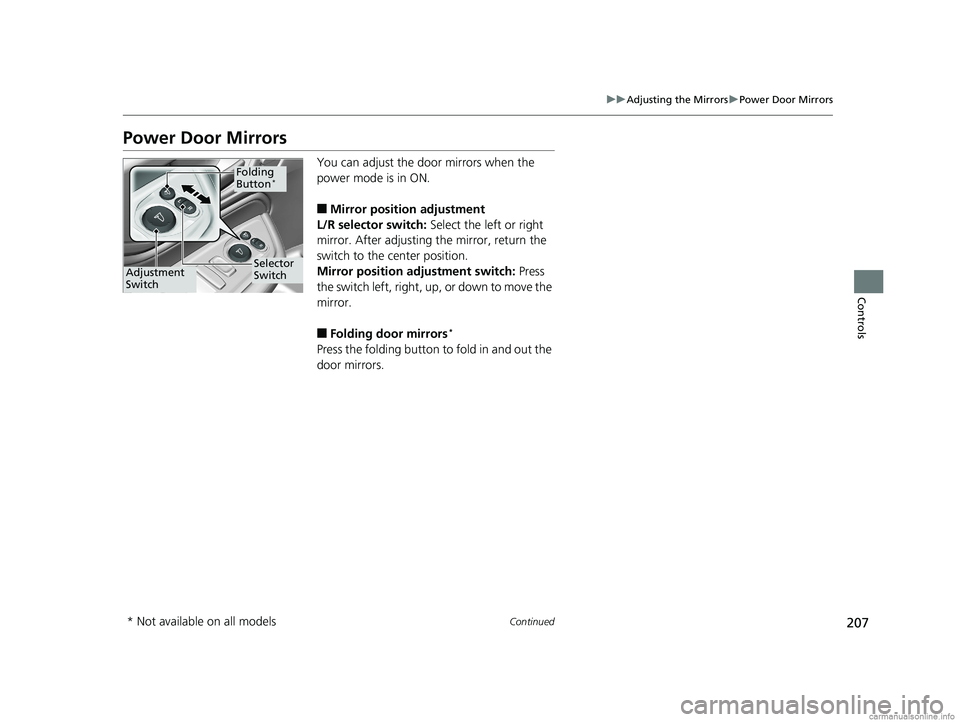
You can adjust the door mirrors when the
power mode is in ON.
■Mirror position adjustment
L/R selector switch: Select the left or right
mirror. After adjusting the mirror, return the
switch to the center position.
Mirror positi on adjustment switch: Press
the switch left, right, up , or down to move the
mirror.
■Folding door mirrors*
Press the folding button to fold in and out the
door mirrors.
Selector
SwitchAdjustment
Switch
Folding
Button*
* Not available on all models
18 US ODYSSEY-31THR6010.book 207 ページ 2018年12月6日 木曜日 午後4時18分