2018 HONDA ODYSSEY dashboard
[x] Cancel search: dashboardPage 83 of 763

81
Safe Driving
Safety Labels
Label Locations
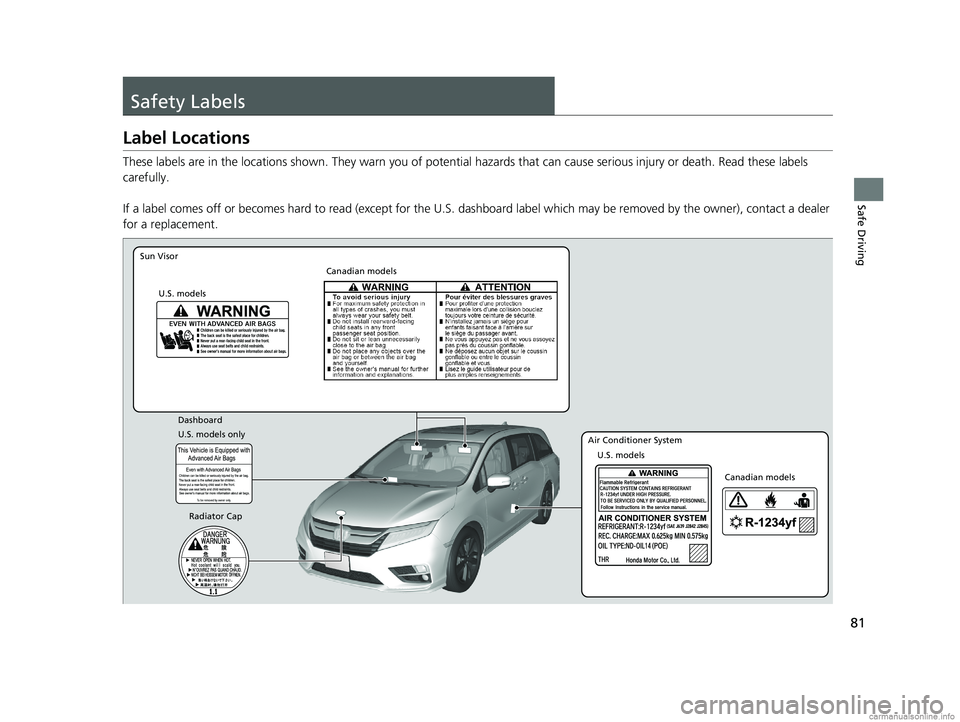
These labels are in the locations shown. They warn you of potential hazards that can cause serious injury or death. Read these labels
carefully.
If a label comes off or becomes hard to read (except for the U. S. dashboard label which may be removed by the owner), contact a dealer
for a replacement.
(SAE J639 J2842 J2845)
Sun Visor
U.S. models Canadian models
Radiator Cap U.S. models
U.S. models only Dashboard
Canadian models
Air Conditioner System
18 US ODYSSEY-31THR6010.book 81 ページ 2018年12月6日 木曜日 午後4時18分
Page 174 of 763

172
uuOpening and Closing the Sliding Doors uOpening/Closing the Power Sliding Doors*
Controls
Opening/Closing the Power Sliding Doors*
The power sliding doors can be operated by pressing the power sliding door button
on the remote, pressing the power sliding door switches on the dashboard or door
pillars, or using the door handle.
The power sliding doors can be operated when:
• The sliding door main switch is in the ON position.
• The power sliding door is unlocked.
• The fuel fill door is closed (on the driver side sliding door only).
• The power mode is in VEHICLE OFF or the re mote engine start mode is active with
use of the remote.
• The transmission is in
(P, the brake pedal is depressed, or the parking brake is
applied (with the power mode in ON) when using the power sliding door switches
on the dashboard.
1 Opening/Closing the Power Sliding Doors*
If you shift into a position other than (P, and release
the brake pedal and the parking brake:
While opening – The sliding door stops and is left
ajar.
While closing – The beeper sounds until the door
closes.
Check that passengers, es pecially children, do not
have their hands on the sliding doors or on the door
pillars before its operation. If someone is caught in
the opening or closing sliding door, it can cause
serious injury.
Before replacing a rear ti re, turn the power sliding
door main switch to OFF.
Operate the power slidi ng doors only when the
vehicle is at a complete stop. Make sure you apply the
brake when rear passengers are boarding or exiting.
* Not available on all models
18 US ODYSSEY-31THR6010.book 172 ページ 2018年12月6日 木曜日 午後4時18分
Page 182 of 763

uuSecurity System uSecurity System Alarm
180
Controls
■To deactivate the security system alarm
Unlock the vehicle using remote transmitter or smart entry system*, or set the power
mode to ON. The system, along with the ho rn and flashing lights, is deactivated.
■Setting the security system alarm
The security system alarm automatically sets when the following conditions have
been met:
• The power mode is set to VEHICLE OFF.
• The hood is closed.
• All doors and the tailgate are locked with the key, the remote transmitter or smart
entry system
*.
■When the security system alarm sets
The security system alarm indicator in the instrument panel blinks. When the
blinking interval changes after about 15 seconds, the security system alarm is set.
■To cancel the security system alarm
The security system alarm is canceled when the vehicle is unlocked using the remote
transmitter, or smart entry system
*, or the power mode is set to ON. The security
system alarm indicator goe s off at the same time.
1Security System Alarm
Do not set the security system alarm when someone
is in the vehicle or a window is open. The system can
accidentally activate when:
•Unlocking the door with the lock tab.•Opening the hood with the hood release.
•Opening the tailgate with the power tailgate
button on the dashboard.
If the battery goes dead after you have set the
security system alarm, the security alarm may activate
once the battery is re charged or replaced.
If this occurs, deactivate the security system alarm by
unlocking a door using the remote transmitter or
smart entry system
*.
Do not alter the system or add other devices to it.
Doing so may damage the system and make your
vehicle inoperable.
Models with power tailgate
* Not available on all models
18 US ODYSSEY-31THR6010.book 180 ページ 2018年12月6日 木曜日 午後4時18分
Page 190 of 763

uuOperating the Switches Around the Steering Wheel uENGINE START/STOP Button
188
Controls
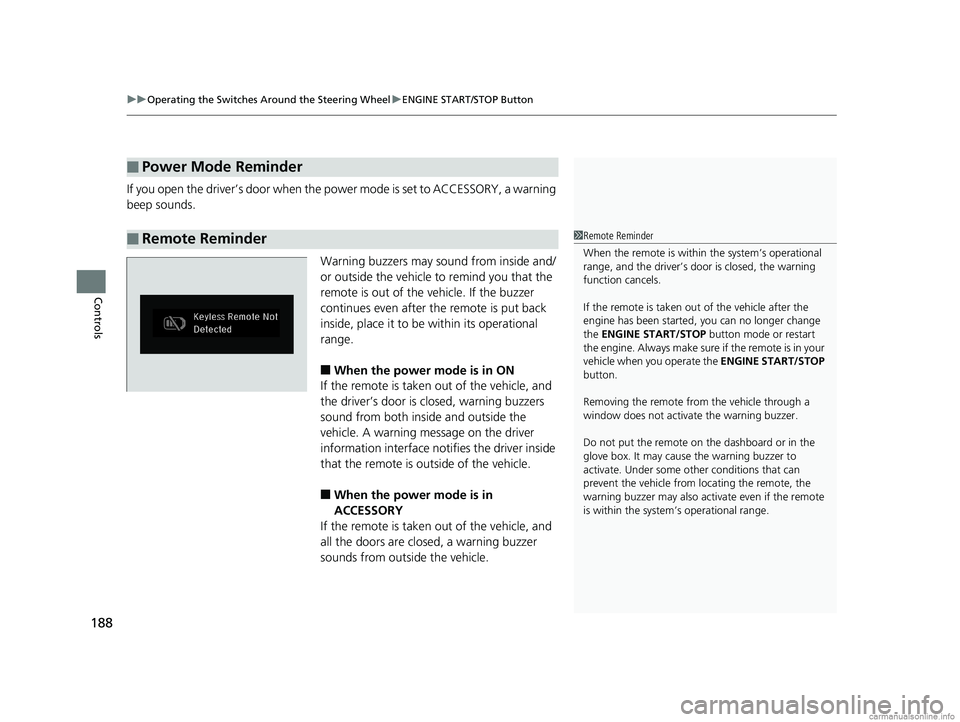
If you open the driver’s doo r when the power mode is set to ACCESSORY, a warning
beep sounds.
Warning buzzers may sound from inside and/
or outside the vehicle to remind you that the
remote is out of the vehicle. If the buzzer
continues even after the remote is put back
inside, place it to be within its operational
range.
■When the power mode is in ON
If the remote is taken out of the vehicle, and
the driver’s door is closed, warning buzzers
sound from both inside and outside the
vehicle. A warning me ssage on the driver
information interface notifies the driver inside
that the remote is outside of the vehicle.
■When the power mode is in
ACCESSORY
If the remote is taken out of the vehicle, and
all the doors are clos ed, a warning buzzer
sounds from outside the vehicle.
■Power Mode Reminder
■Remote Reminder1 Remote Reminder
When the remote is within the system’s operational
range, and the driver’s door is closed, the warning
function cancels.
If the remote is taken out of the vehicle after the
engine has been started, you can no longer change
the ENGINE START/STOP button mode or restart
the engin e. Always make sure if the remote is in your
vehicle when you operate the ENGINE START/STOP
button.
Removing the remote fr om the vehicle through a
window does not activate the warning buzzer.
Do not put the remote on the dashboard or in the
glove box. It may cause the warning buzzer to
activate. Under some ot her conditions that can
prevent the vehicle from locating the remote, the
warning buzzer may also activate even if the remote
is within the system’s operational range.
18 US ODYSSEY-31THR6010.book 188 ページ 2018年12月6日 木曜日 午後4時18分
Page 197 of 763

Continued195
uuOperating the Switches Around the Steering Wheel uAuto High-Beam*
Controls
To activate the system , turn the headlight
switch to AUTO and then set the headlights
to low beam. The auto high-beam indicator
will come on.
2 Light Switches P. 189
The high beams remain on unless:
•You have been driving below 45 mph (72 km/h) for an extended amount of time.
• The speed of the vehicle drops below 30 mph (48 km/h).
• The windshield wipers have been runnin g at a high speed for more than a few
seconds.
• You enter a well lit location.
The high beams come back on once the condi tion that caused them to turn off no
longer exists.
If needed, you can temporarily turn the hi gh beams off manually. Turn on the high
beams by pushing the lever forward until you hear a click, or flash the high beams
once by pulling the lever toward you. To turn the high beams back on, repeat one
of the procedures.
■Operating the System1 Operating the System
For the auto high-beam to work properly:
•Do not place an object that reflects light on the
dashboard.
•Keep the windshield around the camera clean.
When cleaning the windshield, be careful not to
apply windshield cleanser to the camera lens.
•Do not attach an object, sticker or film to the area
around the camera.
•Do not touch the camera lens.
If the camera receives a st rong impact, or repairing of
the area near the camera is required, consult a dealer.
If the Some Driver Assist Systems Cannot
Operate: Camera Temperature Too High message
appears:
•Use the climate control system to cool down the
interior and, if necessary, also use defroster mode
with the airflow directed toward the camera.
•Start driving the vehicle to lower the windshield
temperature, which cool s down the area around
the camera.
If the Some Driver Assist Systems Cannot
Operate: Clean Front Windshield message
appears:
•Park your vehicle in a sa fe place, and clean the
windshield. If the message does not disappear after
you have cleaned the winds hield and driven for a
while, have your vehicle checked by a dealer.
Headlight Switch
18 US ODYSSEY-31THR6010.book 195 ページ 2018年12月6日 木曜日 午後4時18分
Page 211 of 763

209Continued
Controls
Adjusting the Seats
Front Seats
Adjust the driver’s seat as far back as possible
while allowing you to ma intain full control of
the vehicle. You should be able to sit upright,
well back in the seat and be able to
adequately press the pedals without leaning
forward, and grip the steering wheel
comfortably. The passenger’s seat should be
adjusted in a similar manner, so that it is as far
back from the front airbag in the dashboard
as possible.1 Adjusting the Seats
The National Highway Traffic Safety Administration
and Transport Cana da recommend that drivers allow
at least 10 inches (25 cm) between the center of the
steering wheel and the chest.
Always make seat adjustments before driving.
3WARNING
Sitting too close to a front airbag can result
in serious injury or death if the front
airbags inflate.
Always sit as far back from the front
airbags as possible while maintaining
control of the vehicle.
Move back.
Allow sufficient
space.
■Adjusting the Seat Positions
Horizontal
Position
Adjustment
Height
Adjustment
(Driver’s seat
only)
Seat-back
Angle
Adjustment
18 US ODYSSEY-31THR6010.book 209 ページ 2018年12月6日 木曜日 午後4時18分
Page 250 of 763

248
Controls
Climate Control System
Using Automatic Climate Control
The automatic climate control system maintains the interior temperature you select.
The system also selects the proper mix of heated or cooled air that raises or lowers
the interior temperature to your pr eference as quickly as possible.
Use the system when the engine is running.
1. Press the AUTO button.
2. Adjust the interior temperature us ing the temperature control switch.
3. Press the button to cancel.
■Switching between the recirculation and fresh air modes
Press the button and switch the mode depending on environmental
conditions.
Recirculation Mode (indicator on): Recirculates air from the vehicle’s interior through
the system.
Fresh Air Mode (indicator off): Maintains outside ventilation. Keep the system in
fresh air mode in normal situations.
Dual-zone climate control system
1 Using Automatic Climate Control
If any buttons are presse d while using the climate
control system in auto, the function of the button
that was pressed will take priority.
The AUTO indicator will go off, but functions
unrelated to the button th at was pressed will be
controlled automatically.
To prevent cold air from bl owing in from outside, the
fan may not start i mmediately when the AUTO
button is pressed.
If the interior is very warm, you can cool it down
more rapidly by partial ly opening the windows,
turning the system on auto, and setting the
temperature to low. Change the fresh air mode to
recirculation mode until the temperature cools down.
When you set the temperat ure to the lower or upper
limit, Lo or Hi is displayed.
Pressing the button switches the climate
control system between on and off. When turned on,
the system returns to your last selection.
While ECON mode is active, the climate control
system may have reduced cooling performance.
Dashboard
vents
Dashboard
and floor
vents
Floor vents
Floor and
defroster
vents
AUTO Button
Temperature
Control Switch A/C
(Air Conditioning) Button
Fan Control Switch
(Recirculation)
Button
(On/Off)
Button
SYNC
(Synchronized)
Button
(Windshield
Defroster) Button
MODE Button
18 US ODYSSEY-31THR6010.book 248 ページ 2018年12月6日 木曜日 午後4時18分
Page 254 of 763

252
Controls
Climate Control System
Using Automatic Climate Control
The automatic climate control system maintains the interior temperature you select.
The system also selects the proper mix of heated or cooled air that raises or lowers
the interior temperature to your pr eference as quickly as possible.
Use the system when the engine is running.
1. Press the AUTO button.
2. Adjust the interior temperature using the dr iver’s side or passenger’s side control
switch.
3. Press the butto n to cancel.
Tri-zone climate control system
1Using Automatic Climate Control
Press the FRONT CLIMATE button to display A/C,
MODE, fan control information on the audio/
information screen for several seconds. Select icon to
turn on or off A/C, change the vent mode, or change
the fan speed.
During idle-stops, air-conditioning is suspended, and
only the blower remains ac tive. If you do not want
air-conditioning suspended, press to cancel idle-
stop.
If any buttons are presse d while using the climate
control system in auto, the function of the button
that was pressed will take priority.
The AUTO indicator will go off, but functions
unrelated to the button that were pressed will be
controlled automatically.
To prevent cold air from bl owing in from outside, the
fan may not start i mmediately when the AUTO
button is pressed.
If the interior is very warm, you can cool it down
more rapidly by partial ly opening the windows,
turning the system on AUTO, and setting the
temperature to low. Change the fresh mode to
recirculation mode until the temperature cools down.
When you set the temperat ure to the lower or upper
limit, Lo or Hi is displayed.
Models with Auto Idle StopMode Control Icon
(Air flows from
dashboard vents) Mode Control Icon
(Air flows from
floor vents)
Mode Control Icon
(Air flows from
floor and
windshield
defroster vents)
Fan Control Icon
Mode Control Icon (Air flows from
floor and dashboard vents)
A/C
(Air Conditioning)
Icon
(On/Off) Button
(Recirculation) Button
SYNC (Synchronized) Button
FRONT
CLIMATE
Button
Driver’s Side
Temperature
Control switch Fan Control Button
Passenger’s
Side
Temperature
Control switchAUTO Button
18 US ODYSSEY-31THR6010.book 252 ページ 2018年12月6日 木曜日 午後4時18分