Page 505 of 559

Continued503
uuIf a Tire Goes Flat uTemporarily Repairing a Flat Tire
Handling the Unexpected
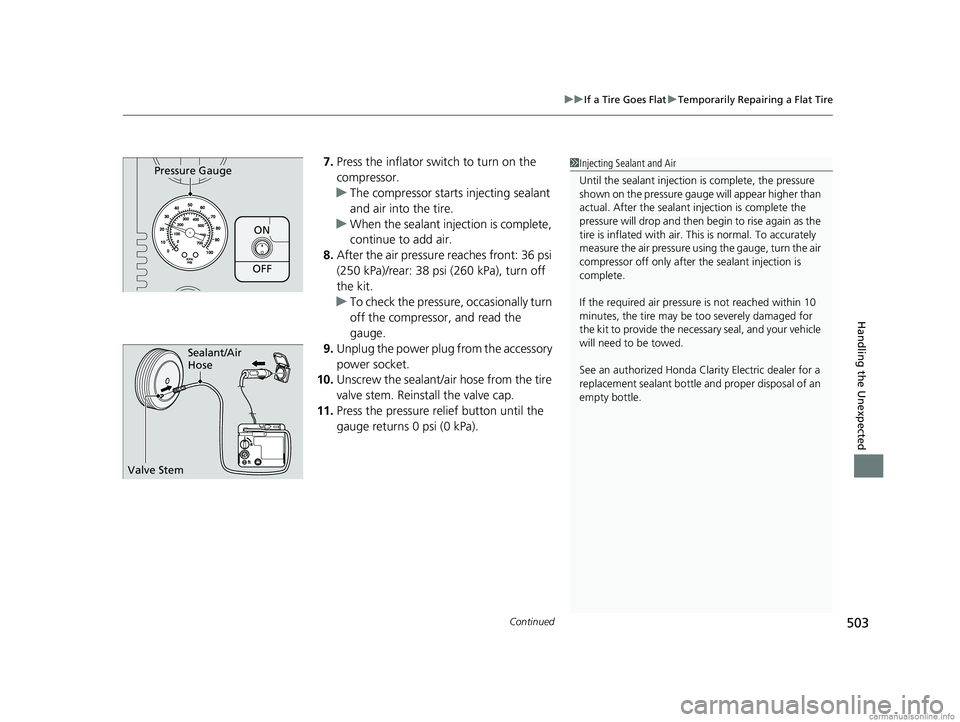
7. Press the inflator switch to turn on the
compressor.
u The compressor starts injecting sealant
and air into the tire.
u When the sealant injection is complete,
continue to add air.
8. After the air pressure reaches front: 36 psi
(250 kPa)/rear: 38 psi (260 kPa), turn off
the kit.
u To check the pressure, occasionally turn
off the compressor, and read the
gauge.
9. Unplug the power plug from the accessory
power socket.
10. Unscrew the sealant/ai r hose from the tire
valve stem. Reinstall the valve cap.
11. Press the pressure relief button until the
gauge returns 0 psi (0 kPa).
ON
OFF
Pressure Gauge1Injecting Sealant and Air
Until the sealant injection is complete, the pressure
shown on the pressure gauge will appear higher than
actual. After the sealant injection is complete the
pressure will drop and then begin to rise again as the
tire is inflated with air. This is normal. To accurately
measure the air pressure usi ng the gauge, turn the air
compressor off only after the sealant injection is
complete.
If the required air pressure is not reached within 10
minutes, the tire may be too severely damaged for
the kit to provide the necessa ry seal, and your vehicle
will need to be towed.
See an authorized Honda Clar ity Electric dealer for a
replacement sealant bottle an d proper disposal of an
empty bottle.
Sealant/Air
Hose
Valve Stem
18 CLARITY ELECTRIC CSS-31TRV6100.book 503 ページ 2018年2月5日 月曜日 午後12時0分
Page 506 of 559
504
uuIf a Tire Goes Flat uTemporarily Repairing a Flat Tire
Handling the Unexpected
12. Apply the repair notification label to the
flat surface of the wheel.
u The wheel surface must be clean to
ensure the label adheres properly.
1. Apply the speed restriction label to the
location as shown.
2. Drive the vehicle for about 10 minutes.
u Do not exceed 50 mph (80 km/h).
3. Stop the vehicle in a safe place.Repair Notification Label
■Distributing the Sealant in the Tire
Speed Restriction Label
18 CLARITY ELECTRIC CSS-31TRV6100.book 504 ページ 2018年2月5日 月曜日 午後12時0分
Page 507 of 559

505
uuIf a Tire Goes Flat uTemporarily Repairing a Flat Tire
Continued
Handling the Unexpected
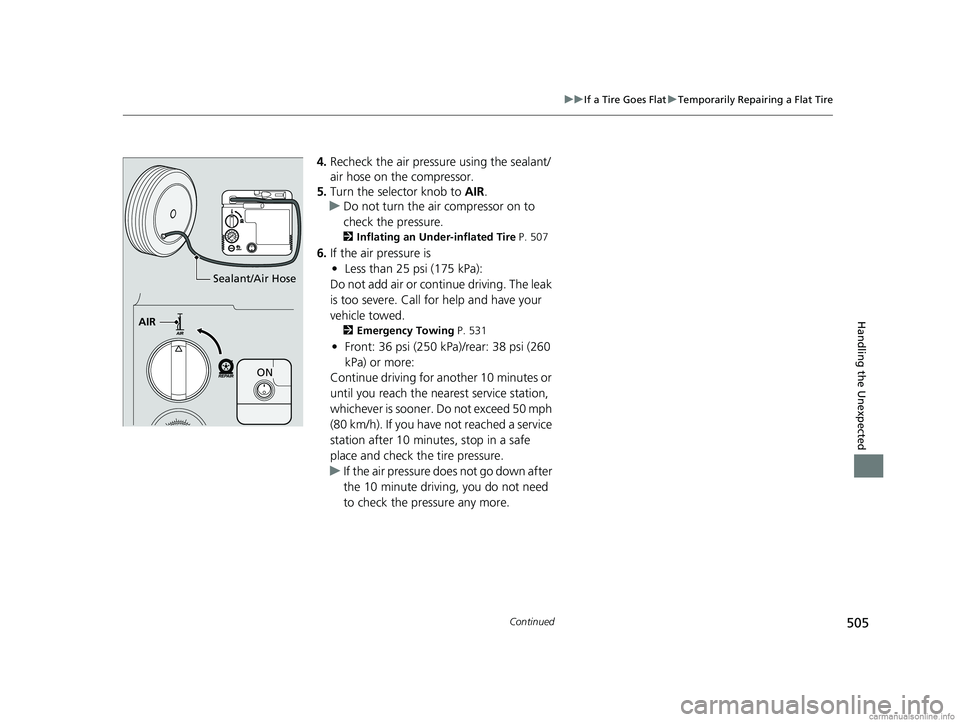
4. Recheck the air pressu re using the sealant/
air hose on the compressor.
5. Turn the selector knob to AIR.
u Do not turn the air compressor on to
check the pressure.
2 Inflating an Under-inflated Tire P. 507
6.If the air pressure is
• Less than 25 psi (175 kPa):
Do not add air or continue driving. The leak
is too severe. Call for help and have your
vehicle towed.
2 Emergency Towing P. 531
•Front: 36 psi (250 kPa)/rear: 38 psi (260
kPa) or more:
Continue driving for another 10 minutes or
until you reach the nearest service station,
whichever is sooner. Do not exceed 50 mph
(80 km/h). If you have not reached a service
station after 10 minutes, stop in a safe
place and check th e tire pressure.
u If the air pressure do es not go down after
the 10 minute driving, you do not need
to check the pressure any more.
AIR
ON
Sealant/Air Hose
18 CLARITY ELECTRIC CSS-31TRV6100.book 505 ページ 2018年2月5日 月曜日 午後12時0分
Page 508 of 559
506
uuIf a Tire Goes Flat uTemporarily Repairing a Flat Tire
Handling the Unexpected
• Greater than 25 psi (175 kPa), but less
than front: 36 psi (250 kPa)/rear: 38 psi
(260 kPa):
Turn the air compressor on to inflate the
tire until the tire pressure reaches front: 36
psi (250 kPa)/rear: 38 psi (260 kPa).
2 Inflating an Under-inflated Tire P. 507
Then drive carefully for 10 more minutes or
until you reach the nearest service station,
whichever is sooner. Do not exceed 50 mph
(80 km/h). If you have not reached a service
station after 10 minutes, stop in a safe
place and check the tire pressure.
u You should repeat this procedure as long
as the air pressure is within this range.
7. Unscrew the sealant/ai r hose from the tire
valve stem. Reinstall the valve cap.
8. Press the pressure relief button until the
gauge returns 0 psi (0 kPa).
9. Repackage and properly stow the kit.
Pressure Relief Button
18 CLARITY ELECTRIC CSS-31TRV6100.book 506 ページ 2018年2月5日 月曜日 午後12時0分
Page 509 of 559
Continued507
uuIf a Tire Goes Flat uTemporarily Repairing a Flat Tire
Handling the Unexpected
You can use the kit to inflate a non-punctured under-inflated tire.
1.Open the trunk floor lid.
2 Getting Ready to Temporarily Repair
the Flat Tire P. 499
2.Remove the kit from the case.
3. Place the kit, face up, on flat ground near
the flat tire, away from traffic. Do not
place the kit on its side.
4. Remove the Sealant/Air hose from the kit.
5. Remove the valve cap.
6. Attach the Sealant/Air hose onto the tire
valve stem. Screw it until it is tight.
■Inflating an Under-inflated Tire1Inflating an Under-inflated Tire
NOTICE
Do not operate the temporary tire repair kit
compressor for more than 15 minutes. The
compressor can overheat and become permanently
damaged.Sealant/Air Hose
Valve Cap
Valve Stem
Sealant/Air Hose
18 CLARITY ELECTRIC CSS-31TRV6100.book 507 ページ 2018年2月5日 月曜日 午後12時0分
Page 510 of 559
508
uuIf a Tire Goes Flat uTemporarily Repairing a Flat Tire
Handling the Unexpected
7. Plug in the kit to the accessory power
socket.
u Be careful not to pinch the cord in a
door or window.
u Do not plug any other electronic
devices into other accessory power
sockets.
2 Accessory Power Sockets P. 182
8.Turn the power system on.
u Keep the power system on while
injecting air.
9. Turn the selector knob to AIR.
10. Press the inflator swit ch to turn on the kit.
u The compressor starts to inject air into
the tire.
11. Inflate the tire to the specified air pressure.
AIR
ON
18 CLARITY ELECTRIC CSS-31TRV6100.book 508 ページ 2018年2月5日 月曜日 午後12時0分
Page 511 of 559
509
uuIf a Tire Goes Flat uTemporarily Repairing a Flat Tire
Handling the Unexpected
12. Turn off the kit.
u Check the pressure gauge on the air
compressor.
u If overinflated, press the pressure relief
button.
13. Unplug the kit from the accessory power
socket.
14. Unscrew the Sealant/Air hose from the tire
valve stem. Reinstall the valve cap.
15. Press the pressure relief button until the
gauge returns 0 psi (0 kPa).
16. Repackage and properly stow the kit.
Pressure Relief Button
18 CLARITY ELECTRIC CSS-31TRV6100.book 509 ページ 2018年2月5日 月曜日 午後12時0分
Page 524 of 559

522
uuIndicator, Coming On/Blinking uIf the Low Tire Pressure/TPMS Indicator Comes On or Blinks
Handling the Unexpected
If the Low Tire Pressure/TPMS Indicator Comes On or
Blinks
■Reasons for the indicator to come on or blink
A tire pressure is signifi cantly low, or the TPMS has not been calibrated.
If there is a problem with the TPMS, the indicator blinks for about one
minute, and then stays on.
■What to do when the indicator comes on
Drive carefully and avoid abrupt cornering and hard braking.
Stop your vehicle in a safe place. Ch eck the tire pressure and adjust the
pressure to the specified level. The sp ecified tire pressure is on a label on
the driver side doorjamb.
u Calibrate the TPMS after the tire pressure is adjusted.
■What to do when the indicator blinks, then remains on
Have the tire inspected by an authorized Honda Clarity Electric dealer as
soon as possible.
1 If the Low Tire Pressure/TPMS Indicator Comes On or Blinks
NOTICE
Driving on an extremely underinflated tire can cause
it to overheat. An overheated tire can fail. Always
inflate your tires to the prescribed level.
18 CLARITY ELECTRIC CSS-31TRV6100.book 522 ページ 2018年2月5日 月曜日 午後12時0分