2018 FORD F450 SUPER DUTY spare tire
[x] Cancel search: spare tirePage 419 of 656

2. Use an up-and-down motion with the
jack handle to raise the wheel
completely off the ground.
Note: Hydraulic jacks are equipped with a
pressure release valve that prevents lifting
loads which exceed the jack's rated
capacity.
3. Remove the lug nuts with the lug wrench.
4. Replace the flat tire with the spare tire,
making sure the valve stem is facing
outward on all front an inboard rear
wheels. If you are replacing the
outboard wheel, the valve stem must
be facing inward. Reinstall the lug nuts
until the wheel is snug against the hub.
Do not fully tighten the lug nuts until
the wheel has been lowered.
5. Lower the wheel by slowly turning the release valve counterclockwise.
Opening the release valve slowly will
provide a more controlled rate of
descent.
6. Remove the jack and fully tighten the lug nuts in the order shown. See
Technical Specifications (page 419).
7. Stow the flat tire. See Stowing the flat or spare tire if the vehicle is equipped
with a spare tire carrier.
8. Stow the jack, jack handle and lug wrench. Make sure the jack is securely
fastened so it does not rattle when
driving.
9. Unblock the wheels. 8-lug nut torque sequence
10-lug nut torque sequence
Installing Dual Rear Wheel Ornaments
1. Align the ornament with the lug nuts.
A is the clip and B is the flange.
416
Super Duty (TFE) Canada/United States of America, enUSA, Edition date: 201709, First Printing Wheels and TiresE161441
13
4
27
6
5
8 1
2
3
4
5
6
7 8
9
10
E169375 AB
E162822
Page 420 of 656
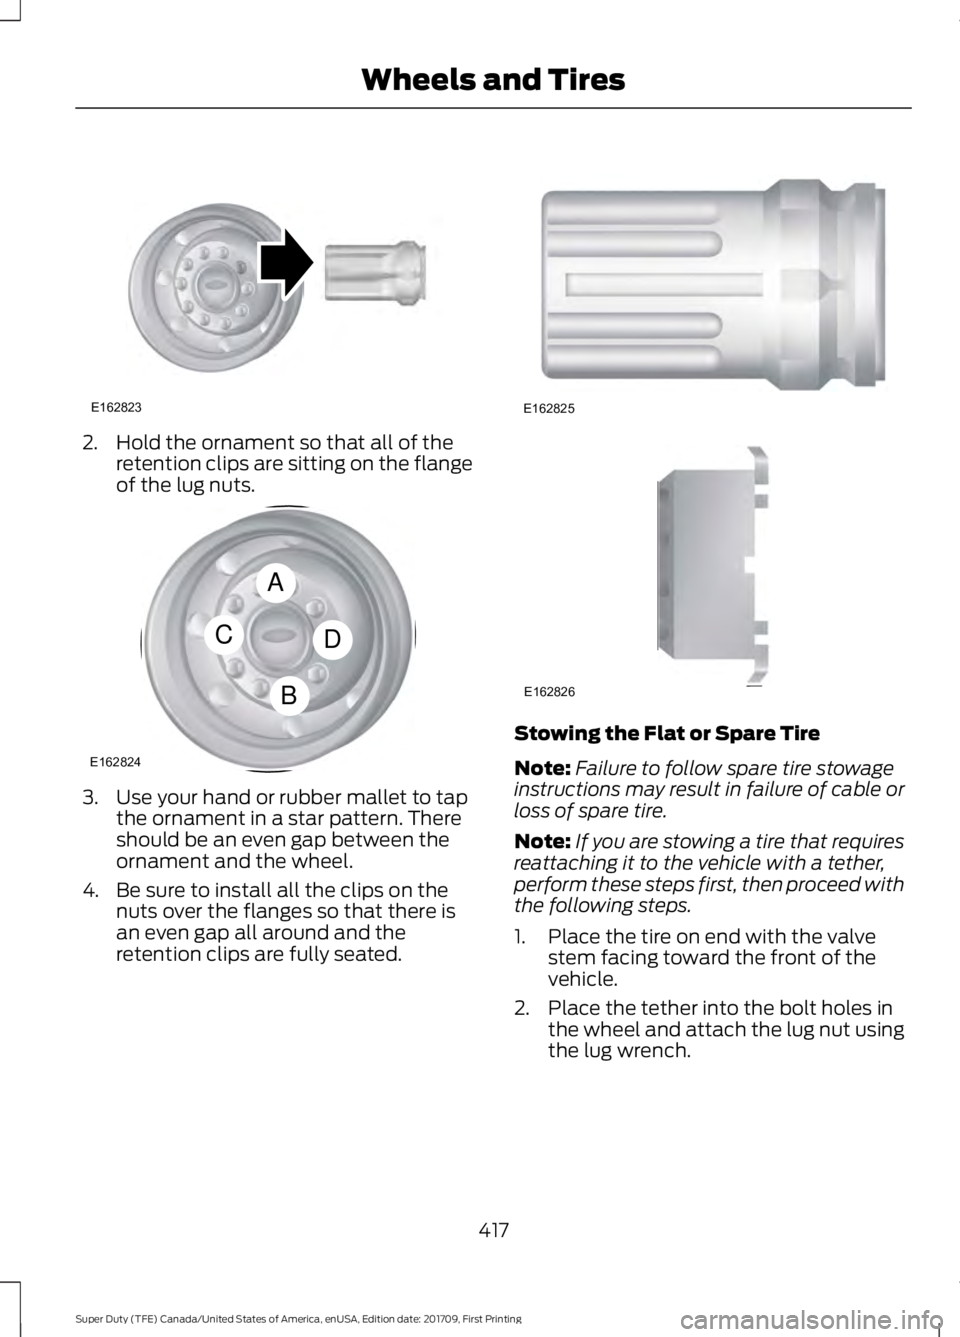
2. Hold the ornament so that all of the
retention clips are sitting on the flange
of the lug nuts. 3. Use your hand or rubber mallet to tap
the ornament in a star pattern. There
should be an even gap between the
ornament and the wheel.
4. Be sure to install all the clips on the nuts over the flanges so that there is
an even gap all around and the
retention clips are fully seated. Stowing the Flat or Spare Tire
Note:
Failure to follow spare tire stowage
instructions may result in failure of cable or
loss of spare tire.
Note: If you are stowing a tire that requires
reattaching it to the vehicle with a tether,
perform these steps first, then proceed with
the following steps.
1. Place the tire on end with the valve stem facing toward the front of the
vehicle.
2. Place the tether into the bolt holes in the wheel and attach the lug nut using
the lug wrench.
417
Super Duty (TFE) Canada/United States of America, enUSA, Edition date: 201709, First Printing Wheels and TiresE162823 A
C
B
D
E162824 E162825 E162826
Page 421 of 656
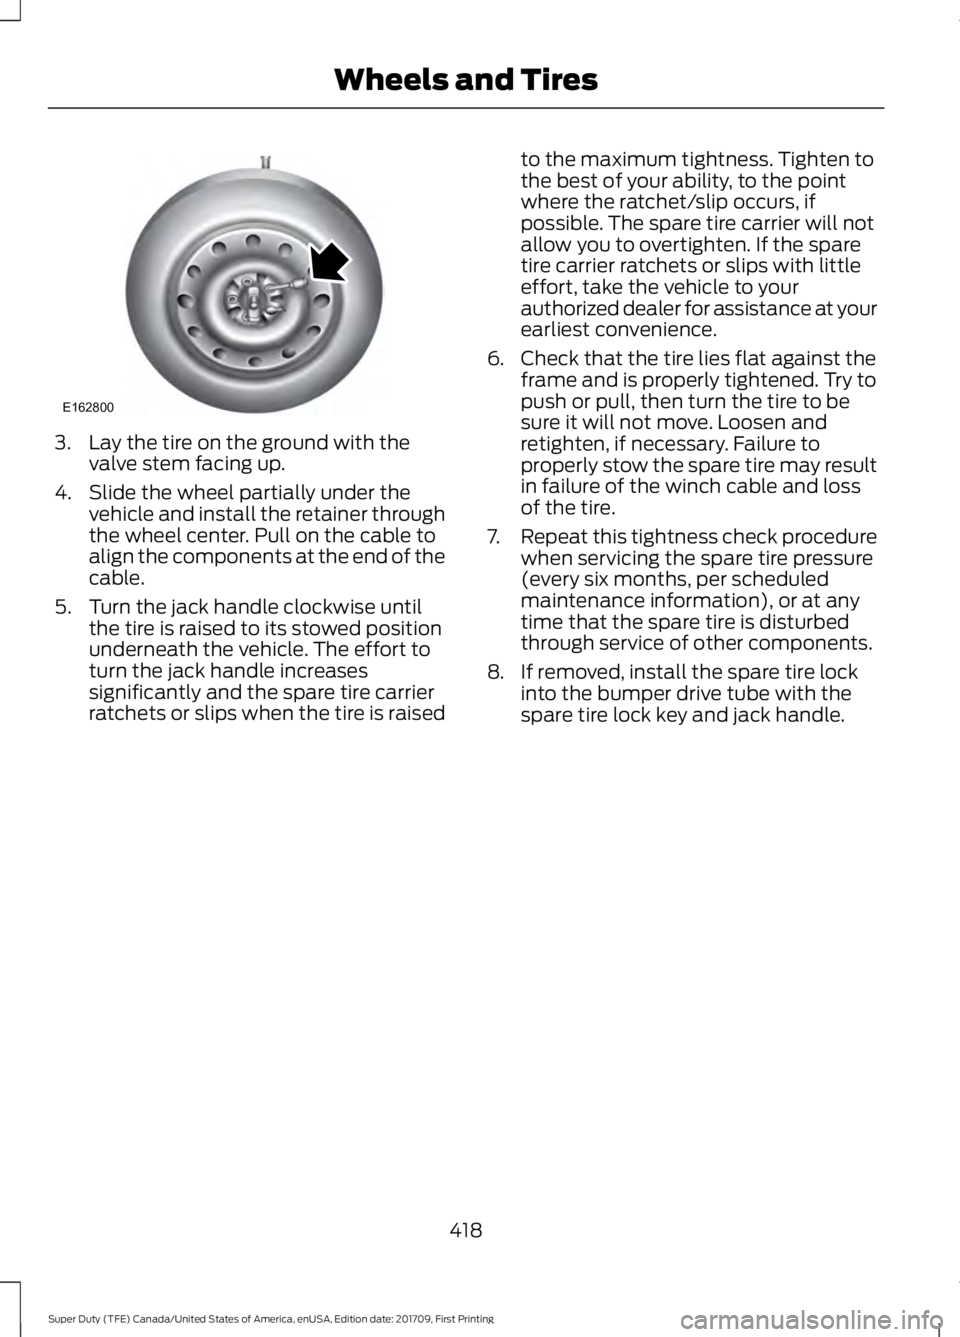
3. Lay the tire on the ground with the
valve stem facing up.
4. Slide the wheel partially under the vehicle and install the retainer through
the wheel center. Pull on the cable to
align the components at the end of the
cable.
5. Turn the jack handle clockwise until the tire is raised to its stowed position
underneath the vehicle. The effort to
turn the jack handle increases
significantly and the spare tire carrier
ratchets or slips when the tire is raised to the maximum tightness. Tighten to
the best of your ability, to the point
where the ratchet/slip occurs, if
possible. The spare tire carrier will not
allow you to overtighten. If the spare
tire carrier ratchets or slips with little
effort, take the vehicle to your
authorized dealer for assistance at your
earliest convenience.
6. Check that the tire lies flat against the frame and is properly tightened. Try to
push or pull, then turn the tire to be
sure it will not move. Loosen and
retighten, if necessary. Failure to
properly stow the spare tire may result
in failure of the winch cable and loss
of the tire.
7. Repeat this tightness check procedure
when servicing the spare tire pressure
(every six months, per scheduled
maintenance information), or at any
time that the spare tire is disturbed
through service of other components.
8. If removed, install the spare tire lock into the bumper drive tube with the
spare tire lock key and jack handle.
418
Super Duty (TFE) Canada/United States of America, enUSA, Edition date: 201709, First Printing Wheels and TiresE162800
Page 586 of 656
Check Every Month
Air filter restriction gauge. Engine oil level.
Function of all interior and exterior lights.
Tires including the spare for wear and proper pressure. Windshield washer fluid level.
Fuel and water separator. Drain if necessary or if indicated by the information display. Holes and slots in the tail pipe to make sure they are functional and clear of debris. Check Every Six Months
Battery connections. Clean if necessary.
Body and door drain holes for obstructions. Clean if necessary. Cooling system fluid level and coolant strength.
Door weatherstrips for wear. Lubricate if necessary.
Hinges, latches and outside locks for proper operation. Lubricate if necessary. Parking brake for proper operation.
Safety belts and seat latches for wear and function.
Safety warning lamps, brake, ABS, airbag and safety belt for operation.
Washer spray and wiper operation. Clean or replace blades as necessary.
Multi-Point Inspection
In order to keep your vehicle running right,
it is important to have the systems on your
vehicle checked regularly. This can help
identify potential issues and prevent major
problems. We recommend having the
following multi-point inspection performed
at every scheduled maintenance interval
to help make sure your vehicle keeps
running great.
583
Super Duty (TFE) Canada/United States of America, enUSA, Edition date: 201709, First Printing Scheduled Maintenance
Page 587 of 656
Multi-Point Inspection
Hazard warning system operation
Accessory drive belt(s)
Horn operation
Battery performance
Radiator, cooler, heater and air conditioninghoses
Engine air filter
Suspension components for leaks ordamage
Exhaust system
Steering and linkage
Exterior lamps operation
Tires including the spare for wear andproper pressure 2
Fluid levels 1
; fill if necessary
Windshield for cracks, chips or pits
For oil and fluid leaks
Washer spray and wiper operation
Half-shaft dust boots
1 Brake, coolant recovery reservoir, automatic transmission and window washer
2 If your vehicle is equipped with a temporary mobility kit, check the tire sealant expiration
Use By date on the canister. Replace as needed.
Be sure to ask your dealership service
advisor or technician about the multi-point
vehicle inspection. It is a comprehensive
way to perform a thorough inspection of
your vehicle. Your checklist gives you
immediate feedback on the overall
condition of your vehicle.
584
Super Duty (TFE) Canada/United States of America, enUSA, Edition date: 201709, First Printing Scheduled Maintenance
Page 645 of 656
Understanding the Shift Positions of Your
Automatic Transmission............................. 210
Understanding your SelectShift Automatic ™ transmission.......................... 212
Automatic Transmission Fluid Check.............................................................347
Checking Automatic Transmission Fluid.................................................................... 347
Autowipers........................................................87
Auxiliary Power Points.................................172 110 Volt - 400 Watt Capacity AC Power
Outlet.................................................................. 172
12 Volt DC Power Point...................................... 172
Locations................................................................ 172
Auxiliary Switches........................................575 Upfitter Interface Module............................... 578
B
Battery See: Changing the 12V Battery..................... 354
Bed Extender....................................................74
Grocery mode........................................................ 75
Tailgate mode........................................................ 74
Bed Ramps
.....................................................270
Installing the Ramp Holder............................ 272
Stowing the Bed Ramp.................................... 272
Using the Bed Ramp......................................... 270
Blind Spot Information System
.............254
Blind Spot Information System with Trailer
Tow..................................................................... 256
Switching the System Off and On..............258
System Errors...................................................... 258
Using the System............................................... 255
Bonnet Lock See: Opening and Closing the Hood..........329
Booster Seats
..................................................32
Types of Booster Seats...................................... 32
Brake Fluid Check........................................350
Brakes...............................................................227 General Information.......................................... 227
Breaking-In....................................................299
Bulb Specification Chart...........................361
C
Cabin Air Filter...............................................154
California Proposition 65
.............................12 Capacities and Specifications -
6.2L................................................................428
Alternative Engine Oil for Extremely Cold Climates........................................................... 432
Specifications..................................................... 429
Capacities and Specifications - 6.7L Diesel.............................................................433
Engine Oil Specifications................................ 439
Specifications..................................................... 435
Capacities and Specifications - 6.8L...............................................................440
Alternative Engine Oil for Extremely Cold Climates........................................................... 444
Specifications...................................................... 441
Capacities and Specifications
.................421
Car Wash See: Cleaning the Exterior................................ 371
Catalytic Converter
......................................198
On-Board Diagnostics (OBD-II)................... 199
Readiness for Inspection and Maintenance (I/M) Testing................................................... 199
Center Console
...............................................174
Changing a Bulb..........................................358 Cargo Lamp and Central High Mounted
Brake Lamp Bulbs........................................ 360
Fog Lamp Bulbs................................................. 359
Front Park and Direction Indicator Lamp Bulbs................................................................. 358
Headlamp Bulbs................................................ 358
License Plate Lamp Bulb................................. 361
Rear Lamps, Brake Lamps, Rear Direction Indicator and Reversing Lamp
Bulbs................................................................. 359
Changing a Fuse...........................................327 Fuses....................................................................... 327
Changing a Road Wheel..........................408 Dissimilar Spare Wheel and Tire Assembly
Information.................................................... 408
Location of the Spare Tire and Tools................................................................. 409
Removing the Spare Tire (With Spare Tire Carrier Only)................................................... 409
Tire Change Procedure...................................... 411
Changing the 12V Battery.........................354 Battery Management System....................... 355
Changing the Crankcase Vent Filter Element.........................................................337
642
Super Duty (TFE) Canada/United States of America, enUSA, Edition date: 201709, First Printing Index