2018 FORD F450 SUPER DUTY four wheel drive
[x] Cancel search: four wheel drivePage 301 of 656
Note:
You can check four-wheel-down
towing status at any time by opening the
driver's door or turning the ignition to the
accessory or on position and verifying a
message displays in the cluster.
To exit four-wheel-down towing and return
the transfer case to its 2H position:
1. With your vehicle still properly secured
to the tow vehicle, put the ignition in
the on position, but do not start the
engine. If your vehicle has an ignition
key, switch the key to on. If your vehicle
has intelligent access, press the engine
START/STOP
button once without
pressing the brake pedal.
2. Press and hold the brake pedal.
3. Shift the transmission out of neutral (N) and into any other gear.
4. Release the brake pedal.
Note: If completed successfully, the
2H
indicator light illuminates and a
confirmation message displays in the
instrument cluster.
Note: If the indicator light and message do
not display, you must perform the procedure
again from the beginning.
Note: You may hear an audible noise as the
transfer case shifts out of its neutral
position. This is normal.
Note: If a message displays in the
instrument cluster stating there is a shift
delay, transfer case gear tooth blockage
may be present. See
Resolving the Shift
Delay Issue after this section.
5. Apply the parking brake and disconnect
the vehicle from the tow vehicle.
6. Release the parking brake, start the engine and shift the transmission to
drive (D) to make sure the transfer
case is out of neutral (N). 7. If the transfer case does not
successfully shift out of neutral (N),
set the parking brake until you can have
your vehicle serviced.
Resolving the Shift Delay Issue
If the instrument cluster displays a shift
delay message, See
Information
Messages (page 131). You need to
perform the following steps:
1. Press and hold the brake pedal.
2. Put the transmission into neutral (N), and then start the engine.
3. With the engine running, shift the transmission to drive (D) and let the
vehicle roll forward, up to
3 ft (1 m).
You may hear an audible noise as the
transfer case shifts out of its neutral
position. This is normal.
4. When the issue is resolved, the instrument cluster displays a message
stating neutral tow is disabled.
298
Super Duty (TFE) Canada/United States of America, enUSA, Edition date: 201709, First Printing Towing
Page 303 of 656
•
Fuel economy may decrease with lower
temperatures during the first 5–10 mi
(12 –16 km) of driving.
• Driving on flat terrain offers improved
fuel economy as compared to driving
on hilly terrain.
• Transmissions give their best fuel
economy when operated in the top
cruise gear and with steady pressure
on the gas pedal.
• Four-wheel-drive operation (if
equipped) is less fuel efficient than
two-wheel-drive operation.
• Close the windows for high-speed
driving.
DRIVING THROUGH WATER WARNING
Do not drive through flowing or deep
water as you may lose control of your
vehicle.
Note:
Driving through standing water can
cause vehicle damage.
Note: Engine damage can occur if water
enters the air filter.
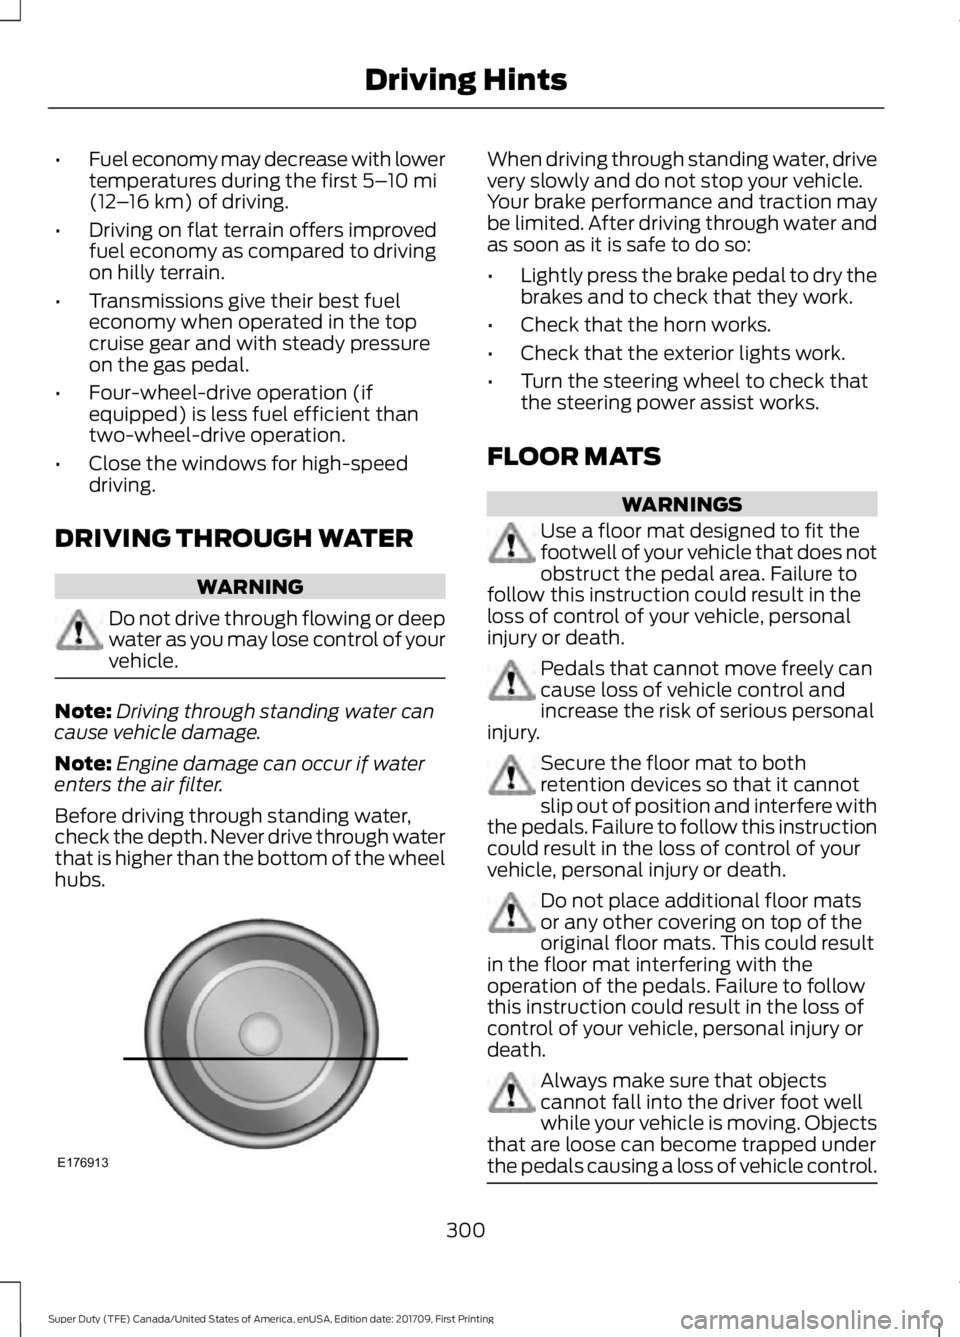
Before driving through standing water,
check the depth. Never drive through water
that is higher than the bottom of the wheel
hubs. When driving through standing water, drive
very slowly and do not stop your vehicle.
Your brake performance and traction may
be limited. After driving through water and
as soon as it is safe to do so:
•
Lightly press the brake pedal to dry the
brakes and to check that they work.
• Check that the horn works.
• Check that the exterior lights work.
• Turn the steering wheel to check that
the steering power assist works.
FLOOR MATS WARNINGS
Use a floor mat designed to fit the
footwell of your vehicle that does not
obstruct the pedal area. Failure to
follow this instruction could result in the
loss of control of your vehicle, personal
injury or death. Pedals that cannot move freely can
cause loss of vehicle control and
increase the risk of serious personal
injury. Secure the floor mat to both
retention devices so that it cannot
slip out of position and interfere with
the pedals. Failure to follow this instruction
could result in the loss of control of your
vehicle, personal injury or death. Do not place additional floor mats
or any other covering on top of the
original floor mats. This could result
in the floor mat interfering with the
operation of the pedals. Failure to follow
this instruction could result in the loss of
control of your vehicle, personal injury or
death. Always make sure that objects
cannot fall into the driver foot well
while your vehicle is moving. Objects
that are loose can become trapped under
the pedals causing a loss of vehicle control. 300
Super Duty (TFE) Canada/United States of America, enUSA, Edition date: 201709, First Printing Driving HintsE176913
Page 312 of 656
We recommend towing a four-wheel drive
vehicle with all wheels off the ground, such
as using a wheel lift and dollies or flatbed
equipment. However, it is acceptable to
use a wheel lift to raise the rear of your
vehicle so long as, depending on vehicle
configuration, you perform the following
before towing:
•
If your vehicle has a manual-shift
transfer case, make sure the front
wheel hub locks are in the FREE
position before towing.
• If your vehicle has an electronic
shift-on-the-fly transfer case, make
sure you switch the four-wheel drive
control to the
2H position before
towing.
Note: Towing an electronic shift-on-the-fly
four-wheel drive vehicle with the front
wheels on the ground without disengaging
the front hubs may cause damage to the
automatic transmission.
Note: Towing a two-wheel drive vehicle or
an electronic shift-on-the-fly four-wheel
drive vehicle with the rear wheels on the
ground for more than
50 mi (80 km) or
faster than 35 mph (56 km/h) may cause
damage to the automatic transmission.
Note: Using wheel lift equipment to tow a
dual rear wheel vehicle requires removing
an outer rear wheel before towing.
TOWING POINTS WARNINGS
Using recovery hooks is dangerous
and should only be done by a person
familiar with proper vehicle recovery
safety practices. Improper use of recovery
hooks may cause hook failure or separation
from the vehicle and could result in serious
injury or death. WARNINGS
Always slowly remove the slack from
the recovery strap prior to pulling.
Failure to do so can introduce
significantly higher loads which can cause
the recovery hooks to break off, or the
recovery strap to fail which can cause
serious injury or death. Never link two straps together with
a clevis pin. These heavy metal
objects could become projectiles if
the strap breaks and can cause serious
injury or death. Your vehicle comes equipped with
frame-mounted front recovery hooks.
These hooks should never have a load
applied to them greater than the gross
vehicle weight rating of your vehicle.
Before using recovery hooks:
•
Make sure all attaching points are
secure and capable of withstanding
the applied load.
• Never use chains, cables or tow straps
with metal hook ends.
• Only use recovery straps that have a
minimum breaking strength two to
three times the gross vehicle weight of
the stuck vehicle.
• Make sure the recovery strap is in good
condition and free of visible cuts, tears
or damage.
• Use a damper device such as a tarp,
heavy blanket or piece of carpet
draped over the recovery strap to help
absorb the energy in the event the
strap breaks.
• Make sure the stuck vehicle is not
loaded heavier than its gross vehicle
weight rating specified on the
certification label.
309
Super Duty (TFE) Canada/United States of America, enUSA, Edition date: 201709, First Printing Roadside Emergencies
Page 383 of 656

GENERAL INFORMATION
Use only approved wheel and tire sizes,
using other sizes could damage your
vehicle. If you change the diameter of the
tires from that fitted at the factory, the
speedometer may not display the correct
speed. Take your vehicle to an authorized
dealer to have the system reprogrammed.
If you intend to change the size of the
wheels from that fitted by the
manufacturer, you can check the suitability
with an authorized dealer.
Additional information related to the
functionality and maintenance of your tires
can be found later in this chapter. See Tire
Care (page 382).
The Ford recommended tire inflation
pressures can be found on the Tire Label,
which is located on the B-pillar or the edge
of the driver's door. This information can
also be found on the Safety Compliance
Certification Label (affixed to either the
door hinge pillar, door-latch post, or the
door edge that meets the door last post;
next to the driver ’s seating position).
Ford strongly recommends maintaining
these tire pressures at all times. Failure to
follow the tire pressure recommendations
can cause uneven treadwear patterns,
reduced fuel economy, and adversely
affect the way your vehicle handles.
Note: Check and set the tire pressure at the
ambient temperature in which you are
intending to drive your vehicle and when the
tires are cold.
Note: Check your tire pressures at least
once per month.
Set the pressure for your spare tire to the
highest value given for your vehicle and tire
size combination (if equipped). Notice to utility vehicle and truck
owners WARNINGS
Utility vehicles have a significantly
higher rollover rate than other types
of vehicles.
Vehicles with a higher center of
gravity (utility and four-wheel drive
vehicles) handle differently than
vehicles with a lower center of gravity
(passenger cars). Avoid sharp turns,
excessive speed and abrupt steering in
these vehicles. Failure to drive cautiously
increases the risk of losing control of your
vehicle, vehicle rollover, personal injury and
death. In a rollover crash, an unbelted
person is significantly more likely to
die than a person wearing a seatbelt.
380
Super Duty (TFE) Canada/United States of America, enUSA, Edition date: 201709, First Printing Wheels and Tires
Do not become overconfident in the
ability of four-wheel drive vehicles.
Although a four-wheel drive vehicle
may accelerate better than a two-wheel
drive vehicle in low traction situations, it
won't stop any faster than two-wheel drive
vehicles. Always drive at a safe speed.E145298
Page 384 of 656

Utility vehicles and trucks handle
differently than passenger cars in the
various driving conditions that are
encountered on streets, highways and
off-road. Utility vehicles and trucks are not
designed for cornering at speeds as high
as passenger cars any more than low-slung
sports cars are designed to perform
satisfactorily under off-road conditions.
Study your owner's manual and any
supplements for specific information about
equipment features, instructions for safe
driving and additional precautions to
reduce the risk of an accident or serious
injury.
Four-wheel drive system (If Equipped)
A vehicle equipped with four-wheel drive
(when selected) has the ability to use all
four wheels to power itself. This increases
traction which may enable you to safely
drive over terrain and road conditions that
a conventional two-wheel drive vehicle
cannot.
Power is supplied to all four wheels
through a transfer case or power transfer
unit. Four-wheel drive vehicles allow you
to select different modes as necessary. For
information on transfer case operation and
shifting procedures, See Four-Wheel
Drive (page 216
). For information on
transfer case maintenance, See
Maintenance (page 329). You should
become thoroughly familiar with this
information before you operate your
vehicle. On some four-wheel drive vehicles, the
initial shift from two-wheel to four-wheel
drive while the vehicle is moving can cause
a momentary clunk and ratcheting sound.
These sounds are normal and are not
cause for concern.
In four-wheel drive vehicles, the size of the
spare tire relative to the remaining tires can
have an effect on the 4x4 system. If there
is a significant difference between the size
of a spare and the remaining tires,
four-wheel drive functionality may be
limited.
See Using Four-Wheel Drive
(page 216).
How your vehicle differs from
other vehicles
Sport utility vehicles and trucks can differ
from some other vehicles in a few
noticeable ways. Your vehicle may be: 381
Super Duty (TFE) Canada/United States of America, enUSA, Edition date: 201709, First Printing Wheels and Tires
WARNING
Do not become overconfident in the
ability of four-wheel drive vehicles.
Although a four-wheel drive vehicle
may accelerate better than a two-wheel
drive vehicle in low traction situations, it
won't stop any faster than two-wheel drive
vehicles. Always drive at a safe speed.E145299
Page 390 of 656
the last four numbers represent
the week and year the tire was
built. For example, the numbers
317 mean the 31st week of 1997.
After 2000 the numbers go to four
digits. For example, 2501 means
the 25th week of 2001. The
numbers in between are
identification codes used for
traceability. This information is
used to contact customers if a tire
defect requires a recall.
I.
M+S or M/S: Mud and Snow, or
AT:
All Terrain, or
AS:
All Season.
J. Tire Ply Composition and
Material Used:
Indicates the
number of plies or the number of
layers of rubber-coated fabric in
the tire tread and sidewall. Tire
manufacturers also must indicate
the ply materials in the tire and the
sidewall, which include steel,
nylon, polyester, and others.
K. Maximum Load: Indicates the
maximum load in kilograms and
pounds that can be carried by the
tire. (affixed to either the door
hinge pillar, door-latch post, or the
door edge that meets the
door-latch post, next to the
driver's seating position), or Tire
Label located on the B-pillar or
the edge of the driver's door.
L. Treadwear, Traction and
Temperature Grades: *Treadwear The treadwear grade
is a comparative rating based on
the wear rate of the tire when
tested under controlled conditions
on a specified government test
course. For example, a tire graded
150 would wear 1½ times as well
on the government course as a tire
graded 100.
*
Traction: The traction grades,
from highest to lowest are AA, A,
B, and C. The grades represent the
tire's ability to stop on wet
pavement as measured under
controlled conditions on specified
government test surfaces of
asphalt and concrete. A tire
marked C may have poor traction
performance.
*
Temperature: The temperature
grades are A (the highest), B and
C, representing the tire's
resistance to the generation of
heat and its ability to dissipate
heat when tested under controlled
conditions on a specified indoor
laboratory test wheel.
M. Maximum Inflation
Pressure:
Indicates the tire
manufacturers' maximum
permissible pressure or the
pressure at which the maximum
load can be carried by the tire. This
pressure is normally higher than
the vehicle manufacturer's
recommended cold inflation
pressure which can be found on
the Safety Compliance
Certification Label (affixed to
either the door hinge pillar,
door-latch post, or the door edge
387
Super Duty (TFE) Canada/United States of America, enUSA, Edition date: 201709, First Printing Wheels and Tires
Page 391 of 656
that meets the door-latch post,
next to the driver's seating
position), or Tire Label located on
the B-pillar or the edge of the
driver's door. The cold inflation
pressure should never be set lower
than the recommended pressure
on the vehicle label.
The tire suppliers may have
additional markings, notes or
warnings such as standard load
or radial tubeless.
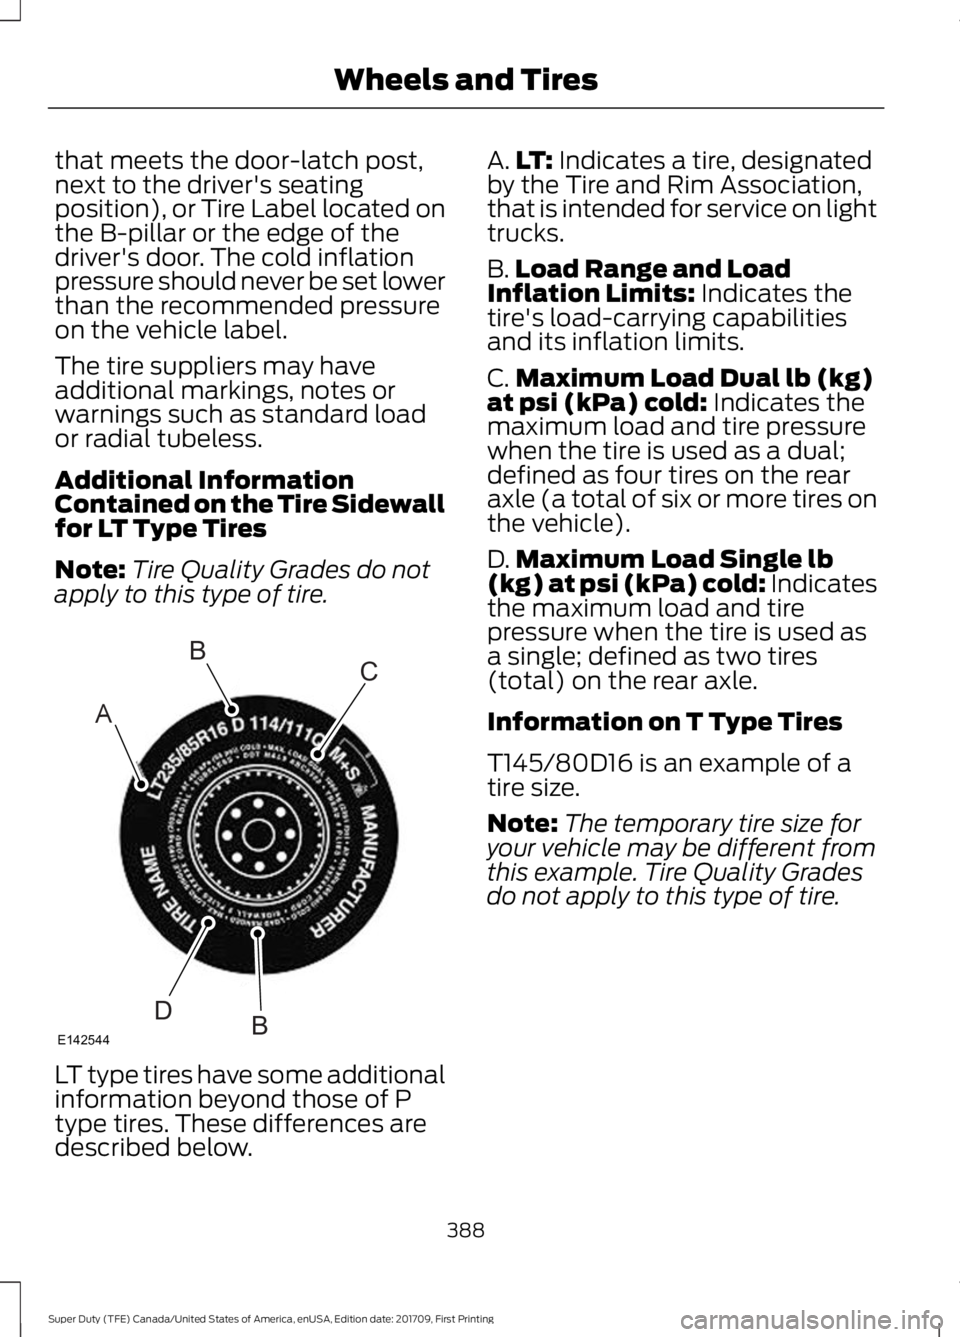
Additional Information
Contained on the Tire Sidewall
for LT Type Tires
Note:
Tire Quality Grades do not
apply to this type of tire. LT type tires have some additional
information beyond those of P
type tires. These differences are
described below. A.
LT: Indicates a tire, designated
by the Tire and Rim Association,
that is intended for service on light
trucks.
B. Load Range and Load
Inflation Limits:
Indicates the
tire's load-carrying capabilities
and its inflation limits.
C. Maximum Load Dual lb (kg)
at psi (kPa) cold:
Indicates the
maximum load and tire pressure
when the tire is used as a dual;
defined as four tires on the rear
axle (a total of six or more tires on
the vehicle).
D. Maximum Load Single lb
(kg) at psi (kPa) cold:
Indicates
the maximum load and tire
pressure when the tire is used as
a single; defined as two tires
(total) on the rear axle.
Information on T Type Tires
T145/80D16 is an example of a
tire size.
Note: The temporary tire size for
your vehicle may be different from
this example. Tire Quality Grades
do not apply to this type of tire.
388
Super Duty (TFE) Canada/United States of America, enUSA, Edition date: 201709, First Printing Wheels and TiresA
BC
BDE142544
Page 398 of 656
U.S. DOT Tire Identification
Number
Both United States and Canada
Federal regulations require tire
manufacturers to place
standardized information on the
sidewall of all tires. This
information identifies and
describes the fundamental
characteristics of the tire and also
provides a U.S. DOT Tire
Identification Number for safety
standard certification and in case
of a recall.
This begins with the letters DOT
and indicates that the tire meets
all federal standards. The next
two numbers or letters are the
plant code designating where it
was manufactured, the next two
are the tire size code and the last
four numbers represent the week
and year the tire was built. For
example, the numbers 317 mean
the 31st week of 1997. After 2000
the numbers go to four digits. For
example, 2501 means the 25th
week of 2001. The numbers in
between are identification codes
used for traceability. This
information is used to contact
customers if a tire defect requires
a recall.
Tire Replacement
Requirements
Your vehicle is equipped with tires
designed to provide a safe ride
and handling capability.
WARNINGS
Only use replacement tires
and wheels that are the same
size, load index, speed rating and
type (such as P-metric versus
LT-metric or all-season versus
all-terrain) as those originally
provided by Ford. The
recommended tire and wheel size
may be found on either the Safety
Compliance Certification Label
(affixed to either the door hinge
pillar, door-latch post, or the door
edge that meets the door-latch
post, next to the driver ’s seating
position), or the Tire Label which
is located on the B-Pillar or edge
of the driver ’s door. If this
information is not found on these
labels, then you should contact
your authorized dealer as soon as
possible. Use of any tire or wheel
not recommended by Ford can
affect the safety and performance
of your vehicle, which could result
in an increased risk of loss of
vehicle control, vehicle rollover,
personal injury and death. To reduce the risk of serious
injury, when mounting
replacement tires and wheels, you
should not exceed the maximum
pressure indicated on the sidewall
of the tire to set the beads without
additional precautions listed
below. If the beads do not seat at
the maximum pressure indicated,
re-lubricate and try again.
395
Super Duty (TFE) Canada/United States of America, enUSA, Edition date: 201709, First Printing Wheels and Tires